Clarion DXZ946MP Owner's Manual
Clarion am/fm cd/mp3/wma player built-in dsp/eq with touch panel owner's manual
Hide thumbs
Also See for DXZ946MP:
- Installation/wire connection manual (2 pages) ,
- Service manual (37 pages)

Subscribe to Our Youtube Channel
Related Manuals for Clarion DXZ946MP


Summary of Contents for Clarion DXZ946MP
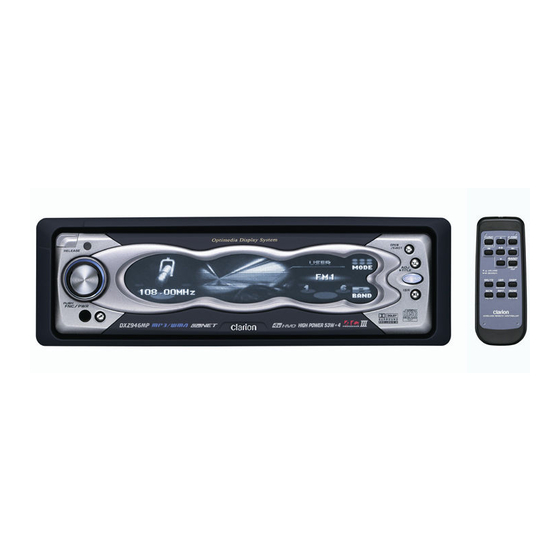
- Page 1 Owner’s manual DXZ946MP AM/FM CD/MP3/WMA PLAYER BUILT-IN DSP/EQ WITH TOUCHPANEL • •...
-
Page 2: Table Of Contents
Thank you for purchasing this Clarion product. Please read this owner’s manual in its entirety before operating this unit. After reading this manual, be sure to keep it in a handy place (e.g., glove compartment). This manual includes the operating procedures of the CD changer and TV tuner connected via the CeNET cable. -
Page 3: Precautions
2. Driving on extremely bumpy roads may cause severe vibration and cause the sound to skip. 3. This unit uses a precision mechanism. Even in the event that trouble arises, never open the case, disassemble the unit, or lubricate the rotating parts. WARNING DXZ946MP... -
Page 4: Sloping Console
If you try to play such a compact disc, you may not be able to remove it from the CD player or it may damage the CD player. DXZ946MP 2. Before the SLOPING CONSOLE closes, there may be a braking sound from the safety mechanism. -
Page 5: Controls
3. CONTROLS Source unit Photo Sensor [ RELEASE ] [ ROTARY ] IR-Receiver With the SLOPING CONSOLE opened Display [ CD SLOT ] [ A] [SOUND ] DXZ946MP... -
Page 6: Nomenclature
• Holding this button down for 1 second or longer also toggles the 2-ZONE function ON and OFF. DXZ946MP [I] button • Immediately calls up a favorite radio station regardless of the current mode. (This is the ISR function.) You can store radio stations to... -
Page 7: Major Button Operations When External Equipment Is Connected To This Unit
● When the TV is connected For details, see the section “TV operations” (cf. page 48). ] button • Switch the TV picture mode or VTR (external) picture mode. [A] button • Used for entering the name of the TV station. DXZ946MP... -
Page 8: Display Items
Touching and holding the display for 2 seconds or longer is used for storing preset memory or other information. DXZ946MP USER ADF Dolby PL II MANU INT. : 2-ZONE indication... -
Page 9: Dcp
• The connector connecting the unit and the DCP is an extremely important part. Be careful not to damage it by pressing on it with fingernails, screwdrivers, etc. Note: • If the DCP is dirty, wipe off the dirt with a soft, dry cloth only. DXZ946MP... -
Page 10: Remote Control
• Do not short-circuit, disassemble or heat batteries. • Do not dispose of batteries into fire or flames. • Dispose of spent batteries properly. DXZ946MP Receiver for remote control unit Operationg range : 30° in all directions Signal transmitter... -
Page 11: Functions Of Remote Control Unit Buttons
Random play play. while in the MP3/ WMA disc. Switches reception band. Moves preset channels up and down. No function. Preset scan. When pressed and held for 2 seconds or longer: Auto store. No function. Switches between TV and VTR. DXZ946MP... -
Page 12: Operations
“Completed” appears on the display. 2. Press the [ROTARY] knob again. The main display for the radio mode appears. DXZ946MP CODEMATIC function When “CODEMATIC” is set to “ON”, and the power is turned ON with the DCP attached, the Touch Code display appears. Touch the display in the order that was set in the adjust mode. -
Page 13: Switching The Display
When the screen saver function is set to “ON”, and you do not operate this unit for about 30 seconds, the screen saver will be displayed. For details, see page 36. Basic Operations USER MODE BAND S/A SCAN MODE BAND MODE BAND DXZ946MP... -
Page 14: Spectrum Analyzer Display
Touching and holding the center of the display for 1 second or longer switches to the wallpaper display. ¥ DXZ946MP Spectrum analyzer display Touching and holding the right of the display for 1 second or longer during the spectrum analyzer (S/A) display switches the spectrum analyzer display. - Page 15 “SW VOLUME” or “CTR VOLUME”. Basic Operations on the adjustment item display switches the on the right of the display to P. EQ Dolby PL II SOUND MENU A - MODE on the adjustment item display AUDIO MODE SW VOLUME DXZ946MP...
-
Page 16: Adjusting Balance/Fader
R12 (rear side emphasized) and F12 (front side emphasized). 5. Press the [SOUND] button to return to the original mode. DXZ946MP Adjusting bass/treble The bass/treble mode can be adjusted only when the Dolby Pro Logic II mode is set to “OFF”... -
Page 17: Ac-Processor Iii Operations
1. Press the [SOUND] button. 2. Touch POSITION. POSITION 2 - ZONE Dolby PL II A - MODE on the right of the display to Dolby PL II P. EQ Dolby PL II SOUND MENU A - MODE DXZ946MP... -
Page 18: User Memory
SP GAIN (speaker gain): Adjusts the speaker output level. Adjust so that the volumes that are output from each speaker are all the same. DXZ946MP 1. Press the [SOUND] button. 2. Touch POSITION. 3. Touch The position effect is toggled ON/OFF. - Page 19 BASIC VSE MODE FLAT BASIC on the VSE basic menu No. to Sound source flat equalizing Mid and treble enhanced Low and treble enhanced Mid tones (human voice) enhanced Produces smooth- sounding tones. DXZ946MP B / U B / U...
- Page 20 To select a stored user memory, touch B/U to display “USER” and touch user memory No. DXZ946MP Selecting the P.EQ menu P.EQ (Parametric Equalizer) allows you to compensate the entire frequency level range in detail by smooth curve using frequency compensation matched to the type of your car.
- Page 21 Selects the channel (front or rear) to adjust. BAND (band selection) Selects the frequency band (1 to 3) to adjust. Set the center frequency (FREQUENCY), gain (GAIN) and Q curve (Q) for each frequency band. on the right of the display and on the DXZ946MP...
- Page 22 125 Hz Front 125 Hz (MINI VAN-1) Rear 250 Hz Front 250 Hz (MINI VAN-2) Rear 250 Hz DXZ946MP ● Compensation of frequency characteristics The figure below shows the relationship between the center frequency, gain and Q curve. Level (dB) Gain ●...
-
Page 23: Radio Operations
2. Touch BAND to switch the reception band. Each touch of BAND switches the reception band as follows: FM1 ➜ FM2 ➜ FM3 ➜ AM ➜ FM1... 87.9MHz 98. 1MHz TITLE LIST 108.0MHz 87. 5MHz Station name (or frequency) DXZ946MP... -
Page 24: Recalling A Preset Station
Touch on the frequency display. Tuning stops when you take your finger away from the panel. DXZ946MP Recalling a preset station Recalling a preset station is a function for tuning pre-stored stations. 1. Touch and hold MODE for 1 second or longer. -
Page 25: Preset Scan
■ To store the station to “ISR” In the radio mode, tune the station to store, and touch and hold the [I] button for 2 seconds or longer. You will hear a long beep, and the station currently being received is stored to ISR. DXZ946MP... -
Page 26: Cd / Mp3 / Wma Operations
MODE: Touching this displays sub-functions. Touching and holding this in the case of MP3/WMA for 1 second or longer displays the folder list. DXZ946MP Note: • This function is enabled only when a disc is playing. -SCAN/ -SCAN: This is displayed during scan play. -
Page 27: What Is Wma
2. Tracks are played in the order that they were recorded onto a disc. (Tracks might not always be played in the order displayed on the PC.) 3. Some noise may occur depending on the type of encoder software used while recording. DXZ946MP... -
Page 28: Ejecting A Cd
Loading a CD 1. Press the [Q] button. The control panel opens. DXZ946MP 2. Load the disc into the CD SLOT. When the disc is loaded, the control panel automatically closes after several seconds, and play starts. -
Page 29: Selecting A Track
The top function resets the CD player to the first track of the disc. 1. Touch TOP. Play starts from the first track (track No.1). In case of MP3/WMA, the first track of a folder being played will be returned. on the track on the track DXZ946MP... -
Page 30: Random Play
1. Touch -RPT. The -RPT display changes to “MODE”, and regular play starts from the track that was playing when you touched -RPT. DXZ946MP Folder repeat play This function allows you to repeatedly play the folder currently being played. This function is available only when a CD-R/CD-RW recorded with MP3 files or WMA files is loaded. -
Page 31: Different Pieces Of Music Heard By Plural Listeners (2-Zone Function)
1. Press and hold the [SOUND] button on the unit for 1 second or longer. Dolby PL II P. EQ SOUND MENU A - MODE External on the ON/OFF display to Speaker Headphones Internal External (internal mode) (external mode) External Internal (external mode) (internal mode) DXZ946MP... -
Page 32: Operations Common To Each Mode
The mode of equipment that is not connected is not displayed. When the TV mode is selected, the mode automatically changes to the VTR mode, and cannot be changed. DXZ946MP Operations Common to Each Mode Screen display in the title entry mode ■... -
Page 33: Entering Titles
In the case of a CD Titles of CDs that have been played the least are cleared, and the new title is stored in memory. MEMO CAUTION on the text type display to switches the type of on the right of the DXZ946MP... -
Page 34: Changing Settings
This unit requires special wiring to mute the audio signal automatically when a cellular telephone rings in the car. This function is not compatible with all cellular telephones Contact your local authorized Clarion dealer for information on proper installation and compatibility. DXZ946MP Changing settings Selecting setting items 1. - Page 35 • Setting TV diversity (cf. page 51) SETTING AUX SENS • Setting the portable audio (AUX) input level (cf. page 43) SYSTEM CHECK • Performing a system check (cf. page 43) CODEMATIC • Setting security (cf. page 44) Operations Common to Each Mode Sub-item DXZ946MP...
-
Page 36: Setting The Screen Saver
• When the battery has been removed for maintenance or for repair, set the time again. 7. Press the [A] button to return to the original mode. DXZ946MP Setting the screen saver (SCREEN SVR) This function allows you display a screen saver when you have not operated this unit for about 30 seconds. - Page 37 4. Press the [A] button to return to the original mode. on the center of the display to on the left of the display to switches the type of on the right of the on the setting item display to ADJUST MODE MESSAGE on the right of the DXZ946MP...
-
Page 38: Spectrum Analyzer
* This setting item can be adjusted within the range SPEED 1 to SPEED 7. Adjust this setting item while viewing how the appearance of the display changes. DXZ946MP 4. Press the [A] button to return to the original mode. Setting the auto-dimmer... - Page 39 2 major levels, bass (low tones) and treble (high tones). 1. Press the [A] button to set to the adjust mode. on the setting item display to ADJUST MODE BEEP on the right of the DXZ946MP...
- Page 40 “SP-SETTING” under “SOUND”. ADJUST MODE SP - SETTING SOUND 3. Either touch on the right of the display, or turn the [ROTARY] knob to set the speaker configuration. DXZ946MP Speaker configuration CTR+SW 5.1ch configuration 4ch+sub-woofer Sub-woofer (2ch) configuration Notes: •...
- Page 41 SOUND 3. Touch EDIT. The mode changes to the SP GAIN adjustment mode. on the setting item display to ADJUST MODE AMP CANCEL on the right of the on the setting item display to ADJUST MODE SP GAIN EDIT DXZ946MP...
-
Page 42: Adjustment Items
“SRD-SP” under “PL II DELAY”. ADJUST MODE SRD - SP PLII DELAY DXZ946MP 3. Either touch display, or turn the [ROTARY] knob to adjust the delay time. “SRD-SP” can be adjusted within the range 0 ms to 15 ms. -
Page 43: Performing A System Check
The system check starts. When the system check is complete, “Completed” appears on the display. 5. Press the [ROTARY] knob again. The main display for the radio mode appears. on the setting item display to ADJUST MODE SYSTEM CHECK START DXZ946MP... - Page 44 Here, select the item for which “INPUT” is displayed at the right of the display. 5. Touch INPUT. The Touch Code display appears. DXZ946MP 6. Enter the touch code. Touch one of 5 locations (left, center, right, top right, or bottom right) of the display.
-
Page 45: Operations Of Accessories
(only in the simple operation display) DISC Touching these selects the track to play. MODE DISC No. Touching and holding these fast-forwards/fast- DISC backwards tracks. Disc No. display SIMPLE MODE MODE DISC Title display Track/playing time display in the standard in the standard operation DXZ946MP... -
Page 46: Selecting A Cd
Pausing play 1. Press the [ ] button. ■ To resume play 1. Press the [ ] button again. DXZ946MP Selecting a CD 1. Touch select a disc. Play starts. If magazine does not contain the disc you selected, the No. for that disc is not displayed. -
Page 47: Disc Scan Play
The MODE display changes to “D-RPT” and disc repeat play is started. ■ To cancel disc repeat play 1. Touch D-RPT. The D-RPT display changes to “MODE”, and regular play starts from the track that was playing when you touched D-RPT. DXZ946MP... -
Page 48: Disc Random Play
1. Touch D-RDM. The D-RDM display changes to “MODE”, and regular play starts from the track that was playing when you touched D-RDM. DXZ946MP TV Operations TV tuner function When an optional TV tuner is connected through the CeNET cable, this unit controls all TV tuner functions. -
Page 49: Manual Tuning
Quick tuning is a function for switching the channel continuously. Touch Tuning stops when you take your finger away from the panel. TV Operations on the channel display. on the channel display again. on the frequency display. at the channel display. DXZ946MP... -
Page 50: Watching A Video
The MODE display changes to “A-STORE” and the preset No. in the auto-store operation appears on the preset No. display. DXZ946MP * Stations with good reception are automatically searched, and are stored to preset memory (No.1 to No.6) in order from the station having the lowest frequency. -
Page 51: Ch Surround Decoder Operations
■ VIRTUAL (Virtual mode) Suitable for movies and other audio sources. ■ OFF The Dolby Pro Logic II mode is not used. 1. Press the [SOUND] button. 2. Touch Dolby PLII. A - MODE Dolby PL II P. EQ SOUND MENU DXZ946MP... -
Page 52: Ch Surround Decoder Operations
When DSF is set to “OFF”, the DSF setting is not reflected on the music source. This completes the DSF setting. Press the [SOUND] button to return to the original mode. DXZ946MP 4. Touch the desired DSF menu. DSF menus HALL ➜ CHURCH ➜ STADIUM ➜ LIVE ➜... -
Page 53: Changing Settings
1. Press the [A] button again. ADJUST MODE CENTER - SP on the setting item display to on the left of the display on the left of the display on the center of the switches sub-items on the right of the DXZ946MP... - Page 54 Normally, select “ON+”. However, when “ON-” is set, an effect in the low range can be strongly felt. 4. Press the [A] button to return to the original mode. DXZ946MP Sub-item Adjusting the filter frequencies of speakers (FRONT HPF/CENTER HPF/...
- Page 55 MIN: the most compressed dynamic range mode that renders even low sounds easy to hear. 4. Press the [A] button to return to the original mode. on the setting item display to ADJUST MODE D - RANGE on the right of the display to DXZ946MP...
-
Page 56: In Case Of Difficulty
Noise is generated or noise is mixed with sound. DXZ946MP Cause Replace with a fuse of the same amperage. If the fuse blows again, consult your store of purchase. Consult your store of purchase. 1. Turn the unit off. - Page 57 Measure Let dry for about 1 hour with the power on. Use ISO9660 level 1, 2 or JOLIET or Romeo file system. Use alphanumeric/ASCII characters for MP3/WMA file name. Use “.M3U” for the file extension of a play list. DXZ946MP...
-
Page 58: Error Displays
If an error display other than the ones described above appears, press the reset button. If the problem persists, turn off the power and consult your store of purchase. DXZ946MP Cause This is a failure of CD deck’s mechanism and consult your store of purchase. -
Page 59: Specifications
80 g (2.82 oz.) (including battery) Dimensions / Source unit: 178 (Width) 50 (Height) 155 (Depth) mm [7" (Width) 2" (Height) 6-1/8" (Depth)] Dimensions / Remote control unit: 44 (Width) 110 (Height) 27 (Depth) mm [1-3/4" (Width) 4-5/16" (Height) (Depth)] 1-1/8" DXZ946MP...
Need help?
Do you have a question about the DXZ946MP and is the answer not in the manual?
Questions and answers