Vicks Mini Cool Mist Humidifier VUl520W Manual
- Use and care manual (5 pages)
Advertisement
- 1 Important Safety Instructions
- 2 Vicks Mini CoolMist Humidifier (Model VUL520)
- 3 VUL520 Series Accessories
- 4 Setting Up Your Humidifier
- 5 Filling/Refilling
- 6 Operating
- 7 Using Scent Pads
- 8 VapoPads Recommended Usage
- 9 Water Quality and Your Humidifier
- 10 Cleaning
- 11 Electrical Ratings
- 12 Troubleshooting
- 13 Videos
- 14 Documents / Resources
Important Safety Instructions

READ AND SAVE THESE IMPORTANT SAFETY INSTRUCTIONS BEFORE USING THIS APPLIANCE
WHEN USING ELECTRICAL APPLIANCES, BASIC PRECAUTIONS SHOULD ALWAYS BE FOLLOWED TO REDUCE THE RISK OF FIRE, ELECTRICAL SHOCK AND INJURY TO PERSONS, INCLUDING THE FOLLOWING:
- The humidifier should always be placed on a firm, flat, waterproof surface at least 1.2 metres away from bedside, 30 centimetres from the wall and out of reach of patients, children and pets. Be sure the humidifier is in a stable position and the power cord is away from heated surfaces and out of the way to prevent the humidifier from being tipped over.
- The humidifier is not intended for use by persons (including children) with reduced physical, sensory or mental capabilities, or lack of experience and knowledge, unless they have been given supervision or instruction concerning use of the humidifier by a person responsible for their safety. Children should be supervised to ensure that they do not play with the humidifier.
- The humidifier should not be left unattended in a closed room since air could become saturated and leave condensation on walls and furniture. Leave room door partly open. Do not aim mist vent directly at children, walls or furniture.
![warning]() To avoid fire or shock hazard, plug the humidifier directly into a 240V AC electrical outlet.
To avoid fire or shock hazard, plug the humidifier directly into a 240V AC electrical outlet. - The humidifier should always be unplugged and emptied when not in operation or while being cleaned. Shut off and unplug humidifier before moving. Do not move or tilt humidifier while it is in operation. Plug and unplug unit with dry hands. Never pull by cord.
- Do not operate the humidifier without water. Turn off and unplug humidifier when tank is empty. Unplug the humidifier during filling and cleaning.
- Humidifier requires regular cleaning. Refer to and follow cleaning instructions.
- Do not operate outdoors; this humidifier is intended for indoor use only.
- Do not cover or insert objects into any openings of the unit.
- Do not attempt to repair or adjust any electrical or mechanical functions on this humidifier. Doing so will void your warranty.
- Do not place in direct sunlight, high temperature areas or near computers or sensitive electronic equipment.
- Do not touch the nebulizer while the humidifier is plugged in as burns could result.
- Do not touch skin with exposed VapoPads® or place VapoPads® on furniture, fabric, bedding or plastic.
- Do not add any medications (e.g. VapoSteam, inhalants or essential oils) into Mist Outlet, Base, Water Reservoir or Water Tank.
- If the supply cord is damaged, it must be replaced by the manufacturer, its service agent or similarly qualified persons in order to avoid a hazard.
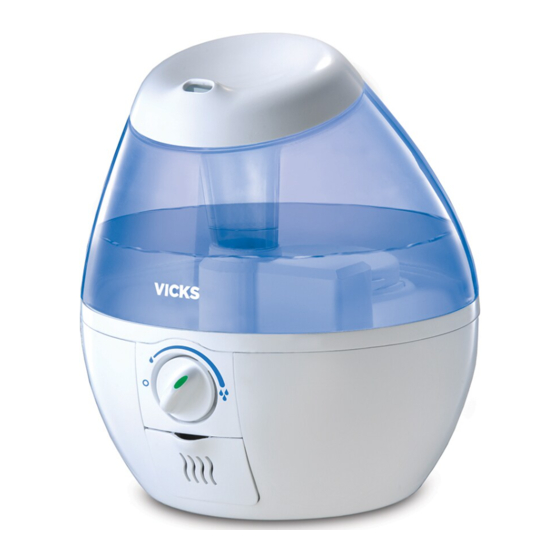
Vicks® Mini CoolMist Humidifier (Model VUL520)
")
VUL520 Series Accessories

Vicks VapoPads®
Provide soothing vapours (sample pad included)
Setting Up Your Humidifier
- Remove packaging materials. Keep instructions.

- Remove twist tie and extend power cord.

- Place on a firm, level, water resistant surface a minimum of 30cm (12") from any walls.


Filling/Refilling
NOTE: Tank should be carried using two hands. One hand using carrying handle located on tank top and other hand supporting the base of the tank.
FGB will not accept responsibility for property damage caused by water spillage.
- Remove Tank and turn upside down.

- Remove Tank Cap in the direction of the open lock sign to remove cap.

- Fill Tank with cool water. Do not fill with warm or hot water.

- Securely replace Tank Cap, aligning arrow to lock symbol.

- Place Tank back on Base


 USE CARE WHEN HANDLING WATER TANK TO AVOID UNNECESSARY IMPACT. BANGING OR DROPPING THE WATER TANK COULD RESULT IN DAMAGE TO THE TANK THAT WILL CAUSE LEAKING.
Operating
- Power: With the Power Knob in the off position, plug humidifier into a 240V AC electrical outlet.
![]() TO AVOID ELECTRIC SHOCK DO NOT PLUG HUMIDIFIER INTO OUTLET WITH WET HANDS.
TO AVOID ELECTRIC SHOCK DO NOT PLUG HUMIDIFIER INTO OUTLET WITH WET HANDS.
![]()
- Output: Turn the Power Knob to highest setting.
![]()
- Direct mist output away from walls, furniture and bedding.
![]()


BEFORE MOVING HUMIDIFIER, TURN OFF, UNPLUG AND EMPTY THE HUMIDIFIER.
Using Scent Pads
- Use Vicks VapoPads® VSP-19 with your humidifier to provide up to 8 hrs of soothing vapours.

- Open Scent Pad Door.

- Open VapoPads® by tearing notch on pad bag. Do not touch pad with hands. If pad is touched do not rub face or eyes as it may cause irritation.

- Insert VapoPads® with angled end facing towards the product and close door.

- After 8 hrs discard scent pad. To continue using scent pads, repeat steps 1-4.


VapoPads® Recommended Usage
- Not recommended for infants under 4.5kg (10 lbs).
- For children between 4.5-10kg (10-22 lbs) do not use more than 2 pads in a 24 hr period.
Scent Pad Ingredients: VSP-19: Eucalyptus Oil, Menthol, Glycol, Cedar Leaf Oil & Others
Water Quality and Your Humidifier
High mineral content in your water, also known as "hard water" may cause a white mineral residue to accumulate on surfaces in the room near the humidifier. This mineral residue is commonly referred to as scale (mineral build up). The higher the mineral content or hardness of your water, the greater the potential that you may have scale (mineral build up).
Scale (mineral build up) is not a result of a defect or flaw in the humidifier. It is a result of the amount of minerals suspended in the water you are using.
If you live in a hard water area, the use of distilled water will minimise the production of scale (mineral build up).
Cleaning
To properly clean your humidifier we recommend the separate processes of Scale Removal and Disinfecting shown below. These two processes must be performed separately.
All maintenance should be done in the kitchen or bathroom on a water resistant surface near a tap. DO NOT wash any components of this humidifier in the dishwasher. For best results, clean weekly.
Instructions for Scale Removal
- Turn off and unplug the humidifier.

- Remove Water Tank from Base. Remove Tank Cap, taking care that black rubber Cap Seal does not come off. Empty water from Water Tank and Base.

- If VapoPads® is installed, remove and set aside. DO NOT clean VapoPads®.

- Add 2 cups of undiluted distilled white vinegar to Water Tank. Replace Tank Cap and swish vinegar solution around in Tank. Place Tank on Base. Vinegar solution will drain into Water Reservoir and loosen mineral buildup (scale) on Nebulizer and Float as they soak in the solution. It will also loosen scale on bottom of Water Tank.

- Soak for 15-20 minutes.

- After soaking, unlock Tank Cap and pour solution out in sink. Pour solution from Water Reservoir out in sink. Wipe Nebulizer and Float with soft cloth to remove loosened mineral deposits.

- Rinse Water Reservoir and Water Tank until smell of vinegar (for Scale Removal process) or bleach solution (for Disinfecting process) is gone. Make sure water does not enter the fan opening (vented opening in back of base) or Power Knob.


DO NOT submerge base in water. Doing so will damage the humidifier and void the warranty.
Instructions for Disinfecting
Follow Steps 1-3 in Scale Removal Instructions in previous section.

For Step 4: Add ½ tsp of bleach to 1.9 litres of water and add to Water Tank. Replace Tank Cap. Swish solution around in Tank. Place Tank on Base. Bleach solution will drain into Water Reservoir and will disinfect Water Reservoir and other components as they soak.
NOTE: Using more than ½ tsp. of bleach per 1.9 litres of water may result in damage to your humidifier. See steps 5-7 in Scale Removal Instructions in previous section to complete Disinfecting process.
NOTE: DO NOT mix vinegar and bleach solutions together. Scale Removal and Disinfecting must be done separately.
End-Of-Season Care And Storage
Follow the CLEANING instructions at the end of the season (remove VapoPads®).
At the end of the season, remove any accessories used with the humidifier and allow the humidifier and accesories to dry completely before storing.
DO NOT store with water inside the Base, Water Reservoir or Tank.
Pack unit safely and store in a cool, dry location.
Electrical Ratings
The Vicks VUL520 Series model is rated at 240V, 50 Hz.
NOTE: IF YOU EXPERIENCE A PROBLEM, PLEASE CONTACT CONSUMER RELATIONS FIRST OR SEE YOUR WARRANTY. DO NOT RETURN THE HUMIDIFIER TO THE ORIGINAL PLACE OF PURCHASE. DO NOT ATTEMPT TO OPEN THE BASE OR TAMPER WITH POWER KNOB YOURSELF, DOING SO MAY VOID YOUR WARRANTY AND CAUSE DAMAGE TO THE PRODUCT OR PERSONAL INJURY.
Troubleshooting
If your humidifier is not working properly, refer to the following:
| Problem | Possible Cause | Solution |
| Power Knob is turned "on (o)" and the power light is off | • Unit not plugged in | • Plug unit in |
| • No power at outlet | • Check home circuits, fuses, test outlet | |
| Power is on and little or no mist is produced | • No water in tank | • Fill Water Tank with cool water |
| • Unit is not level | • Place on a level surface | |
| • Mineral deposits on Nebulizer | • Clean Nebulizer (refer to Weekly Care & Cleaning instructions) | |
| • Power setting may be too low | • Turn the Power Knob to increase output | |
| • Water Tank or Base were washed with detergent | • Rinse thoroughly with clean water until there is no foam or smell of cleaning solution | |
| Water overflows from Reservoir | • Tank may be damaged | • Check the Tank for any cracks or damage. and replace if necessary |
| • Tank Cap is not tight | • Close Tank Cap to lock position | |
| • Tank Cap Seal may be missing | • Check to see if Cap Seal is attached to Tank Cap. If not, contact Consumer Relations | |
| Condensation forms around humidifier or on windows and walls | • Mist Intensity is set too high for room size or pre-existing humidity level | • Decrease mist output to lower setting or open door to the room |
| • Humidifier may be too close to wall or window | • Move humidifier away from wall or point Mist Outlet away from wall or window |
NOTE: Failure to keep this unit clean from mineral deposits normally contained in any water supply will affect the efficiency of operation of this unit. Customer failure to follow these instructions may void the warranty.
This product has been produced with the greatest care for normal, household use. Following directions carefully will ensure dependable operation. If your Vicks Humidifier is found to be defective (other than through misuse), we will repair or replace it at no charge during the 2 year warranty period. Modification to the product by the consumer is not authorised and voids the warranty.
If you experience unsatisfactory operation, please contact Felton Grimwade & Bosisto's as per below. If repair is required under the warranty period, the product should be returned with proof of purchase to Felton Grimwade & Bosisto's service centre.
The purchaser assumes responsibility for the proper care and use of the product in accordance with the printed operating manual. The purchaser or user must make his or her judgment as to when to use the product and the length of use. Keep the operation manual available as it is your guide to safe, efficient operation.
Our goods come with guarantees that cannot be excluded under the Australian Consumer Law. You are entitled to a replacement or refund for a major failure and for compensation for any other reasonably foreseeable loss or damage. You are also entitled to have the goods repaired or replaced if the goods fail to be of acceptable quality and the failure does not amount to a major failure.
© 2016 Kaz
This product is manufactured in China on behalf of Kaz USA, Inc. and under license from The Procter & Gamble Company, Cincinnati, OH, USA. Vicks, the shield device, and other associated trademarks are owned by The Procter & Gamble Company.
Distributed by: Felton Grimwade & Bosisto's Pty. Ltd.
61-81 Clarinda Road (PO Box 74), Oakleigh South, Victoria 3167, Australia
Free call: 1800 655 841
E-mail: mail@fgb.com.au
Website: www.fgb.com.au

VideosVicks Mini Cool Mist Humidifier VUL520 - Getting Started Video
Documents / Resources
References
Download manual
Here you can download full pdf version of manual, it may contain additional safety instructions, warranty information, FCC rules, etc.
Advertisement


Need help?
Do you have a question about the Mini CoolMist VUL520 Series and is the answer not in the manual?
Questions and answers