Dogtra EDGE RT Owner's Manual
Hide thumbs
Also See for EDGE RT:
- Owner's manual (17 pages) ,
- Product manual (14 pages) ,
- Settings manual (6 pages)

Related Manuals for Dogtra EDGE RT


Summary of Contents for Dogtra EDGE RT
- Page 1 EDGE RT EXPANDABLE TO 3-DOG SYSTEM Owner's Manual Please read this manual thoroughly before operating the EDGE RT training e-collar.
- Page 2 Dogtra product or other property. PRODUCT SAFETY Training Methods Dogtra products may be used with a variety of training methods. However, each dog may have a different reaction to training methods and to Dogtra products. Closely observe your dog when determining the right training method to use with your Dogtra product.
- Page 3 Consult your physician or medical device maker before using your medical device with a Dogtra product. If you think that your Dogtra product is interfering with your pacemaker, defibrillator, or other medical device, stop using the Dogtra product.
-
Page 4: Table Of Contents
CONTENTS AT A GLANCE ..............MAIN FEATURES ............OVERVIEW ..............UNDERSTANDING YOUR TRAINING SYSTEM TURNING THE EDGE RT ON/OFF ....... TRANSMITTER BUTTON FUNCTION ....USING THE DOG SELECTOR DIAL ..... RECEIVER FITTING ..........FINDING THE RIGHT STIMULATION ....MAXIMIZING THE DISTANCE ........ -
Page 5: At A Glance
Manual Extension Washer & Adjustment Tool Optional Accessories Auto Charger Dogtra’s auto chargers are designed for use with a 10-volt car outlet. European Charger Dogtra’s European chargers are designed for use with a 230V AC electrical outlet. To purchase accessories, please visit www.dogtra.com or... -
Page 6: Main Features
MAIN FEATURES • Selector Dial for stimulation levels 1-8 • 1-mile range • 2 different stimulation types - Nick & Constant • Pager vibration feature • Stimulation/Combination buttons • Expandable to a 3-dog system • Fully waterproof • Enhanced contact points •... -
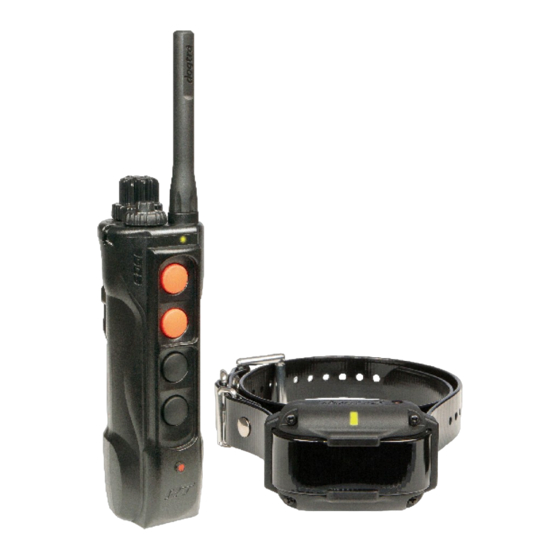
Page 7: Overview
(Orange) High Pager Constant Button Stimulation Low Constant (Gray) (Orange) Stimulation (Orange) Battery Charging Medium Receptacle Nick Stimulation & Rubber (Black) High Nick Plug Stimulation Belt (Black) Low Nick Clip Stimulation (Black) On/Off Magnetic Red Battery Cover EDGE RT Transmitter... - Page 8 Collar Strap Contact Points Battery Charging Receptacle & Rubber Plug On/Off Magnetic Red Dot Indicator Light EDGE RT Receiver...
-
Page 9: Understanding Your Training System
UNDERSTANDING YOUR SYSTEM 1. Turning the EDGE RT On/Off To turn the receiver on, place the red dot on the back of the handheld transmitter to the red dot on the receiver. Hold the two red dots together for a moment until the LED light on the receiver comes on. -
Page 10: Transmitter Button Function
2. Transmitter Button Function The handheld transmitter uses 4 buttons to send stimulation. The LED indicator will blink on both the handheld transmitter and the receiver when the stimulation buttons are pressed. Medium Constant Stimulation High Constant Stimulation Low Constant Stimulation Medium Nick Stimulation... - Page 11 2) Nick Stimulation The two black buttons on the front of the transmitter control 3 levels of Nick stimulation. When the Nick button is pressed, the receiver emits a single rapid pulse of electrical stimulation. - Low Nick Stimulation: Press the lower black button for Low a low power Nick stimulation.
-
Page 12: Using The Dog Selector Dial
3. Using the Dog Selector Dial The EDGE RT is expandable to a 3-dog system. Change the dial to select the number of the receiver that you would like to control from the transmitter. 4. Receiver Fitting Proper Fit The receiver should be fitted so that the surgical stainless steel contact points press firmly against the dog’s skin. -
Page 13: Finding The Right Stimulation
5. Finding the Right Stimulation The EDGE RT has a Selector Dial on the top of the transmitter (1 is the lowest and 8 is the highest). Remember that you will need to adjust the setting (upward or downward) depending on your dog's temperament and threshold for stimulation. -
Page 14: Maximizing The Distance
6. Maximizing the Distance Depending on the way you use your transmitter, the transmitter range may vary. To get the greatest range, hold the transmitter away from your body and avoid touching the antenna. Keep your unit properly charged for maximum signal strength. Maximum range Typical range Minimum range... -
Page 15: Led Indicator
7. LED Indicator The LED indicator flashes every 4 seconds when the receiver is on and ready for use. The LED indicator will blink on both the transmitter and the receiver when the transmitter buttons are pressed. The LED indicator color indicates the battery life level. Green = Full charge Amber = Medium charge Red = Needs charge... -
Page 16: Charging The Battery
NOTE 2: The unit has a partial charge when it leaves the Dogtra facility. Upon receipt of the system, be sure to give it a full 2-hour initial charge before the first use away from any flammable substances. -
Page 17: Changing The Contact Point Length
4. After charging, cover the battery charging receptacles with the rubber plugs. 9. Changing the Contact Point Length The Dogtra EDGE RT comes equipped with standard 5/8” contact points that can be extended to 3/4” contact points to use on dogs with longer coats. - Page 18 * Caution: Tighten until firmly in place. Be careful not to over tighten. To shorten the contact points back to the standard 5/8”, start with the adjustment tool with the side marked 3/4”, remove the contact point extensions, and tighten the contact points with the adjustment tool with the side marked 5/8”.
-
Page 19: Code Setting
10. Code Setting Follow the steps below to code an EDGE RT transmitter to a new or existing receiver. 1. Set the Selector Dial to level 1 and set the Dog Selector Dial to the number you want to code the receiver to. -
Page 20: Attaching The Belt Clip
11. Attaching the Belt Clip Follow the instructions below to attach the included belt clip to the transmitter. 1. Align the belt clip to the grooves on the back of the transmitter. 2. With a firm grip, screw on the belt clip's Phillips head screws with a screwdriver. -
Page 21: Using The Test Light
12. Using the Test Light 1. Turn on the receiver by placing the red dot on the back of the transmitter to the red dot on the receiver. 2. Place the test light, included in the package contents, on the contact points as shown in the diagram. 3. -
Page 22: General Training Tips
GENERAL TRANING TIPS Your dog must know some basic obedience commands before beginning training with the EDGE RT. A dog learns by first being shown a command, followed by lots of repetition over an extended period. As the dog becomes proficient at these commands, the trainer can introduce distractions and different locations to strengthen them. - Page 23 Animals (and humans) perform better in a less stressful environment. For more training information, please visit our website at www.dogtra.com.
-
Page 24: Maintenance
Storage maintenance The EDGE RT should be fully charged before storing for extended periods. While in storage, the unit should be given a full charge once a month and before the first use. -
Page 25: Troubleshooting Guide
TROUBLESHOOTING GUIDE 1. My dog is not reacting to the receiver. – Make sure the receiver and transmitter are turned on by placing the two red dots together to turn on the receiver until it illuminates. – Make sure the collar strap is tight enough so both contact points are touching the dog’s skin. - Page 26 If the dog is in salt-water, be sure to rinse the receiver and charging port with clean water. - If the above does not resolve your issues, contact Dogtra customer service at info@dogtra.com or (888) 811-9111.
-
Page 27: Warranty And Repair Information
1+1 Year Extended Warranty Except as otherwise provided, Dogtra warrants to the original retail purchaser (“You”) that your Dogtra product shall be free of defects in materials and workmanship for a period of one (1) year from the date of purchase (“Original Warranty”). As a special promotion, Dogtra... - Page 28 MERCHANTABILITY AND FITNESS FOR A PARTICULAR PURPOSE. Limitation of Remedies Dogtra’s liability is limited to the cost of repair or replacement of the Dogtra product under the Original Warranty or Extended Warranty. Any claim or action to enforce the Original and/or Extended Warranties must be commenced within thirty (30) days of such warranty’s expiration for...
- Page 29 Dogtra products. To register your product, visit www.dogtra.com/product-registration. If your product is not registered with Dogtra, You will be required to provide a receipt or other proof purchase (as provided above) to qualify for warranty service.
Need help?
Do you have a question about the EDGE RT and is the answer not in the manual?
Questions and answers