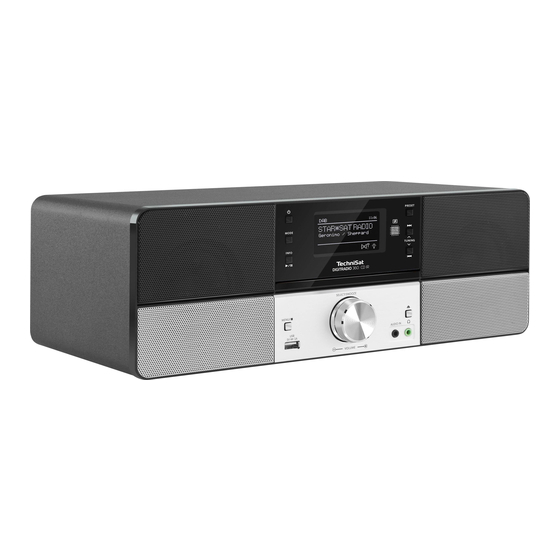
TechniSat DigitRadio 360 CD IR Instruction Manual
Cd micro with dab+/fm/ internet radio
Hide thumbs
Also See for DigitRadio 360 CD IR:
- Instruction manual (12 pages) ,
- User manual (652 pages) ,
- Instruction manual (508 pages)
Table of Contents
Advertisement
Quick Links
Advertisement
Table of Contents

Subscribe to Our Youtube Channel
Related Manuals for TechniSat DigitRadio 360 CD IR


Summary of Contents for TechniSat DigitRadio 360 CD IR
-
Page 2: Safety Precautions
SAFETY PRECAUTIONS - Read all the instructions carefully before using the unit and keep them for future reference. - Check that the voltage marked on the rating label matches your mains voltage. - The unit must be placed on a flat stable surface and should not be subjected to vibrations. - Do not place the unit on sloped or unstable surfaces as the unit may fall off or tip over. -
Page 3: Product Overview
product overview front view 1. STANDBY Button 9. TUNING Button 2. MODE Button 10. MENU/ STOP Button 3. INFO / Button 11. USB 5V 1A Charging Port 4. Disk Tray 12. VOLUME +/– Dial/SELECT Button 5. Display 13. AUDIO IN Socket 6. -
Page 4: Battery Replacement For The Remote Control
remote control 21. INTRO Button 1. ON/STANDBY Button 22. RANDOM Button 2. Number Buttons 23. BACK Button 3. REPEAT Button 24. EQ Button 4. MENU Button 5. MONO/ST. Button 25. TUNING Button 26. VOLUME + Button 6. TUNING Button 27. ENTER Button 7. -
Page 5: Remote Control Operation Range
remote control operation range • The remote control sensor on the front unit is sensitive to the remote control’s commands up to a maximum of 4 metres away and within a maximum of 60° arc. • Please note that the operating distance may vary depending on the brightness of the room. -
Page 6: Getting Started
GETTING STARTED Powering ON/OFF When you first connect the unit to the mains socket, the unit will be in STANDBY mode after showing “Welcome to Internet Radio STARTING….” (F.1)(F.2) Press the Standby button on the unit or remote control to switch the unit on. Press the Standby button on the unit or remote control to switch the unit back to standby on mode. -
Page 7: System Settings
System Settings Press the MENU button to display the menu, press the PRESET buttons to select Main menu and then press the ENTER button to confirm. Press the PRESET buttons to select System settings and then press the ENTER button to confirm. Equaliser This system supports a variety of equalizers and sound effects. -
Page 8: Inactive Standby
Time/Date The Time/Date can be automatically set once it has been connected to the Internet, DAB+ or FM radio station with time/date information. You may also adjust the Time/Date manually. Press the CLOCK button to access Set Time/Date. Alternatively, During System settings mode, press the PRESET buttons to select Time/Date and press the ENTER button to confirm. -
Page 9: Software Update
Press the PRESET buttons to select Yes, and press the ENTER button to confirm or select No to cancel. After the system reset, all the tuned stations, DAB & FM preset stations will be erased. Software update During System settings mode, press the PRESET buttons to select Software update and then press the ENTER button to confirm. -
Page 10: Internet Radio
Multi-room The device can form part of a Multi-room group. The group can be controlled over a Wi-Fi network with UNDOK app running on a smart device or using the device’s Multi-room menu. For Multi-room, several devices can be set up as a group with a device acting as the server and other devices acting as clients. - Page 11 Station list Press the PRESET buttons to select from the following options, and then press the ENTER button to confirm. My Favourites • Favourites are stored in the Internet radio portal and are available to all Internet radios that are registered with the same account. You must register the radio in the Internet radio portal before making use of the favourites.
- Page 12 Spotify Using This Device With Spotify Connect A better way to listen at home Spotify lets you listen to millions of songs – the artists you love, the latest hits and discoveries just for you. You’ll need a Spotify Premium account to use Spotify Connect. If you don’t have it, just go to http://www.spotify.com/freetrial for your free trial.
-
Page 13: Music Player Operation
Music Player Operation This function is for more advanced users. The built-in Music Player allows you to play unprotected audio files (AAC, MP3, WMA, FLAC) stored on a networked computer. To play music from the computer, you must setup a shared file or media library on the computer. -
Page 14: Usb Operation
USB Operation When a USB device is connected to the unit, the display (F.5) shows “USB disk attached – Open folder?” (F.5), and then press USB playback the ENTER button to confirm YES. Alternatively, USB disk attached - During Music Player mode, press the PRESET buttons Open folder? to selec t USB playback and press the ENTER button to... -
Page 15: Dab Operation
DAB Operation Press the MODE button on the unit repeatedly or press the FM/DAB button on the remote control to select “DAB radio”. (F.6) The unit will enter DAB mode and perform the auto scan function. During the scan the display will show “Scanning… ” together with a slide bar that indicates the progress of the scan and the amount of stations that have been found so far. -
Page 16: Station Order
Prune Invalid You may remove all unavailable stations from the list. During DAB mode, press the MENU button and press the PRESET buttons to select Prune invalid and the press ENTER button to confirm. Press the PRESET buttons to select YES and press the ENTER button to confirm. Or select NO to cancel. -
Page 17: Scan Setting
Scan Setting Press the MENU button to access FM menu. Press the PRESET buttons to select Scan setting and then press the ENTER button to confirm. Press the PRESET buttons to select Yes to receive Strong stations only and then press the ENTER button to confirm. - Page 18 To Stop Playback Press the STOP button to stop playback Skipping To Another Track Press the buttons to skip backwards to the beginning of the track or previous track or skip for wards to the next track. Press and hold the buttons to per form fast for ward/reverse playback.
-
Page 19: Aux Operation
AUX operation There is an “AUDIO IN” socket located at the front of the unit. Analogue audio sound signals from other sources can be input to the unit through this socket. Connect the input to another audio device via an AUX cable (not included) with an “AUDIO IN” socket. -
Page 20: Cancelling The Alarm
Enable Off/ Daily/ Once/ Weekends/ Weekdays Time (Alarm On time) Mode Buzzer/ Internet radio/ DAB/ FM/ CD Preset Last Listened/ (Preset station) Volume Muted, 1-31 Save Save and confirm the alarm setting Finally, select “Save” and press the ENTER button to save the alarm setting. When the alarm is set, the alarm icon will appear on the display during standby mode. -
Page 21: Maintenance
Maintenance Handling Discs • Do not touch the playback side of the disc. • Do not attach paper or tape to the disc. Cleaning Discs • Fingerprints and dust on the disc cause sound deterioration. Wipe the disc from the centre outwards with a cloth.
Need help?
Do you have a question about the DigitRadio 360 CD IR and is the answer not in the manual?
Questions and answers