Advertisement
Table of Contents
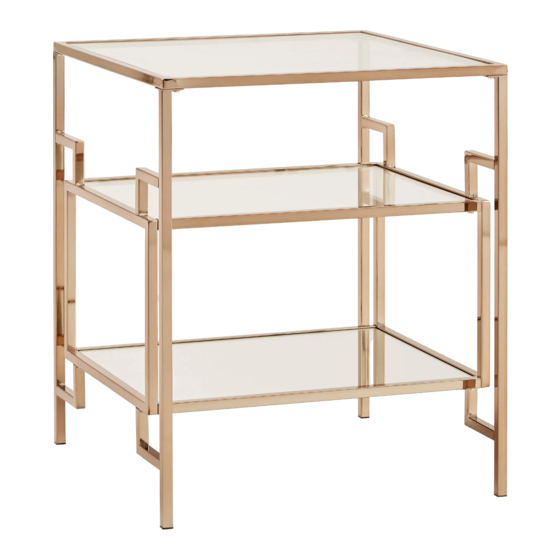
ASSEMBLY INSTRUCTION
E836A SIDE TABLE WITH MIRROR BOTTOM AND GLASS SHELF AND TOP
A
Side Panel
2pcs
E
Shelf Glass
1pc
I
Bolt
1/4" X 1/2"
16pcs
B
Top Frame
1pc
F
Shelf Mirror
1pc
J
Allen Wrench
1/4"
1pc
C
Stretcher
4pcs
G
Pad
8mm
12pcs
This page lists all the contents included in the box.
Please take the time to identify the hardware as
well as the individual components to this product.
As you unpack and prepare for assembly, place the
contents on a carpeted or padded area to protect
them from damage.
1
D
Top Glass
1pc
H
End Cap
16 X16mm
4pcs
Advertisement
Table of Contents

Related Manuals for ROOMS TO GO E836A


Summary of Contents for ROOMS TO GO E836A
- Page 1 ASSEMBLY INSTRUCTION E836A SIDE TABLE WITH MIRROR BOTTOM AND GLASS SHELF AND TOP Side Panel Top Frame Stretcher Top Glass 2pcs 4pcs Shelf Glass Shelf Mirror End Cap 16 X16mm 12pcs 4pcs Bolt Allen Wrench 1/4” X 1/2” 1/4” 16pcs This page lists all the contents included in the box.
- Page 2 *** Do not tighten screws & bolts until the entire unit is completely assembled. Attach Stretcher (C) to Side Panel (A) by Bolt (I) and Allen Wrench (J) as shown. Attach assembled unit to Top Frame (B) by Bolt (I) and Allen Wrench (J) as shown.
- Page 3 Attach End Cap (H) to the bottom of Side Panel (A). Then attach Pad (G) to Top Frame (B) and Stretcher (C) as shown. Place Top Glass (D), Shelf Glass (E) and Shelf Mirror (F) as shown. Cleaning & Care Treat surface with care.
Need help?
Do you have a question about the E836A and is the answer not in the manual?
Questions and answers