Table of Contents
Advertisement
Quick Links
Advertisement
Table of Contents

Related Manuals for Kinova Link 6


Summary of Contents for Kinova Link 6
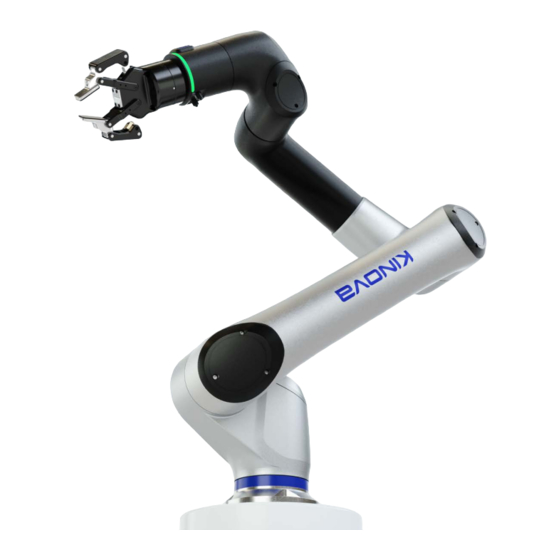
- Page 1 Link 6 user guide Optional gripper shown...
-
Page 2: Table Of Contents
Contents Copyright notice............................1 Disclaimers..............................2 Abbreviations.............................3 Link 6 overview............................5 Intended use..............................6 Unintended uses............................6 Warranty information..........................7 Applicable firmware..........................7 Technical specifications........................... 9 Schematics and dimensions........................11 Eective workspace........................13 Components............................. 15 Base................................15 Specifications and dimensions of the base of the arm............15 Actuators..............................16 Wrist interface overview........................ - Page 3 Gigabit Ethernet on the wrist....................45 Safety................................ 46 Precautions.............................. 46 Safety directives and warnings......................46 Risk assessment............................49 Safety equipment............................ 50 Assessments before using the robot....................50 Stop categories............................51 Emergency stop............................51 Move robot arm without power......................51 Safety functions............................52 List of safety functions........................52 Stopping time and distance.......................
- Page 4 State: Arm maintenance......................96 State: Monitored stop........................97 State: Fault............................... 98 Operating modes............................ 99 Mode: Manual Jog........................100 Mode: Hand Guiding......................... 102 Mode: Hold-to-Run........................103 Mode: Automatic.........................105 Recovery mode............................106 Robot lights and what they mean: a reference................107 Hardware installation........................... 110 Inside the Link 6 boxes........................
- Page 5 Other actions that can be taken on tools................154 Configurations for the robot settings....................155 Configuring the controller for robot controls............... 156 Configuring the arm for robot controls................. 156 Configuring the force torque....................160 Visual programming..........................162 Overview of the Program page......................162 Variable management...........................
- Page 6 Wrist analog on the Industrial I/O plugin page..............249 Wrist digital on the Industrial I/O plugin page..............250 Accessories.............................252 Controller wall mount..........................252 Installing the Kinova wall mount.................... 254 Gigabit Ethernet adapter........................255 Dimensions of the Gigabit Ethernet adapter.................255 Installing the Gigabit Ethernet adapter................. 256 External emergency stop station......................257...
- Page 7 Why is the snapshot button not working?................268 Why is my tool not working?....................268 Emergency stop..........................269 Why is the wrist enabling device not enabling Hand Guiding mode?.......269 Why is the controller hot?....................... 270 Issues related to safety elements.......................270 Why can I not edit any safety configurations?..............270 Why is the external safety device not working?..............270 Why is the robot stuck in Reduced mode?................
-
Page 9: Copyright Notice
EN UG-020 Link 6 user guide r1.0 Copyright notice The information in the Link 6 user guide contains proprietary information and, as such, no part may be reproduced, in part or in whole, or transmitted in any form or by any means, electronically or mechanically, including photocopying, recording, or any information or storage retrieval system, without prior permission in writing from Kinova. -
Page 10: Disclaimers
Kinova continually works towards improving the reliability and performance of its products. Kinova does its best to ensure the content of all their user guides is accurate and precise with respect to the latest version of their products. However, Kinova does not take responsibility for any erroneous or missing information. -
Page 11: Abbreviations
EN UG-020 Link 6 user guide r1.0 Abbreviations alternating current Analog/Digital converter American Wire Gauge Binary Coded Decimal BIST built-in safety test central processing unit Cyclic redundancy check tested to Canadian standards by Underwriters' Laboratories direct current Deutsches Institut für Normung... - Page 12 System Basis Chip stop category SCCR Short-circuit Current Rating Safety Control Unit Serial Peripheral Interface a file format, used by Kinova, to package firmware updates Tool Center Point TCP/IP Transmission Control Protocol/Internet Protocol Underwriters Laboratories Universal Serial Bus 2.5 V 3.3 V...
-
Page 13: Link 6 Overview
Thanks to the modular design of the robot, a variety of optional interfaces are available to connect end effectors. Each of these optional interfaces has no visible cables. Also, Kinova offers a variety of optional parts. • Kinova wall mount kit attaches the controller to walls. -
Page 14: Intended Use
Link 6 is not intended to work in certain applications because it can damage the robot system, or lead to serious injury to, or death of, the user. Kinova is not responsible for any damage caused to the robot system when the robot is not used as intended. -
Page 15: Warranty Information
Allegedly defective Products returned to Kinova in accordance with this contract will be returned to the End User if found by Kinova on examination not to be defective. Kinova may charge a fee for examination and testing. The warranty cannot be assigned or transferred, and is to the sole benefit of the End User. - Page 16 If you are using an earlier firmware or software version, some of the features discussed in the document may not apply to your installation. To upgrade firmware and software, download the packages from the product technical resource page on the Kinova website and install them from the Kortex Web App Upgrade page.
-
Page 17: Technical Specifications
EN UG-020 Link 6 user guide r1.0 Technical specifications The Link 6 is a modern, robust, and collaborative-capable robot for all industries that want to benefit from automation. Table 2: General Degrees of freedom (DoF) Continuous payload 6.0 kg (full range, at 200 mm from wrist, for optimal performance) - Page 18 EN UG-020 Link 6 user guide r1.0 Table 5: Interfaces Programming Visual programming Controller interfaces USB 3.0, Ethernet Controller I/O Digital: 16 inputs (8 redundant safe), 16 outputs (8 redundant safe) General purpose analog: 4 programmable input/output General purpose digital: 8 inputs, 8 outputs...
-
Page 19: Schematics And Dimensions
EN UG-020 Link 6 user guide r1.0 Table 9: Main accessories (optional parts) Vision module Up to: 1920 x 1080 @ 30 fps with FOV 65° ± 3° Focusing range: 30+ cm 0.6 kg Tool adapters with mounting hardware Robotiq, OnRobot, Gigabit Ethernet 0.2 kg... - Page 20 The controller is a box that sits on a table, floor, wall, or in a cabinet near the arm. Note: To install the controller in a cabinet or on a wall, use the Kinova wall mount. The wall mount is an optional accessory.
-
Page 21: EEctive Workspace
EN UG-020 Link 6 user guide r1.0 Figure 3: Controller dimensions in millimeters: Bottom view Related topics Safety directives and warnings on page 46 Move robot arm without power on page 51 Joint limits on page 67 Controller wall mount on page 252 Eective workspace... - Page 22 EN UG-020 Link 6 user guide r1.0 Figure 4: Recommended reach and maximum working area, vertical and horizontal Related topics Protection zones on page 69 +1 514-277-3777 kinovarobotics.com © 2022 Kinova inc. All rights reserved.
-
Page 23: Components
EN UG-020 Link 6 user guide r1.0 Components Each component of Link 6 can be considered as modular parts of the robot; each one has its specific role to play in the overall functionality. There are several main components that make the robotic arm. -
Page 24: Actuators
EN UG-020 Link 6 user guide r1.0 Figure 6: Top view of base dimensions in millimeters Dowel hole feature for optional dowel pins Front Back Related topics Installing the arm directly to a surface on page 112 Installing the arm on a third-party adapter plate... -
Page 25: Wrist Interface Overview
EN UG-020 Link 6 user guide r1.0 Figure 8: Size 80 actuator Figure 7: Size 110 actuator Each actuator also has a mechanical brake that is activated from the firmware or when the power is removed from the arm. Wrist interface overview... - Page 26 EN UG-020 Link 6 user guide r1.0 hidden Built-in force torque sensor Buttons Wrist ring Flange interface ISO 9409-1-50-4-M6 0° and 180° dowel pin positions Figure 9: Top of wrist Connector A M8, 8 pin male connector RS-485 for Modbus RTU and 1 digital...
- Page 27 EN UG-020 Link 6 user guide r1.0 Central pogo pin connector Gigabit Ethernet RS-485 for Modbus 24 V power Figure 11: Bottom of wrist, pogo pin connector Use the buttons on the top of the wrist to control the arm manually.
-
Page 28: Force Torque Sensor
EN UG-020 Link 6 user guide r1.0 Force torque sensor The force torque sensor detects the force and torque applied to the effector. The six-axis force torque sensor is used in Hand Guiding mode to provide smooth and effortless experience. - Page 29 EN UG-020 Link 6 user guide r1.0 Figure 14: Central connector on wrist with cap on and with cap off M8 connectors Each of the two M8 connectors, which are compliant to IEC61131-2, have 8 pins. They provide 24 V power to whatever is attached to them. Connector A has two analog...
- Page 30 EN UG-020 Link 6 user guide r1.0 Connector A Connector B Pin # Signal Signal AIO_2 RS_485_N DIGITAL_IO1 DIGITAL_IO1 DIGITAL_IO2 DIGITAL_IO2 +24v +24v DIGITIAL_IO3 DIGITIAL_IO3 DIGITIAL_IO4 DIGITIAL_IO4 Ground Ground Remember: Always leave the caps on the M8 connectors when they are not being used.
-
Page 31: Wrist Interface Compatibility
EN UG-020 Link 6 user guide r1.0 485_P BI_DB-RX0- 24 V 24 V BI_DA-TX0+ 485_N 485_N BI_DB-RX0+ 24 V 24 V BI_DA-TX0- 485_P Ground BI_DC- BI_DC+ Ground Figure 16: Pogo pin distribution Available power in the wrist The wrist can handle a maximum of 5 A among all M8 connectors plus central pogo pin. If one M8 connector is using 1 A, there is only 4 A left for the other interfaces. -
Page 32: Controller Overview
EN UG-020 Link 6 user guide r1.0 • Kinova accessories º Gigabit Ethernet adapter is an optional Kinova accessory that exposes an M12 X-Coded Gigabit Ethernet connector to connect easily to Ethernet devices. º Robotiq adapter is an optional Kinova accessory that interfaces both mechanically and electrically with Robotiq products. - Page 33 EN UG-020 Link 6 user guide r1.0 Use the Ethernet connector in the front of the controller to connect to a laptop or computer. Note: Alternatively, use the Ethernet connector on the back of the controller. port Use the port to insert a key that contains data that must be pushed onto the controller, such as a new software unit package.
- Page 34 EN UG-020 Link 6 user guide r1.0 Figure 20: Input and output connectors are on the controller behind the side panel The controller uses 12 VDC to power the internal computer units, which include Safety Control Unit (SCU), Main Processing Unit (MPU), module, and optional GPU.
-
Page 35: Controller Mounting Interface
EN UG-020 Link 6 user guide r1.0 Puncture holes in the entry plate for the wires that need to connect to the controller. The entry plate protects the wires from dust and liquids. Attention: Never disconnect any cable from the controller when it is switched on. -
Page 36: Controller Electrical And Communications Interface
EN UG-020 Link 6 user guide r1.0 Figure 23: Mounting point measurements in millimeters Related topics Installing the controller on a flat surface on page 117 Controller electrical and communications interface There is an access panel on the controller with a mapping of all the inputs and outputs listed directly on the back. - Page 37 EN UG-020 Link 6 user guide r1.0 Figure 24: Controller side panel Camlocks; Use 8 mm hex key to unlock and lock On the inside of the panel is a mapping of the location of each input and output. See...
- Page 38 EN UG-020 Link 6 user guide r1.0 Figure 25: Inputs and outputs map on the back of the panel +1 514-277-3777 kinovarobotics.com © 2022 Kinova inc. All rights reserved.
-
Page 39: Teach Pendant Overview
EN UG-020 Link 6 user guide r1.0 connections are connected to the controller through the side panel. The protective earth mount points and fuse are also inside the side panel of the controller. Figure 26: Inside the side panel of the controller... -
Page 40: Industrial I/O Panel Overview
EN UG-020 Link 6 user guide r1.0 E-stop button Use the E-stop button to stop the robot in emergency situations. Power button Use the power button to turn on the teach pendant and access Kortex Web App. Figure 27: Teach pendant front... - Page 41 EN UG-020 Link 6 user guide r1.0 The general-purpose I/Os are powered by 24 V IN or 0 V IN terminals. The terminals can receive their power from 24 V OUT or 0 V OUT terminals, or from an external power supply. The general- purpose I/Os contains eight (8) digital inputs, eight (8) digital outputs, four (4) analog I/Os, and provisions for high-speed encoder inputs.
-
Page 42: Industrial I/O Power Supply
EN UG-020 Link 6 user guide r1.0 Industrial I/O power supply Negative connections, labeled as 0V, are only for power and signaling. protective earth (PE) provides a low impedance path to ensure proper functioning in case of faults. Be careful to connect power to the supplies correctly. When connected incorrectly, you can have undesirable side effects, such as reverse polarity, improper voltage levels, and improper frequencies. -
Page 43: General-Purpose Digital Inputs
EN UG-020 Link 6 user guide r1.0 Label Purpose 0V_OUT 0V output of the internal I/O power supply. Use only to jump with the terminal 0V_IN. If an external power supply is used to connect on the 0V_IN terminal, leave the terminal unconnected. -
Page 44: General-Purpose Digital Outputs
EN UG-020 Link 6 user guide r1.0 Table 19: Digital inputs Digital inputs Typical Unit Note Low state voltage V DC High state voltage V DC Current Voltage drop Function Current sinking IEC 61131-2 Type 1, 3 Digital input type 1 and 3 designed for accordance with IEC 61131-2 Each wetting port is designed to provide the power needed for a single input point. - Page 45 EN UG-020 Link 6 user guide r1.0 Under normal operation, channels are not isolated from each other. There is a monitoring point and a binary state of a visual indicator although there is no actual hardware visual indicator. The delay time for transitions between 0 and 1 and 1 and 0 depends on the load and on software delays.
-
Page 46: Analog Inputs
EN UG-020 Link 6 user guide r1.0 Analog inputs There are four (4) analog inputs. Analog input types are current and voltage. The input impedance in the signal range is in the on or off state; the state is specified by the manufacturer. - Page 47 EN UG-020 Link 6 user guide r1.0 Analog output types are current and voltage. The output impedance in the signal range is in the on or off state; the state is specified by the manufacturer. The analog output has a maximum error at 25 °C ± % of full scale, with a temperature coefficient ±...
-
Page 48: Emergency Stop Inputs
EN UG-020 Link 6 user guide r1.0 Emergency stop inputs Emergency stop devices must comply with ISO 13850:2015. Link 6 requires an emergency stop device with two (2) Normally Closed (NC) redundant contacts. The terminal connections belong to the SAFETY - ESTOP terminal group. -
Page 49: Teach Pendant Bypass Inputs
EN UG-020 Link 6 user guide r1.0 Figure 37: Terminal connections with external emergency stop connected Teach pendant bypass inputs There are only two ways to bypass teach pendant inputs. All other configurations prevent the robot arm from receiving power. -
Page 50: Safety-Rated Digital Inputs
EN UG-020 Link 6 user guide r1.0 Figure 38: Teach pendant bypass inputs terminal connections Safety-rated digital inputs Safety-rated digital inputs can be used as redundant signals. To use the inputs as redundant signals, connect Bank A to one of the contacts of the safety device and connect Bank B to the redundant, secondary contact of the same safety device. -
Page 51: Wrist I/O
EN UG-020 Link 6 user guide r1.0 Figure 39: Safety-rated digital inputs terminal connections Wrist I/O Each of the two M8 connectors has eight (8) pins. The I/O levels associated with the connectors are designed to comply to1/ IEC 61131-2. -
Page 52: Wrist Power Supply
EN UG-020 Link 6 user guide r1.0 Connector A Connector B Pin # Label Purpose Label Purpose +24v Power +24v Power DIGITAL_IO3 Digital In/Out DIGITIAL_IO7 Digital In/Out DIGITAL_IO4 Digital In/Out DIGITIAL_IO8 Digital In/Out Ground Ground Wrist power supply The maximum current is shared among all power outputs of the wrist, including the A and B connectors and the pogo pad. -
Page 53: Gigabit Ethernet On The Wrist
EN UG-020 Link 6 user guide r1.0 Gigabit Ethernet on the wrist Use the Gigabit Ethernet adapter to use the Gigabit Ethernet on the wrist. The Gigabit Ethernet uses the 1000BASE-T signal, which makes it compliant with IEEE802.3. It uses an ANSI/TIA-568 T568B termination. -
Page 54: Safety
EN UG-020 Link 6 user guide r1.0 Safety Link 6 is a powerful robot that can perform heavy duty industrial tasks. Read and understand all safety considerations before installing and using the robot. Safety includes general warnings about the robot, risk assessments, what to do in an emergency, how to work the robot when it loses power, and so on It also includes all safety functions of Link 6. - Page 55 EN UG-020 Link 6 user guide r1.0 Directives specific to the integrator The integrator is responsible for the safe use of Link 6. For the robot to be used safely, there are certain directives the integrator must follow. Important: Link 6 does not support Power and Force Limiting (PFL) collaborative mode as described by ISO TS 15066.
- Page 56 EN UG-020 Link 6 user guide r1.0 Stop the robot when a person is trapped by the robot or some other similar emergency. 1. Push the robot out of the way, using approximately 60 N of force. Important: Applying too much force may damage the arm.
-
Page 57: Risk Assessment
EN UG-020 Link 6 user guide r1.0 Lock out the device during maintenance; not locking the device could result in serious injury. Cautions CAUTION: A caution is a hazardous situation that may cause minor to moderate injury to workers and can damage the property. Avoid hazardous situations that are associated with cautions. -
Page 58: Safety Equipment
EN UG-020 Link 6 user guide r1.0 • Types of applications, whether collaborative non-collaborative Note: For more details, please refer to ISO 10218 and ISO TS 15066. • Robot parameters including, but not limited to, speeds and trajectories • Safety function parameters including, but not limited to, restricted areas and speed limited by areas •... -
Page 59: Stop Categories
EN UG-020 Link 6 user guide r1.0 Stop categories The different categories of stopping the motion of the robot safely when an emergency arises is designed to reduce existing hazards. The SC (SC) are aligned with IEC 60204-1. Table 36: Stop categories... -
Page 60: Safety Functions
EN UG-020 Link 6 user guide r1.0 Warning: Backdriving the actuators more than 360 ° may damage the robot and internal cables. Depending on the position of the robot, damage may occur when the movement is less than 360 °. - Page 61 EN UG-020 Link 6 user guide r1.0 SF01 Emergency stop What does SF01 monitor? SF01 monitors external emergency signals from the Safety I/Os to the robot. It initiates a stop category 1, which stops the movement of the robot before removing power from the arm.
- Page 62 EN UG-020 Link 6 user guide r1.0 SF03 Joint position monitoring What does SF03 monitor? SF03 monitors the positions of each joint and compares the positions with the limits set in the Joint Limits Position Limits page. Cause of the trigger Certain trajectories may inadvertently make a single joint rotate constantly in the same direction without unwrapping.
- Page 63 EN UG-020 Link 6 user guide r1.0 Elbow limits on page 69 Operating modes on page 99 Mode: Manual Jog on page 100 List of safety functions on page 52 Status of safety functions on page 222 SF05 Monitored stop...
-
Page 64: Stopping Time And Distance
EN UG-020 Link 6 user guide r1.0 List of safety functions on page 52 Status of safety functions on page 222 SF07 TCP and elbow speed monitoring What does SF07 monitor? SF07 monitors the Cartesian speeds of the and the elbow, which is the third joint,so that the speeds do not exceed the values set in the TCP &... -
Page 65: Safety Modes
EN UG-020 Link 6 user guide r1.0 Safety modes Configure speeds both as normal or reduced to define safe operation of the robot. Normal safety mode determines the maximum speeds at which the robot can move in Cartesian angular directions. -
Page 66: Sf01 Emergency Stop Timeline
EN UG-020 Link 6 user guide r1.0 Operating modes • Manual Jog • Hand Guiding • Hold-to-Run • Automatic • Monitored Stop • Recovery Related topics State timelines of safety outputs on page 83 SF01 Emergency stop timeline The triggers for and the recovery from the Emergency stop function changes the state of the function. -
Page 67: Sf02 Protective Stop Timeline
EN UG-020 Link 6 user guide r1.0 Operating modes: Monitored Stop Arm: Initialization Idle Maintenance Brake Operational Fault Recovery Idle Fault Release power off power on SF01 active SF01 inactive Note: SF01 is inactive when the arm is in the state Fault power off only when it is initiated by stop category 0 or stop category 1 only. -
Page 68: Sf03 Joint Position Monitoring Timeline
EN UG-020 Link 6 user guide r1.0 Reset conditions - Manual All conditions must be met. • All the channels of the safety input that are configured for Protective Stop with Manual Reset. • All the channels of the safety input that are configured for Protective Stop Reset signals the controller. -
Page 69: Sf04 Joint Speed Monitoring Timeline
EN UG-020 Link 6 user guide r1.0 Reset conditions All conditions must be met. • Each joint position is within operational limits. • The arm is Operational and is in the operating mode Monitored Stop. Reset Tap CLEAR FAULT. Reset result Normal conditions lead to two results. -
Page 70: Sf05 Monitored Stop Timeline
EN UG-020 Link 6 user guide r1.0 Table 42: SF04 trigger and action timeline Monitor frequency of trigger 0.01 s Trigger The speed of at least one joint is faster than the configured limit. Trigger results • Stop category 2 is deployed. -
Page 71: Sf06 Protection Zone Monitoring Timeline
EN UG-020 Link 6 user guide r1.0 Equally important in knowing the timeline of a safety function is knowing where to find the current safety function status. For the status of SF05 Monitored stop0 function, there is one place to look in Kortex Web App: Diagnostics > Status > Safety Functions . - Page 72 EN UG-020 Link 6 user guide r1.0 Equally important in knowing the timeline of a safety function is knowing where to find the current safety function status. For the status of SF05 Monitored stop0 function, there is one place to look in Kortex Web App: Diagnostics > Status > Safety Functions .
-
Page 73: Sf07 Tcp And Elbow Speed Monitoring Timeline
EN UG-020 Link 6 user guide r1.0 SF07 TCP and Elbow speed monitoring timeline Each safety function enters one of two states during operations; it depends on the current state of the arm and the current mode of operation. Equally important in knowing the timeline of a safety function is knowing where to find the current safety function status. -
Page 74: Robot Safety Protections And Limits
EN UG-020 Link 6 user guide r1.0 Operating modes: Recovery Operational Initialization Idle Maintenance Brake Fault Arm: Release power on SF07 active SF07 inactive Figure 48: Timeline for SF07 before and after being triggered Related topics State timeline for the safety output Normal Speed Mode... -
Page 75: Joint Limits
EN UG-020 Link 6 user guide r1.0 • Protection zone • TCP and elbow speed Related topics List of safety functions on page 52 Safety modes on page 57 Joint limits Each joint can be configured with specific minimum and maximum angular positions. -
Page 76: Tool Center Point Limits
EN UG-020 Link 6 user guide r1.0 Table 46: Ranges of speed limits for joints Safety mode Joint size Speed range Normal Size 110 0 °/s to 180 °/s Size 80 0 °/s to 360 °/s Reduced Size 110 0 °/s to 100 °/s Size 80 0 °/s to 200 °/s... -
Page 77: Elbow Limits
EN UG-020 Link 6 user guide r1.0 TCP limit Safety mode Range Force 0 N to 200 N Orientation X -180° to + 180° Orientation Y -180° to + 180° Orientation Y -180° to + 180° Elbow limits The speed and orientation of the elbow must be configured. - Page 78 EN UG-020 Link 6 user guide r1.0 Important: The zone defined for the tool is the only zone that cannot be disabled. However, like the other zones, it can be modified. The tool zone must exist so that the robot takes the size of the end effector into account.
-
Page 79: Tool Sphere
EN UG-020 Link 6 user guide r1.0 Figure 55: Initial launch of Protection Zones page Related topics Effective workspace on page 13 List of safety functions on page 52 Tool sphere The tool sphere, displayed in the Protection Zones page, is a... - Page 80 EN UG-020 Link 6 user guide r1.0 Figure 56: Example when no zones, except for Figure 57: Example of multiple zones listed in the tool, are listed in the Zones pane the Zones pane Table 49: Actions that can be performed on each protection zone from the kebab ( ) menu...
- Page 81 EN UG-020 Link 6 user guide r1.0 Selected zone actions Description Export JSON Export the currently save configuration of the selected zone as a JSON file. Important: Export is available on the teach pendant only when a is connected in the USB port on the controller.
-
Page 82: Zone Shapes
EN UG-020 Link 6 user guide r1.0 3. Tap the zone in the list that needs to be manipulated. A single tap selects the zone. 4. Tap the associated kebab ( ) menu. A menu for the selected zone launches. - Page 83 EN UG-020 Link 6 user guide r1.0 Table 52: Properties specific to the cylinder zone Properties Description Orientation - Euler Enter the orientation of the end effector using the extrinsic ZYX Euler angle convention. Orientation is measured in degrees. Position Distance is measured from the x,y,z coordinates of the base and is measured in millimeters.
-
Page 84: Exporting Or Importing All Zones Into One File
EN UG-020 Link 6 user guide r1.0 Related topics Euler angle convention used on page 76 Euler angle convention used Euler angles are used to represent the orientation of an object, such as a robot tool. The convention used is Tait-Bryan, extrinsic ZYX. -
Page 85: Visualization Pane
EN UG-020 Link 6 user guide r1.0 3. Browse to the location where the protection zone XML or JSON files are stored. 4. Select the desired file. Results The Zones pane populates with all the zones defined in the file. -
Page 86: Safety I/O
EN UG-020 Link 6 user guide r1.0 Figure 60: Visualization pane with tool sphere, robot, and other protection zones Zoom in, zoom out, and view the zones from different angles. Safety I/O Each input safety function can be assigned through Kortex Web App... -
Page 87: Safety Inputs
EN UG-020 Link 6 user guide r1.0 Important: Make sure the arm is in the Idle state before you configure safety inputs and safety outputs. The arm is in the Idle state when the arm is switched off, but the controller is switched on. - Page 88 EN UG-020 Link 6 user guide r1.0 Figure 63: Safety input functions All safety digital inputs are normally closed. The behavior of NC changes depending on what configuration is assigned to the channel. Table 55: Input safety conditions available for each channel...
-
Page 89: Safety Outputs
EN UG-020 Link 6 user guide r1.0 Safety input function name Description Protective Stop with The robot pauses its task automatically and comes to a stop category 2. Automatic Resume After the signal is released, the robot resumes operation immediately. - Page 90 EN UG-020 Link 6 user guide r1.0 Figure 64: Safety outputs pane Output channel 2 Safety behavior Each safety output monitors a specific condition. The different conditions are listed in the safety output menu. Connect Safety Output channels to external Safety monitoring devices, such as a PLC, to obtain live feedback on the state of safety functions.
-
Page 91: State Timelines Of Safety Outputs
EN UG-020 Link 6 user guide r1.0 Table 56: Output safety conditions available for each channel Safety output function Description name Unassigned No output safety function is assigned for the connected equipment. Important: When a factory reset is performed, any channel assigned to a safety output channel becomes unassigned. - Page 92 EN UG-020 Link 6 user guide r1.0 Table 57: Safety output states that are described as safety function Safety output state Corresponding safety function Unassigned Emergency Stop SF01 Emergency Stop Protective Stop SF02 Protective Stop Monitored Stop SF05 Monitored Stop...
- Page 93 EN UG-020 Link 6 user guide r1.0 Trigger off The robot must be in one of the arm states to exit the Arm Moving state. • Initialization • Idle • Maintenance • Brake Release • Fault power off • Fault power on Alternatively, the robot must be in the operating mode Monitored Stop.
- Page 94 EN UG-020 Link 6 user guide r1.0 Trigger on • Normal is selected from the Safety Mode drop-down or in the Program speed control of the Robot control panel. • The safety system is set to Normal. • The safety system is transitioning from Reduced to Normal.
-
Page 95: Safety Checksums
EN UG-020 Link 6 user guide r1.0 Safety checksums The administrator needs a quick way to look at the robot and walk away with peace of mind knowing the safety configurations he put in place are working as expected. The safety checksum is a human readable hexadecimal value displayed beside the Notification icon. -
Page 96: Arm Calibration
EN UG-020 Link 6 user guide r1.0 Safety parameter Description SF06 Protection zone monitoring • Position of all configured protection zones • Shape type (sphere, cylinder, rectangular prism) • Dimensions of all configured protection zones • Orientation of all cylindrical and prismatic protection zones •... - Page 97 EN UG-020 Link 6 user guide r1.0 Figure 70: Arm calibration status The arm calibration can be in one of three states. Table 61: Arm calibration states State Description Not Calibrated The controller is switched on and validation of the calibration file is not yet started.
-
Page 98: Exporting Calibration Files
Exporting calibration files When you first switch on your Link 6, save the default arm calibration package. Use the exported arm calibration package to communicate with Kinova support if anything goes wrong when you first start your robot. About this task If you have multiple Link 6 units, you may want tot save a backup calibration package for... -
Page 99: Importing Arm Calibration Files
Before you begin Kinova keeps archives of the calibration package of each unit. The calibration package contains the data obtained during calibration in our factory. If you misplace the calibration file of your arm, contact support@kinova.ca to provide you with the original calibration package that matches your arm. -
Page 100: Modes Of Operation Of Link 6
EN UG-020 Link 6 user guide r1.0 Modes of operation of Link 6 The robot enters different states and modes during operation. The states often have a visual component for the user to recognize. The modes, which is how the user interacts with the robot, have a visual component for the user to recognize. -
Page 101: Complete Start-Up Sequence
EN UG-020 Link 6 user guide r1.0 • A single line coming out the sides of what is supposed to be the lit portion of equipment indicates one flash for each second. The color of the lines represents the color of the lights. -
Page 102: State: Controller Initialization
EN UG-020 Link 6 user guide r1.0 Figure 73: Controller when it is off Figure 74: Wrist ring when it is off Important: If there is a light on the controller power knob, turn off Link 6 by turning the power knob to the off position. -
Page 103: State: Controller Idle
EN UG-020 Link 6 user guide r1.0 Controller lights Wrist ring Description boot Power knob on the controller Processors in controller flashes white twice (2) each second. ACK button on the controller does Application software for the I/ not illuminate. -
Page 104: State: Arm Maintenance
EN UG-020 Link 6 user guide r1.0 Figure 77: Visual cues of arm initialization Controller lights Wrist ring Description Power knob on the controller Wrist ring flashes white once (1) Arm is receiving power. flashes white twice (2) each each second. -
Page 105: State: Monitored Stop
EN UG-020 Link 6 user guide r1.0 Figure 78: Visual cues of arm maintenance in progress Controller lights Wrist ring Description Microcontrollers Power knob on the controller Wrist ring flashes white twice (2) on the flashes white once (1) each each second. -
Page 106: State: Fault
EN UG-020 Link 6 user guide r1.0 Figure 79: Visual cues of robot in Monitored stop Controller lights Wrist ring Description Power knob on controller Wrist ring illuminates blue Mechanical brakes in the illuminates white steadily. steadily. released. ACK button on the controller does The arm is fully operational and is not illuminate. -
Page 107: Operating Modes
EN UG-020 Link 6 user guide r1.0 Figure 80: Visual cue of fault without power Figure 81: Visual cue of fault with power Controller lights Wrist ring Description Power knob on the controller No light illuminates from the An internal fault occurred. -
Page 108: Mode: Manual Jog
EN UG-020 Link 6 user guide r1.0 • Hand Guiding • Hold-to-Run • Automatic Related topics Stop categories on page 51 Mode: Manual Jog Use the mode Manual Jog to move the with Kortex Web App. There are two jog interfaces: Cartesian control and joint, or angular, control. - Page 109 EN UG-020 Link 6 user guide r1.0 Figure 83: Jog angular icon and control panel Enabling device Figure 84: Location of enabling device on the teach pendant When the robot is in the mode Manual Jog, there is a steady, white light behind the power knob on the controller and a steady, blue light on the wrist.
-
Page 110: Mode: Hand Guiding
EN UG-020 Link 6 user guide r1.0 Controller lights Wrist ring Description Power knob on controller Wrist ring illuminates white Move the arm in any direction illuminates white steadily. steadily. with Kortex Web App while holding the pendant enabling ACK button on the controller does device in the pressed position. -
Page 111: Mode: Hold-To-Run
EN UG-020 Link 6 user guide r1.0 Controller lights Wrist ring Description Power knob on controller Wrist ring illuminates white Move the arm in any direction illuminates white steadily. steadily. while holding the wrist enabling device button in the pressed ACK button on the controller does position. - Page 112 EN UG-020 Link 6 user guide r1.0 Hold-to-Run is also used for troubleshooting a situation with the robot. Robotic movement can be slowed during this mode to ease observing the actual actions in the programmed sequence. To be able to move the arm, an enabling device must be on.
-
Page 113: Mode: Automatic
EN UG-020 Link 6 user guide r1.0 Controller lights Wrist light Description Monitored stop Power knob on controller Wrist ring illuminates white The robot is in illuminates white steadily. steadily. When the robot starts to move again, it runs at the Reduced ACK button on the controller Safety mode speed. -
Page 114: Recovery Mode
EN UG-020 Link 6 user guide r1.0 Controller lights Wrist ring Description ACK button on the controller flashes blue once (1) each second. When the robot is in Automatic mode and the E-stop is pressed, the robot stops automatically and no power feeds the robot. -
Page 115: Robot Lights And What They Mean: A Reference
EN UG-020 Link 6 user guide r1.0 Related topics State: Fault on page 98 Why can the robot not exit recovery mode? on page 271 Robot lights and what they mean: a reference You can tell which mode or state the robot is currently in by looking at the lights on the... - Page 116 EN UG-020 Link 6 user guide r1.0 Description Meaning ACK button on the controller does not Kortex Web App displays the state first as Brakes Released and illuminate. then as Operational. Wrist ring illuminates blue steadily. Power knob on controller illuminates Link 6 is operating in Hold-to-Run mode or is waiting for white steadily.
- Page 117 EN UG-020 Link 6 user guide r1.0 Description Meaning ACK button on the controller does not There is no power in the arm. illuminate. No light illuminates from the wrist. Wrist ring flashes white four (4) times An internal fault occurred.
-
Page 118: Hardware Installation
EN UG-020 Link 6 user guide r1.0 Hardware installation Link 6 requires installation in the working environment. Installation involves placing the where it is going to be performing tasks, placing the controller within the constraints of the length of the cable to the arm in an accessible location, and making sure the robot is installed according to safety guidelines. -
Page 119: Unpacking The Arm
EN UG-020 Link 6 user guide r1.0 Figure 94: Box with arm and attached cable Related topics Accessories on page 252 Components on page 15 Unpacking the arm The box containing the is the larger of the two Link 6 boxes. -
Page 120: Considerations Before Installing The Arm
EN UG-020 Link 6 user guide r1.0 Considerations before installing the arm is heavy and large. It is advisable for two people to be involved in unpacking and installing the arm. Make sure the box that contains the arm is near the area where the arm is to be installed. Have all the tools and screws necessary for installing the arm easily accessible at the mounting location. - Page 121 EN UG-020 Link 6 user guide r1.0 • 4 x M8 socket head cap screws, grade 12.9 steel Note: Torque: 20 N·m Note: An equivalent imperial 5/16 in screw with equal or better mechanical properties and underhead contact patch can be used.
-
Page 122: Installing The Arm On A Third-Party Adapter Plate
EN UG-020 Link 6 user guide r1.0 4. Secure the green ground cable to the protective earth at the back of the base using the green screw. 5. Remove the protective covering from the arm. Related topics Specifications and dimensions of the base of the arm... -
Page 123: Considerations Before Installing The Controller
Note: When the controller needs to be secured to a wall or to the inside wall of a cabinet, it is recommended to use the optional Kinova wall bracket. Wherever the controller is installed, there is a set of guidelines that should be followed. - Page 124 However, if there is a need to fix it and it cannot be fixed to the installation surface, use the optional Kinova wall bracket. The controller must be kept within specific temperatures ranges during storage and use.
-
Page 125: Installing The Controller On A Flat Surface
EN UG-020 Link 6 user guide r1.0 Installing the controller on a flat surface controller must never be in a position where it can slip or fall. Before you begin Personnel • Number of Workers: 1 Supplies • 4 x M6-1.0-6h screws, closed end nut inserts Note: Maximum thread engagement depth: 6 mm Note: Torque: 7-9 N·m... -
Page 126: Connecting The Arm To The Controller
EN UG-020 Link 6 user guide r1.0 3. Tighten each screw until the controller cannot move. Related topics Considerations before installing the controller on page 115 Controller mounting interface on page 27 Surface mount of controller on page 27 Connecting the arm to the controller... - Page 127 EN UG-020 Link 6 user guide r1.0 About this task The teach pendant mount is compatible with VESA MIS-D, 75, and is compatible with the VESA Flat Display Mounting Interface (FDMI™) Standard. It has a 75 x 75 mm screw mounting pattern.
-
Page 128: Connecting The Teach Pendant To The Controller
EN UG-020 Link 6 user guide r1.0 Procedure 1. Choose whether you are installing using the FDMI standard or the 90 x 45 mm pattern; this determines which equipment and tools you need for installation. 2. Use the specifications in the figures to secure the teach pendant mount to the surface. -
Page 129: Connecting A Computer To The Controller
EN UG-020 Link 6 user guide r1.0 Procedure 1. Plug one end the AC cord into the back of the controller. 2. Plug the other end of the AC cord into an electric socket. Connecting a computer to the controller Kortex Web App... -
Page 130: Connecting A Network To The Controller
EN UG-020 Link 6 user guide r1.0 Connecting a network to the controller There are times when you need a permanent set-up in which the controller connects directly to a network. Before you begin You need to have an Ethernet CAT5 cable. -
Page 131: Initial Software Setup
EN UG-020 Link 6 user guide r1.0 Initial software setup Before you can start using Link 6, you have to configure the robot using Kortex Web App. Kortex Web App is a Web-based used for configuring, controlling, and monitoring the robot. Supported client devices Kortex Web App... -
Page 132: Logging In
EN UG-020 Link 6 user guide r1.0 Figure 102: Kortex Web App in a web browser Logging in The first step in using Link 6 is to log into Kortex Web App. You can use either a computer or a teach pendant. Before you begin When you use Kortex Web App in a web browser, make sure the... - Page 133 EN UG-020 Link 6 user guide r1.0 Procedure 1. Switch on the controller. The power knob flashes a white light while the controller initializes the software and firmware. When the controller is ready to be used, the power knob illuminates a steady white light.
-
Page 134: Repositioning The Arm To Use It For The First Time
EN UG-020 Link 6 user guide r1.0 3. Tap CONNECT. The Home page of Kortex Web App launches. The Home page displays the Quick Menu. Repositioning the arm to use it for the first time After the is installed, it probably will not be in an optimal position for starting to use the robot. -
Page 135: Kortex Web App Layout
EN UG-020 Link 6 user guide r1.0 Procedure 1. Press and hold the wrist enabling device on the arm. 2. Use joint, or angular, Hand Guiding mode to move the robot out of its packaging pose and into a stable starting pose. -
Page 136: Menu Pages
EN UG-020 Link 6 user guide r1.0 Header Hamburger to access pages Quick Menu to return to the Home page SAFETY CHECKSUM Notification indicator User profile Mode indicator On power button Important: Tapping the power button switches the arm on or off. - Page 137 Alternatively, you can tap on the Hamburger icon ( ) to display the full menu. The different functions are organized into logical groups. When you are not on the home page, tap on the Kinova logo to access the Quick Menu. The main menu is made of four main options, each of which is subdivided further.
-
Page 138: Indicators, User Profile, And Power
Sometimes, you need a quick way to access notifications, your profile, the current mode of the robot, and a way to power on or off the of Link 6. In the same header as the Hamburger and the Kinova logo are four more icons. Figure 107: Indicators, modes, and arm power status +1 514-277-3777 kinovarobotics.com... - Page 139 EN UG-020 Link 6 user guide r1.0 The Safety checksum icon is a unique number that represents the current configuration of several safety elements derived from the MPU and the SCU. • SF03 Safety position limits • SF04 Safety joint speed monitoring reduced and normal speed limits for all joints •...
-
Page 140: Robot Control Panel
EN UG-020 Link 6 user guide r1.0 The Robot status icon displays the current mode that Link 6 currently is in. The arm is not operational during the Monitored Stop mode. • Automatic • Monitored Stop • Hold-to-Run Tap the Robot status icon to launch a summary of the diagnostics of the robot. - Page 141 EN UG-020 Link 6 user guide r1.0 Figure 108: Example of the Robot control panel Figure 109: Example of the Robot control panel in Manual Jog mode The current mode is a lighter blue than the rest of the Robot control panel.
- Page 142 EN UG-020 Link 6 user guide r1.0 Cartesian Virtual controls in Hand Guiding mode angular Virtual controls in Manual Jog mode Tip: The controls are available only when the enabling device is held in the center position. Tip: Tap the up arrow ( ) in the corner to expand the view of the controls.
-
Page 143: System Information
EN UG-020 Link 6 user guide r1.0 Note: When you tap Hand Guiding in the Robot control panel, the current mode is automatically Monitored Stop. Note: When you tap Jog Angular or Jog Cartesian in the Robot control panel, the current mode is automatically Manual. -
Page 144: Robot Networking And Communication
EN UG-020 Link 6 user guide r1.0 System part Associated information MAC Address Bootloader Version Product Model ID Model Year Assembly Plant Degrees of Freedom Actuator 1 through Actuator 6 Bootloader Version Device Type MAC Address Part Number Part Number Revision... - Page 145 EN UG-020 Link 6 user guide r1.0 Figure 112: Accessing robot networking and communication configurations The factory settings of the Controller Ethernet port IPv4 network can be modified in the Network page typing in the appropriate values. • IPv4 Address •...
-
Page 146: User Management
EN UG-020 Link 6 user guide r1.0 If accessing the robot through the IPv4 address does not work, verify that the IPv4 address of the Ethernet port on the computer is on a compatible IP address; the address must be 192.168.1.XX, where XX represents a set of two digits. -
Page 147: Adding A User
EN UG-020 Link 6 user guide r1.0 Admin user ( ) Operator user ( ) Diagnostics Diagnostics • Status: View only • Status: View only • Monitoring: • Monitoring: º View only. º View only. º Download snapshot of current data if º... - Page 148 EN UG-020 Link 6 user guide r1.0 Procedure 1. Tap Systems > Users. All users are displayed on the Users page. Important: The first time the Users page is accessed, one user is already listed. That is the Administrator user account used to log into Web App.
-
Page 149: Editing A User
EN UG-020 Link 6 user guide r1.0 3. Enter information in the fields. • Username • Password • Retype Password • First Name • Last Name • Notes Important: The username and password are case sensitive. 4. Tap CREATE. Results A user is added to the list of current users. -
Page 150: Deleting A User
EN UG-020 Link 6 user guide r1.0 4. Tap Edit. The Edit User Profile page is displayed. 5. Update the information. • Username • First Name • Last Name • Notes 6. Tap UPDATE PASSWORD to change the user's password. -
Page 151: Elevating Permissions
EN UG-020 Link 6 user guide r1.0 Procedure 1. Tap Systems > Users. All users are displayed on the Users page. 2. Tap the kebab menu of the user to be deleted. Note: Administrator accounts cannot be modified or deleted. The content of the kebab menu is not selectable. -
Page 152: Remote Access
EN UG-020 Link 6 user guide r1.0 Tip: An operator can elevate their permissions only if they know the admin password. Procedure 1. Tap User Profile A User profile launches. 2. Tap ELEVATE PERMISSIONS. The Elevate Permissions dialog launches. 3. Enter the admin user password. -
Page 153: Upgrading Software
EN UG-020 Link 6 user guide r1.0 All remote communication configurations are accessed by tapping Systems > Remote Access. Figure 113: Accessing remote access configurations A warning is displayed directly on the Remote Access page that states that active sessions may close when the communication is enabled or disabled. - Page 154 EN UG-020 Link 6 user guide r1.0 Figure 115: Accessing the software upgrade operation Procedure 1. Tap Off in the On section of Kortex Web App to turn off the arm. 2. Tap Systems > Upgrade. The Upgrade page launches. It shows the current version of Kortex Web App, Web Client API, firmware bundle, and firmware versions.
-
Page 155: Plugins
EN UG-020 Link 6 user guide r1.0 6. Navigate to the new software package on the drive, select it, and tap Open. a. The controller receives its upgrades. Controller upgrades take little time. b. Each actuator receives their upgrades. This takes more time than the controller. There are six (6) actuators and each actuator receives two different firmware updates. -
Page 156: Installing Plugins
About this task The plugin installation file is named <plugin_name_><version>.kp, where <version> is the version of the plugin. Contact Kinova to get the appropriate plugin file if you are unsure which files you need. A computer or USB device is needed to upload and install the plugin installation file. - Page 157 EN UG-020 Link 6 user guide r1.0 All installed plugins are accessed by tapping Systems > Plugins. Figure 116: Accessing the plugins Procedure 1. Tap Systems > Plugins. The Plugins page launches. 2. Tap + A Plugin Installation dialog launches.
-
Page 158: Overview Of Working With Plugins
EN UG-020 Link 6 user guide r1.0 6. Tap Clear Plugin data. When you clear the plugin data, you are making sure you have a clean installation of the plugin. 7. Tap INSTALL. Results The installed plugin appears on the Plugins page and is running. -
Page 159: Configuring Tools
EN UG-020 Link 6 user guide r1.0 Configuring tools All tools need to be configured before they are used. About this task All tool configuration tasks are accessed by tapping Systems > Tools. Tip: Before you can edit the active tools, the robot must be switched on and it must be in Monitored Stopmode. -
Page 160: Adding Tools
EN UG-020 Link 6 user guide r1.0 2. Select a tool in the Inactive pane. Tip: Kinova accessories and tools supported by plugins that are installed are available in the Inactive pane. The properties of the selected tool are displayed on the right. - Page 161 EN UG-020 Link 6 user guide r1.0 Procedure 1. Tap The Create new custom tool dialog launches. 2. Enter the information about the custom tool. • Name • Mass • Transform: x, y, z in mm • Transform: θx, θy, θz in °...
-
Page 162: Other Actions That Can Be Taken On Tools
EN UG-020 Link 6 user guide r1.0 Always validate the mass and center of mass that is entered in Create new custom tool against the physical inertial parameters. Tap CREATE CUSTOM TOOL. The new tool is added to the list of available tools. -
Page 163: Configurations For The Robot Settings
EN UG-020 Link 6 user guide r1.0 Delete A confirmation dialog launches. Tap Delete and the selected tool is no longer available. Configurations for the robot settings Some of the robot settings in the controller, the arm, and the force torque sensor in the wrist are configurable. -
Page 164: Configuring The Controller For Robot Controls
EN UG-020 Link 6 user guide r1.0 Configuring the controller for robot controls The Robot Controller page displays the configurations that can be changed for the controller. About this task All controller configurations for the robot must be performed when the robot is in Monitored Stop. - Page 165 EN UG-020 Link 6 user guide r1.0 Procedure Configuring the gravity vector of the arm When the robot is unboxed, the robot is oriented sideways. The controller expects the robot to be oriented up with gravity pointing down. After the robot is installed, the values for Gravity Vector must be verified, especially when the robot is installed on a wall, ceiling, or other location that is not on a table or floor, because it is not oriented up.
- Page 166 EN UG-020 Link 6 user guide r1.0 Configuring the payload of the arm Important: Payload does not refer to the effector. It refers to the mass of the object that the robot is picking. The mass and its center of the object being picked affect the positioning and speed of the robot.
- Page 167 EN UG-020 Link 6 user guide r1.0 14. Tap Calibration to access configurable parameters to calibrate the arm. The Calibration pane launches. 15. Look at Status for the current calibration status of the arm. The status of the calibration indicates whether there are issues before you start using the robot.
-
Page 168: Configuring The Force Torque
EN UG-020 Link 6 user guide r1.0 19. Tap Collision Detection to access configurable parameters for detecting collisions with the arm. The Collision Detection pane launches. Configuring the force torque The Robot Force Torque Sensor page displays the configurations that can be changed for the force torque sensor in the wrist. - Page 169 EN UG-020 Link 6 user guide r1.0 2. Tap ZERO in the Zero force torque sensor pane. A zero function is necessary when the values listed in Force wrench are not 0 N or the values listed in Torque wrench are not 0 N·m when no external forces are applied. Shock and temperature can cause non-zero values.
-
Page 170: Visual Programming
EN UG-020 Link 6 user guide r1.0 Visual programming To create programs for your Link 6, use the intuitive and easy-to-use GUI, Kortex Web App, and its tile-based, code-free visual progrmaming interface. By using the tiles, you can teach the robot its tasks, manipulate variables, and interact with external devices. - Page 171 EN UG-020 Link 6 user guide r1.0 Tap Tree layout to view the tiles of the program in tree layout. Tap Variable Manager to launch the Variable Manager and define variables within the scope of the program as well as persistent variables.
-
Page 172: Variable Management
EN UG-020 Link 6 user guide r1.0 Figure 122: The parts of the Robot control panel Program play area to play the program. to stop the program. Program speed control to run the program at normal speed. Important: It is recommended to run at reduced speed at least once before running at normal speeds when you are operating in Hold-to-Run;... - Page 173 EN UG-020 Link 6 user guide r1.0 Figure 123: The Program Variables pane of the Variable Manager page Work with the variables that are defined only for the currently selected program by making sure Program Variables is selected. Name of variable.
- Page 174 EN UG-020 Link 6 user guide r1.0 A checkmark in a box indicates the variable has a default value. Tap to deselect the box when you do not want the variable to have a default value. The Default value of the variable is displayed when the checkbox is selected. Enter a different default value for the variable.
-
Page 175: Persistent Variable Management
EN UG-020 Link 6 user guide r1.0 to delete the variable. When the variable is being used, a Delete warning or confirmation dialog launches. Figure 126: Delete confirmation dialog Figure 127: Delete warning dialog to create a variable for the program. - Page 176 EN UG-020 Link 6 user guide r1.0 Figure 128: The Variable Manager page Work with the variables that are defined for all programs by making sure Persistent Variables is selected. Select the Namespace in which you want to work. As a minimum, the available namespaces are globals, arm_plugin, and modbus_slave. It is possible that additional plugins that are installed on Link 6 also have persistent variables;...
- Page 177 EN UG-020 Link 6 user guide r1.0 The persistent variables of the namespace globals are home, package, and zero. These persistent variables are actually small programs that have the waypoints needed to define each of the default positions. They cannot be modified or deleted. To prevent accidental selection, their values are grayed out.
- Page 178 EN UG-020 Link 6 user guide r1.0 The current value of the variable is visible either directly or by tapping {} in the Value column of the pane. Change the values of the modifiable variables if necessary and modifiable. The Unit associated with a variable of Type Number is displayed. Tap to change the unit, especially when the Unit is listed as unspecified.
-
Page 179: Variables
EN UG-020 Link 6 user guide r1.0 to create a variable for the program. The Create Variable dialog launches. Enter a meaningful name for the new variable and tap SAVE. Tap CLOSE to close the Variable Manager page and return to the Programs page. - Page 180 EN UG-020 Link 6 user guide r1.0 Tap to search variable names, types, or schemas. The result is displayed on the page. For example, search package results in the page displaying all global variables named package if it exists as a global variable in the currently selected global namespace.
- Page 181 EN UG-020 Link 6 user guide r1.0 Define the type of the user-defined variable by selecting a type from the Type menu. • String: Text • Boolean: True, False • Number: Integer, float • Object: Complex structure Tip: You must create a variable to define a type.
-
Page 182: Examples Of Json Statements
EN UG-020 Link 6 user guide r1.0 Tap to add a global variable in the currently selected namespace. Related topics Variable management on page 164 Industrial I/O plugin on page 245 Examples of JSON statements JavaScript Object Notation (JSON) is a key-value format for representing structured data. It is text-based, which makes it readable. - Page 183 EN UG-020 Link 6 user guide r1.0 2. Tap The dialog launches. 3. Enter a meaningful name for the global variable. Underscores are allowed. Spaces and dashes are not allowed in the name. 4. Tap SAVE. The new variable is displayed on the Variables page.
- Page 184 EN UG-020 Link 6 user guide r1.0 7. (Only when the variable is of Type Object.) Tap the Value icon ({}) next and enter the values in the JSON Object Editor and tap SAVE. The information entered can then be available in entities of various tiles.
-
Page 185: Adding A Variable To A Program
EN UG-020 Link 6 user guide r1.0 Figure 142: Editor object type Arm Plugin - Waypoints - Output when first invoked Adding a variable to a program Variables can be added to the namespace of the program from the Select Variable page. - Page 186 EN UG-020 Link 6 user guide r1.0 Tap (X) in the banner beside the name of the program. The Variable Manager page launches. Tap Program Variables or Persistent Variables, depending on the type of variable you need to create. The Create Variable dialog launches.
- Page 187 EN UG-020 Link 6 user guide r1.0 Option Description Boolean False or True Number Enter an integer or floating point number. Select a Unit for the number. Object A Schema • Unspecified • Default - Pose • Default - Joint Angles •...
- Page 188 EN UG-020 Link 6 user guide r1.0 Figure 146: Editor object type Arm Plugin - Matrix - Output Figure 145: Editor for object type Default - Joint Angles Figure 147: Editor object type Arm Plugin - Waypoints - Output Tap CLOSE.
-
Page 189: Selecting A Variable
EN UG-020 Link 6 user guide r1.0 Tip: You can also create variables in context from the Select Variable page. 10. Tap a tile in the Sequence editor pane. 11. Tap (X) beside Output Results To Variable. The Select Variable page launches with the name of the field to which the variable is to be associated. -
Page 190: Deleting A Variable That Is Being Used In A Program
EN UG-020 Link 6 user guide r1.0 The name of the variable is highlighted and a check mark displays beside the name. Tap on the small arrow beside the variable name reveals the content of that variable 4. Tap SELECT. - Page 191 EN UG-020 Link 6 user guide r1.0 About this task Variables that are used in programs are on the Program Variables pane of the Variable Manager page. When you attempt to delete a program variable that is used by the program from the Variable Manager page, a Delete warning dialog launches.
-
Page 192: Core Tiles
EN UG-020 Link 6 user guide r1.0 Core tiles The Programs page has a set two sets of core tiles that are used to drag and drop into the Sequence editor pane to help create programs. Figure 149: Base tiles... -
Page 193: Common Core Parameters In The Tile Configuration Pane
EN UG-020 Link 6 user guide r1.0 Table 71: Tiles Tile Tile name Description Matrix Define a matrix of positions. Waypoints Create a list of waypoints in the program. Remember: Each list must be all angular or all Cartesian. Important: Aside from the core tiles, each installed... -
Page 194: Basic: Set Tile Parameters
EN UG-020 Link 6 user guide r1.0 Item Description Tap to launch a circle help visualize the angle. Use the circle to change the angle of the joint. Basic: Set tile parameters The Set tile is a core basic tile. When you drag it into an available tile in the Sequence editor pane, the Tile configuration pane changes dynamically to expose the entities of Set that can be configured. -
Page 195: Basic: Wait Tile Parameters
EN UG-020 Link 6 user guide r1.0 Basic: Wait tile parameters The Wait Time tile is a core basic tile. When you drag it into an available tile in the Sequence editor pane, the Tile configuration pane changes dynamically to expose the entities of Wait Time that can be configured. - Page 196 EN UG-020 Link 6 user guide r1.0 Figure 154: The Condition tile expands in the Figure 155: The Tile configuration pane when Sequence editor pane Condition is the current tile A condition starts with If and requires variables and values to set the condition.
-
Page 197: Basic: Loop Tile Parameters
EN UG-020 Link 6 user guide r1.0 Item Description Show ELSE statement Select to show the program going through the else condition. The tile in the Sequence editor pane expands. Basic: Loop tile parameters The Loop tile is a core basic tile. When you drag it into an available tile in the Sequence editor pane, the Tile configuration pane changes dynamically to expose the entities of Loop that can be configured. -
Page 198: Robot: Waypoints Tile Parameters
EN UG-020 Link 6 user guide r1.0 Table 76: Core basic Message entities Item Description Message Enter a message. Messages can contain variables. Example A variable can be defined as meaningful_variable_name = { "employee":{"name":"John", "age":30, "city":"Montreal"} Enter in the message field: Hello, ${meaningful_variable_name.employee.name}. - Page 199 EN UG-020 Link 6 user guide r1.0 Figure 157: Parameters common to all types of waypoints Table 77: Parameters common to all types of waypoints Item Description Type Select Cartesian, which is moving the arm, or Angular, which is moving the joints.
- Page 200 EN UG-020 Link 6 user guide r1.0 Cartesian waypoint parameters When you select Cartesian as the waypoint type, the parameters related to Cartesian poses are displayed. Figure 158: Parameters of Cartesian waypoints Table 78: Parameters of Cartesian waypoints Item Description Reference Frame Select a frame of reference.
- Page 201 EN UG-020 Link 6 user guide r1.0 Item Description Use waypoint-specific speed limits Select when you want to set a specific speed limit on the robot at the selected waypoint instead of using the parametric values shared among all waypoints in the list.
- Page 202 EN UG-020 Link 6 user guide r1.0 Figure 159: Parameters of angular waypoints Table 79: Parameters of Angular waypoints Item Description Angles The pose is expressed in degrees for each of the joints. Joint 1, Joint 2,Joint 3, Joint 4, Joint 5, Joint 6 The current angular position of each joint at the waypoint selected in the list is displayed.
-
Page 203: Constraint Parameters
EN UG-020 Link 6 user guide r1.0 Item Description Speed Limits Joint 1, Joint 2,Joint 3 Drag the slider to, or enter, the desired speed at the joint at the selected waypoint. Minimum: 1 °/s Maximum: 200 °/s. Important: The desired speed cannot exceed the Safety Joint Speed Limit defined on Safety >... - Page 204 EN UG-020 Link 6 user guide r1.0 Figure 160: Constraints for Cartesian waypoints Table 80: Constraints for Cartesian waypoints Item Description Speed Limits sub-pane TCP Translation Speed Drag the slider to, or enter, the desired translation speed for the TCP at the selected waypoint.
- Page 205 EN UG-020 Link 6 user guide r1.0 Figure 161: Constraints applied to all joints of an angular waypoint +1 514-277-3777 kinovarobotics.com © 2022 Kinova inc. All rights reserved.
- Page 206 EN UG-020 Link 6 user guide r1.0 Figure 162: Constraints applied to specific joints of an angular waypoint Table 81: Constraints for angular waypoints Item Description Speed Limits sub-pane +1 514-277-3777 kinovarobotics.com © 2022 Kinova inc. All rights reserved.
- Page 207 EN UG-020 Link 6 user guide r1.0 Item Description Same limit for all joints Select when you want to constrain all six joints by the same speed. Joints 1-6 Drag the slider to, or enter, the desired speed for all joints at the selected waypoint.
-
Page 208: Custom Frame Parameters
EN UG-020 Link 6 user guide r1.0 Item Description Joint 4Joint 5Joint 6 Drag the slider to, or enter, the desired speed for the specific joint at the selected waypoint. Tip: A message launches when the speed you select exceeds the safety speed defined on Safety >... -
Page 209: Debug Tools For Waypoints
EN UG-020 Link 6 user guide r1.0 Debug tools for waypoints To simplify creating the perfect waypoints in a program, a few debug tools are available. Any settings made on individual waypoints with the debug tools are not valid during an actual run of the full program. - Page 210 EN UG-020 Link 6 user guide r1.0 Item Description Custom Range Enter the start and end waypoints. For example, if 6 waypoints are defined in a tile and you want to investigate only from waypoint #2 and want to end at waypoint #5, you would enter the range as 2-5.
-
Page 211: Robot: Matrix Tile Parameters
EN UG-020 Link 6 user guide r1.0 Item Description SET AS LAST GO-TO Tap to move the arm automatically to the coordinates of the selected waypoint and treat the selected waypoint as the last waypoint to move to automatically. Go-to Options changes automatically to Play Custom Range. - Page 212 EN UG-020 Link 6 user guide r1.0 • Parameters • Coordinates Tip: Whenever you see (X) beside an exposed entity, tap it to launch the Select Variable page and store the value you entered in a variable. Figure 164: Entities of the Matrix tile on the Parameter sub-pane in the Tile configuration pane...
- Page 213 EN UG-020 Link 6 user guide r1.0 Item Description Distance between layers Tap in the text field or tap (X) to select, or create, a variable that defines the distance between layers. Bottom to top? Select to run the matrix from the bottom layer to the top layer.
-
Page 214: Industrial I/O: Tiles
EN UG-020 Link 6 user guide r1.0 Table 84: Core robot Matrix entities on the Coordinates sub-pane Item Description Origin The origin is the selected Starting point on the Parameters sub-pane. Tap the X, Y, Z, Theta X, Theta Y, Theta Z text boxes, or the (X) beside them, to select or create a variable that has the associated values. -
Page 215: Industrial I/O: Read Input Tile Parameters
EN UG-020 Link 6 user guide r1.0 Industrial I/O: Read Input tile parameters The Read Input tile is an Industrial I/O tile. When you drag it into an available tile in the Sequence editor pane, the Tile configuration pane changes dynamically to expose the entities of Read Input that can be configured. - Page 216 EN UG-020 Link 6 user guide r1.0 Figure 167: The Tile configuration pane when Set Output is the current tile Figure 168: The Tile configuration pane when Set Output is the current tile Table 87: Industrial I/O Set Output parameters...
-
Page 217: Industrial I/O: Wait For Input Tile Parameters
EN UG-020 Link 6 user guide r1.0 Item Description Settings (X) Name Displays the names of the available outputs of the chosen type as defined by the Industrial I/O plugin configuration. State When the Output Type is digital, the state is either High or Low. -
Page 218: Hand Guiding Panel
EN UG-020 Link 6 user guide r1.0 Item Description State When the selected input channel is in the selected state, your program resumes. Hand Guiding panel Hand Guiding takes into account external forces and torque feedback from the environment of the robot. -
Page 219: Jog Cartesian Panel
EN UG-020 Link 6 user guide r1.0 • Use Lock Presets to control the Hand Guiding constraints in Cartesian translation and rotation admittance mode. Locks all x, y, and z axes. Cartesian movement is constrained. Only rotations are possible. Locks all θx, θy, and θz coordinates. Rotations are constrained. Only movement in Cartesian translation are possible. -
Page 220: Additional Settings
EN UG-020 Link 6 user guide r1.0 • The angular joystick applies a rotational motion to the TCP with respect to the current position. Figure 175: Controls for the Cartesian movement of the arm Each set of virtual joysticks features a 2-axis joystick for controlling the x and y axes, and a 1-axis joystick to control in the z-axis. -
Page 221: Jog Angular Panel
EN UG-020 Link 6 user guide r1.0 Figure 178: Additional settings in the Jog Cartesian panel The linear speeds are measured in mm/s and the angular speeds in °/s. Configure the linear and angular speeds for the motion. The Cartesian velocity of the is specified in one of three reference frame conventions. -
Page 222: Additional Settings
EN UG-020 Link 6 user guide r1.0 Figure 180: Jog Angular button in the panel Figure 181: Jog Angular panel The joint angles are controlled through angular velocity. Control the angle of each actuator, as well as end effectors. The robot... -
Page 223: Program Creation
EN UG-020 Link 6 user guide r1.0 Figure 183: Additional settings in the Jog Angular panel To control the angle of each actuator, use the virtual controls to apply a velocity in the given direction. Increase the angle by tapping the up arrow; decrease the angle by tapping the down arrow. -
Page 224: Creating A Program
EN UG-020 Link 6 user guide r1.0 Figure 185: Example of a validated program Only validated programs are available to operators. Creating a program Every program is unique to the work environment of the robot. About this task Teaching trajectories to the robot in a program can be made easier using Hand Guiding mode. -
Page 225: Debug Panel Overview
EN UG-020 Link 6 user guide r1.0 Drag a tile from Robot ( ), Basic ( ), or any of the other tiles made available from the installed plugins, that is associated with how you need the robot to move and configure the tile in the Tile configuration pane. -
Page 226: Debugging A Program
EN UG-020 Link 6 user guide r1.0 6 Stats Statistics are information about the program. (Statistics) • Play count is the number of times the program is run. • Total duration (play + pause) is the total of time the program runs, before pauses, before the program ends. -
Page 227: Program Is Ready To Use
EN UG-020 Link 6 user guide r1.0 Program is ready to use The robot is ready to be used in its environment and to perform its tasks. All users can run a program that is validated. There are different ways to run a program. - Page 228 EN UG-020 Link 6 user guide r1.0 About this task The robot must be on and operational. When you run a program in Hold-to-Run mode, you may want to determine whether it needs further debugging or they may want to see how it works either at reduced or normal speeds.
-
Page 229: Diagnostics
EN UG-020 Link 6 user guide r1.0 Diagnostics You can view potential issues in any part of the robot from the diagnostic pages. The pages are found under the Diagnostics menu. • Status: displays the results of all the built-in tests •... -
Page 230: Status Of Safety Functions
EN UG-020 Link 6 user guide r1.0 Figure 186: Status page The page is divided into several panes. • Safety Functions • Controller • Actuators • SCU • Wrist Status of safety functions The safety functions that are listed on the Safety Functions pane on the Status page are the same safety functions listed with their current state. -
Page 231: Status Of The Controller
EN UG-020 Link 6 user guide r1.0 Figure 187: Status of safety functions Related topics List of safety functions on page 52 SF01 Emergency stop on page 53 SF02 Protective stop on page 53 SF03 Joint position monitoring on page 54... - Page 232 EN UG-020 Link 6 user guide r1.0 Figure 189: Status page of the controller Each controller status displays one of its two states. • A green circle with a checkmark ( ) beside the status indicates that controller status is fine.
- Page 233 Causes of the trigger • Communication is faulty when the SWU package is uploaded to the robot. • Firmware is corrupted during its initial download from the Kinova Artifactory server. Procedure 1. Download the latest version of the firmware from our Artifactory server.
- Page 234 1. Take note of the exact error along with the conditions that seem to have triggered it. 2. Reboot the controller. 3. Re-install the SWU package if the problem persists. 4. If the problem persists, contact support at support@kinova.ca. Joint fault What does Joint fault monitor? Joint fault monitors all actuators to determine whether any of them are currently in a fault state.
- Page 235 1. Take note of the exact error along with the conditions that seem to have triggered it. 2. Reboot the controller. 3. Re-install the SWU package if the problem persists. 4. If the problem persists, contact support at support@kinova.ca. Maximum ambient temperature reached What does Maximum ambient temperature reached monitor? Maximum ambient temperature reached monitors the ambient temperature.
- Page 236 1. Take note of the exact error along with the conditions that seem to have triggered it. 2. Reboot the controller. 3. Re-install the SWU package if the problem persists. 4. If the problem persists, contact support at support@kinova.ca. Procedure 1. Reboot the controller.
-
Page 237: Status Of The Actuators
EN UG-020 Link 6 user guide r1.0 Cause Manual control and trajectories can drive the robot in configurations where self-collisions can occur. Procedure • Modify your trajectory accordingly when it is clear from observing the pose of the robot which links are at risk of entering in contact. - Page 238 EN UG-020 Link 6 user guide r1.0 Figure 192: Status page of the actuators when all actuator status are good Each actuator pane displays one of two states, depending on the overall state of all its status. • A green circle with a checkmark ( ) beside the actuator indicates that all status for that actuator is fine.
- Page 239 EN UG-020 Link 6 user guide r1.0 Figure 193: Status page of the actuators with an actuator pane expanded +1 514-277-3777 kinovarobotics.com © 2022 Kinova inc. All rights reserved.
- Page 240 EN UG-020 Link 6 user guide r1.0 The Actuators pane displays all the status that are being monitored, including internal variables. Some of the internal variables cannot be accessed by users; the variables may be associated with hardware problems. Table 90: Listing of status of each actuator...
- Page 241 EN UG-020 Link 6 user guide r1.0 Status Status Brake release motion out of range Brake driver enable pin disagreement VMON 48V overvoltage VMON 48V disagreement VMON 48V undervoltage Motor housing temperature disagreement VMON 5V overvoltage Joint position disagreement VMON 5V undervoltage Motor position disagreement VMON 3.3V overvoltage...
- Page 242 • Explanation of what can trigger the fault • What can be done to fix the problem 2. Reboot the controller. 3. Re-install the SWU if the error persists. 4. If the problem persists, contact support at support@kinova.ca. Related topics Joint fault on page 226 Remedy for MCU firmware corruption...
- Page 243 2. Take note of the exact error along with the conditions that seem to have triggered it. 3. Reboot the controller. 4. Re-install the SWU package if the problem persists. 5. If the problem persists, contact support at support@kinova.ca. Safety input signals disagreement What does Safety input signals disagreement monitor? Safety input signals disagreement monitors whether each of the safety I/O signals are in alignment with the state of the robot.
-
Page 244: Status Of The Wrist
EN UG-020 Link 6 user guide r1.0 Cause of the trigger Low internal temperature is a consequence of low ambient temperature. Remedy Make sure the robot is operating in the recommended ambient temperature. Motor housing temperature too high What does Motor housing temperature too high monitor? Motor housing temperature too high monitors whether the temperature of the motor housing is below a specific temperature. -
Page 245: Robot Monitoring
• What can be done to fix the problem 2. Reboot the controller. 3. Re-install the SWU if the error persists. 4. If the problem persists, contact support at support@kinova.ca. Robot monitoring At any time, you can view current information about the base, actuators,... -
Page 246: Overview Pane Of The Monitoring Page
EN UG-020 Link 6 user guide r1.0 The Monitoring pages display the live feedback from the sensors on the robot, as well as vallues computed from that feedback. Computed values include TCP position and velocity, among others. To access the robot Monitoring page, tap >... -
Page 247: Detailed Pane Of The Monitoring Page
EN UG-020 Link 6 user guide r1.0 Table 92: Content of the Overview pane Part Information displayed Controller Operating mode Control mode Servoing mode Actuators Position of each actuator; measured in ° Torque of each actuator; measured in N·m Velocity of each actuator; measured in °/s End Effector X, Y, and Z;... - Page 248 EN UG-020 Link 6 user guide r1.0 Figure 197: Detailed pane of the Monitoring page Table 93: Content of the Detailed pane Part Information displayed Controller Operating mode Control mode Servoing mode Arm voltage Arm current CPU temperature Acceleration X, Y, and Z...
-
Page 249: Event Notifications
EN UG-020 Link 6 user guide r1.0 Part Information displayed Tool twist angular X, Y, and Z; measured in °/s Commanded tool pose X, Y, and Z; measured in mm Commanded tool pose Theta X, theta Y, and theta Z; measured in °... - Page 250 EN UG-020 Link 6 user guide r1.0 Figure 200: The Events page and its parts Delete icon ( ) Tap to delete the events on the page. Close icon (X) Tap to close the page. Filtering tools All filtering tools can be used independently or with each other.
- Page 251 EN UG-020 Link 6 user guide r1.0 Select one or more of the types of information you want to see. • Code • Severity • Timestamp • Title Tap X to close the Show Columns pane. Filter icon ( ) Tap to launch the Filters pane.
- Page 252 EN UG-020 Link 6 user guide r1.0 Information A summary of each event that meets the filtering criterion is displayed in the Details pane. Title Summary of the event Severity Level of severity of the event Timestamp Date and time the event took place...
-
Page 253: Plugins
EN UG-020 Link 6 user guide r1.0 Plugins The modular design of Link 6 makes it a robot with expanding capabilities. The expanding capabilities are added on as plugins. Link 6 comes with two pre-installed plugins and cannot be uninstalled. Arm plugin The plugin handles all actions needed to control the arm. -
Page 254: Controller Analog On The Industrial I/O Plugin Page
EN UG-020 Link 6 user guide r1.0 Figure 201: Industrial equipment connection on the controller There are many configurable parameters for the Industrial I/O plugin. All parameters are found on different panes in the Industrial I/O page. • Controller Analog •... -
Page 255: Controller Digital Inputs On The Industrial I/O Plugin Page
EN UG-020 Link 6 user guide r1.0 Table 94: Controller analog configurations Parameter Description Mode Select a driver mode. • High Impedance (disable) • Voltage Output • Current Output • Voltage Input • Current Input Friendly Name Enter a meaningful name for that specific analog input or output for the controller. -
Page 256: Controller Digital Outputs On The Industrial I/O Plugin Page
EN UG-020 Link 6 user guide r1.0 Parameter Description Friendly Name Enter a meaningful name for that specific digital input for the controller. Controller digital outputs on the Industrial I/O plugin page All digital outputs for the controller must be configured on the Controller Digital Inputs pane of the Industrial I/O plugin page. -
Page 257: Wrist Analog On The Industrial I/O Plugin Page
EN UG-020 Link 6 user guide r1.0 Parameter Description Driver Mode Select a driver mode. • High Impedance (disable) • Voltage Output • Current Output • Voltage Input • Current Input Friendly Name Enter a meaningful name for that specific digital output for the controller. -
Page 258: Wrist Digital On The Industrial I/O Plugin Page
EN UG-020 Link 6 user guide r1.0 Figure 207: Wrist Analog pane with Mode drop-down Table 95: Wrist analog configurations Parameter Description Mode Select a mode. • High Impedance (disabled) • Voltage Output • Current Output • Voltage Input • Current Input... - Page 259 EN UG-020 Link 6 user guide r1.0 Figure 208: Wrist Digital pane Table 96: Wrist digital configurations Parameter Description IO Type Select either Input or Output. Mode Select a mode. • High Impedance (disabled) • Voltage Output • Current Output •...
-
Page 260: Accessories
Accessories range from mounts to adapters to vision systems that simplify complex tasks. In addition to the accessories by Kinova, there is a growing number of accessories that Link 6 can support. - Page 261 EN UG-020 Link 6 user guide r1.0 Figure 209: Dimensions of the Kinova wall mount measured in millimeters +1 514-277-3777 kinovarobotics.com © 2022 Kinova inc. All rights reserved.
-
Page 262: Installing The Kinova Wall Mount
EN UG-020 Link 6 user guide r1.0 Figure 210: Controller with Kinova wall mount Installing the Kinova wall mount The Kinova wall mount is designed to fit perfectly with the Link 6 controller. Before you begin Personnel: • Number of Workers: 1 Supplies •... -
Page 263: Gigabit Ethernet Adapter
EN UG-020 Link 6 user guide r1.0 Procedure 1. Fix the wall mount to the controller with the M6 screws such that the I/O panel is on the side opposite to the UP arrow on the mount. The fastening screws must be torqued to 10 N·m. -
Page 264: Installing The Gigabit Ethernet Adapter
EN UG-020 Link 6 user guide r1.0 Figure 213: Dimensions of the Kinova Gigabit Ethernet adapter measured in millimeters Installing the Gigabit Ethernet adapter The adapter installs directly to the wrist of Link 6. Before you begin Personnel: • Number of Workers: 1 Supplies •... -
Page 265: External Emergency Stop Station
EN UG-020 Link 6 user guide r1.0 2. Align the holes on the adapter with the holes in the wrist. The center connection pins on the wrist and the adapter align with each other. 3. Secure the adapter with the screws. -
Page 266: External 3-Position Enabling Device
EN UG-020 Link 6 user guide r1.0 • 1 x Emergency stop station • 1 x Cable Tools • Ferrule (optional) About this task View or download publications at rok.auto/literature Procedure 1. Make sure the controller is switched off. 2. Connect the E-stop to the controller. Use the wire order on the E-stop connector. -
Page 267: Installing The External 3-Position Enabling Device
EN UG-020 Link 6 user guide r1.0 Installing the external 3-position enabling device Whenever you need to install an external 3-position enabling device, be sure to read and follow all mounting instructions from the manufacturer. Before you begin Personnel: • Number of Workers: 1 Supplies •... -
Page 268: Maintenance
EN UG-020 Link 6 user guide r1.0 Maintenance Preventive maintenance of Link 6 averts major issues that can arise, and keeps the robot and users safe. There are three main things to do to give the robot a long and productive life. -
Page 269: Preventive Maintenance
EN UG-020 Link 6 user guide r1.0 Preventive maintenance Always perform preventive maintenance within the time scheduled maintenance time frame to avoid downtime of the robot. Different parts of Link 6 require maintenance checks on a daily, weekly, quarterly, or yearly schedule. -
Page 270: Quarterly Maintenance
Make sure the actuator covers are not loose. Retorque. Check that the fan in the controller is rotating freely. Contact support at support@kinova.ca. Yearly maintenance Always perform yearly tasks every year to avoid downtime of the robot. Table 102: Yearly checks for preventive maintenance... -
Page 271: Fastener Maintenance
EN UG-020 Link 6 user guide r1.0 Validation task Corrective action Tools and accessories are attached correctly and Secure the tools and accessories. are not loose. Joints are not loose. Contact support at support@kinova.ca. The base is fixed correctly. In other words, the Secure the base of the arm. - Page 272 EN UG-020 Link 6 user guide r1.0 Robot part Location Quantity Fastener type Recommended Maximum thread torque engagement Mounting bracket M8×1.25 - 14 fasteners to wall Teach Mounting bracket pendant fasteners to wall +1 514-277-3777 kinovarobotics.com © 2022 Kinova inc. All rights reserved.
-
Page 273: Servicing
EN UG-020 Link 6 user guide r1.0 Servicing Some routine maintenance and repair work must be performed by a Kinova expert. Not servicing Link 6 in a timely manner voids the Kinova warranty. Contact Kinova support to learn how to have the robot serviced. -
Page 274: Disposal
• Replace the robot and dispose of the old device appropriately. If you wish to continue using Link 6 after its expected lifespan, Kinova highly recommends that you return the device temporarily to Kinova for routine servicing that includes inspection of the robot, as well as replacement and repair of any internal components that may be worn out. -
Page 275: Troubleshooting
There are many examples of expected robot behavior that some users may deem undesirable listed. If you believe you have an issue with Link 6, check to see if you can find a similar issue. If you cannot find an issue similar to yours, please write to us at support@kinova.ca. Issues related to hardware Examples of hardware-related issues that you may have deal with the controller, the arm, the buttons on the wrist, the tool, and external equipment. -
Page 276: Why Is The Robot Moving In Joint Hand Guiding Mode By Itself
EN UG-020 Link 6 user guide r1.0 Why is the robot moving in joint Hand Guiding mode by itself? Condition The robot is in Joint Hand Guiding mode and it is moving without the application of external forces. Cause The masses or centers of mass of the tool or payload is not correct. -
Page 277: Emergency Stop
EN UG-020 Link 6 user guide r1.0 Remedy Procedure 1. Tap Systems > Plugins to access the Plugins page. 2. Install the plugin associated with the tool if it is not already installed. 3. Activate the plugin associated with the tool. -
Page 278: Why Is The Controller Hot
EN UG-020 Link 6 user guide r1.0 Why is the controller hot? Condition controller is hot or the diagnostics in Kortex Web App indicate the SCU or the MCU are overheating. Cause The temperature of the SCU core or MCU board is too high. -
Page 279: Why Is The Robot Stuck In Reduced Mode
EN UG-020 Link 6 user guide r1.0 Remedy Make sure the safety I/O channel associated with the external device is configured correctly. Select the correct safety type from the safety type drop-down on the Safety I/Os page in Kortex Web App for the channel where the device is connected. -
Page 280: Issues Related To Plugins
EN UG-020 Link 6 user guide r1.0 • The initial cause of the fault is still in effect. • After clearing the initial fault, another fault is triggered in the current configuration of the robot. Remedy Procedure • Make sure the robot is far from its position limits. -
Page 281: Why Are Tiles Missing In The Visual Programming Interface
EN UG-020 Link 6 user guide r1.0 Cause The type of the variable does not match that of the field. Remedy Modify the definition of the variable to match what it is supposed to be. Why are tiles missing in the visual programming interface? Condition The tiles cannot be found anywhere under the Actions menu on the Program page. -
Page 282: Why Do Some Of The Tiles Of An Imported Program Show A Question Mark
EN UG-020 Link 6 user guide r1.0 Note: This condition only happens when the user is an operator and is not an admin user. Cause The user is an operator and the admin user has not validated the program. Remedy The admin user must validate the program. -
Page 283: Why Is The Computer Not Connecting To Kortex Web App
3. Verify that the calibration status is Not Calibrated. 4. Tap Import in the Import calibration file panel to upload the calibration file to the robot. Important: Contact support@kinova.ca if the administrator does not have a backup of the calibration file. -
Page 284: Why Is Kortex Web App Not Responding On My Computer
EN UG-020 Link 6 user guide r1.0 Why is Kortex Web App not responding on my computer? Condition Kortex Web App is running on a computer, but there is no response from interacting with the application. The application behaves as if it were frozen. -
Page 285: Glossary
EN UG-020 Link 6 user guide r1.0 Glossary type of electrical current alternating current (AC) actuator a device that is responsible for robot motion administrator a person who configures and uses the robot synonym: admin user, admin angular refers to an object with joints and its rotational capabilities the part of the robot that is connected to the base and that moves a standardized wire gauge system;... - Page 286 EN UG-020 Link 6 user guide r1.0 camlock a type of fastener Cartesian linear movement along the x, y, and z coordinate lines collaborative the ability for an integrated robot to work in a shared space, or in close proximity of people and...
- Page 287 EN UG-020 Link 6 user guide r1.0 synonym: German Institute for Standardization the number of variables needed to define the configuration of a robot, particularly for all the directions in which the motion can occur degrees of freedom (DoF) a series of quick, high frequency pulses often caused by a lack of electricity flowing through the...
- Page 288 EN UG-020 Link 6 user guide r1.0 emergency stop (E-stop) synonym: SF01 firmware in computers, it is low-level software that is programmed into read-only memory and is used directly by hardware flange a rim used for attaching another object originally created to enhance graphic rendering, it also has proven itself useful in many other...
- Page 289 EN UG-020 Link 6 user guide r1.0 human machine interface (HMI) input output input output (I/O) an organization that creates international standards for electrotechnology International Electrotechnical Commission (IEC) industrial I/O panel a panel on the controller where the integrator connects external devices...
- Page 290 EN UG-020 Link 6 user guide r1.0 synonym: Web App Lockout Tagout safety procedure where power is removed from the machinery, one or more locks is placed on the power supplies, and a tag is added to the lock with the name or initials of the worker who locked...
- Page 291 EN UG-020 Link 6 user guide r1.0 namespace a way in computer science of grouping together all objects that work together such that each object has a unique name electricity flows through a contact in its normal state Normally Closed (NC)
- Page 292 EN UG-020 Link 6 user guide r1.0 a system that connects a power supply with the ground protective earth (PE) synonym: ground pendant enabling device enabling device located on a teach pendant, usually as a button enabling device on page 279...
- Page 293 EN UG-020 Link 6 user guide r1.0 synonym: SF06 protective stop a stop in which the robot stops, but there still is power in the robot synonym: SF02 the memory of the computer that stores data for the CPU to use...
- Page 294 Link 6 stop category a type of safety control function SC (SC) a file format, used by Kinova, to package firmware updates firmware update package (SWU) the position and orientation of the tool Tool Center Point (TCP)
- Page 295 EN UG-020 Link 6 user guide r1.0 synonym: pendant teach pendant enabling device enabling device located on a teach pendant, usually as a button enabling device on page 279 synonym: enabling device, pendant enabling device Underwriters Laboratories Inc., an organization dedicated to testing and creating standards for...
- Page 296 Proudly made in North America Quebec, Canada kinovarobotics.com © 2022 Kinova inc. All rights info@kinova.ca reserved. Optional gripper shown +1 514 277-3777...
Need help?
Do you have a question about the Link 6 and is the answer not in the manual?
Questions and answers