Kinova Jaco User Manual
Assistive robot
Hide thumbs
Also See for Jaco:
- User manual (34 pages) ,
- User manual (18 pages) ,
- Driver installation manual (15 pages)
Table of Contents
Advertisement
Quick Links
Advertisement
Table of Contents

Related Manuals for Kinova Jaco


Summary of Contents for Kinova Jaco
- Page 1 Jaco® assistive robot User guide...
-
Page 2: Table Of Contents
Contents Disclaimer..................................1 About this document.............................2 Symbols, definitions, and acronyms........................ 3 Warranty................................... 5 Safety / warnings..............................6 Jaco robotic arm..............................9 General information..............................9 Components................................9 Robot external connectors..........................9 Specifications................................ 10 Robot control modes............................11 Home / retract positions...........................12 Installation, configuration, and operation of the robot................13 Normal use definition............................13... - Page 3 Lift arm accessory..............................39 Lift arm: General information........................39 Lift arm specifications............................41 Lift arm components............................41 Lift arm limit switch............................42 Controlling tilt back / forward control......................43 Using the swing-away mechanism......................44 Cleaning, maintenance, and disposal......................46 Contacting support............................. 48...
-
Page 5: Disclaimer
Kinova , Kinova OLED display, and the Kinova logo are trademarks of Kinova inc., herein referred to as Kinova. All other brand and product names are trademarks or registered trademarks of their respective corporations. The mention of any product does not constitute an endorsement by Kinova. This manual is furnished under a lease agreement and may only be copied or used within accordance with the terms of such lease agreement. -
Page 6: About This Document
Jaco® assistive robot User guide About this document ® This document contains information on the installation and operation of the Jaco assistive robotic arm, as well as its accessories, the OLED display (PD 0508 0001) and the Lift Arm. Read all instructions before using this product. -
Page 7: Symbols, Definitions, And Acronyms
Important information regarding the safety related to the product and the user Warning: Safety measure that could lead to injury if ignored Tip on the maintenance, operation and manipulation of Kinova’s products Notice: General important information and good practice Caution: Safety measure that could lead to equipment damage if ignored... - Page 8 Type BF Applied Part device European Union (EU) mandatory conformity marking Kinova assumes no liability of any kind if safety measures are not followed. Please read all the information concerning this product before using it. This document is addressed to Kinova’s authorized, certified partners, distributors and end users.
-
Page 9: Warranty
Allegedly defective Products returned to Kinova in accordance with this contract will, if found by Kinova on examination not to be defective, be returned to End User and Kinova may a charge a fee for examination and testing. -
Page 10: Safety / Warnings
Jaco® assistive robot User guide Safety / warnings Follow basic safety rules when working with the Jaco, OLED display, and Lift Arm to avoid injury or damage to the equipment. Jaco and OLED display considerations It is not recommended to use the robot under heavy rain or snow. - Page 11 The software in the Kinova arm that governs the protection zones around the user and the defined trajectories of the arm assumes that the base of the arm is stationary in relation to the wheelchair and user.
- Page 12 fingers clear of the lift mechanism before engaging the lift arm. Buttons should not be disconnected from the lift arm controller except by a Kinova-approved professional. The limit switch should only be adjusted by a Kinova-approved professional.
-
Page 13: Jaco Robotic Arm
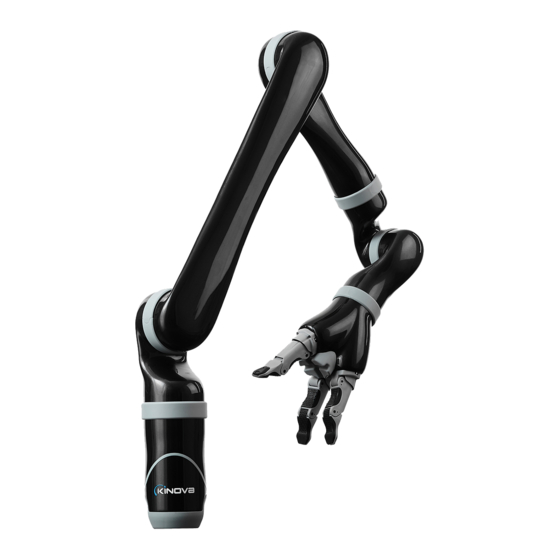
Jaco robotic arm General information Jaco is a medical device intended to be used on wheelchairs for people with functional limitations or upper body disabilities. The robot is designed to support in eating and drinking tasks, personal hygiene, medication management, leisure and active life, work, school, and personal safety. -
Page 14: Specifications
The power on/off switch is used to power up or power down the robotic arm. The four-pin power connector is used to connect the robotic arm to electrical power. The eight-pin joystick / controls / expansion port is used to connect the Kinova Joystick or the Universal Interface Control Box for the arm. -
Page 15: Robot Control Modes
This may be due to the singularity (impossible robot position) avoidance algorithms embedded in the kinematics. It is a normal protective behaviour of the robot and is position dependent. +1 514-277-3777 kinovarobotics.com © 2021 Kinova inc. All rights reserved. -
Page 16: Home / Retract Positions
This section describes the Home and Retracted positions of the robotic robot. The robot comes with two configurable factory default pre-set positions: • Home position and • Retract position. Home and retract positions are configured using the Kinova Assistive Robotic Arm Configurator utility. +1 514-277-3777 kinovarobotics.com... -
Page 17: Installation, Configuration, And Operation Of The Robot
Installation Guide. Contact Kinova directly to validate whether your contact is a technician approved by Kinova. When your robot arrives, a Kinova approved installer will help you to get set up and started with your robot. This includes: • Physical installation of the robot on your powered wheelchair and integration with the wheelchair power supply and controls •... -
Page 18: Electromagnetic Interference From Radio Wave Sources
3. Long-range transmitters and transceivers, such as commercial broadcast transmitters (radio and TV broadcast antenna towers) and amateur (Ham) radios. Other types of gripper-held devices, such as cordless phones, laptop computers, AM/FM radios, TV sets, CD players, cassette players, +1 514-277-3777 kinovarobotics.com © 2021 Kinova inc. All rights reserved. -
Page 19: Operating And Controlling The Robot
For more options to control the Jaco through other joysticks, please refer to your Kinova-certified contact. Another option that gives more flexibility in operating the Jaco is the Kinova Lift arm. The Lift arm accessory is explained in the section "Lift arm accessory". - Page 20 Jaco® assistive robot User guide Joystick movements and modes The Kinova joystick allows you to control the robot in a 2-axis or 3-axis mode. 2-axis mode will disable the joystick twist rotation. The following table shows the button default factory settings for using the joystick in a 2-axis and 3- axis modes.
- Page 21 Operating principles The operating principles are very simple and intuitive. The robot may be operated through several controllers. The following sections present the general control principles through Kinova’s joystick. Basic movements The normal control of the robot with the joystick is said to be Cartesian. The user commands the tool translations (position variations) with respect to the base and the rotations (orientation variations) around the tool reference frame.
- Page 22 Do not install the robot near any heat sources, such as radiators. Do not use it to directly manipulate hot objects. Joystick control quick start This section describes how to get started using the Kinova joystick to control the robot in the default configuration. Before you begin The joystick needs to be connected to the robot.
- Page 23 4 / 6 / 6S / 7S DoF Incline LEFT Gripper moves left 4 / 6 / 6S / 7S DoF Incline RIGHT Gripper moves right 4 / 6 / 6S / 7S DoF +1 514-277-3777 kinovarobotics.com © 2021 Kinova inc. All rights reserved.
- Page 24 4 / 6 / 6S / 7S DoF Incline LEFT Wrist rotation clockwise 4 / 6 / 6S / 7S DoF Incline RIGHT Wrist rotation counter-clockwise 4 / 6 / 6S / 7S DoF Wrist Orientation +1 514-277-3777 kinovarobotics.com © 2021 Kinova inc. All rights reserved.
- Page 25 • Red LEDs: error condition(s) Joystick blue LED feedback This section describes the blue LED feedback on the Kinova controller. The blue LEDs on the controller give feedback on the current control mode. The interpretation of the blue mode LED indicators is described in the following table.
- Page 26 • The robot must be set in its HOME position by holding the HOME/RETRACTED function until the robot stops moving. Joystick green LED feedback This section describes the green LED feedback on the Kinova joystick. The green lights offer visual feedback on the power status of the robot. Table 7: Power status feedback...
-
Page 27: Packing Materials
Electrical components, circuit boards, and carbon fiber Please contact your local distributor for information regarding disposal of such parts. You can also address questions directly to Kinova through our website; see Contacting Support. Carrying case Reuse the carrying case to store the robot arm when it is not installed or in use. Also, transport the robot arm in the carrying case. -
Page 28: Oled Display Accessory
OLED display accessory OLED: General information The Kinova OLED display is an optional accessory that was designed to make the control of the robot more intuitive by providing users with a visual reference of the current modes and status of the robot. -
Page 29: Specifications
• Stand-by mode: The indicator is off AMBIENT LIGHT SENSOR The ambient light sensor is used to sense environmental lighting conditions and adjusts the screen’s brightness accordingly. Specifications The OLED display can function within specific conditions. +1 514-277-3777 kinovarobotics.com © 2021 Kinova inc. All rights reserved. -
Page 30: Installation Guidelines
The display comes equipped with industrial Velcro™ installed on the back of the device. Peel off the protective plastic and stick the Velcro™ to the desired surface. For optimal mounting, use the Kinova display holder (Part number: AM 1241 0001). Position The display should be installed in a proper position so that the user can see the screen and feedback lights clearly from his normal position in the wheelchair. -
Page 31: Connecting The Display
The two types of displays that can be connected are the Universal Interface V1 and the Universal Interface V2. Procedure • Connect the display according to which display is available. Universal interface V1 (PC 0000 0002) Connect the display to the Auxiliary port #1. +1 514-277-3777 kinovarobotics.com © 2021 Kinova inc. All rights reserved. -
Page 32: The Oled Display
There are three basic precautions to take. • Before plugging or unplugging any connectors, power off the system. • Before using the display, wait for the device to reach room temperature. +1 514-277-3777 kinovarobotics.com © 2021 Kinova inc. All rights reserved. -
Page 33: Power-Up Sequence
• No display for about ten (10) seconds • Blue indicator light denotes the display is receiving power 2. Kinova logo • Kinova logo is displayed for about 5 seconds • Blue indicator light is Off 3. Settings screen • Settings information is displayed for up to two (2) seconds •... -
Page 34: Screen Sections
• Possible movements: movements that are possible to take in the current mode • Active movements: movements that are currently in progress Status section The status section displays different arm status information. +1 514-277-3777 kinovarobotics.com © 2021 Kinova inc. All rights reserved. - Page 35 Figure 7: Status section, and its details, of the display Retract status icon The retract icon is represented by a green or orange circle. It is used to communicate the state of the robot. +1 514-277-3777 kinovarobotics.com © 2021 Kinova inc. All rights reserved.
- Page 36 The current mode is used to communicate information about the currently active controller mapping. The mode section displays two types of information. • current mode list • current mode list index +1 514-277-3777 kinovarobotics.com © 2021 Kinova inc. All rights reserved.
- Page 37 • active • warnings When a special function, or multiple special functions, are available in the current mode, the available function is displayed on the left side of the Function section. +1 514-277-3777 kinovarobotics.com © 2021 Kinova inc. All rights reserved.
- Page 38 The +/- icon indicates that an “add current position” command or a “clear advanced Goto” command has been sent. Hand facing up Automatic Orientation Hand facing down Hand facing left Hand facing right Hand facing forward +1 514-277-3777 kinovarobotics.com © 2021 Kinova inc. All rights reserved.
- Page 39 Available Movements in the currently active mode are indicated by a green arrow representing the direction of the movement. Active Movements are represented by a yellow highlight around the currently active movement arrow. +1 514-277-3777 kinovarobotics.com © 2021 Kinova inc. All rights reserved.
-
Page 40: Movements Display
Figure 17: Example of translation movement Orientation Movements Orientation movements are also known are rotation movements. Figure 18: Rotate right and left Figure 19: Rotate up and down Figure 20: Rotate wrist +1 514-277-3777 kinovarobotics.com © 2021 Kinova inc. All rights reserved. -
Page 41: Sleep Mode
When there is an error with the controller or the display cannot communicate with the robot for any other reason, a joystick with an X is displayed in the main section of the OLED display. +1 514-277-3777 kinovarobotics.com © 2021 Kinova inc. All rights reserved. -
Page 42: Communication Lost Error
Do not try to disconnect and reconnect the display module or the universal interface while the robot is powered on. Always power off the system before plugging and unplugging any connectors. +1 514-277-3777 kinovarobotics.com © 2021 Kinova inc. All rights reserved. -
Page 43: Lift Arm Accessory
This section describes the purpose of the lift arm. The lift arm is an accessory that can be used to mount Jaco onto a powered wheelchair. The lift arm mechanism increases the range and flexibility of the robotic arm (robotic arm sold separately). - Page 44 The lift arm is available in both left and right handed configurations, depending on which side of the powered wheelchair the device will be installed on. LHS lift model RHS lift model +1 514-277-3777 kinovarobotics.com © 2021 Kinova inc. All rights reserved.
-
Page 45: Lift Arm Specifications
• Maximum Duty cycle: 10% (operation for 2 minutes maximum in every 20 minute period) • Electrical rating: 24V, max 2.7A Weight and dimensions are for the lift arm alone and do not include Jaco. Refer to Table 1: Specifications for maximum allowable payload. -
Page 46: Lift Arm Limit Switch
The lift arm includes a limit switch. This serves to limit the extent to which the lift arm tilts forward. This angle limit is adjustable during installation. The limit switch should only be adjusted by a Kinova-approved professional. +1 514-277-3777 kinovarobotics.com... -
Page 47: Controlling Tilt Back / Forward Control
Control buttons let the user control the tilt-forward and tilt-backward functionalities. There are two separate buttons. One button is used to make the lift arm tilt forward, and the other button causes the lift arm to tilt back. +1 514-277-3777 kinovarobotics.com © 2021 Kinova inc. All rights reserved. -
Page 48: Using The Swing-Away Mechanism
The swing-away mechanism is meant to make it easier for the user to get out of the wheelchair on the side of the lift arm. When it is time to use the swing-away mechanism, lift the latch to release it. +1 514-277-3777 kinovarobotics.com © 2021 Kinova inc. All rights reserved. - Page 49 Note: The lift mechanism and the robotic arm can still be activated when the arm is swung out. However, for safety reasons, it is recommended not to do so and is not considered to be normal use. +1 514-277-3777 kinovarobotics.com © 2021 Kinova inc. All rights reserved.
-
Page 50: Cleaning, Maintenance, And Disposal
• To clean the lift arm, it is best to use a lightly moistened cloth (without dripping) to clean the outer case. • Internal components such as the motor or the mechanism may only be cleaned by Kinova personnel. • If you notice any heavy contamination here, please contact Kinova directly. - Page 51 Disposal of the Lift arm The lift arm is expected to last for the lifetime of the Kinova robotic arm that it accompanies. At the end of this period, there are two options: Continue using the device Replace the device and dispose...
-
Page 52: Contacting Support
• product serial number (this will allow the support agent to access the information regarding your product, such as software version, part revisions and characteristics, etc.). If the product needs to be returned to Kinova, ensure the product is packaged in its original case for transportation. - Page 53 Kinova inc. (HQ) 4333, boulevard de la Grande-Allée Boisbriand (QC) J7H 1M7 Canada +1 (514) 277-3777 info@kinova.ca Kinova Europe GmbH Assistive Technologies Vorderbreitenthann 150 91555 Feuchtwangen Germany T: 0800 5466822 Support: support@kinovarobotics.de assistive@kinovarobotics.de...
Need help?
Do you have a question about the Jaco and is the answer not in the manual?
Questions and answers