Table of Contents
Advertisement
Available languages
Available languages
Quick Links
Advertisement
Table of Contents

Related Manuals for universalblue UBLAV2702-21


Summary of Contents for universalblue UBLAV2702-21
-
Page 2: Table Of Contents
Lavavajillas Dishwasher ÍNDICE ESPAÑOL 1. INSTRUCCIONES DE SEGURIDAD ..........4 2. PARTES DEL PRODUCTO Y CARACTERÍSTICAS ......8 3. INSTALACIÓN ................10 4. PANEL DE CONTROL ..............13 5. PRIMER USO ................. 15 6. COLOCACIÓN DE LA VAJILLA ............. 24 7. - Page 3 7. WASHING PROGRAMS..............77 8. SWITCHING THE DEVICE ON AND OFF ........80 9. CLEANING AND MAINTENANCE ..........82 AFTER-SALES SERVICE ............84 ERP TABLE ................88 ENVIRONMENTAL INFORMATION .......... 90 WARRANTY ................91...
-
Page 4: Español
ESPAÑOL Felicidades por haber adquirido este producto. Le recomendamos que dedique algún tiempo a leer cuidadosamente este Manual de Instrucciones / Instalación con el fin de hacer un buen uso del mismo. Lea cuidadosamente todas las instrucciones de seguridad antes de utilizar el aparato y conserve este Manual de Instrucciones / Instalación para poder consultarlo en el futuro. - Page 5 Para evitar peligro y deterioro de su aparato debido a su uso incorrecto, se aconseja leer atenta y cuidadosamente las instrucciones. El fabricante no asume ninguna responsabilidad cuando no se adopten las medidas de seguridad especificadas en este manual. ...
- Page 6 Si el cable de alimentación está dañado, debe ser reemplazado por el fabricante o supervisor técnico autorizado. No utilice varios enchufes en la misma toma de corriente ya que la sobrecarga podría causar incendios. Antes de limpiar el lavavajillas, asegúrese que esté desenchufado.
- Page 7 No lave utensilios de plástico a menos que estén indicados como aptos para uso en lavavajillas. Use solamente detergentes y aditivos abrillantadores específicos para lavavajillas automáticos. Nunca utilice otro tipo de productos limpiadores no aptos para lavavajillas. Los detergentes para lavavajillas son muy alcalinos. Pueden ser muy peligrosos si se aspiran.
-
Page 8: Partes Del Producto Y Características
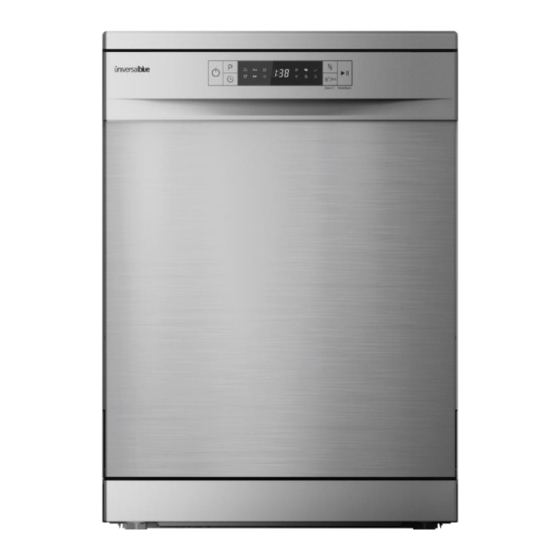
Brazos rociadores. Cesta inferior. Descalcificador de agua. Dispensador de detergente. Dispensador de abrillantador. Bandeja de cubiertos. Soporte para tazas. Modelo UBLAV2702-21 Instalación Libre Clase energética Número de servicios Número programas de funcionamiento Programación diferida hasta 24 horas Con display digital... - Page 9 Panel de acero inoxidable Filtro incluido Acero inoxidable Brazos de aspersión Número de bandejas Cesta de cubiertos incluída Con sensor de agua antinundación Zona de lavado dual y 3 en 1 Opción media carga Color Blanco Consumo de agua 10 litros Dimensones del producto 845x600x600mm Voltaje / Frecuencia...
-
Page 10: Instalación
3. INSTALACIÓN La instalación de las conexiones eléctricas debe realizarse exclusivamente por profesionales autorizados. Si hay que mover el aparato en algún momento, manténgalo en posición vertical; si es absolutamente necesario, puede inclinarse hacia atrás. POSICIONAMIENTO Y NIVELACIÓN Retire el aparato de todos los embalajes y compruebe que no se ha dañado durante el transporte. - Page 11 Conecte la manguera de suministro de agua fría a una manguera roscada de 3/4 (pulgadas) y asegúrese de que esté fijo. Si las tuberías de agua son nuevas o no se han utilizado durante largo tiempo, deje que el agua corra a fin de asegurarse que esté...
- Page 12 La toma está conectada a tierra y cumple con la normativa vigente. El enchufe puede soportar la carga máxima del aparato, que se indica en la etiqueta del producto. El voltaje se encuentra dentro de los valores indicados en la etiqueta del producto.
-
Page 13: Panel De Control
CONSEJOS SOBRE EL PRIMER CICLO DE LAVADO Una vez instalado el aparato, inmediatamente antes de iniciar el primer ciclo de lavado, se debe limpiar completamente, llenar el disoficador de sal y abrillantador. El agua puede desbordase al llenar el dosificador de sal pero no se preocupe ya que esto es completamente normal. - Page 14 Pulse la tecla de programación: Pulse la tecla para desplazarse por los ciclos de lavado. La luz del programa correspondiente se encenderá para indicar qué CICLO DE LAVADO se ha seleccionado Botón de retardo: El retardo de inicio le permitirá retrasar la hora de inicio de cualquier ciclo automáticamente hasta 24 horas.
-
Page 15: Primer Uso
cuando utilice el programa de lavado parcial para ahorrar agua, electricidad y tiempo si la máquina está sólo a media carga. El aparato iniciará o pausará el ciclo de lavado previsto o reiniciará el lavavajillas cuando lo pulse durante 3 segundos. 5. - Page 16 aparecerá en el display (H4 es el valor por defecto establecido en fábrica) 6. Para cambiar el valor, pulse el botón "Delay“ tantas veces como sea necesario hasta ajustar al valor deseado. Cada vez que se pulse el botón se aumentará un nivel. Cuando el valor alcanza H7, si se presiona nuevamente, el valor H0 salta en la pantalla.
- Page 17 lugar a otro. Si se utiliza agua con exceso de cal en el lavavajillas, se formarán depósitos en los platos y utensilios. El aparato está equipado con un descalcificador especial que utiliza sales específicamente diseñadas para eliminar la cal y los minerales del agua.
- Page 18 NOTAS El depósito de sal debe rellenarse cuando se encienda la luz de advertencia de sal en el panel de control. Aunque el recipiente de sal esté lo suficientemente lleno, es posible que la luz indicadora no se apague hasta que la sal se haya disuelto completamente.
- Page 19 Para rellenar el depósito del abrillantador, siga los siguientes pasos: 1. Para abrir el dispensador, gire la tapa hacia la izquierda y sáquela. 2. Vierta el abrillantador en el dosificador con cuidado de no sobrecargarlo, ya que podría causar espuma. El volumen del envase del abrillantador es de unos 140 ml.
- Page 20 Ajuste del dispensador de abrillantador El dosificador de abrillantador tiene cuatro o seis niveles, según el modelo adquirido. Empiece siempre con el dispensador en un punto intermedio, si la vajilla mancha seca completamente, aumente o disminuya la cantidad de abrillantador en base a sus preferencias.
- Page 21 todas las tareas. Los potentes detergentes modernos suelen emplear formulaciones de bajo contenido alcalino, con fosfatos y enzimas. El fosfato engloba la cal contenida en el agua. Las enzimas degradan el almidón y la albúmina. Menos frecuentes son los detergentes exentos de fosfatos. Éstos poseen una capacidad de englobe de la cal algo menor y requieren una dosificación más elevada.
- Page 22 ¡El detergente del lavavajillas es corrosivo! Tenga cuidado de mantenerlo fuera del alcance de los niños. En el compartimento más grande (1) se coloca el detergente para los programas habituales de lavado. El mínimo de detergente a añadir es de 20 ml (para una vajilla normal entre 20 y 25 ml será...
- Page 23 Normalmente el detergente pulverizado nuevo no contiene fosfato y la función descalcificadora no se emplea. En este caso, se recomienda llenar el recipiente con sal, incluso cuando la dureza del agua es sólo de 6 dH. Si se utilizan detergentes sin fosfato en caso de agua dura, a menudo aparecen manchas de color blanco en la vajilla.
-
Page 24: Colocación De La Vajilla
Estos productos deben utilizarse estrictamente de acuerdo con las instrucciones del fabricante del detergente. Si tiene problemas al utilizar por primera vez productos "3 en 1", póngase en contacto con el servicio de atención al cliente del fabricante del detergente Cuando se utilizan productos combinados, las luces del abrillantador y de la sal ya no son útiles. - Page 25 Usar sólo cristalería y vajilla de porcelana provistas por el fabricante con el distintivo «Resistente al lavavajillas». Usar un detergente caracterizado como «suave» o «no agresivo». Retirar la cristalería y los cubiertos lo antes posible una vez concluido el programa de lavado, a fin de evitar daños en los mismos.
- Page 26 Los platos y los cubiertos no deben estar unos dentro de otros, ni cubrirse mutuamente: Para evitar que los cristales se dañen, no deben tocarse. Cargue los objetos grandes más difíciles de limpiar en el cesto inferior. El cesto superior está diseñado para albergar la vajilla más delicada y ligera, como vasos, tazas de café...
- Page 27 AJUSTE DE LA BANDEJA SUPERIOR El mecanismo de ajuste de la altura de la cesta superior de su máquina está diseñado para permitirle ajustar la altura de su cesta superior hacia arriba o hacia abajo, sin necesidad de retirarla de su máquina cuando esté...
- Page 28 CARGA DE LA BANDEJA INFERIOR Cesta inferior Tipo Artículo Taza Plato Cuenco postre Plato hondo Plato llano Bandeja para postres Plato ovalado Olla pequeña Olla para el horno Platos delicados Cuencos delicados Recomendamos que coloque los artículos grandes que son más difíciles de limpiar en la parte inferior de la cesta, por ejemplo, ollas, sartenes, tapas, platos para servir y tazones, como se muestra en la figura de abajo.
- Page 29 SOPORTES DE LA BANDEJA INFERIOR Y SUPERIOR ABATIBLES En las bandejas del lavavajillas los soportes son abatibles con el fin de permitir la colocación de utensilios más grandes. Para abatir los soportes, tire ligeramente hacia arriba y luego pliege el soporte. BANDEJA PARA CUBIERTOS Disponga los cubiertos en la bandeja como se indica Los cubiertos deben colocarse de forma que el agua circule libremente.
- Page 30 Bandeja para cubiertos Tipo Artículo Cucharas de té Cucharas de postre. Cucharas soperas Cucharón para salsa Tenedor para servir Tenedores Cuchillos Cucharas para servir NO incluir en su lavavajillas los siguientes utensilios: Cubiertos con porcelana, madera, cuerno o asas de nácar ...
- Page 31 Las piezas de plata tienen tendencia a decolorarse. Los patrones vidriados pueden desvanecerse si se lavan con frecuencia. No ponga artículos que estén sucios de ceniza de cigarrillo, cera de vela, laca o pintura. Si compra platos nuevos, por favor, asegúrese de que sean aptos para lavavajillas. Por favor, no sobrecargue su lavavajillas.
-
Page 32: Tabla De Programas
7. TABLA DE PROGRAMAS Para las cargas más sucias, como Prelavado: 3/20 1,680 15,3 ollas, sartenes, cacerolas y platos Lavado principal: (o 3 en 1) INTENSIVO que han permanecido con comida (60℃) seca durante un tiempo Aclarado1 Aclarado2 Aclarado en caliente Secado Para cargas de suciedad normal, Prelavado... - Page 33 Secado Para platos y sartenes ligeras y Aclarado en caliente 3/16 1,050 normalmente sucios de todos los 60 MINUTOS días. Aclarado en caliente Aclarado en caliente: (50℃) Secado RÁPIDO Un lavado más corto para cargas Lavado principal: 3/16 0,600 poco sucias que no necesitan (45℃) secado.
- Page 34 El prelavado manual de los artículos de vajilla conlleva un mayor consumo de agua y energía, por lo que no se recomienda. El lavado de la vajilla en un lavavajillas doméstico suele consumir menos energía y agua que el lavado a mano cuando el lavavajillas doméstico se utiliza de acuerdo con este manual de instrucciones.
-
Page 35: Encender Y Apagar El Aparato
8. ENCENDER Y APAGAR EL APARATO ENCENDER EL LAVAVAJILLAS Abra las bandejas del lavavajillas e introduzca la vajilla. Se recomienda cargar la bandeja inferior primero. Añada el detergente. Conecte el aparato a la luz, teniendo en cuenta las instrucciones de voltaje del aparato. - Page 36 b) Una de las luces de programa parpadeando: significa que el ciclo está en pausa Si todas las luces empiezan a parpadear, por favor, apague el aparato, corte el suministro de agua al aparato y contacte con el servicio técnico. SI SE HA OLVIDADO INCLUIR ALGÚN UTENSILIO EN EL LAVAVAJILLAS Un plato olvidado puede añadirse en cualquier momento antes de...
-
Page 37: Limpieza Y Mantenimiento
Abra la puerta del lavavajillas, déjela entreabierta y espere unos minutos antes de retirar los platos. 9. LIMPIEZA Y MANTENIMIENTO LIMPIEZA Y MANTENIMIENDO DE FILTROS El filtro se utiliza para evitar que los restos se introduzcan en el interior de la bomba y pueda ocasionar problemas en el aparato. Los residuos que se quedan en el filtro pueden ocasionar obstrucción y se debe limpiar periódicamente. - Page 38 Se recomienda inspeccionar los filtros en busca de obtrucciones cada vez que el lavavajillas haya sido utlizado. Se recomienda limpiar los filtros bajo el grifo de agua una vez a la semana. Para limpiar el filtro principal y el microfiltro, rogamos utilice un cepillo de limpieza. Para instalar de nuevo hágalo a la inversa.
- Page 39 superior del brazo y retírelo. Lave los brazos con agua tibia y jabón y use un paño suave. Una vez hayan sido limpiados, coloque los brazos nuevamente. LIMPIEZA Y MANTENIMIENTO EXTERIOR Para limpiar el panel de control, utilice un paño ligeramente humedecido y seque bien el panel antes de poner el aparato en funcionamiento.
-
Page 40: Servicio Postventa
Cuando el aparato no vaya a utilizarse durante algún tiempo, se recomienda que se ejecute un ciclo de lavado con el lavavajillas vacío. A continuación, desconecte el enchufe de la toma de corriente, corte el suministro de agua y deje la puerta ligeramente abierta. - Page 41 Pérdidas de agua Pérdidas de agua del aparato El aparato se calienta por encima Resistencia de lo habitual Si se produce un desbordamiento, desconecte el suministro de agua principal antes de llamar al servicio técnico. Si hay agua en la base por un sobrellenado o una pequeña fuga, el agua debe ser removida antes de volver a poner en funcionamiento el aparato.
- Page 42 (agua correr, dosificador del detergente abriéndose…) Antes de poner en funcionamiento el Utensilios lavavajllas, asegúrese de que la vajilla incorrectamente y los utensilios hayan sido colocados colocados correctamente El lavavajillas no se ha utilizado con regularidad. En ese caso, intente encenderlo al menos una vez a la semana, para asegurar el correcto Ruido del motor...
- Page 43 - Cierre la puerta nuevamente y deje Colocación de la que el lavavajillas finalice el programa vajilla correcta - Si no funciona repita el proceso con Dosificador de zumo de limón en vez de vinagre abrillantado y sal vacíos Dosificador del detergente incorrecto Combinación de...
-
Page 44: Tabla Erp
Todos los usuarios deben familiarizarse con este capítulo. El hecho de saber qué puede salir mal puede servirle de ayuda para evitar que se causen mayores problemas. TABLA ERP Marca Universalblue Modelo Servicio estandar Servicio estandar PARÁMETRO UNIDAD VALOR Consumo de energía del programa... - Page 45 Índice de eficiencia energética (IEE) 49,9 Consumo agua programa l/ciclo 10,0 ecológico (EPWC) redondeado a un decimal Índice de rendimiento de limpieza (IC) 1,13 Índice de rendimiento de secado (ID) 1,09 Duración del programa ecológico (Tt) h:min 3:54 redondeada al minuto más cercano Consumo de energía en modo off (Po) 0,49 redondeado a dos decimales...
-
Page 46: Informacion Inherente Medioambiente
LVD 2014/35/EU EMC 2014/30/EU EUP 2019/2022 NOTA: los valores anteriores se han medido de acuerdo con las normas en condiciones operativas especificadas. Los resultados pueden variar enormemente según la cantidad y la contaminación de los platos, la dureza del agua, la cantidad de detergente, etc. El manual se basa en las normas y reglas de la Unión Europea. -
Page 47: Garantía
etc. de acuerdo con las normas locales sobre la eliminación de basuras y las normas vigentes. Los materiales del embalaje de este producto son reciclables. Puede depositar estos materiales en un lugar público de recogida para su reciclaje. Para aquellos aparatos que contengan pilas o baterías recargables, estas partes se deben extraer y depositar contenedores reciclaje... - Page 48 Para hacer uso de la garantía acuda al centro donde compró este producto o bien contacte con nosotros de cualquiera de las siguientes formas: o A través del email sat@universalblue.es, adjuntando la factura de compra e indicando sus datos de contacto y brevemente qué problema presenta su producto.
- Page 49 Puedes descargar este manual en nuestra página web: www.universalblue.es *Universal for Engineering Industries Spain, S.L. se reserva el derecho de hacer cualquier cambio en las especificaciones y características de los productos sin previo aviso, debido a la mejora continua de los productos. Las imágenes aquí mostradas son orientativas, por lo que puede haber pequeñas diferencias entre las imágenes y el producto que haya adquirido.
-
Page 50: English
ENGLISH Congratulations on the purchase of your product. We recommend you to spend some time to read this Instruction Manual in order to fully understand how to use it correctly.. Read all the safety instructions carefully before use and keep this Instruction / Installation Manual for future reference. - Page 51 The manufacturer will not take any responsibility if safety measures specified in this manual are not taken. This appliance must not be used for purposes other than those specified in the instruction manual. Its safety is intended for domestic use and not for commercial use.
- Page 52 Do not store explosive substances in this product, such as aerosol cans with a flammable propellant. Install the dishwasher only in a vertical position and correctly leveled. Do not sit on the door or dishwasher baskets or place heavy items on the door or dishwasher baskets as this could cause irreversible damage to the appliance.
- Page 53 The dishwasher must be connected to the water inlet using the hose and connecting elements provided with this appliance. When installing the dishwasher, the power cord should not be excessively bent or crushed. Never pull the cable to unplug the dishwasher. ...
-
Page 54: Product Parts And Features
Upper basket Spray arms Lower basket Water softener Detergent dispenser Rinse aid dispenser Cutlery tray Cup holder Model UBLAV2702-21 Instalation Freestanding Energy Class Place settings Operation programs Delay function up to 24 hours With digital display Stainless steel panel Filtre... - Page 55 With water and anti-flood sensor Dual and 3 in 1 wash zone Half load option Color White Water consumption 10litres Product dimensions 845x600x600mm Rated voltage / frequency AC 220-240V / 50Hz Power 1850W Model UBLAV2703-21 Instalation Freestanding Energy Class Place settings Operation programs Delay function up to 24 hours With digital display...
-
Page 56: Installation
3. INSTALLATION Installation of electrical connections must be carried out only by authorised professionals. If the appliance must be moved at any time, keep it in an upright position; if absolutely necessary, it may be tilted onto its rear. POSITIONING AND LEVELLING ... - Page 57 Connect the cold water supply hose to a 3/4 (inch) threaded hose and make sure it is secured. If the water pipes are new or have not been used for a long time, let the water run to make sure it is free of impurities. CONNECTING THE WATER OUTLET HOSE Place your machine's drain hose into the drain pipe without bending.
- Page 58 The voltage is within the values indicated on the product label. Do not use extension cords or multiple plugs. Once the appliance is installed, the power cord and power outlet should be easily accessible. The cable must not be bent or compressed. ...
-
Page 59: Control Panel
If there are leaks in the duct connections If the cables are properly connected If the power is connected If the inlet and outlet hoses are properly installed All packaging and printing materials must be removed from the dishwasher. -
Page 60: Using The Appliance For First Time
Rinse aid refill indicator: The indicator lights up when dispenser needs to be refilled. Salt refill indicator: The indicator lights up when the softener needs to be refilled. Half Load indicator: The indicator lights up when the additional function is selected. 3 in 1 indicator: The indicator lights up when the additional function is selected. - Page 61 ADJUSTING THE WATER SOFTENER The water softener is designed to remove minerals and salts from the water, which would have an adverse effect on the operation of the appliance. The higher the content of these minerals and salts, the harder the water. The softener should be adjusted according to the hardness of the water in your area.
- Page 62 13-15 Medium 1.9-2.1 16-20 Medium 2.2-2.9 21-26 Hard 3.0-3.7 27-38 Hard 3.8-5.4 39-62 Hard 5.5-8.9 FILL THE SALT TANK Always use salt for the dishwasher. The use of salt will help prevent corrosion of the tank. Attention! Use only salt specially designed for dishwasher use. All other types of salt not specifically designed for use in the dishwasher (especially table salt) will damage the water softener.
- Page 63 1. Remove the bottom tray, then unscrew and remove the lid from the salt container. 2. If it is the first time you fill the container, fill 2/3 of its volume with water (about 500 ml). 3. Place the end of the funnel (supplied) in the hole and insert approximately 1.2 kg of salt.
- Page 64 Attention! Only use branded rinse aid for the dishwasher. Never fill the rinse aid dispenser with any other cleaning agent (e.g. dishwasher detergent or liquid detergent). This could damage the device. When to refill the rinse aid dispenser: If there is no rinse aid warning light on the control panel, you can judge the amount of rinse aid by the color of the optical level indicator "D"...
- Page 65 1. Open the dispenser by turning the lid to the left and remove it. 2. Add the rinse aid into the dispenser taking care not to overload it, as this may cause foam. The volume of the rinse aid container is about 140 ml.
- Page 66 Most commercial-grade detergents are suitable for this purpose. In your dishwasher you can load detergent in tablets, powder or liquid. Never use a manual washing detergent! Depending how dirty the dishes are, the detergent dosage can be adapted to individual requirements by means of powder or liquid detergent.
- Page 67 The detergent in the dishwasher is corrosive! Be careful to keep it out of the of children. In the largest compartment (1) the detergent for the usual washing programs is placed. The minimum amount of detergent to be added is 20 ml (for normal dishes between 20 and 25 ml will suffice).
- Page 68 With phosphate and without chlorine Phosphate-free and chloride-free Normally the new sprayed detergent does not contain phosphate and the decalcifying function is not used. In this case, it is recommended to fill the container with salt, even when the water hardness is only 6 dH.
-
Page 69: Loading The Dishwasher Baskets
These products must be used strictly in accordance with the detergent manufacturer's instructions. If you have problems using "3 in 1" products for the first time, please contact the detergent manufacturer's customer service. When combined products are used, rinse aid and salt lights are no longer useful. - Page 70 To get the best performance from your dishwasher, follow these loading guidelines. NOTE: Orientative images. The trays may vary depending on the model purchased. INSTRUCTIONS BEFORE LOADING BASKETS Scrape off any large amount of leftover food. It is not necessary to rinse the dishes with water.
- Page 71 LONG BLADED KNIVES STORED IN AN UPRIGHT POSITION ARE A POTENTIAL HAZARD. Long and/or sharp items of cutlery such as carving knives must be positioned horizontally in the upper basket. LOADING THE UPPER BASKET Upper basket is designed for lighter, more delicate utensils such as glasses, coffee and tea cups and saucers, as well as plates, small and shallow bowls.
- Page 72 machine as needed. Basket of your machine is set to lower position in factory settings. In order to raise your basket, hold it from both sides and pull it upwards. In order to lower it, hold it from both sides again, and leave it.
- Page 73 Lower basket Type Item Saucer Dessert bowl Soup plate Dinner plate Dessert plate Oval plate Small pot Oven pot Delicate desset plate Delicate bowl FOLDABLE LOWER AND UPPER TRAY SUPPORTS Folding racks consisting of three/two parts in the upper/lower basket of your machine are designed in order to let you place big items easier as pots, pans, etc.
- Page 74 CUTLERY TRAY Arrange the cutlery in the tray as shown. Cutlery should be placed to ensure that water runs off freely. Cutlery tray Type Item Tea spoons Dessert spoons Soup spoons Gravy ladle Serving fork Forks Knives Serving spoons DO NOT include the following utensils in your dishwasher: o Porcelain cutlery of wood, horn or mother-of-pearl handles o Plastic items that are not heat-resistant...
- Page 75 o Steel elements subject to oxidation o Wooden trays o Synthetic fibre elements Some types of crystal can become opaque after a large number of washes. Silver pieces have a tendency to fade. Glazed patterns can fade if washed frequently. Do not put items that are soiled with cigarette ash, candle wax, lacquer, or paint.
- Page 76 EMPTY THE DISHWASHER At the end of the wash, the appliance will beep 6 times and then stop. Turn the 'Power' button to turn off the appliance and cut off the water Supply, then open the door of the dishwasher. Wait a few minutes before empty the dishwasher to avoid handling the dishes and dishware while they are still hot.
-
Page 77: Washing Programs
7. WASHING PROGRAMS For the heaviest soiled loads, such as pots, Pre-wash 3/20 1,680 15,3 INTENSIVE pans, casserole dishes and dishes that have Main wash: (60℃) (or 3 in been sitting with dried food on them for a Rinse1 while. Rinse2 Hot rinse Drying... - Page 78 Hot rinse: (50℃) Drying. RAPID A shorter wash for lightly soiled loads that do Main wash: (45℃) 3/16 0,600 not need drying. Hot rinse PRE-RINSE To rinse dishes that you plan to wash later that Pre-wash 0,010 day. If you want to clean your diswhaser, you Main wash: (60℃) 0,800 SELF CLEAN...
- Page 79 Capacity: 15 settings Position of upper basket: Low position Rinse aid setting: 6 ( or 4 for four setting dispenser)
-
Page 80: Switching The Device On And Off
8. SWITCHING THE DEVICE ON AND OFF TURN ON THE DISHWASHER Open the dishwasher baskets and insert the dishwasher. It is recommended to load the lower basket first. Add detergent. Connect the device to the light, observing the voltage instructions of the device. - Page 81 b) One of the program lights flashing: it means that the cycle is paused. If all the lights start flashing, please turn off the appliance, turn off the water supply to the appliance and contact the service technician. IF YOU FORGOT TO INCLUDE ANY UTENSILS IN THE DISHWASHER A forgotten dish can be added at any time before the detergent dispenser opens.
-
Page 82: Cleaning And Maintenance
9. CLEANING AND MAINTENANCE CLEANING AND MAINTENANCE OF FILTERS The filter is used to prevent getting inside the pump and causing problems in the unit. Residues left in the filter can cause clogging and should be cleaned periodically. The filter system consists of a flat filter, a main filter and a microfilter. ... - Page 83 The dishwasher must never be used without filters. Incorrect filter replacement can reduce the performance level of the appliance and damage dishes and utensils. CLEANING AND MAINTENANCE OF SPRAY ARMS Spray arms should be cleaned regularly to prevent clogging of nozzles and cushions.
-
Page 84: After-Sales Service
After each wash, close the water supply and leave the door slightly open so that moisture and odors are not trapped inside. Before cleaning, always remove the plug from the outlet. To clean the exterior and rubber parts of the dishwasher, do not use solvents or abrasive cleaning agents. - Page 85 Problem with the water inlet of the Water inlet appliance Water drainage Problem in the drainage of the appliance Temperature sensor Malfunction in the temperature sensor Overflow or loss of water from the Overflow appliance Water leaks Water leaks from the appliance Resistance The appliance heats up more than usual If an overflow occurs, disconnect the main water supply...
- Page 86 Make sure that the water inlet hose is Low water correctly positioned and the water faucet is pressure open. fucnion drainage The device is designed to detect overflow pump Overflow problems Normal The device does not present any problem noise during when normal operating sounds are heard operation of (running water, detergent dispenser...
- Page 87 Overloading Open the door and add 2 cups of vinegar at the bottom of the appliance- dishwasher Close the door again and let the dishwasher finish the program- Placing the If it does not work repeat the process with correct lemon juice instead of vinegar.
-
Page 88: Erp Table
Wipe away spills any spills with a damp cloth. Dishwasher Dishwasher leaks isn't level Make sure the dishwasher is level. ERP TABLE Brand Universalblue Model Standard place settings Standard place settings PARAMETER UNIT VALUE Eco programme energy consumption kWh/cycle 0,861... - Page 89 Duration of the eco programme (Tt) h:min 3:54 rounded to the nearest minute Power consumption in off-mode (Po) 0,49 rounded to two decimal places Power consumption in standby mode 0,60 (Psm) rounded to two decimal places Does standby mode include the display of information? Power consumption in standby mode (Psm)
-
Page 90: Environmental Information
greatly according to quantity and pollution of the dishes, water hardness, amount of detergent, etc. The manual is based in the European Union’s standards and rules Note: A (highest efficiency) to G (lowest efficiency). ENVIRONMENTAL INFORMATION This appliance is labelled in compliance with European directive 2012/19/EU for Waste Electrical and Electronic Equipment (WEEE). -
Page 91: Warranty
For devices containing batteries or rechargeable batteries, these parts must be removed and disposed of in clearly marked recycling bins. Please go to the nearest recycling bin in your location or common store. Please comply with your legal obligations and contribute protecting our environment. - Page 92 To make use of the guarantee go to the store where you purchased this product or contact us by: o By email, sat@universalblue.es. Please, attach the invoice, add your contact details and explain briefly what the issue is.
- Page 93 www.universalblue.es...
Need help?
Do you have a question about the UBLAV2702-21 and is the answer not in the manual?
Questions and answers