Table of Contents
Advertisement
Quick Links
Instruction manual
TUMBLE DRYER
EN
FR
Français,17
English,1
IT
DE
PT
Português, 49
Deutsch, 65
IDPA 745 A ECO
www.indesit.com
This symbol reminds you to read this
!
instruction manual.
!
Keep this manual at hand for immediate reference whenever
necessary. Always store this manual close to the tumble dryer and
remember to pass it on to any new owners when selling or tran-
sferring the appliance, so they may familiarise with the warnings
and suggestions herein contained.
!
Read these instructions carefully: the following pages contain
important information on installation and useful suggestions for
operating the appliance.
ES
Español,33
Contents
Installation, 2
Where to install the tumble dryer
Warnings, 4
Saving energy and respecting the environment
Cleaning the condenser unit
Special programmes
Laundry, 14
Troubleshooting, 15
GB
1
Advertisement
Table of Contents

Related Manuals for Indesit IDPA 745 A ECO


Summary of Contents for Indesit IDPA 745 A ECO
-
Page 1: Table Of Contents
Emptying the water container after each cycle Cleaning the condenser unit Cleaning the tumble dryer Description of the tumble dryer, 8 IDPA 745 A ECO Features Control panel How to carry out a drying cycle, 10 Starting and selecting a programme... -
Page 2: Installation
Installation substitute the existing one as indicated in figure B inserting it in the Where to put your dryer same place. • Place your dryer at a ! The drain tube has to be below 1 m from the bottom of the Dryer. distance from gas ranges, ! Once the Dryer has been installed please assure that the drain stoves, heaters, or cooktops... - Page 3 Model Warning ! Before you use your dryer ensure that its has IDPA 745 A ECO (EU) been in a upright position for at least 6 hours. Rated capacity of cotton laundry for the "standard cotton programme" at full load - kg...
-
Page 4: Warnings
Warnings ! This appliance has been designed and built • Do not turn off the dryer when there are still according to international safety standards. warm items inside. These warnings are given for safety reasons • Clean the filter after each use (see and must be followed carefully. - Page 5 solvents or other flammable or explosive substances. Highly flammable substances commonly used in domestic environments including cooking oil, acetone, denatured alcohol, kerosene, spot removers, turpentine, waxes and wax removers. Ensure these items have been washed in hot water with an extra amount of detergent before being dried in the tumble dryer.
-
Page 6: Care And Maintenance
Care and maintenance Disconnecting the power supply Emptying the water container after each cycle ! Disconnect the dryer when not in use or Remove the water container and during cleaning and maintenance operations. empty it into a sink or other Cleaning the filter after each suitable drain outlet, then replace it correctly. -
Page 7: Cleaning The Tumble Dryer
4.Whenever you clean ! Do not use solvents or abrasives. the Heat pump filter ! Have the dryer checked regularly by authorised technical personnel in order to ensure that the electrical and mechani- unit always clean any cal parts work safely (see Assistance). build up of fluff from the surface of the metal Quick Tips... -
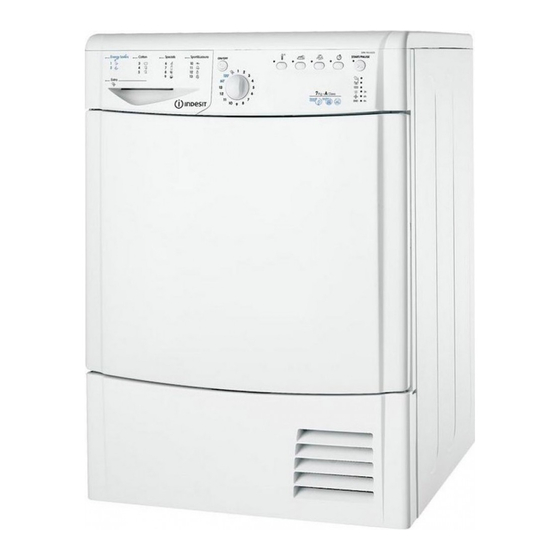
Page 8: Description Of The Tumble Dryer
Description of the tumble dryer Features Opening the door Rating plate Water container Press the door Model Filter & Serial Numbers Heat Pump Filter Unit intake (cover open) grille Heat Pump Filter Unit cover handle (Pull here to open) Ajustable feet (to level dryer) Control panel Options... - Page 9 ON/OFF/Reset button Pressing the button normally will cause the machine to switch on or off. If the button is pressed for 3 seconds while the dryer is in function, the machine will switch off and the running cycle will reset. Programme selection knob Allows for setting the programme: turn until the indicator points towards the desired programme (see Starting and selecting a programme).
-
Page 10: How To Carry Out A Drying Cycle
How to carry out a drying cycle Starting and selecting a programme 1. Plug the dryer into the power supply socket. 2. Select the programme according to the type of laundry (see Laundry). 3. Open the door, ensure that the filter is clean and securely placed and that the water container is empty and correctly slotted (see Care and maintenance). -
Page 11: Programmes And Options
Programmes and options Programme chart Max. Cycle Programme load Compatible options duration* (kg) Energy Saver 1 Eco Cotton Anti Crease – Delay start. 55’ 2 Eco Shynthetics Anti Crease – Delay start. 40’ Cottons 3 Standard Cotton Max. High heat - Fast Iron - Anti Crease – Delay start. 215’... - Page 12 Easy Mix This programme is ideal for drying cotton and synthetic fabrics together. Special Shoes Programme This programme is specific for drying sports shoes. The shoes must have been previously washed and spun at a minimum spin speed of 400 revolutions. A specific shoe rack is provided and must be used, otherwise the dryer will be damaged if shoes are dried in the drum.
-
Page 13: Options
Options The options allow for customising the selected programme according to one’s own needs. High Heat When a drying time is selected, pressing this button sets high heat drying and the indicator light above the button lights up. The timed programmes are pre-set to low heat. Fast Iron This option, when selected, delivers for the cycle chosen the best humidity level to help make ironing quicker and easier. -
Page 14: Laundry
Laundry Sorting laundry Drying times • Check the symbols on the care labels of the various gar- Drying times are approximate and may vary depending on ments to verify whether the garments can be safely tumble the following: dried. • Sort laundry according to the type of fabric. •... -
Page 15: Troubleshooting
Troubleshooting If you feel that the dryer is not working properly, consult the following troubleshooting suggestions before contacting the Technical (see Assistance). Assistance Centre Problem: Possible causes / Solutions: The dryer does not start. • The plug has not been inserted far enough into the socket to make contact. •... -
Page 16: Assistance And Guarantee
‘Right first time’ – our engineers have the latest tools to help get your Indesit appliance back up and running the first time we visit. Experts in our field – all of our engineers are trained to the highest standard at our Training Centre of Excellence and possess unrivalled expertise and product knowledge. - Page 17 Nettoyage du groupe filtre de la pompe à chaleur Nettoyage du sèche-linge Description du sèche-linge, 24 Caractéristiques Tableau de bord Comment effectuer IDPA 745 A ECO un cycle de séchage, 26 Démarrage et choix du programme Programmes et options, 27 Tableau des programmes Programmes Spécial/Sport/Partiaux...
- Page 18 Installation Où installer le sèche-linge Pour installer le nouveau il suffit de remplacer le tuyau exi- stant comme illustré par la figure B dans la même position. • Placez votre sèche- linge à une certaine La hauteur de la vidange doit être inférieure à 1 m en distance des cuisinières, partant du bas du sèche-linge.
- Page 19 Indesit de ces règles. Modèle IDPA 745 A ECO (EU) ! En cas de doute au sujet des points Capacité nominale de linge en coton pour le « programme coton précédents, consultez un électricien standard »...
- Page 20 Précautions Cet électroménager a été conçu et réalisé • Ne chargez pas d’articles qui dégouttent conformément aux normes internationales de d’eau. sécurité. Ces consignes sont fournies pour • Vérifiez avec soin toutes les instructions sur des raisons de sécurité, il faut les respecter les étiquettes des vêtements (voir Linge).
Need help?
Do you have a question about the IDPA 745 A ECO and is the answer not in the manual?
Questions and answers