
Subscribe to Our Youtube Channel
Related Manuals for Samil Power SolarRiver 4500TL-G3


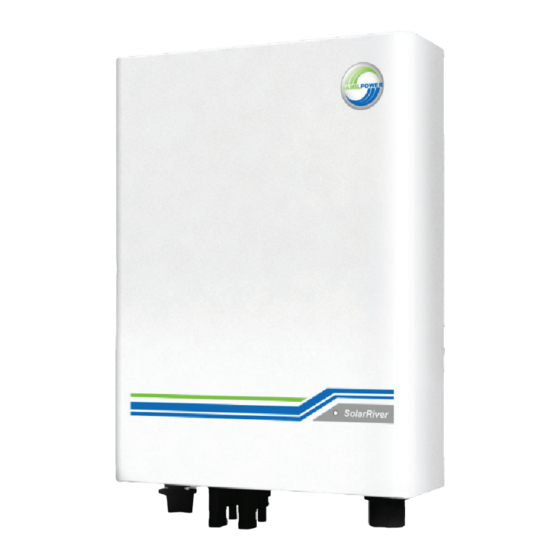
Summary of Contents for Samil Power SolarRiver 4500TL-G3
- Page 1 SolarRiver 4500TL-G3 SolarRiver 5300TL-G3 SolarRiver 5600TL-G3 SolarRiver 6000TL-G3 SR4_5-6_0KTL-G3-IG_11_AA...
- Page 2 SR4_5-6_0KTL-G3-IG_11_AA...
-
Page 3: Table Of Contents
Table of Contents About this Installation Guide ..2 AC- and DC-Connection ....16 Safety Symbols....... 3 Connection of the WIFI/GPRS General Safety Requirements ..4 Monitoring Module ......20 Intended Use ........5 Starting the Inverter ...... 21 System Connection ......7 Commissioning ...... -
Page 4: About This Installation Guide
This installation guide describes the Terms: safe installation of the inverters listed Installer Qualified technician on the left. in charge of the SolarRiver 4500TL-G3 Target group: installation Max. DC-Power 4500 W Supplier Company the product Qualified technicians Max. AC-Power 4000 VA... -
Page 5: Safety Symbols
Safety Symbols Life threatening voltages are Countermeasures that must processed inside the inverter. be taken in order to avoid the Hazardous situations that can lead to hazardous situation are indicated with death or serious injuries are indicated an arrow: with the “WARNING” symbol (1) on Î... -
Page 6: General Safety Requirements
General Safety Requirements 1. WARNING! Danger of electric 4. Disassembling the inverter shock! is forbidden. Î Read Installation Guide WARNING! Danger of electric carefully. Follow all shock and fire! instructions. Î Never modify the inverter unless 2. Contact your supplier when you explicitly instructed to do so by the have questions. -
Page 7: Intended Use
Intended Use The inverter (1) converts DC-power CAUTION! Risk of damaging from the PV-generator (2) to AC- the inverter! power. The AC-power is fed into the Î Do not connect other DC-power grid (3). In case of a grid failure: The sources (6) such as wind power inverter automatically disconnects systems, hydroelectric generators,... - Page 8 Electrical Safety 1. WARNING! Risk of electric 2. The inverter is not shock! The PV-panels emit a equipped with an internal dangerous DC-voltage when isolation transformer exposed to sunlight. 3. Local regulations and standards can require that an isolation transformer is additionally installed.
-
Page 9: System Connection
System Connection-DC 1. Measure the open circuit voltage 3. Fix a manual DC of the PV strings by using a breaker between the multimeter and confirm that it PV modules and the inverter. is less than the maximum input (Ur≥600Vdc,Ir≥40A) voltage of the inverter. - Page 10 System Connection-AC 1. Confirm that the voltage and according to the AC output frequency of the public grid is within specification of the inverter. the range of permissible voltage and 5. The inverter is equipped with an frequency by using a multimeter. integrated RCMU Type B (tested 2.
-
Page 11: Inverter Function
Inverter Function 1. DC-side insulation monitoring 7. GPRS 2. DC-side disconnection switch 8. WIFI 3. Status LEDs Note: The inverter is equipped with 4. AC-side disconnection relay either WiFi or GPRS communication 5. Grid monitoring 6. AC-side surge voltage protection 逆变器功能... -
Page 12: Labels And Markings On The Inverter
Labels and Markings on the Inverter Type Label: Bottom of Inverter: General Symbols 8. DC connection area 1. WEEE-mark 9. PE-connections 2. CE-mark 10. DC-Switch 3. CQC-mark 11. WIFI/GPRS module Safety Symbols 12. DRM 0 4. Warning: Hot Surfaces! 13. AC-plug 5. -
Page 13: Unpacking
Unpacking Proceed as follows: 4. Check all items for visible 1. Check the packaging for damages. damages. 5. Contact your supplier when 2. Contact your supplier in case items are missing or the inverter packaging is damaged. is damaged. Do not install a 3. - Page 14 Required Tools The following tools are required for the installation of the inverter: 1. Cable stripping tool for cables (e.g. PV-AZM) 2. Drill 3. Multimeter 4. Pencil 5. Screwdriver 6. Spanner 7. Hammer 8. Level 安装工具 安装逆变器需要使用以下工具: 1. 剥线钳(例如:PV-AZM型) 2. 冲击钻 3.
-
Page 15: Mounting The Inverter
Mounting the Inverter Note! Ensure the mounting place 3. Hang the inverter on the is strong enough to hold the screw. weight of the inverter. 4. Tighten the bolts to ensure that the inverter is securely fastened.. Proceed as follows: 1. - Page 16 min. 30 cm min. 30 cm min. 30 cm 297 mm 166 mm 275 mm SR4_5-6_0KTL-G3-IG_11_AA...
- Page 17 < 25 ° < +45 °C > +45 °C > - 20 °C < - 20 °C < 95 % > 95 % SR4_5-6_0KTL-G3-IG_11_AA...
-
Page 18: Ac- And Dc-Connection
AC-Connection - Requirements 1. Use suitable circuit breaker. 4. Observe values for wire 2. WARNING! Risk of fire! sizes. Î Do not connect any consumers 5. In France: Use a PE-connection to the AC-line. with a minimum cross section 3. Recommendation: Keep of 6 or 16 mm cable losses below 1 %. - Page 19 Connection of the AC Cable WARNING! Risk of electric shock! 6. Attach wires to AC-terminal. Î Deactivate AC-voltage when Green-yellow wire --> PE(Ground); connecting the AC-cable. Blue wire --> N(Neutral); Î Cable specification: 12AWG Brown wire --> L(Line). 0 V ? Proceed as follows: 7.
- Page 20 DC-Connection - Requirements 1. CAUTION! Risk of damaging the 4. The DC-ports can be inverter! connected: Install diodes in Î Ensure that the voltage and order to avoid reverse currents. < 600 current is below the specified 5. Cover PV-modules when working values.
- Page 21 PV Connection (PV Plugs) WARNING! Risk of electric shock! 3. Put swivel nut on cable. 6 - 7.5 mm Î The distance between inverter 4. Crimp cable on plug contact. and PV modules needs less than 5. Insert plug contact in plug. Pull on 30 meters.
-
Page 22: Connection Of The Wifi/Gprs Monitoring Module
Connection of the WIFI/GPRS Monitoring Module WARNING! Risk of electric shock! Î Do not connect the Photovoltaic modules or AC Grid. 1. Insert the WiFi/GPRS module into the corresponding connector at the bottom of the inverter. 2. Tighten up the screws. Ensure that the WiFi/GPRS module and inverter are connected securely. -
Page 23: Starting The Inverter
Starting the Inverter Before starting: Proceed as follows for • Make sure DC-switch is “OFF”. starting: • Make sure AC-switch is “OFF. 1. Connect AC-plug. • Make sure DC plugs are 2. Connect DC-plugs. connected. 3. Turn DC-switch to “ON”. 4. -
Page 24: Commissioning
WIFI Initialization • Select “User” in the login interface. Input the password (the default • Scan the QuickMark of password is111111 ) and enter the initialization interface . Samilportal APP below and download it into mobile phone. • Set the “Grid code” and “Date and time” in the initialization interface. •... - Page 25 WIFI初始化设置 • 在登录界面选择“个人用户”; • 扫描下面Samilportal APP二维码并 • 输入密码(密码为111111),进入“初始化设置”页面。 下载至手机。 • 在“初始化设置”页面依次设置“电网标准”及“日期与时间”, • 当逆变器的直流侧和交流侧通电后,逆变器LED红灯、绿灯、蓝灯开 按“√”确认,设置完成后,点击“完成”,结束初始化设置。 始交替闪烁; • 打开手机设置项,连接逆变器WiFi热点:Samil_xxxxxxxxxx 电网标准 标准 10:28 CZ-EN 50438 2017 年 03 月 12 日 10 : 28 Wi-Fi xxxxxxxxxx 电网标准 为逆变器10 Samil_xxxxxxxxxx 日期与时间 Wi-Fi 位序列号 完 成 与时间...
-
Page 26: Led Status
The LED Status LED Status Means Notes Red light and Green light and Blue light Wifi: the inverter is switched on for the first time, relative When the inverter is switched on for the flashing alternately. parameter need be set by APP. first time, the safety and time parameters GPRS: enter the China safety immediately. - Page 27 LED状态 闪烁方式 含义 备注 红绿蓝三色灯交替闪烁 WIFI:首次开机,需要通过APP设置相关参数 首次上电完成安规,时间等相关设置(包括自 GPRS:立即自动进入中国安规 动默认进入的安规模式)。 无通讯模块:两分钟后自动默认中国安规 绿灯闪烁 机器自检,等待开机 绿灯常亮 机器正常并网发电 红灯常亮 永久性故障 可重启逆变器,如还是红灯常亮,需要联系 客服。 红灯和蓝灯交替闪烁 市电故障 无市电,电网频率,电压超范围,请电工检查 市电情况。 红灯和绿灯交替闪烁 FAN故障 请联系山亿客服。 红灯闪两下,绿灯闪一下交替 RTC故障 重新通过APP设置时间。 红灯闪一下,蓝灯闪两下交替 ISO故障 请检查直流测线缆是否有问题。 红灯闪两下,蓝灯闪一下交替 GFCI故障 可重启逆变器,如还是红灯常亮,需要联系 客服。 红灯闪两下,蓝灯闪两下交替 PV电压异常 检查直流侧电压。 红灯闪烁 其他可恢复故障 可重启逆变器,如还是红灯常亮,需要联系...
-
Page 28: Monitoring Mode
Monitoring Mode The inverter can be monitored by 2. Remote Monitoring the local monitoring mode or remote Mode: monitoring mode: The inverter supports remote monitoring by connecting the GPRS 1. Local Monitoring Mode: module or WiFi module. User can For the inverter installed WIFI module, view the monitoring data as follows: user beside the inverter can view •... - Page 29 Local Monitoring Mode The Local Monitoring Mode is only • User can update the applicable to the inverter which has inverter software after been installed WiFi module. entering the “FW update” • User can view the inverter interface. operating status and power 主...
- Page 30 Remote Monitoring Mode • Make sure the inverter and GPRS module or WiFi module are • Scan the series number on the label of the inverter. Input the connected securely. password and click “Done” to finish creating plants. Î The module can only be installed as described on page 21. Create Plant Create Plant Serial...
- Page 31 远程监控模式 • 确保GPRS模块或WIFi模块与逆变器之间可靠连接。 • 扫描逆变器标贴上的序列号,输入密码,点击“确认”,电站即创建 Î 安装步骤详见P21。 完成。 快速创建电站 快速创建电站 序列号:扫描序列号 序列号:SR12345678 密 码: 密 码:123456 确 认 确 认 确 认 • 打开SamilPortal APP; • 在“模式设置”页面选择“远程模式”,进入登录界面。 扫描序列号 密码 • 在登录页点击“注册”,填写相关信息,点击“下一步”,进入“快 速创建电站”项。 验证码 注 册 1234 密码 手机号 用户后续可以在APP远程模式下登录查看电站及逆变器监控数据,还可以 ● ● ● ● ● ● 确认密码...
- Page 34 SR4_5-6_0KTL-G3-IG_11_AA...
-
Page 35: Warranty Card
Warranty Claim Fault Details Fault Code Fault Description Installer Name Signature Date Contact Details Phone For Office Use Email Remarks Site address with Post Code Decision Signature Date Address for delivery of replacement if different from above Feedback from Client Date of Receipt of Replacement Replacement Model and Serial Number System Details... - Page 38 SR4_5-6_0KTL-G3-IG_11_AA SR4_5-6_0KTL-G3-IG_11_AA Art No.: 614-04301-01...
Need help?
Do you have a question about the SolarRiver 4500TL-G3 and is the answer not in the manual?
Questions and answers