
Related Manuals for La Crosse Technology WS6862


Summary of Contents for La Crosse Technology WS6862
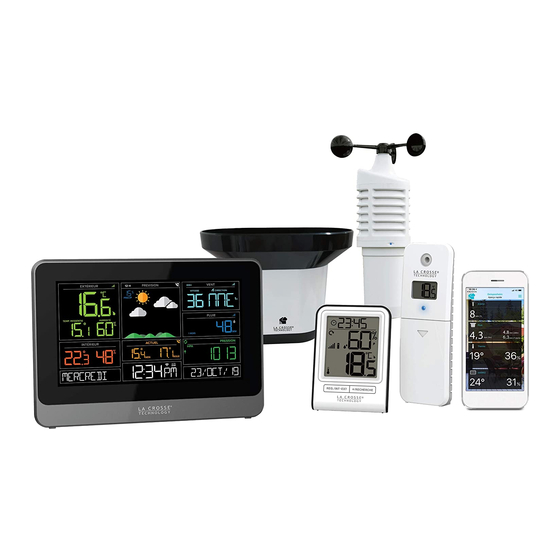
- Page 1 -FI PROFESSIONAL FI PROFESSIONAL WEATHER STATION STATION WITH FORECAST FORECAST...
- Page 2 MODEL: WS6862 MODEL: WS6862 STEP 1: POWER UP SENSORS AND STATIONS POWER UP SENSORS AND STATIONS SENSORS SENSORS SENSORS In any order, insert batteries into your Thermo In any order, insert batteries into your Thermo-Hygro, Wind, and Rain Sensors. Hygro, Wind, and Rain Sensors.
- Page 3 Bonus Display Weather Station LTV-DiD WS6862 Note: It may take up to 10 minutes for your sensor data to appear It may take up to 10 minutes for your sensor data to appear on your stations’ on your stations’ screen.
-
Page 4: Benefits Of Connecting To La Crosse View
GET YOUR STATION READY GET YOUR STATION READY Ensure your station’s Wi- Indicator is flashing. If it is not, press and flashing. If it is not, press and hold the Plus (+) and Minus ( ) and Minus (–) button down together until it begins flashing. This tells button down together until it begins flashing. - Page 5 Wind Direction Rainfall Date Indoor & Outdoor Temperature Indoor & Outdoor Humidity Feels Like Temperature 12-Hour Forecast Internet Time & Calendar Barometric Pressure Forecast Icons Daily Forecast His & Los % Chance of Precipitation Ability to Add Sensors Data Stream Technology STEP 3:...
-
Page 6: Basic Settings
MOUNT YOUR SENSORS THERMO-HYGRO Keep out of direct sunlight & ensure the sensor is well ventilated. We recommend mounting under a deck or eave facing north. WIND Ensure the sensor is mounted vertically, an unobstructed rooftop is ideal. Your Wind Sensor should be the tallest object in the area to avoid reduced wind speed values. -
Page 7: Rain Readings
• Hour • Minutes •Year • Month • Date • Date/Month or Month/Date • Fahrenheit/Celsius • Pressure Units: InHg / hPa • Pressure number setting • Wind Speed KMH or MPH • Merci Language: Whichever language is selected; the following instructions and weekday will be presented in that language. -
Page 8: Wind Readings
1 HOUR: The past one hour rain fall (12 consecutive 5 minute accumulated totals). 24 HOURS: Accumulated total from the last 24 consecutive 1 hour rainfall readings. Not a midnight to midnight value. This updates each hour. 7 DAYS: Accumulated total from the last 7 consecutive 24 hour rainfall readings. Updates at midnight each day. - Page 9 24 HOURS: Top speed in the past 24 hours. Not a midnight to midnight total. Updates each hour. 7 DAYS: Top speed in the past 7 consecutive days. Updates at midnight each day. Be sure time is set correctly 1 MONTH: Top speed in the current calendar month (i.e. January 1 - January 31). Note: Press the PLUS (+) button to view your past 11 monthly top speeds.
- Page 10 Reception Indicator: During the synchronization, the indicator will animate while searching for a signal. It will be solid when connected. TEMPERATURE/HUMIDITY READINGS Press the TEMP button to view indoor and outdoor HI | LO Temperature/Humidity records and Feels Like and Dew Point. Viewing order: •...
-
Page 11: Temperature Trend Arrows
TEMPERATURE TREND ARROWS The trend arrows update every 15 minutes and reflect changes greater than 1°C over the past hour. Up arrow: Temperature is rising Right arrow: Temperature is steady Down arrow: Temperature is falling FEELS LIKE TEMPERATURE Feels Like temperature indicates both Wind Chill and Heat index on stations with wind speed Feels Like Temperature shows Wind Chill: When the temperature is below 10°C, and there is an8 KMH sustained wind speed. -
Page 12: Pressure Reading
Not Connected: The Minimum and Maximum Temperatures will come from your outdoor Thermo-Hygro Sensor. Connected: The Minimum and Maximum Temperatures will come from Accu Weather. PRESSURE READING The Relative Pressure reading will come from the station. In the Settings Menu, select between Hecto Pascal (HPA) or Inches of Mercury (INHG) for unit readout, and even program specific pressure values if desired. - Page 13 The Moon Icon will show from 7pm to 7:00am if the forecast is Sunny or Partly Sunny. 1 2 H R 1 2 H R 1 2 H R 1 2 H R 1 2 H R 1 2 H R HOURLY AND DAILY FORECASTS When connected to the Internet, your station can display future forecast information.
-
Page 14: Adjustable Backlight
ADJUSTABLE BACKLIGHT Press the ECLAIRAGE button to adjust your backlight intensity from OFF to full brightness (5 levels). AUTO DIM Program your station to automatically dim during preselected times. 1. Hold the ECLAIRAGE button to enter Auto Dim Settings. 2. Press + or - button to adjust. 3. - Page 15 View ID numbers in station: Press and release the CAPTEUR button. The ID number and type will show on the bottom of the station. • Station • TH Sensor • Wind Sensor • Rain Sensor • Extra Sensor (if connected to station) Search for Individual sensors: 1.
- Page 16 1. Press and release the CAPTEUR button to view sensor type and ID. Press and release the CAPTEUR button to view sensor type and ID. Press and release the CAPTEUR button to view sensor type and ID. 2. Hold the MINUS (-) button to delete the sensor from the station. button to delete the sensor from the station.
-
Page 17: Buttons And Functions
WI-FI STATUS Press the REG. button to quickly view your Wi-Fi Status. ALL OK CONNECTED: Your Station is connected to your Wi-Fi and its data should be available in your La Crosse View app. CHECK APP: Check you La Crosse View app for notifications. LOST WIFI: Check your router and network connections. - Page 18 REG. Press to view Wi-Fi Status. Hold to enter Settings Menu CAPTEUR Press to toggle through “Extra Sensors” and Pressure. Hold to SUPPLEMENTAIRE add Sensors. CAPTEUR Press to view sensor ID numbers, then hold PLUS (+) to search, or hold MOINS (–) to remove. QUOTIDEN Press to see Daily/Hourly Forecast.
- Page 19 BONUS DISPLAY Your Bonus Station does not connect to La Crosse View and will need to be set manually: Settings Menu: 1. Hold the REG./INT-EXT button for 3 seconds to enter the Settings menu. 2. Press the +/RECHERCHE button to adjust settings. Hold to adjust quickly. 3.
-
Page 20: Wi-Fi Network Requirements
WIND (LTV-W1) • Wind Speed Range: 0 to 178 KMH (0 to 111 MPH) • Power Requirements: 2 “C” Batteries (sold separately) • Update Interval: Every 31 seconds for changes >0.7KMH, otherwise every 3 minutes to save battery life. • Dimensions: 18.03cm L x 18.03cm W x 47.16cm H (7.10" L x 7.10" W x 18.57" H) (with mounting bracket/pole) RAIN (LTV-R3) •... - Page 21 Android phones require Android OS with cellular or Wi-Fi service Android phones require Android OS with cellular or Wi WARNING: 1. This product contains a button This product contains a button battery. 2. If swallowed, it could cause severe injury or death in just 2 hours. If swallowed, it could cause severe injury or death in just 2 hours.
- Page 22 No part of this manual may be reproduced without written authorization of the manufacturer. RED DIRECTIVE 2014/53/EU Summary of the Declaration of Conformity: We hereby declare that this wireless transmission device does comply with the essential requirements of RED Directive 2014/53/EU LA CROSSE TECHNOLOGY 6 A RUE DU COMMERCE...
- Page 23 67118 GEISPOLSHEIM FRANCE...
Need help?
Do you have a question about the WS6862 and is the answer not in the manual?
Questions and answers