Table of Contents
Advertisement
Advertisement
Table of Contents

Subscribe to Our Youtube Channel
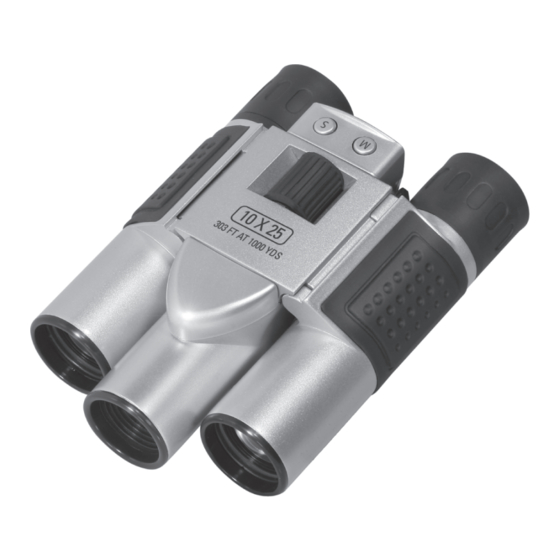
Summary of Contents for Vivitar Digital 10X25
-
Page 2: Table Of Contents
Table of Contents 1. Profile.......................1 1.1. Kit descriptions..................1 1.2. An introduction to the digital telescopic camera........1 1.3. LCD descriptions..................3 1.4. Relevant parameters..................3 2. Use of the digital telescopic camera..............4 2.1. Turn on/off....................4 2.2. Common shooting mode................4 2.3. Automatic shooting mode................5 2.4. -
Page 3: Profile
1.Profile 1.1.Kit descriptions System requirements Operating system: Windows98/WindowsME/Windows2000/Win dowsXP CPU: PII 200MHZ MMX or above Internal memory: 32M or more CD-ROM Display card: 2M or above USB interface Hard disk: 500M or more VGA or above monitor Please check if all the fittings have been supplied before using this product: 1) One digital telescopic camera;... -
Page 5: Lcd Descriptions
1.3. LCD display descriptions 20: Common shooting mode OF: urn off the digital camera s : Self-shooting mode c : Continuous shooting mode cp: Compression mode p: Non-compression mode ai: Video-taping function mode cl: Delete one photo ca: Delete all photos h : High definition format l : Low definition format f5: AC frequency 50Hz... -
Page 6: Use Of The Digital Telescopic Camera
LCD: 2 digits and letters Imaging speed: 12 pictures/second (network IP mode); 8 pictures/second (continuous shooting/short videotaping mode) Power source and management: A) Two Size-AAA alkaline battery B) The camera is turned off automatically after not being operated for 30 seconds C) Allows continuous shooting for 10 hours D) Alarm against low voltage of battery Total weight: about 271g (excluding batteries) -
Page 7: Automatic Shooting Mode
when you see the clearest image inside the binoculars to shoot a digital photo, which seems largely the same as the real one (pay special attention: as this system features a pixel level of 352X480, the image quality will differ slightly from what you observe). ØPress the shutter button to take a photo, the buzz gives a tick, meaning that the photo is taken;... -
Page 8: Functions
ØNotes: move your hands slowly and smoothly during the recording course. 3. Functions 3.1. Delete one photo: ØPress the Mode button, the LCD will display "cl"; ØPress the shutter button to select a photo, the LCD will blink; then press the shutter button again to confirm your selection, then the last photo will be deleted. -
Page 9: Non-Compression Mode
ØIn the compression mode, QCIF can take 243 photos. 3.6 Non-compression mode ØPress the mode button, LCD will display " p "; ØPress the shutter button to confirm; ØIn the non-compression mode, CIF can take about 20 photos; ØIn the non-compression mode, QCIF can take about 81 photos. 3.7 Shooting light source AC voltage frequency 50Hz mode ØPress the mode button, LCD will display "f5 ";... -
Page 10: Software Descriptions
computer until software is completely installed first. ØRestart your computer after completion of installation. 4.2 Software descriptions Save the currently selected photo; Ø Save all photos; Ø Pause previewing; Ø Start previewing Ø... -
Page 11: Setting Of Video Parameters
Capture a current photo – online shooting (Capture Ø Single); PC-CAMERA mode (PC-Camera): enter the PC Ø pickup head working mode; Photo album mode. Ø 4.3 Setting of video parameters ØLight source blinking frequency (De-flicker)—when the light source features AC 220V 50HZ, please select 50HZ; otherwise, choose 60HZ;... -
Page 12: Photo Downloading And Viewing
ØVideo color mode and resolution selection: 4.4 Photo downloading and viewing Connect the digital camera to your computer using the provided USB cable. Run the software application and follow the prompts and select “YES” to download stored photos. 4.5 File previewing Select the photo that you want to preview on the right side of the download interface, then the selected photo will be displayed on the left side in its real-life size, as shown below:... -
Page 13: File Storage
4.6 File storage Click to save your selected photo; Click to save all the photos. 4.7 Play an AVI file To download an AVI file (by the same method as that applied for downloading a photo), click the icon on the lower right side of the AVI file to play (your computer must be installed with some multi-media broadcasting software, such as Windows Media Player or Real Player Basic). -
Page 14: Photo Impression 4.0
Click to enter the pickup head working mode; Click to stop the pickup head working mode; Click to start real-time videotaping. Click to seize the current scene; 5. Photo Impression 4.0 You can use Photo Impression 4.0 to download and edit photos further. -
Page 15: Others
6. Miscellaneous 6.1 Precautions Please make sure all photos stored in the camera's memory are downloaded first,before you remove or change batteries as all data will be lost. 6.2. Trouble shooting Q: Press the startup button, but the digital telescopic camera does not work. -
Page 16: Protect Your Digital Telescopic Camera Properly
charge is not enough, please save the photos in the camera into your computer immediately, and also replace the batteries with new ones. 6.3. Protect your digital telescopic camera properly: The digital telescopic camera is a precision device, and must be kept and used carefully.


Need help?
Do you have a question about the Digital 10X25 and is the answer not in the manual?
Questions and answers
Were can i get hold of a usb cable?And do i need softwere to upload photos?