
Related Manuals for JVC SP-UXE15


Summary of Contents for JVC SP-UXE15
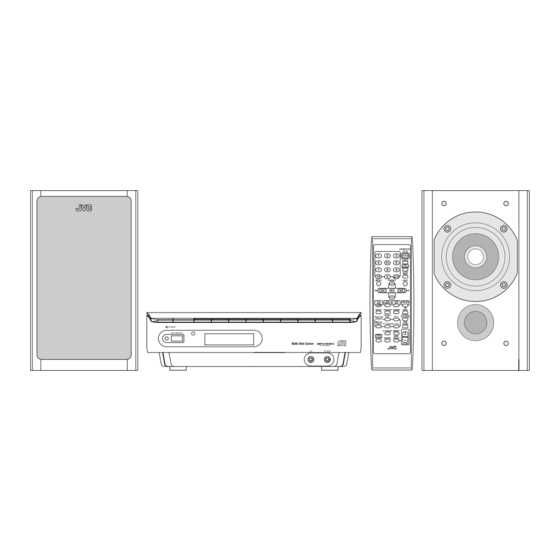
- Page 1 MICRO COMPONENT SYSTEM COMPACT COMPONENT SYSTEM UX-E15 — Consists of CA-UXE15 and SP-UXE15 INSTRUCTIONS LVT1471-001A...
- Page 2 IMPORTANT for the U.K. DO NOT cut off the mains plug from this equipment. If the plug fi tted is not suitable for the power points in your home or the cable is too short to reach a power point, then obtain an appropriate safety approved extension lead or consult your dealer.
-
Page 3: Safety Instructions
(Business users) European Union. If you wish to dispose of this product, please visit our web page www.jvc- europe.com to obtain information about the take-back of the product. [Other Countries outside the European Union] If you wish to dispose of this product, please do so in accordance with applicable national legislation or other rules in your country for the treatment of old electrical and electronic equipment. -
Page 4: Table Of Contents
Step 2: Prepare the Remote Control ...4 Step 3: Hook Up ...5 To assemble and connect the AM loop antenna ...7 To connect the speaker cords ...7 Before Operating the System ...8 Daily Operations — Playback — ...9 Listening to the Radio ...10 Playing Back a Disc ...11... -
Page 5: Introduction
Introduction Thank you for purchasing the JVC Micro Component System. We hope it will be a valued addition to your home, giving you years of enjoyment. Be sure to read this instruction manual carefully before operating your new stereo system. -
Page 6: How To Read This Manual
Others • Should any metallic object or liquid fall into the System, unplug the AC power cord and consult your dealer before operating any further. DO NOT disassemble the System since there are no user serviceable parts inside. • If you are not going to operate the System for an extended period of time, unplug the AC power cord from the wall outlet. -
Page 7: Getting Started
• FM antenna (1) • AM loop antenna (1) • Speaker cords (2) • Remote control (1) • Batteries (2) If any item is missing, consult your dealer immediately. Step 2: Prepare the Remote Control Insert the batteries into the remote control by matching the polarity (+ and –) correctly. -
Page 8: Step 3: Hook Up
Step Hook Up If you need more detailed information, see page 7. Illustrations of the input/output terminals below are typical examples. When you connect other components, refer also to their manuals since the terminal names actually printed on the rear may vary. Turn the power off to all components before connections. - Page 9 FM antenna (supplied) Extend it so that you can obtain the best reception. Speaker cord (supplied) Connect the striped side to the black (−) terminal. AM loop antenna (supplied) Turn it until the best reception is obtained. Speaker cord (supplied) Connect the non-striped side to the red (+) terminal.
-
Page 10: To Assemble And Connect The Am Loop Antenna
To connect the AM loop antenna Make sure to connect the wire correctly. • If the AM loop antenna wire or speaker cords are covered with vinyl, remove the vinyl to expose the tip of the antenna by twisting the vinyl. -
Page 11: Before Operating The System
Before Operating the System The indications on the display teach you a lot of things while you are operating the System. Before operating the System, be familiar with when and how the indicator illuminates on the display. Indications on the main display While listening to radio: While selecting USB: Band... -
Page 12: Daily Operations - Playback
Daily Operations Remote control Numeric buttons DISPLAY 4,1,7, 33, ¢ STANDBY/ON Turn on the power. The STANDBY lamp on the main unit turns off. • Without pressing STANDBY/ON the System turns on by pressing one of the source selecting buttons in the next step. -
Page 13: Listening To The Radio
To display the clock indication While the System is turned on... • Press the button again, to return to the source information. Listening to the Radio To select the band (FM or AM) To tune in to a station While FM or AM is selected... Remote control: Main unit: 1 sec. -
Page 14: Playing Back A Disc
To tune in to a preset station Select a band (FM or AM). Select a preset number for the station you store. • You can also use the PRESET (UP/DOWN) Playing Back a Disc This System can play back the following discs— regular CD and CD-R/CD-RW (recorded either in the audio CD, MP3, or WMA format). -
Page 15: Playing Back From The Usb Memory Or Digital Audio Player
To locate a particular portion While playing a disc, press and hold until the portion you want is reached. Fast-reverses the track. Fast-forwards the track. To locate a track directly and start play Remote ONLY Examples: To select track number 5, press 5. -
Page 16: Playing Back From The Pc
For MP3/WMA playback According to the MP3/WMA playback mode,4 / ¢ or number buttons work for the group selection or the track selection. Examples: When the MP3 play back mode is “GROUP.” Total group number GROUP mode Total track number You can change the MP3/WMA playback mode by pressing MP3/ WMA PLAY MODE. -
Page 17: Playing Back From Other Equipment
Connect the System to the PC using a USB cable (not supplied). (rear panel) USB cable • Use “USB series A plug to B plug” cable. The USB drivers are installed automati- cally. To play back sounds on the PC Refer to the manuals supplied with the sound reproducing application installed in the PC. - Page 18 To show Radio Data System signals on the display Select an FM station with Radio Data System signals. If a station contains the signals, “PS” appears on the display. Station Frequency PS (Program Service): While searching, “PS” alternately appear on the display.
- Page 19 To stop searching at any time during the process, press PTY SEARCH to stop search operation. Tune in again into your desired FM station. If no program is found in the 30 preset stations, “NOT FOUND” appears on the display and returns to the previous station.
- Page 20 How Enhanced Other Networks works If no station is broadcasting the type of program you have selected: • The unit continues to receive the current station. • When the selected type of program starts on a different station, the unit automatically switches to the station and the indicator on the display starts blinking.
-
Page 21: Daily Operations - Sound & Other Adjustments
Daily Operations Remote control DISPLAY ¢ DIMMER A.STANDBY AHB PRO Main unit 4 / ¢ — Sound & Other Adjustments Adjusting the Volume You can adjust the volume level from level 0 (VOLUME-MIN) to level 31 (VOLUME-MAX). Remote control: CANCEL SET/RESUME CLOCK/TIMER SLEEP... -
Page 22: Remote Only
To adjust the treble BASS TREBLE Canceled Changing the Display Brightness — DIMMER Remote ONLY You can dim the display window. DIMMER ON DIMMER OFF (Canceled) memo • If you press the button while the system is turned off, the clock indication turns off and the system goes into the ECO mode, reducing the standby power consumption. -
Page 23: Remote Only
Turning Off the Power Automatically Remote ONLY To turn off the System after playback is over — Auto Standby When Auto Standby is in use, the A.STANDBY indicator lights on the display. When the disc playback stops, the A.STANDBY indicator starts fl ashing. If no operation is done for about 3 minutes while the indicator is fl... -
Page 24: Advanced Disc/Usb Memory/Dap Operations
Advanced Disc/USB Memory/DAP Operations Remote control Numeric buttons PROGRAM REPEAT Programming the Playing Order—Pro- gram Play Remote ONLY You can arrange the playing order of the tracks (up to 32) before you start playback. • You can repeat all the programmed tracks by pressing REPEAT. -
Page 25: Remote Only
For MP3/WMA To skip a truck: To pause To release, press again. To check the programmed contents While the PRGM indicator is shown on the display and before play back... In the reverse order. In the programmed order. To modify the program While the PRGM indicator is shown on the display... -
Page 26: Remote Only
Playing Repeatedly — Repeat Play Remote ONLY You can repeat playback. Canceld (No indication) Repeats the current MP3/WMA track. (Track mode) MP3/WMA (Group mode) Repeats all the tracks. MP3/WMA (Track mode) Repeats all the tracks MP3/WMA in the current group (Group mode) (for MP3/WMA playback mode... -
Page 27: Timer Operations
Timer Operations Remote control 4 / ¢ Setting the Timer Remote ONLY Using Daily Timer, you can wake up with music, etc. • To exit from the timer setting, press CLOCK/ TIMER repeatedly until the current status (normal operation) is displayed. •... - Page 28 4 Set the volume. • “SET OK” appears on the display fol- lowed by the timer settings you have entered. Turn off the System (on standby) if you have set the timer with the System turned on. STANDBY/ON To turn off the Timer after its setting is done Since Daily Timer is activated at the same time everyday, you may need to cancel it on some particular days.
-
Page 29: Additional Information
Additional Information Learning More about This System Daily Operations—Playback (see pages 9 to 17) Listening to the Radio: • If you store a new station into an occupied preset number, the previously stored station in that number will be erased. •... -
Page 30: Troubleshooting
Signals cannot reach the remote sensor. More closer to the System. The batteries are exhausted. No sound is heard from the speakers. Speaker connections are incorrect or loose (see page 7). Headphones are connected (see page 9). Radio Operations: Hard to listen to broadcasts because of noise (see pages 4 to 7). -
Page 31: Specifi Cations
Input Sensitivity/Impedance (1 kHz) AUX IN LEVEL1 500 mV/47 kΩ LEVEL2 250 mV/47 kΩ USB Audio ver. 1.1 USB Host ver. 1.1 Speaker terminals 6 Ω - 16 Ω Phones 32 Ω - 1 kΩ 15 mW/ch output into 32 Ω CD Player... -
Page 32: Parts Index
Parts Index Refer to the pages to see how to use the buttons and controls. Remote control 10-12, 21 10, 19 10-13, 19, 21, 22, 24, 25 21, 22 15-17 11, 13 Main unit 11, 13 9-14 10-13 9 1212 Remote sensor 9, 25... - Page 33 © 2005 Victor Company of Japan, Limited 0805NYMCREBET...
Need help?
Do you have a question about the SP-UXE15 and is the answer not in the manual?
Questions and answers