JVC UX-EP25 Instructions Manual
Jvc micro component system instructions
Hide thumbs
Also See for UX-EP25:
- Instructions manual (39 pages) ,
- Instructions manual (35 pages) ,
- Instructions manual (35 pages)
Table of Contents
Advertisement
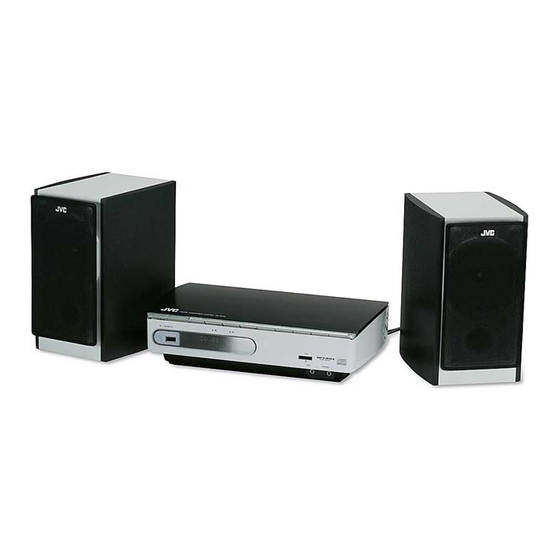
MICRO COMPONENT SYSTEM
COMPACT COMPONENT SYSTEM
UX-EP25
— Consists of CA-UXEP25 and SP-UXEP25
For Customer Use:
Enter below the Model No. and Serial No.
which are located either on the rear, bot-
tom or side of the cabinet. Retain this
information for future reference.
INSTRUCTIONS
Model No.
Serial No.
LVT1598-001C
[J]
Advertisement
Table of Contents

Subscribe to Our Youtube Channel
Related Manuals for JVC UX-EP25


Summary of Contents for JVC UX-EP25
- Page 1 MICRO COMPONENT SYSTEM COMPACT COMPONENT SYSTEM UX-EP25 — Consists of CA-UXEP25 and SP-UXEP25 For Customer Use: Enter below the Model No. and Serial No. which are located either on the rear, bot- tom or side of the cabinet. Retain this information for future reference.
- Page 2 Connect the equipment into an outlet on a circuit different from that to which the receiver is connected. Consult the dealer or an experienced radio/TV technician for help. CAUTION Changes or modifi cations not approved by JVC could void the user’s authority to operate the equipment.
-
Page 3: Note To Catv System Installer
(For U.S.A.) For the main unit: Declaration of Conformity Model Number: UX-EP25 Trade Name: Responsible Party: JVC Americas Corp. Address: 1700 Valley Road, Wayne New Jersey 07470 Telephone Number: 973-317-5000 This device complies with Part 15 of FCC Rules. Operation is subject to the following two... - Page 4 IMPORTANT FOR LASER PRODUCTS / IMPORTANT POUR PRODUITS LASER 1. CLASS 1 LASER PRODUCT 2. CAUTION: Do not open the top cover. There are no user serviceable parts inside the unit; leave all servicing to qualifi ed service personnel. 3. CAUTION: (For U.S.A.) Visible and/or invisible class II laser radiation when open. Do not stare into beam.
-
Page 5: Table Of Contents
Contents Introduction ...2 Precautions ...2 How to Read This Manual ...3 Getting Started ...4 Step 1: Unpack ...4 Step 2: Prepare the Remote Control ...4 Step 3: Hook Up ...5 To assemble and connect the AM loop antenna ...7 To connect the speaker cords ...7 Before Operating the System ...8 Daily Operations—... -
Page 6: Introduction
Introduction Thank you for purchasing the JVC Micro Component System. We hope it will be a valued addition to your home, giving you years of enjoyment. Be sure to read this instruction manual carefully before operating your new stereo system. -
Page 7: How To Read This Manual
Others • Should any metallic object or liquid fall into the System, unplug the AC power cord and consult your dealer before operating any further. DO NOT disassemble the System since there are no user serviceable parts inside. • If you are not going to operate the System for an extended period of time, unplug the AC power cord from the wall outlet. -
Page 8: Getting Started
Getting Started Step 1: Unpack the package and check the accessories. Step 2: Prepare the remote control. Step 3: Hook up the components such as AM/FM antennas, speakers, etc. (see pages 5 to 7). Finally plug the AC power cord. Now you can operate the System. -
Page 9: Step 3: Hook Up
Step Hook Up If you need more detailed information, see page 7. Illustrations of the input/output terminals below are typical examples. When you connect other components, refer also to their manuals since the terminal names actually printed on the rear may vary. Turn the power off to all components before connections. - Page 10 FM antenna (supplied) Extend it so that you can obtain the best reception. Speaker cord (supplied) Connect the black cord to the black (−) terminal. AM loop antenna (supplied) Turn it until the best reception is obtained. Speaker cord (supplied) Connect the white cord to the red (+) terminal.
-
Page 11: To Assemble And Connect The Am Loop Antenna
To assemble and connect the AM loop antenna To assemble the AM loop antenna To connect the AM loop antenna Make sure to connect the wire correctly. • If the AM loop antenna wire or speaker cords are covered with vinyl, remove the vinyl to expose the tip of the antenna by twisting the vinyl. -
Page 12: Before Operating The System
Before Operating the System The indications on the display teach you a lot of things while you are operating the System. Before operating the System, be familiar with when and how the indicator illuminates on the display. Indications on the main display While listening to radio: While selecting USB: Band... -
Page 13: Adjust The Volume
Daily Operations Remote control Numeric buttons DISPLAY 4,1,7, 33, ¢ STANDBY/ON Turn on the power. The STANDBY lamp on the main unit turns off. • Without pressing STANDBY/ON the System turns on by pressing one of the source selecting buttons in the next SET/RESUME step. -
Page 14: Listening To The Radio
To display the clock indication While the System is turned on... • Press the button again, to return to the source information. Listening to the Radio To select the band (FM or AM) USB AUDIO To tune in to a station While FM or AM is selected... -
Page 15: Playing Back A Disc
To tune in to a preset station Select a band (FM or AM). USB AUDIO Select a preset number for the station you store. • You can also use the PRESET Playable media and fi les This system can playback following types of media and fi... -
Page 16: Playing Back From Ipod
For information on operating the iPod, see the iPod instruction manual. • JVC is not responsible for any loss of or damage to iPod that might result from the use of this product. • When you connect your iPod to the cable, make sure it connects all the way in. -
Page 17: Playing Back From The Usb Mass Storage Class Device
When disconnecting the iPod, make sure that the System is turned off. To remove the connector from your iPod, squeeze the buttons on the sides and pull. To playback sounds on the iPod To start: To pause: To select a track Decrease the track numbers Increase the track numbers Search... - Page 18 To select a track/group* Decrease the track/group* numbers. Increase the track/group* numbers. * For details about the group selection, see “For MP3/WMA playback” on this page. For MP3/WMA playback According to the MP3/WMA playback mode, 4 / ¢ or number buttons work for the group selection or the track selection.
-
Page 19: Playing Back From The Pc
Resume Play for MP3/WMA If you press 7 while playing MP3/WMA, the number of the track where you have stopped playback will be memorized by the unit. By pressing CD 6 or USB MEMORY 6, you can start playback again from the beginning of the same track. -
Page 20: Playing Back From Other Equipment
Playing Back from Other Equipment To connect other equipment By using a stereo mini plug cord (not supplied), you can connect other equipment with analog audio output jacks, such as Digital Audio Player, a TV, etc. Stereo mini plug cord (not supplied) Portable audio device, Game machine, etc. -
Page 21: Daily Operations- Sound & Other Adjustments
Daily Operations Remote control DISPLAY ¢ DIMMER A.STANDBY AHB PRO Main unit 4 / ¢ — Sound & Other Adjustments Adjusting the Volume You can adjust the volume level from level 0 (VOLUME-MIN) to level 30 (VOLUME-MAX). Remote control: CANCEL SET/RESUME CLOCK/TIMER SLEEP... -
Page 22: Changing The Display Brightness - Dimmer
To adjust the treble BASS TREBLE Canceled Changing the Display Brightness — DIMMER Remote ONLY You can dim the display window. DIMMER ON DIMMER OFF (Canceled) Setting the Clock Remote ONLY Without setting the built-in clock, you cannot use the Daily Timer and sleep Timer (see page 23). •... -
Page 23: Turning Off The Power Automatically
Turning Off the Power Automatically Remote ONLY To turn off the System after playback is over — Auto Standby This function works only when the source is CD. A.STANDBY Canceled When Auto Standby is in use, the A.STANDBY indicator lights on the display. When the disc playback stops, the A.STANDBY indicator starts fl... -
Page 24: Advanced Disc/Usb Mass Storage Class Device Operations
Advanced Disc/USB mass storage class device Operations Remote control Numeric buttons PROGRAM REPEAT Programming the Playing Order — Pro- gram Play Remote ONLY You can arrange the playing order of the tracks (up to 32) before you start playback. • You can repeat all the programmed tracks by pressing REPEAT. -
Page 25: Playing At Random - Random Play
To check the programmed contents While the PRGM indicator is shown on the display and before play back... In the reverse order. In the programmed order. To modify the program While the PRGM indicator is shown on the display and before play back... To erase the last step: To add steps in the program: Repeat Step 2 on page 20. -
Page 26: Playing Repeatedly - Repeat Play
Playing Repeatedly — Repeat Play Remote ONLY You can repeat playback. Canceld (No indication) Repeats the current MP3/WMA track. (Track mode) Repeats all the tracks MP3/WMA in the current group (Group mode) (for MP3/WMA playback mode in “GROUP” only). Repeats all the tracks. MP3/WMA... -
Page 27: Timer Operations
Timer Operations Remote control 4 / ¢ Setting the Timer Remote ONLY Using Daily Timer, you can wake up with music, etc. • To exit from the timer setting, press CLOCK/ TIMER repeatedly until the current status (normal operation) is displayed. •... - Page 28 4 Set the volume. • “SET OK” appears on the display fol- lowed by the timer settings you have entered. Turn off the System (on standby) if you have set the timer with the System turned on. STANDBY/ON Display is turned off. The STANDBY lamp blinks slowly until the setting time comes.
-
Page 29: Additional Information
Additional Information Learning More about This System Daily Operations—Playback (see pages 9 to 16) Listening to the Radio: • If you store a new station into an occupied preset number, the previously stored station in that number will be erased. •... -
Page 30: Troubleshooting
To remove the speaker grilles Troubleshooting If you are having a problem with your System, check this list for a possible solution before calling for service. General: Adjustments or settings are suddenly canceled before you fi nish. There is a time limit. Repeat the procedure again. -
Page 31: Maintenance
Maintenance To get the best performance of the System, keep your discs, and mechanism clean. Handling discs • When removing the disc from its case, hold it at the edge while pressing the center hole lightly. • Do not touch the shiny surface of the disc, or bend the disc. -
Page 32: Parts Index
Parts Index Refer to the pages to see how to use the buttons and controls. Remote control 9, 24 18, 21, 23, 24 10-12, 20 10, 15, 16, 18, 23, 24 18, 23, 24 10, 18 10-14, 18, 21 23, 24 11, 13, 20, 21 10, 11, 13, 15, 16, 20, 21... - Page 33 TO OUR VALUED CUSTOMER THANK YOU FOR PURCHASING THIS JVC PRODUCT. WE WANT TO HELP YOU ACHIEVE A PERFECT EXPERIENCE. NEED HELP ON HOW TO HOOK UP? NEED ASSISTANCE ON HOW TO OPERATE? NEED TO LOCATE A JVC SERVICE CENTER?
-
Page 34: Limited Warranty
WHAT WE WILL DO: If this product is found to be defective within the warranty period, JVC will repair or replace defective parts with new or rebuilt equivalents at no charge to the original owner. Such repair and replacement services shall be rendered by JVC during normal business hours at JVC authorized service centers. - Page 35 © 2006 Victor Company of Japan, Limited 0706NYMCREBET...
Need help?
Do you have a question about the UX-EP25 and is the answer not in the manual?
Questions and answers