Table of Contents
Advertisement
Quick Links
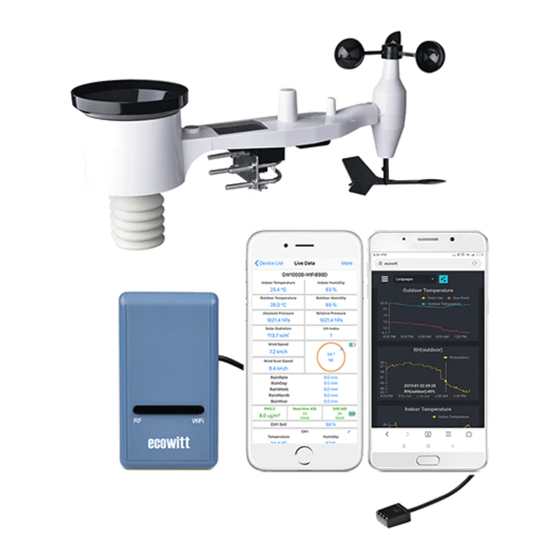
GW1001 WIFI WEATHER STATION
with 7-In-1 Solar Powered Outdoor Sensor Array
Operation Manual
Model: GW1001
Thank you for purchasing this GW1001 Wi-Fi Weather Station. Your sensor
data will be available on your local Wi-Fi network and the Internet.
This manual will guide you, step-by-step, through setting up your weather
station and gateway, and understanding the operation of your weather station.
Use this manual to become familiar with your professional weather station
and save it for future reference.
Note: The stainless steel pole is not included in the package.
1
Advertisement
Table of Contents

Related Manuals for ECOWITT GW1001


Summary of Contents for ECOWITT GW1001
- Page 1 7-In-1 Solar Powered Outdoor Sensor Array Operation Manual Model: GW1001 Thank you for purchasing this GW1001 Wi-Fi Weather Station. Your sensor data will be available on your local Wi-Fi network and the Internet. This manual will guide you, step-by-step, through setting up your weather station and gateway, and understanding the operation of your weather station.
-
Page 2: Table Of Contents
ATEWAY ONFIGURATION 5.2 A ................23 DDING WEATHER SERVICES 5.3 E ..................27 COWITT EATHER 5.3.1 Viewing data on ecowitt.net..............28 5.4 W ................31 EATHER NDERGROUND 5.4.1 WU Dashboard vs Live Data..............32 5.5 C ..............33 ALIBRATION OR AIN TOTALS 5.5.1 Calibration of barometric pressure settings........... - Page 3 5.9 D ....................40 EVICE LIST 5.10 M ................40 ANAGE UNDERGROUND 5.11 U ..................... 41 ETTINGS 5.12 M ..................41 ANAGE COWITT 5.13 V ........... 43 IEWING DATA ON WUNDERGROUND 6 MAINTENANCE....................47 7 TROUBLESHOOTING GUIDE................ 49 8 SPECIFICATIONS....................54 9 WARRANTY INFORMATION.................56...
-
Page 4: Unpacking
2 Unpacking Open your weather station box and inspect that the contents are intact (nothing broken) and complete (nothing missing). Inside you should find the following: Item Description USB Wi-Fi Gateway Cable clip USB extension cable for powering the gateway Outdoor Sensor Body with built-in: Thermo-hygrometer / Rain Gauge / Wind Speed Sensor/ Wind Direction Sensor, Light and UV sensor, Solar panel... -
Page 5: Overview
3 Overview 3.1 USB Gateway Figure 1: Wi-Fi Gateway 3.2 Features USB Wi-Fi Gateway Attached temperature, humidity and atmospheric pressure 3-in-1 probe sensor. Collects sensor data from various supported wireless sensors. Additional/optional sensors: Up to 8 WH31 multi-channel temperature and humidity sensors ... - Page 6 Stores data for past one year at 30-minute intervals Note: All the optional sensors can all be found on our website: www.ecowitt.com. Make sure to select the model of the units with the same RF frequency as your gateway (the frequency is different for various countries because of regulations).
- Page 7 To view and record all the sensors data remotely, we recommend you to use the Ecowitt server. Outdoor Sensor Package Outdoor temperature and humidity Wind speed, gust speed, and wind direction Rainfall rate and totals for day, week, month, and year ...
-
Page 8: Set Up Guide
4 Set up Guide To complete assembly you will need a Philips screwdriver (size PH0) and a wrench (size M6; included in package). Note: We suggest you assemble all components of the weather station, including gateway in one location so you can easily test functionality. -
Page 9: Install U-Bolts And Metal Plate
1. Wind Speed cups 7. Antenna 2. Wind Vane 8. U-Bolts 3. Thermo- and hygro-meter sensors 9. Battery compartment door 4. Rain collector 10. Reset button 11. LED (red) to indicate data 5. Bubble level transmission 6. Solar panel 12.Light sensor and UV sensor Table 2: Sensor assembly detailed items 4.1.1 Install U-bolts and metal plate Installation of the U-bolts, which are in turn used to mount the sensor... -
Page 10: Install Wind Vane
Figure 4: U-Bolts and nuts installed The plate and U-Bolts are not yet needed at this stage but doing this now may help avoid damaging wind vane and wind speed cups later on. Handling of the sensor package with wind vane and speed cups installed to install these bolts is more difficult and more likely to lead to damage. -
Page 11: Install Wind Speed Cups
4.1.3 Install wind speed cups Push the wind speed cup assembly onto the shaft on the opposite side of the wind vane, as shown in Figure 6 on the left side. Tighten the set screw, with a Philips screwdriver (size PH0), as shown on the right side. Make sure the cup assembly can rotate freely. -
Page 12: Mount Assembled Outdoor Sensor Package
Note: If LED does not light up or is on permanently, make sure the battery is inserted the correct way and inserted fully, starting over if necessary. Do not install the batteries backwards as it may permanently damage the outdoor sensor. Note: We recommend Lithium batteries for cold weather climates, but alkaline batteries are sufficient for most climates. - Page 13 Figure 8: Sensor package mounting diagram The mounting plate will slide into a slot on the bottom of the sensor package and then you can provisionally insert the U-Bolts from the other side through the holes provided holes. Next place a nut on each of the four ends of the U-Bolts and tighten by hand several turns so they will not fall off.
-
Page 14: Reset Button And Transmitter Led
charging internal capacitors. Secondly it causes a zero reading for wind direction to correspond to due NORTH, as is customary. This orientation is correct for installations in the northern hemisphere. If you are installing in the southern hemisphere, the correct orientation to achieve the same optimal positioning is to have the “WEST”... -
Page 15: Best Practices For Wireless Communication
Figure 9: Reset button and Transmitter LED location 4.2 Best Practices for Wireless Communication Wireless (RF) communication is susceptible to interference, distance, walls and metal barriers. We recommend the following best practices for trouble free wireless communication between both sensor packages and the gateway: Indoor sensor placement: The sensor will have the longest reach for its ... - Page 16 Metal Barriers. Radio frequency will not pass through metal barriers such as aluminum siding or metal wall framing. If you have such metal barriers and experience communication problems, you must change the placement of sensor package and or gateway. The following table shows different transmission media and expected signal strength reductions.
-
Page 17: Wi-Fi Gateway Introduction
4.3 Wi-Fi Gateway Introduction See Figure 10 to help you identify elements of the gateway. Figure 10: Gateway Introduction Wi-Fi Configure/Reset Button 2. RF Status Indicator Light (Blue) 3. Wi-Fi Status Indicator Light (Red) 4. USB Connector for system power supply 5. -
Page 18: Button Functions
On (steady): indicates connected to Wi-Fi network; network communication normal and data uploaded to configured weather service(s) successfully. Off (steady): Wi-Fi connection failed. Flash (slowly), indicates connected to Wi-Fi network; network communication normal, but upload to one or more configured weather services failed. -
Page 19: Publish To Internet Weather Services
Site: Ecowitt Weather https://www.ecowitt.net Ecowitt’ s new weather server that can host a bunch of sensors that other services don’t support at this time. Table 5: Supported weather services 5.1 Gateway Wi-Fi Configuration The gateway can function as an independent Wi-Fi access point during Wi-Fi configuration. - Page 20 2. Connect your gateway with the included USB extension cable and then plug your gateway into an available USB port that supplies power and ensure it is in Wi-Fi configuration mode (red LED flashing fast). If it is not, follow the procedure to put it in that mode (hold down button for about 5 seconds).
- Page 21 7. For Android version: Enter your preferred Wi-Fi SSID (network name) and security password. You can set the uploading to weather servers (Ecowitt Weather / Weather Underground / Weather Cloud / WOW / Customized Website) on this page or do that after the Wi-Fi configuration done.
- Page 22 Figure 12: Live Data screen Note: If it displays a blank screen on the Device List instead of the “Live Data” screen, please check the following: Wait for 1-2 minutes and check whether the device will appear and go to the “Live Data” screen. ...
-
Page 23: Adding Weather Services
Check whether you have used the 2.4GHz band Wi-Fi network only (dual band is not supported) Try to turn off your mobile data/cellular data. Exit the app and close all the applications in process, then reopen the WS View app and back to the Device List If still not work, contact the customer service for support ... - Page 24 Figure 13: Device List screen On the “Live Data” screen, press the “More” button in the upper right and select “Weather Services” from the menu.
- Page 25 Figure 14: Live Data screen with settings menu Navigate to the weather service you wish to configure by pressing “Next” and enter the appropriate data.
- Page 26 Figure 14: Weather Services uploading setting screen...
-
Page 27: Ecowitt Weather
5.3 Ecowitt Weather It’s recommended to use the Ecowitt Weather server to monitor and record your sensors data. You may do so as the following tips: On the ecowitt.net uploading page, enable the ON button (displayed blue) and set the uploading interval time. -
Page 28: Viewing Data On Ecowitt.net
It only supports setting the units and language on the WS View app. To use the full settings, please visit the ecowitt website on your browser or on a computer. If you could not register on the WS View app, please go to the website to register and add the device. - Page 29 Note: If you want to share your station data with other users, you may use the Share option under the Menu to create a share link. It will show a page such as this, where you can look at today’s data and historical data as well.
- Page 30 Graph display List display...
-
Page 31: Weather Underground
Weather Map Email Alerts 5.4 Weather Underground If you are planning to use wunderground.com you must have an account and register a (new) personal weather station. You may do so on the Wunderground uploading page in the WS View application:... -
Page 32: Wu Dashboard Vs Live Data
Press Register at Wunderground.com and finish the registration on the page (you may choose “other” when selecting device hardware). Take note of the PWS identifier (ID) and the password that will be generated for you. Back to the app and input the Station ID and Key. Press Save. -
Page 33: Calibration Or Rain Totals
5.5 Calibration or Rain totals When on the “Live Data” screen, you can press the “More” button (upper right) to enter the calibration screen or the rain totals screen. When you select “Calibration” you can change sensor calibration values on the next screen. - Page 34 For this procedure we will get the most precise results if our display for pressure is in hPa units. Even if you do not want to use those units eventually, set the app to use them for now. Determine the altitude, or elevation above sea level, of your station’s gateway.
- Page 35 higher than absolute pressure) of this number will be our “REL PRESS OFFSET” value. Use the settings procedure to increase REL by +1.6 (nearest rounded value we can input). Now we need a reliable reference for pressure at sea level. Locate the official identifier for the nearest airport.
-
Page 36: Registering With And Using Wunderground Com
until the ABS pressure reads identical. You would then still adjust “REL barometer” until it displays the value from the reference airport. This procedure would also produce the correct relative pressure, but due to a precise calibration of the absolute pressure, it too is correct. The first procedure above generally works quite well, but for stations at fairly high altitudes (e.g. - Page 37 Visit Wunderground.com and click Join as the right top arrow indicates and select the Sign up for free option. Click More and select Add Weather Station to register your station...
- Page 38 Click verify location and fill out the form. After submitting the form, you will see the following:...
-
Page 39: Device Settings
5.7 Device Settings On Live Data page, press More and select Device Settings to set the following: Select sensor type Set time zone Reboot Device Reset to Factory Settings 5.8 Sensor ID On Live Data page, press More and select Sensor ID to set the following: View sensor ID, signal bar and battery power condition Register the sensor when offline Enable or disable the sensor... -
Page 40: Device List
5.9 Device list When on WU Dashboard screen, you can press the “Menu” button (upper right) and select Device List to view all your devices. You can press your device to view or modify the settings. Note: This function requires that your phone and the console is using the same network. -
Page 41: Unit Settings
You can set your desired display units by selecting “Unit Settings” on the submenu: 5.12 Manage Ecowitt Once you created your ecowitt account successful on the WS View app, you may select “Manage Ecowitt” on the submenu to manage your device. - Page 42 You may view your weather station data by pressing your device on this screen:...
-
Page 43: Viewing Data On Wunderground Com
5.13 Viewing data on wunderground.com You can also observe your weather station’s data by using the wunderground.com web site. You will use a URL like this one, where your station ID replaces the text “STATIONID”: http://www.wunderground.com/personal-weather-station/dashboard?ID=ST ATIONID It will show a page such as this, where you can look at today’s data and historical data as well: There are also some very useful mobile apps. - Page 44 WU Storm: iPad and iPhone application for viewing radar images, animated wind, cloud coverage and detailed forecast, and PWS station data https://itunes.apple.com/us/app/wu-storm/id955957721...
- Page 45 Weather Underground: Forecast: iOS and Android application for forecasts https://itunes.apple.com/us/app/weather-underground-forecast/id486154 https://play.google.com/store/apps/details?id=com.wunderground.androi d.weather&hl=en PWS Weather Station Monitor: View weather conditions in your nei ghborhood, or even right in your own backyard. Connects to wundergr ound.com...
- Page 46 https://itunes.apple.com/us/app/pws-weather-station-monitor/id713705929...
-
Page 47: Maintenance
6 Maintenance The following steps should be taken for proper maintenance of your station Clean Rain Gauge Check the rain gauge every 3 months. Rotate the funnel counter-clockwise and lift it up. Clean the funnel and bucket with a damp cloth to remove any dirt, debris and insects. - Page 48 Replacing Batteries Regularly Batteries of the outdoor sensor array need to be replaced every 1-2 years for environmental friendly. In serious environments, check the batteries every 3 months and apply a corrosion preventing compound(not included) on the battery terminals for protection. To Prevent Snow build up In snowy days, use anti-icing silicon spray on the top of the weather station to prevent snow build up.
-
Page 49: Troubleshooting Guide
7 Troubleshooting Guide Look through the following table and locate an issue or problem you are experiencing in the left column and read possible solutions in the right column. Problem Solution Outdoor sensor not Check that the outdoor transmission LED on the reporting to gateway bottom is flashing approximately every 16 seconds.. - Page 50 Problem Solution on gateway.” Intermittent There may be a temporary loss of communication due problems with to signal quality issues caused by electrical interference outdoor sensor or other location related factors (obstacles along line of reception on gateway sight). ...
- Page 51 Problem Solution Time is incorrect Make sure your time zone and daylight savings time setting is correct (even when connected to the Internet via Wi-Fi this is needed). Data not reporting to Confirm your station ID is correct. The station ID is all Wunderground.com caps, and the most common issue is substituting a capital letter O for a 0 (zero) or vice versa.
- Page 52 Problem Solution conditions before being connected. Make sure your Wi-Fi supports 2.4 GHz signals (801 type B or G, or N) because Wi-Fi that uses the 5 GHz spectrum is not supported. For router with dual band, please disable the 5GHz band. ...
- Page 53 Try to set your router password to none and then do the configuration again. If successfully, you may set your router password back and configure the gateway again. Method 5: Try the configuration using a different mobile device. If still unsuccessfully, please contact our Customer Service Department via email: support@ecowitt.com ecowittweather@outlook.com.
-
Page 54: Specifications
8 Specifications Note: Out of range values will be displayed using “---”: Outdoor sensor Specification Transmission distance 100 m (330 ft.) open field RF Frequency 433/868/915 depending location Temperature range -40°C – 60°C (-40°F - 140°F) Temperature accuracy ± 1°C, or ± 2°F Temperature resolution 0.1°C, or 0.1°F Humidity range... - Page 55 USB gateway built-in sensor Specification Temperature range -10°C – 60°C (14°F - 140°F) Temperature resolution 0.1°C, or 0.1°F Humidity range 1% ~ 99% Humidity resolution Barometric pressure range 300 – 1,100 hPa (8.85 – 32.5 inHg) Barometric pressure accuracy ± 3 hPa in 700 – 1,100 hPa range Barometric pressure resolution 0.1 hPa (0.01 inHg) Table 7: USB gateway built-in sensor specification...
-
Page 56: Warranty Information
9 Warranty Information We disclaim any responsibility for any technical error or printing error, or the consequences thereof. All trademarks and patents are recognized. We provide a 1-year limited warranty on this product against manufacturing defects, or defects in materials and workmanship. This limited warranty begins on the original date of purchase, is valid only on products purchased, and only to the original purchaser of this product.
Need help?
Do you have a question about the GW1001 and is the answer not in the manual?
Questions and answers