Table of Contents
Advertisement
Quick Links
Advertisement
Table of Contents

Related Manuals for JVC KW-XC88AU


Summary of Contents for JVC KW-XC88AU
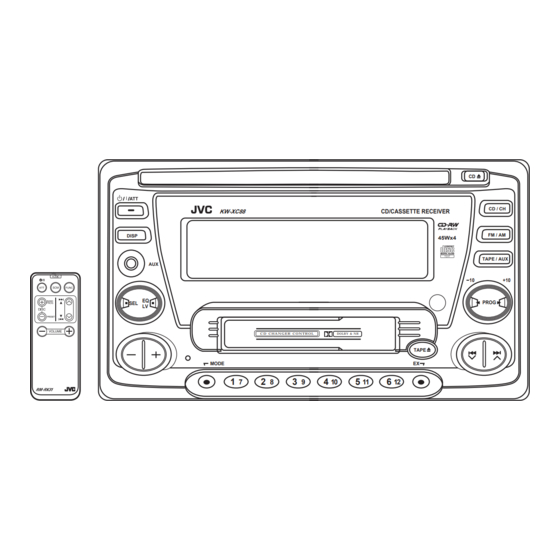
- Page 1 CD/CASSETTE RECEIVER DISP KW-XC88 CD/CASSETTE RECEIVER C D C H A N G E R C O N T R O L DOLBY & NR MODE INSTRUCTIONS INSTRUKSI KW-XC88 CD / CH FM / AM 45Wx4 TAPE / AUX PROG TAPE LVT1250-001A (UN)
-
Page 2: About The Demonstration Mode (Demo Mode)
IMPOR TANT FOR LASER PRODUCTS Precautions: 1.CLASS 1 LASER PRODUCT 2.CAUTION: Invisible laser radiation when open and interlock failed or defeated. Avoid direct exposure to beam. 3.CAUTION: Do not open the top cover. There are no user-serviceable parts inside. Leave all servicing to qualified service personnel. -
Page 3: Table Of Contents
Thank you for purchasing a JVC product. Please read all instructions carefully before operation, to ensure your complete understanding and to obtain the best possible performance from the unit. CONTENTS About the demonstration mode (DEMO MODE) ... How to reset your unit ... -
Page 4: Location Of The Buttons
LOCATION OF THE BUTTONS Control panel DISP Display window 24 25 Control panel 1 Display window 2 CD loading slot (standby/on / attenuator) button 4 DISP (display) button 5 Auxiliary input jack 6 SEL (select) button 7 EQ LV (Equalizer/Level) button + / - buttons Reset button 10 MODE button... -
Page 5: Remote Controller
Remote controller 1 Functions the same as the on the main unit. Changes the band while listening to the radio. Changes the tape direction while listening to a tape. Selects disc numbers in the increasing order, and starts playing while listening to the CD changer. -
Page 6: Preparing The Remote Controller
Preparing the remote controller Before using the remote controller: • Aim the remote controller directly at the remote sensor on the main unit. Make sure there is no obstacle in between. Do not expose the remote sensor to strong light •... -
Page 7: Basic Operations
KW-XC88 DISP C D C H A N G E R C O N T R O L MODE Turn on the power. “HELLO!” appears on the display. Note on One-Touch Operation: When you select a source in step 2 below, the power automatically comes on. -
Page 8: Radio Operations
RADIO OPERA TIONS Listening to the radio You can use either automatic searching or manual searching to tune in to a particular station. Searching a station automatically: Auto search Select the band (FM1, FM2, FM3 or AM). Note: This receiver has three FM bands (FM1, FM2, and FM3). -
Page 9: Storing Stations In Memory
Storing stations in memory You can use one of the following methods to store broadcasting stations in memory. • Automatic preset: SSM (Strong-station Sequential Memory) • Manual preset • Storing your favorite station into the EX button Automatic preset: SSM You can preset 6 local stations in each FM band (FM1, FM2, and FM3). -
Page 10: Storing Your Favorite Station Into The Ex (Extra) Button
Storing your favorite station into the EX (extra) button You can preset an FM or AM station (such as your favorite station or traffic announcement station); and recall it by one touch operation even if the unit is turned off. EXAMPLE: Storing an FM station of 88.3 MHz into the EX button Select the FM1 band. -
Page 11: Other Convenient Tuner Functions
Other convenient tuner functions Scanning broadcast stations Select “SCAN”. Canceled (frequency indication) * When receiving an FM stereo broadcast. Start scanning. Each time a broadcast is tuned in, scanning stops for about 5 seconds (tuned frequency number flashes on the display), and you can check what program is now being broadcasted. -
Page 12: Cd Operations
CD OPERATIONS Playing a CD Insert a disc into the loading slot. CD indicator lights up. Total track number of the inserted disc Current track Elapsed playing time Note on One-Touch Operation: When a CD is already in the loading slot, pressing CD/CH turns on the unit and starts playback automatically. -
Page 13: Playing A Cd Text
Playing a CD Text In a CD Text, some information about the disc (its disc title, performer and track title) is recorded. You can show these disc information on the display. Select text display mode while playing a CD Text. Each time you press the button, the display changes as follows:... -
Page 14: Selecting Cd Playback Modes
Selecting CD playback modes To play back tracks repeatedly (Repeat Play) You can play back the current track repeatedly. Press MODE repeatedly until “REPEAT” appears. REPEAT Canceled Press SEL. Each time you press the button, CD repeat play mode turns on (“REPEAT ON”) and off (“REPEAT OFF”) alternately. -
Page 15: Tape Operations
Listening to a tape You can play back type 1 (normal) tapes. Insert a cassette into the cassette compartment. The unit turns on and tape play starts automatically. When one side of the tape reaches its end during play, the other side of the tape automatically starts playing. -
Page 16: Finding The Beginning Of A Tune
To stop play and eject the cassette Press TAPE Tape play stops and the cassette automatically ejects from the cassette compartment. If you change the source, the tape play also stops (without ejecting the cassette this time). • You can also eject the cassette by pressing TAPE with the unit turned off. -
Page 17: Other Convenient Tape Operations
Other convenient tape operations Skipping blank portions on the tape You can skip blank portions between the tunes (Blank Skip). Press MODE repeatedly until “B.SKIP” appears. DOLBY B Canceled Press SEL. Each time you press the button, skip function mode turns on (“B.SKIP ON”) and off (“B.SKIP OFF”) alternately. -
Page 18: Sound Adjustments
SOUND ADJUSTMENTS Adjusting the sound You can adjust the sound characteristics to your preference. Select the item you want to adjust. Each time you press the button, the adjustable items change as follows: FADER Indication To do: FADER* Adjust the front and rear speaker Adjust the left... -
Page 19: Selecting Preset Sound Modes
Selecting preset sound modes You can select a preset sound adjustment suitable to the music genre. Select ”. “ Canceled Select the sound mode. The sound mode changes as follows: FLAT Hard Rock JAZZ DanceMusic Country Raggae USER** (back to the beginning) * Rhythm and Blues ** If you want to adjust and store your original sound mode (USER), see Storing your own... -
Page 20: Storing Your Own Sound Adjustments
Storing your own sound adjustments You can adjust the sound modes to your preference and store your own adjustments in memory (USER sound mode). • There is a time limit in doing the following procedure. If the setting is cancelled before you finish, start from step 1 again. -
Page 21: Level Meter Setting
Selecting level meter patterns You can select any one from 7 different level meter patterns or a demonstration of all the patterns. Select “L.V. METER.” Canceled Press +/- to select the level meter pattern. Each time you press the button, the level meter changes as follows: ALL DEMO... -
Page 22: Other Main Functions
OTHER MAIN FUNCTIONS Setting the clock After installation, set the built-in cloc k correctly . Press and hold SEL (select) f or more than 2 seconds so that one of the PSM items appear s on the displa y . (See page 23.) If “... - Page 23 Preferred Setting Mode (PSM) items Hold. Select. CLOCK HOUR Hour adjustment CLOCK MIN Minute adjustment CLOCK DISP Clock display EQ LINK Sound control memory linkage DIMMER Dimmer mode CONTRAST Display contrast SCROLL Scroll mode EXT INPUT External input selection AUX ADJ Auxiliary input level adjustment DEMO...
- Page 24 Setting the clock display - CLOCK DISP You can set the clock to be shown on the display when the unit is turned off. When shipped from the factory, the clock is set not to be shown on the display. •...
-
Page 25: Assigning Names To The Sources
Turning the demo mode on or off - DEMO MODE You can turn the demo mode on or off. When shipped from the factory, “DEMO ON” is selected. • DEMO OFF: Turns the demo mode off. • DEMO ON: Turns the demo mode on. The demonstration will start automatically if no sound comes in for 3 minutes. - Page 26 Select the character set you want while “ ” is flashing. Each time you press the button, the character set changes as follows: Capital letters ( Small letters ( Numbers and symbols ( Select a character. About the available characters, see the right column.
-
Page 27: External Component Operations
EXTERNAL COMPONENT OPERATIONS MD player, etc. You can connect two external components to this unit. Connect one to the auxiliary (AUX) input jack on the control panel, and the other to the CD changer jack on the rear. Preparations: • For connecting the Line Input Adaptor KS-U57 and the external component, refer to the Installation/ Connection Manual (separate volume). -
Page 28: Cd Changer Operations
We recommend that you use one of the CH-X series with your unit. If you have another CD automatic changer, consult your JVC car audio dealer for connections. • For example, if your CD automatic changer is one of the KD-MK series, you need a cord (KS-U15K) for connecting it to this unit. - Page 29 T o fast-for ward or r everse the track Press and hold while pla ying a CD , to f ast-f orw ard the trac k. Press and hold while pla ying a CD , to re verse the trac k. T o go to the next tracks or the pr evious tracks Press while pla ying a CD , to go...
-
Page 30: Selecting Cd Playback Modes
Selecting CD playback modes To play back tracks repeatedly (Repeat Play) Press MODE repeatedly until “REPEAT” appears. REPEAT Canceled (Continuous play) Press SEL. Each time you press the button, CD repeat play mode changes as follows: REPEAT1 ON REPEAT OFF Mode Plays repeatedly Indicator... -
Page 31: Maintenance
Handling cassettes The cassette deck built in this unit requires very little attention, but you will be able to extend the life of the cassette deck if you follow the instructions below. To clean the heads • Clean the heads after every 10 hours of use using a wet-type head cleaning tape (available at an audio store). -
Page 32: Handling Cds
Handling CDs The CD player built in this unit has been designed to play back the CDs bearing the following marks. COMPACT DIGITAL AUDIO You can also play back your original CD-Rs (Recordable) and CD-RWs (Rewritable) on this receiver. This unit is not compatible with MP3. How to handle CDs When removing a CD from its case, press down the... -
Page 33: Troubleshooting
What appears to be trouble is not always serious. Check the following points before calling a service center. Symptoms • CD cannot be played back. • CD sound is sometimes interrupted. • NO DISC” appears on the “ display. • CD can neither be played back nor ejected. - Page 34 Symptoms • SSM automatic preset does not work. • Static noise while listening to the radio. • “NO MAGAZINE” appears on the display. • “RESET 8” appears on the display. • “RESET 1 RESET 7” appears on the display. • This unit does not work at all.
-
Page 35: Specifications
AUDIO AMPLIFIER SECTION Maximum Power Output: Front: 45 W per channel Rear: 45 W per channel Continuous Power Output (RMS): Front: 17 W per channel into 4 40 Hz to 20 000 Hz at no more than 0.8% total harmonic distortion. - Page 36 Having TROUBLE with operation? Please reset your unit Refer to page of How to reset your unit Punya MASALAH pengoprasian? Tolong reset unit anda Lihat pada halaman tentang mereset unit EN, IN © 2004 VICTOR COMPANY OF JAPAN, LIMITED 0704MNMMDWJEIN...
Need help?
Do you have a question about the KW-XC88AU and is the answer not in the manual?
Questions and answers