Table of Contents
Advertisement
Quick Links
TABLE OF CONTENTS
1 Specifications ----------------------------------------------------- 2
2 Location of Controls and Components ------------------- 3
3 Troubleshooting Guide ----------------------------------------- 5
4 Disassembly and Assembly Instructions ---------------- 6
4.1. Dust box cover assembly removal -------------------- 6
4.2. Separate the upper and lower body units ----------- 6
4.3. Removal of the cord reel U------------------------------ 7
4.4. Removal of the P.C.B. ass'y and motor -------------- 8
5 Wiring Connection Diagram ---------------------------------10
6 Exploded View and Replacement Parts List -----------11
6.1. EXPLODED VIEW (ATTACHMENTS) -------------- 11
6.2. PARTS LIST (ATTACHMENTS) ----------------------12
6.3. EXPLODED VIEW (BODY UNIT) --------------------13
6.4. PARTS LIST (BODY UNIT) ----------------------------14
6.5. PACKING INSTRUCTIONS----------------------------15
6.6. PACKING LIST--------------------------------------------16
Model No.
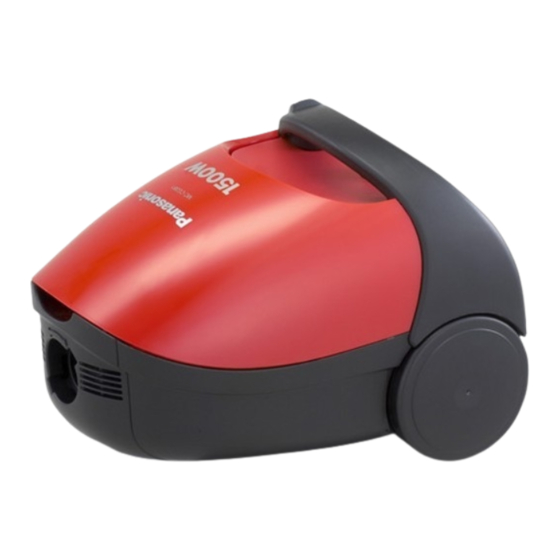
Product Color :Sporty red
Destination
PAGE
© 2008 Matsushita Electric Industrial Co., Ltd. All
rights reserved. Unauthorized copying and distribu-
tion is a violation of law.
Order No.VCB0803005CE
Vacuum Cleaner
MC-CG383-RC79
MC-CG383-RW79
MC-CG383K-RP47
:Europe
PAGE
Advertisement
Table of Contents

Related Manuals for Panasonic MC-CG383-RC79


Summary of Contents for Panasonic MC-CG383-RC79
-
Page 1: Table Of Contents
Order No.VCB0803005CE Vacuum Cleaner MC-CG383-RC79 Model No. MC-CG383-RW79 MC-CG383K-RP47 Product Color :Sporty red Destination :Europe TABLE OF CONTENTS PAGE PAGE 1 Specifications ----------------------------------------------------- 2 2 Location of Controls and Components ------------------- 3 3 Troubleshooting Guide ----------------------------------------- 5 4 Disassembly and Assembly Instructions ---------------- 6 4.1. -
Page 2: Specifications
1 Specifications Model No. MC-CG383 MC-CG383K Power source 230 V~50 Hz 230-240 V~50 Hz Input power (MAX) 1800 W Input power (Nominal) 1500 W 1400-1500 W Power control Extension wand Metal x 2 Telescopic Dimensions (WxLxH)mm 240x350x250 Net weight 3.8kg Multipurpose accessory... -
Page 3: Location Of Controls And Components
2 Location of Controls and Components... -
Page 5: Troubleshooting Guide
3 Troubleshooting Guide CONDITION CHECK POINT METHOD OF INSPECTION TRANSACTION Motor fails to rotate Power supply cord Check power supply cord continu- If there is no continuity, replace the (no noise is heard at all) ity. cord reel patition unit. Fuse of P.C.B. -
Page 6: Disassembly And Assembly Instructions
4 Disassembly and Assembly Instructions Important notice: Before replacing any components, make sure to turn OFF the vacuum cleaner. Remove the power plug from the outlet. * Caution: 1. Do not attempt to modify the machine, parts, etc. when marking repairs. 2. -
Page 7: Removal Of The Cord Reel U
3. Lift the upper body U to separate it from the lower body. 2. Lift the cord reel partition ass’y from the lower body. 3. Remove the two lead wires connected to the cord reel 4.3. Removal of the cord reel U partition ass’y. -
Page 8: Removal Of The P.c.b. Ass'y And Motor
4.4. Removal of the P.C.B. ass’y 4. Remove the cord reel partition ass'y. and motor 1. Remove the motor case U with the motor and the P.C.B. ass'y fitted from the lower body. 5. Push the brake lever and loosen the spring winding the cord (loosen the pre-winding). - Page 9 3. Remove the motor support front from the motor and then 5. Remove the noise supporessor, motor support rubber the thermal protecter inserted into the motor case U. (rear), and motor support rubber (front). 4. Remove the lead wire, from the P.C.B., connected to the motor ass'y terminal.
Need help?
Do you have a question about the MC-CG383-RC79 and is the answer not in the manual?
Questions and answers