Table of Contents
Advertisement
Quick Links
Advertisement
Table of Contents
Troubleshooting

Related Manuals for Novanta f201


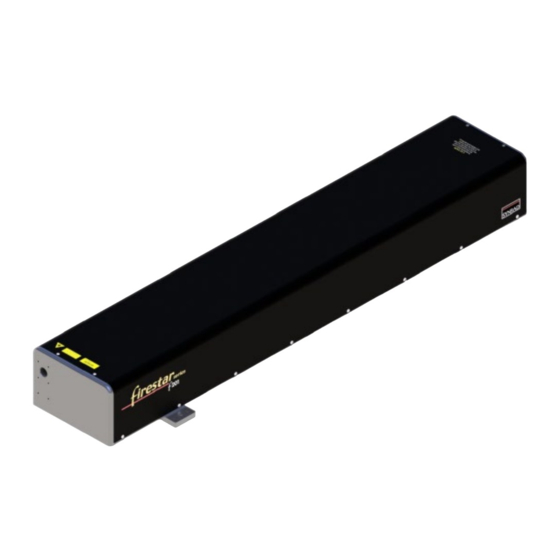
Summary of Contents for Novanta f201
- Page 1 Laser User Manual ENGINEERED BY SYNRAD...
-
Page 2: Table Of Contents
Technical Support ....................................9 Reference Materials ..................................9 EU Headquarters ..................................... 10 Getting Started ....................................10 Introduction ..................................... 11 f201 Nomenclature ..................................11 Unpacking ......................................12 Incoming inspection ..................................12 Packaging guidelines ..................................12 Removing the lifting handles ................................14 Inventory ...................................... - Page 3 Operating modes ..................................... 59 User I/O connections ..................................61 Input/output signals ..................................62 DC Power cables ....................................72 Integrating F201 laser safety features ............................. 73 OEM lasers ....................................... 73 Remote interlock functions ................................74 Integrating f201 safety features ..............................75 f201 general specifications ................................
- Page 4 Figure 2-3 f201 shipping box contents..................................15 Table 2-1 f201 ship kit contents....................................16 Figure 2-4 Fastening the f201 from below................................... 18 Figure 2-5 Detail of fastening into mounting surface..............................18 Figure 2-6 Fastening f201 from below..................................19 Table 2- Dew point temperatures.
- Page 5 Figure 4-12 F201 laser output driving warning lamp..............................70 Figure 4-13 F201 laser output driving relay................................. 70 Figure 4-14 F201 laser output driving PLC input module............................71 Table 4-7 f201 DC Power connector pinouts................................72 Figure 4-15 F201 packaging diagram.................................... 76 Table 4-8 f201 general specifications.
-
Page 6: Important Information
Retain these instructions for future reference. Novanta reserves the right to update this user manual at any time without prior notification. If product ownership changes, this manual should accompany the product. DANGER: Indicates a hazardous situation which, if not avoided, will result in serious injury or death. - Page 7 Devices and Radiological Health) certification. Customer Support Before contacting Novanta for assistance, review appropriate sections in the manual that may answer your questions. After consulting this manual, please contact one of our worldwide offices between 9 AM and 5 PM local time.
-
Page 8: Trademark & Copywrite
Warranty Information This is to certify that F201 laser® f-Series lasers are guaranteed by NOVANTA to be free of all defects in materials and workmanship for a period of one year from the date of shipment. This warranty does not apply to any defect caused by negligence, misuse (including environmental factors), accident, alteration, or improper maintenance. -
Page 9: Sales, Application & Support
Novanta@Novanta.com Sales & Application NOVANTA Regional Sales Managers work with customers to identify and develop the best CO2 laser solution for a given application. Because they are familiar with you and your laser application, use them as a first point of contact when questions arise. Regional Sales Managers also serve as the liaison between you and our Applications Lab in processing material samples per your specifications. -
Page 10: Eu Headquarters
Getting Started Use information in this section to prepare your f201 laser for operation. The order of information presented in this section is the same as the order of tasks that you will need to perform. The best way to get your laser ready for operation is to start at Unpacking and work your way through Connecting. -
Page 11: Introduction
Keyswitch and OEM models available. f201 Nomenclature f201 lasers are available only as OEM lasers; they do not include either a keyswitch or manual shutter assembly. NOVANTA’s OEM lasers are primarily designed as components for integration into larger processing systems by the Original Equipment Manufacturer (OEM) or System Integrator who bears the responsibility for meeting the appropriate laser safety requirements for Class 4 laser systems. -
Page 12: Unpacking
Packaging guidelines Warning: Serious Personal Injury Lifting or moving f201 lasers poses a potential for injury. Use appropriate lifting techniques and/or equipment to prevent a risk of injury. In some cases, you may require assistance from additional personnel to safely unpack and move this equipment. -
Page 13: Figure 2-1 Unpacking The Laser
Important Note: All f201 lasers are water-cooled because of the integrated RF section’s heat removal requirements. f201 lasers cannot be fan cooled. Damage to your laser will void your warranty. -
Page 14: Removing The Lifting Handles
REMOVING THE LIFTING HANDLES PAGE Removing the lifting handles Once you have placed the laser in its final mounting location, refer to the figure below and perform the following steps to remove the lifting attachments. Figure 2-2 Removing lifting handles. 2. -
Page 15: Inventory
INVENTORY PAGE Inventory F201 Lasers Figure 2-3 f201 shipping box contents. -
Page 16: Nomenclature (Continued)
DC Power Cable – carries DC power from the DC power supply to your F201 laser laser. Quick Start Plug – connects to F201 laser’s User I/O connector. Jumpers are built into the plug to enable F201 laser’s shutter and remote interlock circuits for initial start-up and testing. -
Page 17: Mounting
Do not use more than one fastener per mounting foot. Doing so will damage the laser. Fastening f201 lasers from above To fasten your f201 laser to a mounting surface from above, perform the following steps: Refer to the appropriate outline and mounting drawing for dimensions and then drill and tap three mounting holes into your mounting surface. -
Page 18: Figure 2-4 Fastening The F201 From Below
Figure 2-5 Detail of fastening into mounting surface. Fastening f201 lasers from below To fasten your f201 laser to a mounting surface from below, perform the following steps: Refer to the appropriate outline and mounting drawing for dimensions and then drill three 8.5 mm (f201) holes into your mounting surface. -
Page 19: Connecting
These hole locations (referenced by Note 1 or Note 3 on the O & M drawings) should correspond to the threaded holes labeled “M”, for metric, or “S”, for standard, as shown in the following figure. Figure 2-6 Fastening f201 from below. Connecting The Connecting section includes subsections: •... - Page 20 WATER IN/WATER OUT fittings from 1/2-inch standard to 12- mm metric tubing. The ship kit sent with your f201 laser includes a cooling kit containing two each 1/2- inch male to 1/2-inch female 90° adaptors and two each 1/2-inch male to 12-mm female 90° adaptors. If required, many tubing and fitting manufacturers can supply 1/2-inch to 12-mm straight fittings.
- Page 21 MUST be taken to reduce the risk of condensation damage. • Use the Gas Purge port (f201) to introduce nitrogen or dry, filtered air into the laser housing. • Air-condition or dehumidify the room or the enclosure containing the laser.
-
Page 22: Connecting
CONNECTING PAGE Connecting The following table provides dew point temperatures for a range of air temperature and relative humidity values. Remember that the laser’s coolant temperature must be set above the dew point temperatures given in the chart; however, for best results and performance, use a coolant temperature in the range of 18–22 °C (64–72 °F) when possible. -
Page 23: Figure 2-7 F201 Cooling Connections
PAGE f201 cooling tubing connections To connect cooling tubing to your f201 laser, refer to the figure below and perform the following steps. The numbered items that follow correspond to the step numbers in the following procedure. Figure 2-7 F201 cooling connections. -
Page 24: Ps-96 Power Supply Connections
(1/2-inch) or metric (12-mm) cooling tubing. PS-96 power supply connections The following procedures describe how to connect the PS-96 DC power supply to your f201 laser. When connecting other types of DC power sources, remember to follow proper Lockout/Tagout pro- cedures to ensure that AC power is de-energized, and then connect input AC power per the manufac- turer’s instructions. -
Page 25: Ps-96 Ac Input Section
Verify that input AC voltage to the DC power supply is physically locked out or disconnected. Locate the f201 DC Power cable. The DC Power cable is 5 meters (16 feet) long with a plug on one end and five (5) connection lugs on the other. This cable has a minimum bend radius of 87.4 mm (3.44"). -
Page 26: Figure 2-8 Ps-96 Interface
PS-96 AC INPUT SECTION PAGE Table 2-4 Three-phase AC electrical recommendations. Parameter Recommendation Input voltage 105–264 VAC, 3Ø Input current, max. 23 Amperes (per phase) Wire gauge 10 AWG Fuse/circuit breaker 30 Amps To connect three-phase AC input power to the PS-96 power supply, refer back to the prior figure and perform the following steps: Caution: Possible Equipment Damage Do not plug and unplug the DC Power cable on the rear of the laser to switch DC power to the laser. - Page 27 Connect the third AC hot wire, typically blue, to the input terminal labeled “L3/N”. Single-phase input power requirements for NOVANTA PS-96 DC power supply are 208–264 VAC, 1Ø (single phase), 20 A maximum, 47–63 Hz. Table below provides recommendations for single-phase input wiring and fusing.
-
Page 28: Control Connections
Connect the return (neutral) wire from circuit 2, typically white, to the input terminal labeled Control connections All control connections to F201 laser f201 lasers are made through the 15-pin User I/O connector on the rear panel. The User I/O port receives power commands from NOVANTA’s UC-2000 Universal Laser Controller or FH Series Marking Head and also serves as the connection point for auxiliary signals between the laser and any parts handling, automation, or monitoring equipment. -
Page 29: Other Connections
Plug the compact transformer into any 100–240 VAC, 50–60 Hz outlet. Quick Start Plug In order for your f201 laser to properly operate, several input signals must be applied to the DB-15 User I/O connector before lasing is enabled. Voltage must be applied to Remote Interlock (Pin 3) and Shutter Open Request (Pin 10) inputs before the laser will fire. - Page 30 (30–60 SCFH, Standard Cubic Feet per Hour) at a pressure not to exceed 34.5 kPa (5 PSI). The Gas Purge connector on your f201 laser must be connected to a source of nitrogen or clean, dry air only; do not use any other gases for purging. Purge gas specifications are listed in the table below.
-
Page 31: Laser Safety
• Disposal – information on your f201 laser parts and/or components as they pertain to disposal. • Additional Safety Information – describes how to find additional information about your f201 laser. -
Page 32: Hazard Information
Specific warnings and cautions not appearing in this section are found throughout the manual. F201 lasers should be installed and operated in manufacturing or laboratory facilities by trained personnel only. Due to the considerable risks and hazards associated with the installation and operational use of any equipment incorporating a laser, the operator must follow product warning labels and instructions to the user regarding laser safety. - Page 33 GENERAL HAZARDS PAGE Warning: Serious Personal Injury Do not allow laser radiation to enter the eye by viewing direct or reflected laser energy. CO2 laser radiation can be reflected from metallic objects even though the surface is darkened. Direct or diffuse laser radiation can inflict severe corneal injuries leading to permanent eye damage or blindness.
-
Page 34: Other Hazards
This product contains components that are considered hazardous industrial waste. If a situation occurs where the laser is rendered non-functional and cannot be repaired, it may be returned to NOVANTA® who, for a fee, will ensure adequate disassembly, recycling and/or disposal of the product. -
Page 35: Additional Laser Safety Information
Additional Laser Safety Information The NOVANTA web site (http://www.Novanta.com/LaserFacts/safetyinfo.html) contains an online laser safety handbook that provides information on (1) Laser Safety Standards for OEM’s/System Integrators, (2) Laser Safety Standards for End Users, (3) References and Sources, and (4) Assistance with Requirements. -
Page 36: F201 Label Locations
F201 LABEL LOCATIONS PAGE f201 label locations Figure 3-1 100 hazard label locations. -
Page 37: F201 Label Locations (Continued)
F201 LABEL LOCATIONS (CONTINUED) PAGE f201 label locations (continued) Figure 3-2 F 200 hazard label locations. -
Page 38: F201 Label Locations (Continued)
F201 LABEL LOCATIONS (CONTINUED) PAGE f201 label locations (continued) Figure 3-3 F 201 hazard label locations. -
Page 39: Compliance
(Keyswitch or OEM). See the Class 4 safety features, located in the following table, that indicate which features are available on f201 lasers, the type and description of the feature, and if the feature is required by CDRH regulations. - Page 40 Important Note: The following FCC information to the user is provided to comply with the requirements of 47 CFR, Part 18, Section 213. Interference Potential In our testing, NOVANTA has not discovered any significant electrical interference traceable to f201 lasers. System Maintenance Ensure that all exterior covers are properly fastened in position.
- Page 41 Maintenance of Safe Operation, Incident Reporting and Accident Investigation, and Medical Surveillance. OEM Models F201 OEM lasers are OEM products intended for incorporation as components in laser processing systems. As supplied by NOVANTA, these lasers do not meet the requirements of EN 60825-1 without additional safeguards.
- Page 42 Table 3-1 Class 4 safety features as required by CDRH and EN. Required by: Available on Feature Location Description CDRH EN60825-1 OEM f201 On/Off/Reset Key switch controls power to laser electronics. Key Keyswitch Rear Panel Control cannot be removed from switch in the “On”...
- Page 43 1 Not available on f201 OEM lasers When integrating NOVANTA f201 OEM lasers, the Buyer and/or integrator of the end system is responsible for meeting all applicable Standards to obtain the CE mark. To aid this compliance process, NOVANTA testing program has demonstrated that f201 lasers comply with the relevant requirements of 2014/30/EU, the Electromagnetic Compatibility Directive, as summarized in the table below.
-
Page 44: Figure 3-4 F201 Declaration Document
COMPLIANCE PAGE Figure 3-4 f201 Declaration Document... - Page 45 COMPLIANCE PAGE Figure 3-5 (continued) F201 Declaration Document...
-
Page 46: Operation
Always be aware of the beam’s path and always use a beam block while testing. Warning: Serious Personal Injury On f201 OEM lasers, remote interlock faults are not latched. Clearing the fault condition re-enables the Ready indicator and the laser will fire after the five-second delay provided that the Shutter indicator is lit and a PWM Command signal is applied. -
Page 47: Controls And Indicators
Figure 3-1 F201 controls and indicators (front). Laser Aperture – provides an opening in F201 laser’s front panel from which the beam exits. 2. Aperture Seal – prevents dust from damaging the output coupler during shipping. Remove the red self-adhesive label before applying power to the laser. - Page 48 Refer to User I/O connections in the Technical Reference chapter for pinouts and signal descriptions. 12. Gas Purge Connector (f201 only) – provides a low-pressure nitrogen (or pure air) purge gas con- nection to prevent dust and debris from entering the laser housing and damaging electronic or...
-
Page 49: Initial Start-Up
INITIAL START-UP PAGE Initial start-up The Initial start-up section includes subsections: • With a UC-2000 Controller • Without a UC-2000 Controller With a UC-2000 Controller Before your laser is put into service for the first time, its functionality should be verified. Follow this procedure to verify the laser system is operating at optimum performance. -
Page 50: Starting Your F201 Laser
Lase LED to flicker during the transition from tickle to lasing. Laser output may occur if the Lase LED flickers. Important Note: If your f201 laser fails to lase, refer to Troubleshooting in the Maintenance/Troubleshooting chapter for troubleshooting information. -
Page 51: Initial Start-Up
Inlet cooling water temperature must always be maintained above the dew point to prevent condensation and water damage to your F201 laser. Technical Reference Summary This section is a technical reference for your f201 laser and contains the following information:... -
Page 52: Technical Overview
Duo-Lase’ operation F201 laser lasers consist of two standard, sealed tubes (f201 tubes respectively) that are combined using NOVANTA’s Duo-Lase technology to provide a single diffraction-limited beam at twice the output power. -
Page 53: Optical Resonator
Figure 4-1 beam characteristics. On f201 lasers, the beam waist is located one meter before the output aperture due to the addition of internal beam conditioning optics that improve beam quality and strip any side lobes present to produce... -
Page 54: Internal Rf Power Supply
Because the laser beam diverges slowly, increasing by two or three diameters over several meters, F201 laser lasers should be mounted a distance of 1.3–1.8 meters (50–70 inches) away from the work area and no closer than one meter (40 inches) for optimum performance. - Page 55 OPTICAL SETUP PAGE f201 lasers, with their internal one-meter beam path and conditioning optics, can be mounted right at the work area. Figure 4-2 “Flying optics” beam path. Important Note: Optical components in the beam path must always be aligned to the actual beam path, not the laser faceplate.
-
Page 56: Controlling Laser Power
Much of the information provided in this section describes the use of a NOVANTA UC-2000 Universal Laser Controller to provide PWM Command signals to the f201 laser. If using an alternate method of laser control, thoroughly review this section, as well as the following section, User I/O connections, for an understanding of the signal requirements necessary to control f201 lasers. - Page 57 PWM input with a rise and fall time constant of ~150 μs; however, the laser cannot precisely follow PWM input signals if the “On” pulse is less than 150 μs in duration. At a constant 50% duty cycle, f201 lasers typically reach 90–100% of full optical output when operated at a frequency of 3 kHz.
- Page 58 Figure 4-4 PWM Command signal waveform. F201 laser’s User I/O PWM input consists of a high-speed optoisolator LED with a forward voltage drop (Vf) of 1.5 VDC. The PWM input frequency can range from DC (0 Hz) to 100 kHz. Table below provides...
-
Page 59: Operating Modes
(power). Analog voltage or analog current control Although f201 lasers cannot be controlled directly by analog voltage or current signals, this type of control is possible when using the UC-2000 Controller. The Controller is connected normally to the laser and analog voltage, or current signals sent to the UC-2000’s ANV/C connector then control both laser gating... - Page 60 When the delay between the end of one PWM Command signal pulse and the beginning of the next PWM pulse exceeds 200 microseconds (less than or equal to 5 kHz), F201 laser’s on-board tickle generator sends a tickle pulse to maintain plasma ionization in the tube. Because the on-board tickle generator cannot anticipate when the next PWM Command pulse will arrive;...
-
Page 61: User I/O Connections
The User I/O connections section includes subsections: • User I/O connection summary • Input/output signals • Sample I/O circuits • I/O connections User I/O connection summary Table below provides a quick reference summary to F201 laser f201 User I/O connections. Table 4-3 User I/O pin descriptions. -
Page 62: Input/Output Signals
0.5 A. Pin 12, Auxiliary DC Power Ground, is connected to chassis ground while all other User I/O pins are floating with respect to chassis ground. Figure 3-6 illustrates F201 laser’s internal DC supply wiring. - Page 63 INPUT/OUTPUT SIGNALS PAGE Caution: Possible Equipment Damage Turn off DC power before installing or removing any plug or cable from the User I/O connector. Ensure that user connections are made to the appropriate pins and that the appropriate signal levels are applied.
- Page 64 PAGE Input signals A total of four user inputs allows control of F201 laser lasers. Remote Interlock, Shutter Open Request, and Remote Reset/Start Request inputs are optoisolated and bi-directional, allowing for positive or negative polarity signal inputs. These three signals also share a common return connection, Input Common, which is separate from chassis ground to completely isolate control signals for optimal EMI performance.
- Page 65 Table 4-4 Input circuit specifications. Important Note: The Remote Reset/Start Request input must not be sent until F201 laser’s +5 VDC power supply has stabilized (approximately 200 ms after DC power-up). Warning: Serious Personal Injury The use of the Quick Start Plug bypasses the laser’s safety interlock function, potentially exposing...
- Page 66 Figure 4-7 Quick Start Plug wiring diagram. F201 laser’s optically isolated outputs are useful for sending laser status to a Programmable Logic Controller (PLC) or computerized control system. Each of the five outputs can source 50 mA at ±24 VDC maximum for a total load of 250 mA.
- Page 67 See the following tables for output circuit specifications. Following figure illustrates the output circuit’s equivalent internal schematic and the following provides f201 output circuit specifications. Table 4-5 Output circuit specifications.
- Page 68 Figure below illustrates one method of supplying a Remote Interlock signal using a customer-supplied limit switch. F201 laser’s +24 VDC Auxiliary Power output powers the circuit. Note that Pin 4, +5 VDC Auxiliary Power, could have been used instead, depending on circuit voltage requirements.
- Page 69 Figure 4-10 PLC driven interlock signal. When multiple PLC outputs are used, connect F201 laser inputs to the PLC as shown in Figure below. By supplying voltage (+VDC) to Pin 11, Input Common, and pulling individual inputs to ground, each input can be independently activated by the PLC’s output module.
- Page 70 Ensure that the relay coil’s pull-in current does not exceed 50 mA. A diode or surge sup- pressor must be installed across the relay coil to prevent voltage spikes from damaging F201 laser outputs. Figure 4-13 F201 laser output driving relay.
- Page 71 INPUT/OUTPUT SIGNALS PAGE Figure below illustrates how F201 laser’s outputs can drive the DC Input Module of a Programmable Logic Controller (PLC). By supplying voltage (+VDC) to Pin 13, Output Common, each F201 laser output is inde- pendently switched to activate individual PLC inputs.
-
Page 72: Dc Power Cables
DC Power cables DC Power cables for f201 lasers are manufactured with #12 AWG wire; however, DC input current is split between two positive (+) and two negative (–) conductors. F201 laser f201 DC Power cables are available in 5-meter (16.4 ft) and 7 m (23 ft) lengths. -
Page 73: Integrating F201 Laser Safety Features
F201 laser’s keyswitch, shutter, and remote interlock functions serve to enable or disable DC power to F201 laser’s RF drive. Without DC power, the RF driver cannot supply RF energy to the resonator, causing the gas to remain in a zero-energy state. -
Page 74: Remote Interlock Functions
Remote Interlock input signal on Pin 3 of the User I/O connector. To use F201 laser’s remote interlock feature, apply a voltage in the range of ±5–24 VDC to Pin 3, Remote Interlock. Applying an interlock signal causes the Remote Interlock LED to illuminate green and sends DC power to the RF driver, which enables lasing after a five-second delay (provided that the Ready LED is yellow, and the Shutter LED is blue). -
Page 75: Integrating F201 Safety Features
The f201 DB-9 Connector allows system integrators or end-users to integrate f201 laser safety features into their control system. In particular, the f201 Remote Keyswitch function serves to disable DC power to the laser’s RF driver. Without power, the RF driver cannot supply PWM or tickle signals to the resonator, causing the CO2 gas to remain in a zero-energy state. - Page 76 INTEGRATING F201 SAFETY FEATURES PAGE Figure 4-15 F201 packaging diagram.
-
Page 77: F201 General Specifications
F201 GENERAL SPECIFICATIONS PAGE f201 general specifications Table 4-8 f201 general specifications. - Page 78 F201 GENERAL SPECIFICATIONS PAGE Table 4-9 f201 general specifications (continued)
-
Page 79: Maintenance And Troubleshooting
Getting Started chapter for details on preventing condensation. When using compressed air as a purge gas on your f201 laser, empty water traps and oil separa- tors on each filter and/or dryer between the laser and your compressed air source. Compressed air purity must meet the purge gas specifications shown in Table 1-6 in the Getting Started chapter. -
Page 80: Storage/Shipping
When finished, cap all connectors to prevent debris from entering the cooling system. When shipping NOVANTA lasers to another facility, we highly recommend that you ship the unit in its original NOVANTA shipping container. If you no longer have the original shipping box and inserts, contact NOVANTA Customer Service about purchasing replacement packaging. -
Page 81: Cleaning Guidelines
Important – F201 laser f201 and lasers do not have output windows located inside the faceplate. NEVER disassemble the laser housing to inspect f201 optics. Instead, always connect nitrogen or filtered air to the laser’s Gas Purge port to prevent vapor and debris from contaminating internal... -
Page 82: Cleaning Optics
PAGE Required cleaning materials The table below lists the type and grade of materials required to properly clean optical surfaces. Table 5-1 Required cleaning materials Cleaning optics Shut off and lock out all power to the laser. You must verify that the laser is OFF (in a zero-energy state) before continuing with the optical inspection! Visually inspect all optical surfaces in the beam path for contaminants. -
Page 83: Troubleshooting
Contact NOVANTA® or a NOVANTA Authorized Distributor for repair or replacement information. To troubleshoot the f201 laser, it is necessary to understand the sequence of events that must happen before the laser can turn on and operate. Before you attempt to perform any service, we advise you to read the entire troubleshooting guide and review the relevant schematic diagrams. - Page 84 Always be aware of the beam’s path and always use a beam block while testing. Caution: Possible Equipment Damage Attempting repair of a NOVANTA laser without the express authorization of NOVANTA, will void the product warranty. If troubleshooting or service assistance is required, please contact NOVANTA...
-
Page 85: Operational Flow Chart
OPERATIONAL FLOW CHART PAGE Operational flow chart The flowchart in the figure below illustrates f201’s start-up sequence. Figure 5-1 Operational flowchart. -
Page 86: Functional Block Diagram
FUNCTIONAL BLOCK DIAGRAM PAGE Functional block diagram Figure below is a functional block diagram illustrating the f201’s control architecture. Figure 5-2 f201 functional block diagram. -
Page 87: Status Leds
LED indicators, also mirrored as output signals on the User I/O connector, provide status information to the user. Table below shows F201 laser output signal and LED indicator states during normal and fault conditions. User I/O outputs are Closed when the state indicated by the signal name is True. - Page 88 STATUS LEDS PAGE Tables below show how 201 signal status changes when remote interlock, over-temperature, or shutter closed conditions occur (fault conditions are shown in bold type). Table 5-3 Normal operating condition. Table 5-4 Quick Start Plug or interlock/shutter inputs not connected. Table 5-5 Interlock open condition.
- Page 89 STATUS LEDS PAGE Table 5-6 Over Temperature fault. Table 5-7 Shutter closed condition. Table 5-8 VSWR fault.
-
Page 90: Laser Fault Indications
PAGE Laser fault indications On f201 lasers manufactured after November 2007, Ready (RDY) and Shutter (SHT) LED’s flash to annun- ciate one of four laser faults. The following table lists error codes, the corresponding fault, and describes basic corrective action. See the following section, Resetting faults, for detailed corrective actions. -
Page 91: Troubleshooting
Over-temperature faults are now latched. To reset an over-temperature fault, lower coolant temperature below 28 °C (f201) to cool the laser and then cycle DC power to the laser. Once the Temp indicator is green and the Ready lamp is lit, lasing is possible after the five-second delay. -
Page 92: Other Laser Faults
If the RF Drive DC fault reappears, contact NOVANTA or a NOVANTA Authorized Distributor. PWM Drive/RF Oscillation faults New circuitry on the f201 RF board has eliminated PWM Drive and RF Oscillation faults. The 4-blink fault indication no longer exists. VSWR fault A VSWR fault indicates an impedance mismatch between the tube and RF Driver and occurs when a PWM Command signal is first applied. - Page 93 Possible Causes: • Coolant temperature is above 28 °C (f201) or there is inadequate coolant flow through the laser. Check that your chiller is maintaining a water temperature between 18 °C–28 °C (64 °F–82 °F) at a flow rate of 9.5 lpm (2.5 GPM) for f201.
- Page 94 Possible Causes: • Coolant temperature is above 28 °C (f201) or there is inadequate coolant flow through the laser. Check that your chiller is maintaining a water temperature between 18 °C–28 °C (64 °F–82 °F) at a flow rate of 9.5 lpm (2.5 GPM) for f201.
- Page 95 One of the two 20 A fast-acting fuses has blown. On f201 lasers, a single blown 20 A fuse on the laser’s rear panel may cause the Ready lamp to remain Off while other LEDs indicate normal status. Remove DC power from the laser and then check each fuse on...
-
Page 96: Beam Delivery Optics
If the focusing optic is pitted, it must be replaced immediately. Because of the extremely high power density of F201 laser lasers, pits or debris on the lens surface may absorb enough energy from the focused beam to crack the lens. If this happens, other optics in the beam path may be contaminated or damaged as well. - Page 97 A risk of exposure to toxic elements, like zinc selenide, may result when certain optical or beam delivery components are damaged. In the event of damage to laser, marking head, or beam delivery optics, contact NOVANTA, Inc. or the optics manufacturer for handling instructions.
-
Page 98: Index
INDEX PAGE Index Block diagram 100 Symbols BNC Control cable 31 +5 VDC Auxiliary Power 73 +5 VDC output 74 signal description, 75 Caution condensation, 57,59 +24 VDC,83 condensation damage, 58,60 +24 VDC Auxiliary Power 73 dirty optics, 65,95,97 +24 VDC output 74 single-phase operation, 34,37,40,42,43,50, signal description, 75 51,57,60... - Page 99 Delivery optics 66 Controls and indicators, 53 Dew point chart, 38 f100/f201 lasers, 53 Diode Pointer 56,59 Control signals 68–69 Disabling F201 laser 94 Command signal, 69 Divergence 65,66 Pulse width modulation (PWM), 68 Duo-Lase 64 Tickle pulse, 68 Cooling connections 36...
- Page 100 Laser ready output 101 Laser Ready output 106,107,108,109 Inspections Lift handles daily, 94 removing, 29 Integrating F201 laser safety features 85 Maintenance 94,95,96 Interlock daily inspections, 94 see Remote Interlock disabling F201 laser, 94 Interlock Open 80 pin description, 74,80...
- Page 101 79 Over Temperature output 101,106,107,108,109 Occupational Safety and Health Administration (OSHA) 14 Operating modes Package outline drawings analog current control, 70 f201, analog voltage control, 70 continuous wave (CW), 71 Packaging external control, 70 guidelines, 27 marking/engraving operation, 72...
- Page 102 INDEX PAGE connecting, 48 Shutter Open output, 101,106,107,108,109 wiring diagram, 79 Shutter Open Request, 77 Shutter Open request input, 65 Shutter Open Request input, 49,55,57,87,101 Ready indicator 54,56,101,108 Shutter Open Request signal description, 77,78 Reference materials viii specifications, 78 Remote Interlock, 73,76 Shutter switch, 56,57,58,59,65,101,108 customer-supplied circuit, 81 Spherical washer set, 31,34,35...
- Page 103 INDEX PAGE Unpacking 27 guidelines, 27 inspection, 27 removing lift handles, 29 unboxing the f400, 27 User I/O connection summary, 73 pin descriptions, 73 User I/O connections 73,74 input/output signals 73 sample input circuits, 81 sample I/O circuits, 81 sample output circuits, 83 User I/O connector, 48,49,54,55,57,70,87,101,108 Warning laser output, 49,50,56,58,60,68,69,71,78...
- Page 104 INDEX PAGE This page is intentionally left blank...
- Page 105 Engineered by Synrad, part of Novanta Novanta Headquarters, Bedford, USA Phone: +1-781-266-5700 Email: photonics@novanta.com ###### Revision X August 2022 © 2022, Novanta Corporation. All rights reserved.
Need help?
Do you have a question about the f201 and is the answer not in the manual?
Questions and answers