Table of Contents
Advertisement
Advertisement
Table of Contents

Related Manuals for Opel mobile BigButton M


Summary of Contents for Opel mobile BigButton M
-
Page 2: Table Of Contents
Table of Contents Safety Information ....... 5 Quick Setup Guide ......15 Turn the phone on for the first time ... 20 Overview of the Phone...... 22 Phone Status Icons ......26 Quick User Guide ......29 Predictive text (En/en/EN modes) ..34 Symbols (except 123 mode) ..... - Page 3 Messages ......... 63 Sound Profiles ........71 Alarm Clock ........75 Camera / Video Recorder ....76 Gallery / Image Viewer...... 80 Video Viewer ........82 Music ..........85 FM Radio .......... 88 Sound Recorder ........ 91 World Clock ........93 Calendar with Voice Note ....
- Page 4 Settings ........... 110 Troubleshooting and Support ..127...
-
Page 5: Safety Information
Safety Information Welcome to Opel Mobile and thanks for purchasing our products. For the best performance, we recommend you read this manual carefully, especially the "safety instructions". This will take you a couple of minutes, but it will save you time later and will allow you to enjoy all the features on your device. - Page 6 guidelines unit measurement known as the Specific Absorption Rate, or SAR. The SAR limit for mobile devices is 2 W/kg and the highest SAR value for this device when tested at the ear was 0.662 W/kg*. As mobile devices offer range functions, they can be used in other positions, such as on the body as...
- Page 7 **For body worn operation, this phone has been tested and meets the RF exposure guidelines when used with the Opel Mobile accessories supplied or designated for this product. Use of other accessories may not ensure compliance with RF exposure guidelines...
- Page 8 make the warranty invalid. Only certified repairers may install or repair phone equipment. Avoid hitting or shaking your phone. The warranty of this phone may be annulled unauthorised accessories. To prevent this from happening and to keep your phone working properly use only the battery charger and USB-C cable that originally comes with the device.
- Page 9 device before entering petrol stations, oil refinery’s or chemical plants. This product should not be used in extremely hot, cold, dusty or humid spaces. It also should not be exposed to long periods of sunshine or strong magnetic fields. If you have a pacemaker keep the phone at least a 20cm distance from the place it is located.
- Page 10 listening to music or employing any of the multimedia features on the phone. High sound pressure is possible and presents a hearing damage risk. Do not listen at high volume levels for long periods. You are fully responsible for keeping your information backed up and we do not take any legal responsibility for data that is damaged or lost.
- Page 11 Safety recommendations for accessories • Use only Opel Mobile accessories or chargers that came with this phone. • Be careful when handling the battery. The lithium-ion y can be put...
- Page 12 • In case you notice the cable, or the plug have suffered any damage, discontinue using it and contact Opel Mobile support line as soon as possible for advice.
- Page 13 Usage conditions and restrictions • All packaging materials, especially plastic ones, must be disposed of properly. The lack of this procedure may cause a suffocation danger to children. Any packaging must be kept out of children’s reach. • This device is not a toy and not designed for children and strict adult supervision must be adhered to at all times.
- Page 14 service provider as soon as possible and ask for the SIM card to be deactivated. • You are fully responsible for any damage caused by not following these instructions or for improper use of the device. We do not accept any liability for any improper use or mishandling on this device.
-
Page 15: Quick Setup Guide
Quick Setup Guide Unpack all the contents out of the packaging and have your SIM card ready to insert into the phone. (Please note this phone supports a Nano sized SIM card, if you do not have a Nano sized SIM card please contact your SIM card provider as they will be able to supply one for you) - Page 16 Lift from this corner first, using your thumb or fingernail to remove the cover Remove the battery from the phone by lifting from the bottom and pulling out. (Skip this step if the battery is not inserted into the phone)
- Page 17 Slide your SIM card into the SIM tray (sliding in until it does not go in any further), ensure the gold plates are facing downwards and the cornered edge is in the upper left corner.
- Page 18 Memory Card SIM Card Please note: This phone supports a Nano sized SIM card. If you do not have a Nano sized SIM card, please contact your SIM card provider as...
- Page 19 they will be able to supply one for you. If you wish to use an optional MicroSD memory card for extra phone storage, insert it into the memory card slot, ensure the gold plates are facing downwards when inserting it into the phone. (PLEASE NOTE: supports up to 32GB MicroSD card only) Re-insert the battery back into the...
-
Page 20: Turn The Phone On For The First Time
Replace the battery cover by sliding and pushing your fingers across the edges of the battery cover to ensure it has completely clicked back into place. Charge the phone by plugging in the USB-C cable into the phone’s charging port located at the bottom of the phone. - Page 21 active, the time and date will be automatically based your location. Power the phone on and off To turn the phone on, press and hold the power button for 5 seconds. To turn the phone off, press and hold the power button for 5 seconds.
-
Page 22: Overview Of The Phone
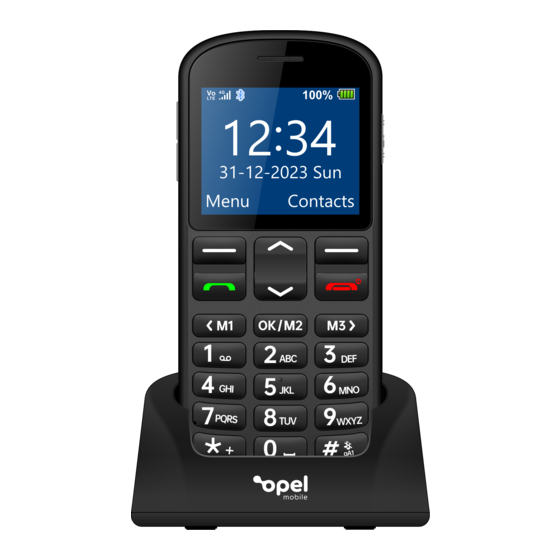
Overview of the Phone... - Page 24 Earpiece Volume buttons Up and down navigation keys Menu / Left selection key Answer / Call key Left navigation key / Quick Dial M1 (press-and-hold) Voicemail shortcut (press-and- hold) + symbol for international calls Torch switch Contacts / Right selection key End call / Power on/off key Right navigation key / Quick Dial M3 (press-and-hold)
- Page 25 OK key / Quick Dial M2 (press- and-hold) Silent / Vibrate mode (press and hold) Camera SOS emergency button (press 3 times) Battery cover 3.5mm headphone jack Loudspeaker Charging cradle connectors Torch LED Charging cradle connectors USB charging port Charging cradle...
-
Page 26: Phone Status Icons
Phone Status Icons Note: Icons are only for demonstration; they may differ on the actual device. Icons Descriptions Battery gauge Network signal strength VoLTE (4G Voice) service is activated Connected to roaming mobile network No SIM card is inserted... - Page 27 Memory card is inserted Unread SMS or MMS SMS/MMS storage is full Missed calls Call forwarding is activated HD Voice is enabled for current call Earphone is connected Silent mode is on Vibrate mode is on...
- Page 28 Bluetooth® is on Alarm is set Flight mode is on The Bluetooth® word mark and logos are registered trademarks owned by Bluetooth SIG, Inc. and any use of such marks by 3 Feet Solutions Pty Ltd is under license. Other trademarks and trade names are those of their respective owners.
-
Page 29: Quick User Guide
Quick User Guide Answer a call To answer an incoming call, simply press the green “Answer” key. Reject and silence a call To reject an incoming call, you can press the red Hang up/Power key. - Page 30 To silence an incoming call, you can press the OK key or either of the volume buttons.
- Page 31 Dialing and using keypad numbers (123 mode) To dial a phone number, press the numbers on the keypad then press the green “Answer” key to dial. To type numbers while creating a contact or writing a message, press the “Hash” # key until “123” mode is highlighted then press the ok key.
- Page 32 Typing Letters (en/En/EN/Abc/abc/ABC modes) To type in letters, press the “Hash” # key to choose between En, en, EN, Abc, abc, ABC modes, once...
- Page 33 the mode you desire is highlighted press the OK key. En, en and EN are predictive text modes with capital first letter, small letters or all capitals, respectively (see predictive text below). Abc, abc and ABC are standard text modes. E.g. To type the letter “c”, press the “2 ABC”...
-
Page 34: Predictive Text (En/En/En Modes)
Predictive text (En/en/EN modes) Predictive text is a smart way to type messages. This feature can make typing easier by suggesting words based on what you are typing. To use predictive text, press the “Hash” # key and select “En, en or EN”, then use the keypad to type the word without pressing the same key multiple times. - Page 35 To choose another candidate word, use the cursor keys to highlight it and then press “OK” key or “Space” 0 key to select the word.
-
Page 37: Symbols (Except 123 Mode)
Symbols (except 123 mode) To add symbols like dot, comma, question mark, etc., press the “Star” * key and scroll using the up/down cursor key and the M1 (Left) and M3 (Right) keys to choose the symbol you wish to use. Confirm your selection with the OK key. -
Page 38: Main Interface
Main Interface Main Menu From the main menu you will be able to access Messages, Contacts, Call Logs, Sound Profiles, Alarm, Tools, Settings and SOS. You can press the red Hang up/Power key to go back to the home screen. - Page 39 Notifications – Missed Calls and Unread Messages Notifications will be displayed on the front cover phone and/or displayed on the main screen. You can review the details of the missed call or messages via the main menu and select the item for more information.
-
Page 40: M1/M2/M3 And Speed Dial
M1/M2/M3 and Speed Dial Speed Dial is a quick and easy way to call the people that you may contact on a regular basis. Two sets of speed dial shortcuts can be configured here: (1) M1/M2/M3 keys (2) 2-9 number keys To set up Speed Dial, select the “Settings”... - Page 41 You can add contacts to M1/M2/M3 and 2-9 number keys by either manually typing in the phone numbers or choosing an existing contact. To remove a phone number from speed dial, highlight it and press the Options key then scroll down to Clear and press the OK key to delete.
-
Page 42: Photo Dial
To call any of your Speed Dial contacts, press and hold the M1/M2/M3 or 2-9 number keys from the home screen for 3 seconds, the phone will then dial that saved contact. Photo Dial Photo Dial is an intuitive and visualized way to call the people that you may contact on a regular basis. - Page 43 To assign a new phone number to an empty slot, press the corresponding number key and then Options key. You can add a contact from the phone contacts, or type in the phone number directly. To call any of your Photo Dial contacts, press 1-8 number keys while in the photo dial menu, the phone will then dial that saved...
- Page 44 the Options key then select Clear to delete it.
-
Page 45: Phone Contacts
Phone Contacts To access the phonebook, select the “Contacts” icon from the main menu, or simply press the right selection key at the home screen. Add a contact Press “Options” key and select “New contact” from the menu. - Page 46 Choose “Phone” or “SIM” memory to save this contact Press down cursor key to get to Name, then press OK key. Type in the contact name using the keypad and press OK to confirm. Use the down cursor key to get to “Mobile”...
- Page 47 using the keypad and press OK to confirm. Press “Save” key to save the contact.
- Page 48 Edit a contact Highlight the contact using the cursor keys, press “OK” key to view the contact. Then press Left selection key for “Options” and then “Edit” from the menu. Modify the contact’s name and phone number using the keypad and press “Save”...
- Page 49 Delete contacts Highlight the contact using the cursor keys you want to delete, then press the “OK” key. Press “Options” key and select “Delete” from the menu. Press “OK” key to confirm.
- Page 50 Search contacts Press any number on the keypad to access the search menu. A cursor will blink when it is in search menu. Type in some letters of the name of the contact you wish to find, press the “OK” key and the phone will list out the contacts matching with the letters you typed in.
- Page 51 cursor keys, press the “green call key” and the phone will call that contact highlighted. To send a message to a contact in the Phonebook, highlight the contact using the cursor keys, press “Options” key and select “Write Message” from the menu.
- Page 52 Import and Export contacts From the main menu select “Contacts”, press “Options” key and select “Import/Export” from the menu.
- Page 53 To copy contacts from phone to SIM or from SIM to phone. Press “OK” on Copy. Then press “OK” on “Copy from” and select either phone or SIM as the source. Then press “OK” key on “Copy to” and select either phone or SIM as the destination.
- Page 54 keys and the “OK” key to select individual contacts. Then press “Options” key and select “OK”, and choose the folder you want to save the exported contacts. To import contacts from a memory card to Phone memory, select “Import contacts”. Then select the files you want to import by press the “OK”...
- Page 55 Send vCard via SMS, MMS or Bluetooth Highlight and press “OK” key on the contact you wish to send via SMS, MMS or Bluetooth...
- Page 56 Select “Options” and highlight “Send vCard” and press the “OK” key. The highlight and press the “OK” key on the method you want to send the vCard – SMS, MMS or Bluetooth. Sending by SMS, type the phone number or select “Contacts” and press “OK”...
- Page 57 on the contacts you wish to MMS the vCard, then select “options” and “OK”. Scroll down using the cursor to “Type text message” if you wish to send a text message with this vCard. Press the “OK” key to then send the MMS. Sending by Bluetooth –...
-
Page 58: Call Logs
Call Logs To access call history including dialed calls, received calls, missed calls and rejected calls, select “Call Logs” icon from the main menu, or simply press the green “Answer/Call” key at the home screen. To view different types of call history, scroll down using the cursor keys to highlight a call log and press the “OK”... - Page 59 Call and Send message to a call log entry To call an entry from call logs, highlight the contact or number and press the green “Answer/Call” key, or press “Options” and select “Call” from the menu.
- Page 60 To send a message to an entry from call logs, highlight the contact or number and press “Options” key and select “Write Message” from the menu and choose whether to send an SMS or MMS Add call log number to contacts Highlight the call log number and select options.
- Page 61 Add call log number to blacklist Highlight the call log number and select options. Highlight “Add to blacklist” and press the “OK” key.
- Page 62 Delete call log entries From the main menu, select “Call Logs” and select the desired call history from the menu. Select “Options” and scroll down to “Delete”, then press the “OK” key. You can also delete all call history from the main Call Logs screen by selecting “Delete all”.
-
Page 63: Messages
Messages access text multimedia messages, select “Messages” icon from the main menu. Here you can view previous messages or send new messages to your friends and family. Create a new message Select “Write message” and press “OK” key. - Page 64 In the “Recipients” box, type in a phone number or press “OK” key to choose a contact from phonebook you want to send the message to.
- Page 65 Press the down key to “Text” box, type the message content using the keypad, and then press the Options key and then select “Send” to send the message. You can also send the message by pressing the “OK” key while in text message box.
- Page 66 Attach a media file or quick response When creating a message, you can attach a quick response, image, video or audio file. Press the “Options” key and select “Add” from the menu.
- Page 67 Attach the selected item – using the cursor keys and “OK” key to record or select a media file/quick response from the phone memory. View and reply to a message To view a message, highlight “Inbox” and press the “OK” key then use the cursor keys to highlight the message you want to view then press the “OK”...
- Page 68 To reply to a message, highlight the message you want to reply to. Select “Options” and press the “OK” key on “Reply” then type the content using the keypad in the “Text” box, and then use the “OK” key to send the message.
- Page 69 Delete or forward a message, or save the media file attachment Use cursor keys to highlight and open the message you want to delete, forward or save, then press the “OK” key to select and open it. Press “Options” key and select the actions from the menu by press the “OK”...
- Page 70 Quick Responses You can add new quick response or edit/delete an existing quick response. From the Messages menu, scroll down to Quick responses and press the “OK” key. Here you can edit or add a quick response message. To send a quick response, highlight it and press “OK”...
-
Page 71: Sound Profiles
capacity has reached the limit, the device will not be able to receive any new message. Delete unwanted or read messages from time to time can prevent the problems caused by memory full. Sound Profiles Here you can change Profile, Ringtones, Sound volume, Ringtone mode and Other alert settings. - Page 72 and then select Edit ringtones to edit the settings of highlighted sound profile. You can access Sound Profiles via the main menu or via the Settings menu. Select ringtones – Change ringtone of voice calls and alert tone of incoming messages. Press Select on either ringtone or message tone, then highlight the tone you wish to choose then press the “OK”...
- Page 73 Adjust volume – Change the sound volume of ringtones, alerts and voice calls. Press “OK” on the tone you want to edit, then use the up/down volume buttons to change the volumes. Ringtone mode – Select ringing, vibrate or silent for calls and alerts. Press the “OK”...
- Page 74 press the “OK” key on the option you want.
-
Page 75: Alarm Clock
Alarm Clock To access the alarm clock, select the “Alarm” icon from the main menu. You can set alarms to wake you in the morning or for other events or reminders. You can select Left Selection Key on the highlighted alarm to turn it on/off. -
Page 76: Camera / Video Recorder
Press the OK key to edit an alarm. You can change the alarm name, time, tone and repeat mode. You even can record your own voice as the alarm tone. Camera / Video Recorder To take photos or record videos, select Tools icon from the main menu, then select Camera. - Page 77 the Up cursor key while at the Home Screen. To shoot a photo - press the “OK” key to start capturing. You also can change photo effect and the options for capturing the images by pressing the Options key.
- Page 78 To shoot a video – press the Options key and select Video mode. You also can change video effect and the options for capturing the videos by pressing the Options key. To view the last photos, select “Options” and select “Gallery“. To view the last video, press “Options”...
- Page 79 “OK” key on the video you want to play. To change camera settings – press “Options” and then select “Settings” to configure Picture Quality, Shutter Sound, Auto save and Storage options (Optional SD Storage).
-
Page 80: Gallery / Image Viewer
Gallery / Image Viewer To access the photos captured and saved, select Tools and then Gallery icon from the main menu. Use cursor keys and “OK” key to open the photo file you want to view. - Page 81 Use left and right cursor keys to view the next or previous photo files. Press “Options” key and select the various actions from the menu, such as Set as wallpaper, Set as contact thumbnail, Delete, Share, Rename, Slide play and Details.
-
Page 82: Video Viewer
Video Viewer For Video Files - Select Tools and then Video icon from the main menu. By selecting Video, you will see the most recent file. Press “OK” key to play the most recent video file. Left/Right cursor keys to go to the next or previous video file. - Page 83 Press left “Options” key and select the various actions from the menu, such as Open other video files, Repeat, Shuffle, View play list, Settings, Set as Power on/off display and File details.
- Page 84 To view all saved video files, you can press “Options” key, select Open and then Local browse.
-
Page 85: Music
Music Select Tools from the main menu and then select Music. Using the curser to select and playback a song. You can playback music files saved to an external memory (SD) card inserted into the phones SD card slot. Press “OK” key to play/pause the music. - Page 86 Music playlist To create a new music list, press the Options key and select Music list, then press Options key again and select New list. To add music files to a music list, highlight one of the lists and press OK key to view the details, and...
- Page 87 then press the Options key and select Add music. Playing options To set the current music file as ringtone, press the Options key and select Set as ringtone.
-
Page 88: Fm Radio
To randomly playing music files within a playlist, press the Options key and select Shuffle. To repeat playing music, press the Options key and select Repeat. FM Radio The FM Radio can be accessed via the Tools icon on the main menu. Please note: For better FM reception and sound quality, it is suggested to be used in an outdoor environment. - Page 89 Press the “OK” key to turn on/off FM radio. Press Left/Right cursor keys to go to the next or previous preset station or press and hold to search for the next/previous available station. Press End Call key to leave FM radio turned on in background, while operating the phone as usual.
- Page 90 Preset radio stations Press the Options key and select Auto search and save to search for all available radio stations in your area. Press the Options key and select Channel list to Edit or Delete preset channels.
-
Page 91: Sound Recorder
Record FM radio Press the Options key and select Record or Scheduled record to record the FM radio programme as an audio file saved in the phone memory. Sound Recorder To access the Sound Recorder, select the “Tools” icon from the main menu, then select “Sound Recorder”. - Page 92 You can record your voice or any sound and store them in the phone. Use the OK key to start/pause recording, and the Stop key to stop and save the recording.
-
Page 93: World Clock
World Clock To access the World Clock, select the “Tools” icon from the main menu, then select “World Clock”. To add cities to your world clock list, press the OK key, or Options key and select Add city, then scroll down using the cursor key until you find the cities you wish to include in... - Page 94 your world clock, then press the OK key on those cities to add them. To delete a city from your world clock list, press the Options key, select Delete city, and scroll down using the cursor key until you find the cities you wish to delete.
- Page 95 cursor key until you find the cities you wish to set. Press OK key to select them, and then confirm selection.
-
Page 96: Calendar With Voice Note
Calendar with Voice Note To access the calendar, events and reminders, select the “Tools” icon from the main menu, then select calendar. - Page 97 Create a new event Use cursor keys to select a date and press “OK” key to create an event. Type in the event title in the Subject and use the cursor keys and keypad numbers to adjust the date, time, ringtone and repeat mode.
- Page 98 Create a reminder with voice note When creating or editing an event, you can record your voice as the reminder. Scroll to "Reminder tone" and press “OK” key. Select “Record voice”, and press “OK” key again to start recording.
- Page 99 Press the “Stop” key to finish recording, and press “OK” key again to save and use this recording as the reminder. Edit or delete an event Use cursor keys to select a date and press “OK” key to open it. (Date with events is denoted by a yellow flag)
- Page 100 Use cursor keys to highlight an event and press “OK” key again to view the details of an event. Press “Options” key and select “Edit” or “Delete” from the menu.
- Page 101 View all schedules Press Options key while viewing the monthly calendar, select View schedules to view the events on the highlighted date, or select View all schedules to view all the events saved.
-
Page 102: Calculator
Calculator To access the calculator, select “Tools” icon from the main menu, then select “Calculator“. This is just like any normal calculator. Press the number keys on the keypad and use the cursor keys for the calculations. The “Hash” # key is for typing a decimal point. -
Page 103: Magnifier
Magnifier Select the Tools icon from the main menu, then select “Magnifier”. You can magnify a real object for viewing it clearer via the camera. Use up and down cursor keys to zoom in and zoom out, maximum magnification level is 6x. -
Page 104: File Manager
File Manager To access the files stored in the phone or external memory card, select the Tools icon from the main menu, then select “My files”. - Page 105 Use cursor keys to highlight the file you want to manage, then press the “OK” key to open the file or press Options key to select various actions, including create folder, send SMS/MMS/Bluetooth, delete, view details, search, rename, copy/cut and paste.
-
Page 106: Sos
SOS feature is designed for people who need to contact their family or close friends by just pressing the SOS button on the back on the phone 3 times, in case there is an emergency. When the SOS is activated, it will send a text message to all your saved emergency contacts, as well as a text message contains the GPS location of... - Page 107 ring your saved emergency contacts until someone answers the phone call. Add or edit an emergency contact From the main menu, select the SOS Emergency icon and press the “OK” key. In the Emergency menu, you can enable the SOS function, set up your SOS contacts, set up your SOS message, turn on/off siren while activating SOS and see the...
- Page 108 Select SOS Contacts to add up to five contact numbers by pressing Options, then Edit or Import contacts. You can either type in a phone number manually or select an existing contact from your phonebook.
-
Page 109: Torch
Edit the emergency text message Select “SOS Message” and press “OK” key to edit your emergency text message. Torch To turn on the LED flashlight, flip the switch on the right-hand side of the phone. - Page 110 Settings Under Settings you will be able to adjust most of the phone settings, like Speed dial, Bluetooth, Phone settings (Time & date, Language, Shortcuts, Low battery notification, Restore factory settings), Display settings (e.g. Wallpaper, Brightness), Sound profiles (Ringtones, Sound volume, Other tone settings), Security (SIM PIN number, Phone password, Blacklist), Call settings and Networks.
- Page 111 Speed Dial Speed Dial is a quick and easy way to call the people that you may contact on a regular basis. Two sets of speed dial shortcuts can be configured here: (1) M1/M2/M3 keys (2) 2-9 number keys See the Speed Dial instructions above.
- Page 112 Bluetooth Press “OK” key to switch Bluetooth on or off. Click on “Paired device” and “add new device” to search for nearby devices. Once it has found the device you want to connect to, select the device and it will begin to pair to that device. Once paired, it will say “Connected”.
- Page 113 Phone settings Here you can change Time & Date, Language, Shortcuts, battery notification and Restore factory settings. Time & Date – Change the time and date on the phone, use the cursor keys and the number keypad to modify the date and time and their formats, then press Done to save.
- Page 114 Language – Change the writing language when writing messages or saving a contact. Shortcuts – Change the shortcuts function of Up/Down cursor key. Press the “OK” key then highlight your selection using the cursor keys then press the Done to save.
- Page 115 Low battery notification – When battery capacity is lower 10%, the phone will automatically send a text message to the 3 Notification Contacts you have saved, to ask them to remind the phone user to charge the phone. Restore factory settings – Clear all the data stored in the phone and restore all the phone settings to factory default.
- Page 116 and then select “OK” to confirm the factory reset. Display settings Here you can change Wallpaper, Brightness and Blacklight settings. Wallpaper settings – Change wallpaper to built-in wallpaper, your...
- Page 117 own photo or video files. Press “OK” on wallpaper settings and choose your desired wallpaper and select “OK” Brightness – to adjust the screens brightness, use the left and right selection keys to increase or decrease the brightness. Backlight – Change the timeout value of screen backlight.
- Page 118 Security Here you can change SIM PIN number, enable phone startup password, keypad lock, call and message blacklist settings. SIM PIN – Enable SIM PIN and change the PIN number (default PIN is provided by your network operator), press the “OK” key on SIM PIN to enable SIM PIN.
- Page 119 password is 0000). Press the “OK” key on require password and input the phones password to activate password on startup. To modify the passcode, press “OK” key on modify phone password, enter in the current passcode, then enter in your new passcode. Auto keypad lock –...
- Page 120 To add new number to the blacklist press “Options” key and select “New” then type in the name and phone number you want to block from calling or messaging you. Then select “Save” to save it to your blacklist. To remove a phone number on the blacklist, highlight it and press “Options”...
- Page 121 Call settings Here you can setup call forwarding, call waiting, call barring, caller ID and call waiting settings and more.
- Page 122 Call forwarding – Within call forwarding you can select to always forward calls, forward when busy, forward when unanswered and forward when unreachable. Simply select the options you wish to use and turn them on. You can then choose which number you wish callers to be forwarded to.
- Page 123 select the options you wish to use using the “OK” Key and selecting on or off. Hide Caller ID – Do not show your phone number (caller ID) while making an outgoing call. Select either Hide Caller ID, Display own ID or Display ID set by your network using the “OK”...
- Page 124 Networks Here you can change Access Point (APN), turn on or off mobile data service, data roaming, 4G voice (VoLTE), select mobile network and restrict network type. Network account – Configure mobile data service settings (APN) Data service – Enable of disable mobile data service Data roaming - Enable of disable roaming mobile data service in...
- Page 125 Network selection – Select available mobile network to connect Network type – Select whether to connect to 4G networks...
- Page 126 VoLTE calls – Enable 4G voice calls (network dependent)
- Page 127 Troubleshooting and Support If you are experiencing difficulties with your mobile phone, please go through the following troubleshoots: The Mobile Phone will not power on Ensure the battery is inserted correctly. Ensure you have removed the battery sticker from the gold connection pins.
- Page 128 The phone is asking for a PUK code This means you have input the incorrect password 3 times or more. Contact your network provider to retrieve your PUK code to unlock your phone. Only your network provider can help unlock your SIM. SIM card error or no SIM card Ensure you have inserted the SIM...
- Page 129 Failure to connect to the network Your network signal may be weak or out of range. Contact your network provider or try the phone in a different location to check your signal. Your SIM card may be damaged, invalid or has no credit. Contact your network provider for support.
- Page 130 Ensure you have enough credit on your network provider’s account. Contact your network provider for support. Your signal strength may be weak. Check your signal strength and contact your network provider. Cannot receive calls Ensure your mobile phone is switched on. Ensure you have enough signal strength to receive calls.
- Page 131 Cannot hear anyone on the call Ensure your call volume is adjusted to your requirements. Using the volume keys on the left side of the phone Ensure you have sufficient signal strength. The other party cannot hear you on the call Ensure your hand or fingers are not covering the microphone which is located next to the 7 number key.
- Page 132 Ensure the other party has their volume turned up to their desired level. Mobile Phone won’t charge Ensure the power plug is inserted in the wall socket correctly and the wall switch is turned on. Ensure the wall power socket is working by testing another device or a separate power socket.
- Page 133 Mobile phone won’t connect via Bluetooth Ensure you have turned on and activated the Bluetooth setting. Ensure you follow the Bluetooth instructions above. Ensure the other device has Bluetooth enabled. Your Bluetooth device may be too far away from the other device to connect.
Need help?
Do you have a question about the BigButton M and is the answer not in the manual?
Questions and answers
How to remove SIM?
To remove the SIM card from the Opel BigButton M:
1. Turn off the device.
2. Hold the device in one hand.
3. Use your thumb or fingernail to lift off the battery cover, starting from the bottom left corner when looking at the back of the phone.
4. Once the battery cover is removed, locate and remove the SIM card.
Note: The phone uses a Nano SIM card.
This answer is automatically generated
How do I ring a number?
To make a call on an Opel Mobile BigButton M:
1. Dialing a Number Manually: Enter the phone number on the keypad and press the call button.
2. Using Speed Dial: Press and hold the M1, M2, M3, or any 2-9 number key (if assigned) for 3 seconds to call the saved contact.
3. Using Photo Dial: Press the Down cursor key on the home screen to open the Photo Dial menu, select a contact shortcut, and press the call button.
These methods allow quick and easy calling on the Opel BigButton M.
This answer is automatically generated
our Smart J5 phone has bad static at the receivers end , can only Tex some times