Table of Contents
Advertisement
Advertisement
Table of Contents

Related Manuals for Opel mobile FlipPhone 4


Summary of Contents for Opel mobile FlipPhone 4
-
Page 2: Table Of Contents
Table of Contents Safety Information ........................... 3 Quick Setup Guide .......................... 6 Turn the phone on for the first time ....................9 Overview of the Phone ........................10 Phone Status Icons ........................12 Quick User Guide .......................... 13 Predictive text (En/en/EN modes) ....................15 Symbols (except 123 mode) ...................... -
Page 3: Safety Information
Safety Information Welcome to Opel Mobile and thanks for purchasing our products. For the best performance, we recommend you read this manual carefully, especially the "safety instructions". This will take you a couple of minutes, but it will save you time later and will allow you to enjoy all the features on your device. - Page 4 Be careful when handling the battery. The lithium-ion battery can be put into use immediately after being unpacked. Use only the Opel Mobile battery that came with the device. We recommend charging the battery as soon as possible once the phone has been switched on.
- Page 5 This device is not a toy and not designed for children and strict adult supervision must be adhered to at all times. Keep the phone and the accessories beyond children’s reach. This device can be recycled. To dispose of this device properly remember to follow local regulations.
-
Page 6: Quick Setup Guide
Quick Setup Guide Unpack all the contents out of the packaging and have your SIM card ready to insert into the phone. (Please note this phone supports a Nano sized SIM card, if you do not have a Nano sized SIM card please contact your SIM card provider as they will be able to supply one for you) Make sure your device is turned off. - Page 8 Please note: This phone supports a Nano sized SIM card. If you do not have a Nano sized SIM card, please contact your SIM card provider as they will be able to supply one for you. If you wish to use an optional MicroSD or TF card for extra phone storage, insert it into the MicroSD/TF card slot, ensure the gold plates are facing downwards when inserting it into the phone.
-
Page 9: Turn The Phone On For The First Time
Replace the back cover by sliding and pushing your fingers across the edges of the back cover to ensure it has completely clicked back into place. Charge the phone by plugging in the Micro USB cable into the phone’s charging port located on the left-hand side of the phone. -
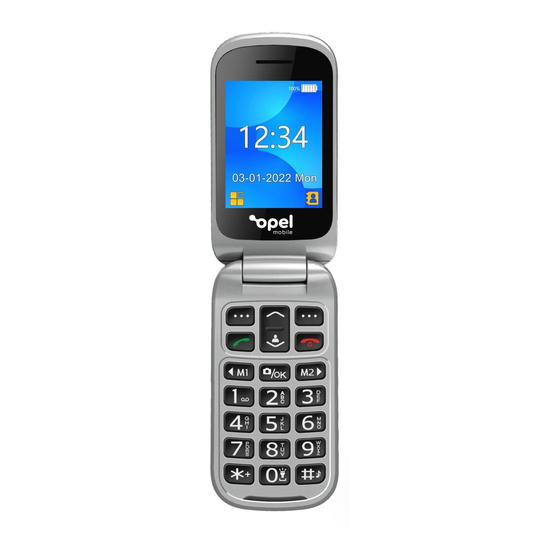
Page 10: Overview Of The Phone
Overview of the Phone Menu / Left selection key Answer / Call key Quick Dial M1 / Left navigation key + symbol for international calls Earpiece Write new message / Up navigation key Speed Dial / Down navigation key Contacts / Right selection key End call / Power on/off key 10 Quick Dial M2 / Right navigation key 11 Camera / OK key... - Page 11 16 USB charging port 17 Volume up button 18 Torch (press and hold) 19 Volume down button 20 Charging cradle connectors 21 Camera 22 Missed call alert (green), Torch (yellow), Charging indicator (red) 23 External screen...
-
Page 12: Phone Status Icons
Phone Status Icons Note: Icons are only for demonstration; they may differ on the actual device. Icons Descriptions Battery capacity Network signal strength VoLTE (4G Voice) service is activated Connected to roaming mobile network No SIM card is inserted Memory card is inserted Unread SMS or MMS Missed calls Call forwarding is activated... -
Page 13: Quick User Guide
Quick User Guide Answer a call To answer an incoming call, simply flip open the phone and the call will be answered. You can turn off the flip to answer function in the settings menu. If this is turned off, to answer a call press the green “Answer”... - Page 14 Dialling and using keypad numbers (123 mode) To dial a phone number, press the numbers on the keypad then press the green “Answer” key to dial. To type numbers while creating a contact or writing a message, press the “Hash” # key until “123”...
-
Page 15: Predictive Text (En/En/En Modes)
Abc, abc and ABC are standard text modes. E.g. To type the letter “c”, press the “2 ABC” key 3 times until the letter “c” comes up. Predictive text (En/en/EN modes) Predictive text is a smart way to type messages. This feature can make typing easier by suggesting words based on what you are typing. -
Page 16: Symbols (Except 123 Mode)
To choose another candidate word, use the cursor keys to highlight it and then press “OK” key or “Space” 0 key to select the word. Symbols (except 123 mode) To add symbols like dot, comma, question mark, etc., press the “Star” * key and scroll using the up/down cursor key and the M1 (Left) and M2 (Right) keys to choose the symbol you wish to use. -
Page 17: Main Interface
Main Interface Main Menu From the main menu you will be able to access Messages, Contacts, Call logs, Sound profiles, Clock, Torch, Tools, Settings and SOS. You can press the red Hang up/Power key to go back to the home screen. Notifications –... -
Page 18: M1 / M2 Quick Dial
M1 / M2 Quick Dial Quick Dial is a quick and easy way to call the people that you may contact on a regular basis. Two contact shortcuts can be added to Quick Dial. To set up Quick Dial, press upper left key to get into the phone menu and go to the Settings icon. -
Page 19: Speed Dial
To call any of your Quick Dial contacts, press the M1 or M2 key from the home screen, it will then dial that contact. Speed Dial Speed Dial is a quick and easy way to call the people that you may contact on a regular basis. -
Page 20: Phone Contacts
To call any of your Speed Dial contacts, press and hold down the respective keypad number for 3 seconds, it will then ring that phone number. Phone Contacts To access phone contacts, press the upper left key to get into the phone menu, then press the down cursor key until you get to contacts. - Page 21 Choose “Phone” or “SIM” memory to save this contact Press down cursor key to get to Name, then press OK key. Type in the contact name using the keypad and press OK to confirm. Use the down cursor key to get to “Mobile” or “Home number”, then press the OK key. Type in the phone number using the keypad and press OK to confirm.
- Page 22 Press upper left selection key to save the contact.
- Page 23 Edit a contact Highlight the contact using the cursor keys, press “OK” key to select the contact. Then press Left selection key for “Options” and then “Edit” from the menu. Modify the contact name and phone number using the keypad and select “Save” to save the contact.
- Page 24 Search contacts Press any number on the keypad to access the search menu. A cursor will blink when it is in search menu. Type in some letters of the name of the contact you wish to find, press the “OK” key and the phone will list out the contacts matching with the letters you typed in.
- Page 25 To send a message to a contact in the Phonebook, highlight the contact using the cursor keys, press “Options” key and select “Write Message” from the menu. Blacklist contacts Highlight the contact you want to add to the blacklist. Press “Options” then use the cursor key to highlight “Add to blacklist” then press the “OK”...
- Page 26 Import and Export contacts From the main menu select “Contacts” press “Options” key and select “Import/Export” from the menu. To copy contacts from phone to SIM or from SIM to phone. Press “OK” on copy. Then press “OK” on “Copy from” and select either phone or SIM. Then press “OK” on “Copy to”...
- Page 27 To export contacts in phone memory to a memory Card, select “Export contacts”. Use the down cursor and press the “OK” key to select individual contacts or select options using the top left key and press “OK” on “Mark All” if you want to export all contacts. Then press “options”...
- Page 28 Send vCard via SMS, MMS or Bluetooth Highlight and press “OK” key on the contact you wish to send via SMS, MMS or Bluetooth Select “Options” and highlight “Send vCard” and press the “OK” key. The highlight and press the “OK” key on the method you want to send the vCard – SMS, MMS or Bluetooth.
-
Page 29: Call Logs
Sending by SMS type the phone number or select “Contacts” and press “OK” key on the contacts you wish to send the vCard to, then select “options” and “OK” then press the “OK” key to send the vCard to the contacts selected. Sending by MMS type the phone number or press the “OK”... - Page 30 Call and Send message to a call log entry To call an entry from call logs, highlight the contact or number and press the green “Answer/Call” key, or press “Options” and select “Call” from the menu. To send a message to an entry from call logs, highlight the contact or number and press “Options”...
- Page 31 Add call log number to contacts Highlight the call log number and select options. Highlight “Add to contacts” and press the “OK” key, then choose to add as a new contact or to an existing contact and press “OK” key. Add call log number to blacklist Highlight the call log number and select options.
-
Page 32: Messages
Delete call log entries From the main menu, select “Call logs” and select the desired call log from the menu. Select “Options” and scroll down to “Delete”, then press the “OK“ key. You can also delete all call logs from the main Call Logs screen by selecting “Delete all”. - Page 33 Create a new message Select “Write message” and press “OK” key. Alternatively, you can press the Up cursor from the standby screen. In the “Type name or number” box, type in a phone number or press “OK” key to choose a contact from phonebook you want to send the message to. Press the down key to “Type message”...
- Page 34 the message. You can also send the message by pressing the “OK” key while in text message box. To change the keypad text mode, press the “Hash” # key and choose between En, en, EN, Abc, abc, ABC and 123 modes using the up/down cursor. Press OK key to confirm.
- Page 35 Attach a media file/quick response to a message. When creating a message, you can attach a quick response, image, video or audio file to this message. Press the “Options” key and select “Add” from the menu. Attach the selected item – using the cursor keys and “OK” key to record or select a media file/quick response from the phone memory.
- Page 36 View and reply to a message To view a message, highlight “Inbox” and press the “OK” key then use the cursor keys to highlight the message you want to view then press the “OK” key to select and open it. Once opened you can use the up or down cursor keys to read the previously received messages of a conversation.
-
Page 37: Camera / Video Recorder
Quick Responses You can add new quick response or edit/delete an existing quick response. From the Messages menu, scroll down to Quick responses and press the “OK“ key. Here you can edit and add quick responses by selecting edit on a quick response. To send a quick response, highlight and press “OK“... - Page 38 To shoot a photo or a video - use left and right cursor (M1 and M2) keys to select Photo (DC mode) or Video (DV mode), and then press the “OK” key to start capturing. You also can change the options for capturing the images or videos, such as flash light, resolution, night mode, auto timer, brightness, exposure, white balance and colour filter.
- Page 39 To view the last photos, select “Options“ and press “Image viewer“. To view the last video, press “Options“ while in video mode and select “View video directory” and press the “OK” key on the video you want to play. To change camera settings – press “Options” and then select “Settings“ to configure Picture Quality, Shutter Sound, Auto save and Storage options (Optional SD Storage).
-
Page 40: Gallery / Image Viewer
Gallery / Image Viewer To access the photos captured and saved, select Tools and then Gallery icon from the main menu. - Page 41 Use cursor keys and “OK” key to open the photo file you want to view. Use left and right cursor keys to view the next or previous photo files. Press “Options” key and select the various actions from the menu, such as Set as wallpaper, Set as contact thumbnail, Power on/off picture, and Delete.
-
Page 42: Video Viewer
Video Viewer For Video Files - Select Tools and then Video icon from the main menu. By selecting Video, you will see the most recent file. Press “OK” key to play the most recent video file. Left/Right cursor keys to go to the next or previous video file. - Page 43 Press “Options” key and select the various actions from the menu, such as Open other video files, Full screen playback, Adjust brightness,View history, My favourite play list, Repeat, Shuffle, Set as Power on/off animation, Set as wallpaper, Settings and File details.
-
Page 45: Calculator
Calculator To access the calculator, select “Tools“ icon from the main menu, then select “Calculator“. This is just like any normal calculator. Press the number keys on the keypad and use the cursor keys for the calculations. The “Hash” # key is for typing a decimal point. The */+ key is for switching between negative and positive number. -
Page 46: Clock
Clock To access the alarm clock, world clock, timer and stopwatch, select the “Clock“ icon from the main menu. Use Left/Right cursor keys to select Alarm, World clock, Stopwatch and Timer. Alarm Clock Scroll across to alarm clock, here you can set alarms to wake you in the morning or for other events or reminders. - Page 47 Press the OK key to edit an alarm. You can change the alarm name, time, tone and repeat mode. World Clock...
- Page 48 To add cities to your world clock list, press the Options button, select Add city, and scroll down using the cursor button until you find the cities you wish to include in your world clock, then press the ok button on those cities to add them. To delete a city from your world clock list, press the Options button, select Delete city, and scroll down using the cursor button until you find the cities you wish to delete.
- Page 49 Stop watch Press Left Selection key to begin the stopwatch. Press OK/Count key to add lap times. You can pause the timer and start again by pressing the Left Selection key. To reset the stop watch completely, press the Left Selection key to pause the timer and then then press OK/Reset key to reset.
-
Page 50: Calendar
Calendar To access the calendar, events and reminders, select the “Tools“ icon from the main menu, then select calendar. Create a new event Use cursor keys to select a date and press “OK” key to create an event. - Page 51 Type in the event title in the Subject and use the cursor keys and keypad numbers to adjust the date, time, ringtone and repeat mode. Press “Save” to save the event. Edit or delete an event Use cursor keys to select a date and press “OK” key to open it.
- Page 52 Use cursor keys to highlight an event and press “OK” key again to view the details of an event. Press “Options” key and select “Edit” or “Delete” from the menu.
- Page 53 View all schedules Press Options key while viewing the monthly calendar, select View schedules to view the events on the highlighted date, or select View all schedules to view all the events saved. Weekly view or Daily view Press Options key while viewing the monthly calendar, scroll down and select Weekly or Daily for different calendar views.
-
Page 54: Fm Radio
FM Radio The FM Radio can be accessed via the Tools icon on the main menu. Please note: For better FM reception and sound quality, it is suggested to be used in an outdoor environment. Press the “OK” key to turn on/off FM radio. Press Left/Right cursor keys to go to the next or previous preset station or press and hold to search for the next/previous available station. -
Page 55: Music
Press the Options key and select Channel list to Edit or Delete preset channels. Music Select Tools from the main menu and then select Music. Using the curser to select and playback a song. You can playback music files saved to an external memory (SD) card inserted into the phones SD card slot. - Page 56 Press “OK” key to play/pause the music. Press the Left/Right cursor keys to go to the next or previous tracks, or press and hold to fast forward or rewind the current music playing. Press End Call key to leave the music being played in background, while operating the phone as usual.
- Page 57 To add music files to a music list, highlight one of the lists and press OK key to view the details, and then press the Options key and select Add music. Playing options To set the current music file as ringtone, press the Options key and select Set as ringtone.
-
Page 58: File Manager
File Manager To access the files stored in the phone or external memory card, select the Tools icon from the main menu, then select “My files”. Use cursor keys to highlight the file you want to manage, then press the “OK” key to open the file or press Options key to select various actions, including create new folder, send via SMS/MMS/Bluetooth, delete, view details, search, rename, copy/cut and paste. -
Page 59: Sos
SOS feature is designed for people who need to contact their family or close friends by just pressing the SOS button on the back on the phone 3 times, in case there is an emergency. When the SOS is activated it will send a text message to all your saved emergency contacts. Important: After the phone has sent out the text messages, it will then attempt to ring your emergency contacts until someone answers the phone call. - Page 60 Add or edit an emergency contact From the main menu, select the SOS Emergency icon and press the “OK” key. In the Emergency menu, you can enable the SOS function, set up your SOS contacts, set up your SOS message and see the help menu. Select SOS Contacts to add up to five contact numbers by pressing Options and Edit.
-
Page 61: Torch
Edit the emergency text message Select “SOS Message” and press “OK” key to edit your emergency text message. Torch To turn on the LED flashlight, select the Torch icon from the main menu. Pressing “OK” to turn it On and Off. You can also access the Torch function via the keypad by pressing and holding the “0”... -
Page 62: Settings
Settings Under Settings you will be able to adjust most of the phone settings, like Quick Dial Keys (M1 and M2), Bluetooth, Phone settings (Time & date, Shortcuts, Auto power on/off, Restore factory settings), Display settings (e.g. Wallpaper, Brightness), Sound profiles (Ringtones, Sound volume, Other tone settings), Security (SIM PIN number, Phone password, Blacklist), Call settings and Networks. - Page 63 Phone settings Here you can change Time & Date, Standby screen shortcuts, Auto power on/off and Restore factory settings. Time & Date – Change the time and date on the phone, use the cursor keys and the number keypad to modify the date and time then press select to save.
- Page 64 Shortcuts – Change the shortcuts function of Up/Down cursor key (default settings are Up: Write new message, Down: Speed dial). Press the “OK” key then highlight your selection using the cursor keys then press the “OK” key to save. Auto power on/off – Change time of powering on or off automatically. Press the “OK” key to edit the turn on or turn off time and repeat settings.
- Page 65 Restore factory settings – Clear all the data stored in the phone and restore all the phone settings to factory default. Default password is 0000. Please note: if you restore your device all information saved on this phone will be permanently deleted. To factory reset press the “OK”...
- Page 66 Wallpaper settings – Change wallpaper to built-in wallpaper, your own photo or video files. Press “OK” on wallpaper settings and choose your desired wallpaper and select “OK” Idle display settings – Show time & date, current music and radio station on home screen.
- Page 67 Profile name – Change name of the profile by press the “OK” key and editing the name then pressing the “OK” key to save. Select ringtones – Change ringtone of voice calls and alert tone of incoming messages. Press select on either ringtone or message tone, then highlight the tone you wish to choose then press the select key to save that option.
- Page 68 Other alert ring – Change the tone of the keypad, battery low alert and dial tone (talking keys). Press the “OK” key on the function you want to edit then press the “OK” key on the option you want for that function.
- Page 69 Security Here you can change SIM PIN number, enable phone startup password, call and message blacklist settings. SIM PIN – Enable SIM PIN and change the PIN number (default PIN is provided by your network operator), press the “OK” key on SIM PIN to enable SIM PIN. To modify the SIM pin press the “OK”...
- Page 70 Blacklist Blacklist can block unwanted phone numbers from being able to call or message you. Press the “OK” key on Blacklist. It will then show you all the numbers and contacts that are listed in blacklist. To add new number to the black list press “Options” key and select “New” then type in the name and phone number you want to block from calling or messaging you.
- Page 71 To remove a phone number on the blacklist, highlight it and press “Options” key and select “Delete” Call settings Here you can setup flip to answer, call forwarding, call barring, caller ID and call waiting settings. Flip answer – Press the “OK” key on flip to answer to turn this option on or off. Turning it on means when the someone calls your phone when you flip it open it will automatically answer the call.
- Page 72 wish callers to be forwarded to. The default number will be your network providers voicemail service. Press the “OK” key on the call forwarding option and select on or off using the “OK” key. Call waiting – Enable the second caller to call you while you are having an ongoing call. Press the “OK”...
- Page 73 Access Point Name – Configure mobile data service settings Data service – Enable of disable mobile data service Data roaming - Enable of disable roaming mobile data service in overseas Network selection – Select available mobile network to connect...
- Page 74 Network type – Select whether to connect to 4G networks VoLTE calls – Enable 4G voice calls (network dependent)
-
Page 75: Troubleshooting And Support
Troubleshooting and Support If you are experiencing difficulties with your mobile phone, please go through the following troubleshoots: The Mobile Phone will not power on Ensure the battery is inserted correctly. Ensure you have removed the battery sticker from the gold connection pins. Ensure you are pressing and holding the power button for 5 seconds to turn on the phone. - Page 76 Cannot receive calls Ensure your mobile phone is switched on. Ensure you have enough signal strength to receive calls. Ensure you do not have the phone in flight mode. Ensure your SIM card is installed correctly. Cannot hear anyone on the call Ensure your call volume is adjusted to your requirements.
Need help?
Do you have a question about the FlipPhone 4 and is the answer not in the manual?
Questions and answers
can u change to 4g on this phone?