Table of Contents
Advertisement
Advertisement
Table of Contents

Related Manuals for Opel mobile EasySmart 2


Summary of Contents for Opel mobile EasySmart 2
-
Page 2: Table Of Contents
Table of contents Safety Information ........................3 Safety Recommendations while using your device ..............5 Appearance and Key Functions ....................7 Quick Setup Guid ........................8 Notifications Bar ........................10 Phonebook/Calls ........................11 Phone Settings .......................... 22 Messages ..........................23 Camera ............................ -
Page 3: Safety Information
Safety Information Read this entire manual carefully before you start using the device. This will take you a few minutes, but it will save you time later and will allow you to enjoy all the features on your device. THIS MODEL MEETS INTERNATIONAL GUIDELINES FOR EXPOSURE TO RADIO WAVES Your mobile device is a radio transmitter and receiver. - Page 4 device with your hands wet or immerse it in water. In case it gets wet keep the phone OFF and do not use a microwave to dry it. This product should not be used in extremely hot, cold, dusty or humid spaces. It also should not be exposed to long periods of sunshine or strong magnetic fields.
-
Page 5: Safety Recommendations While Using Your Device
Safety Recommendations while using your device AIRCRAFT Switch off your wireless device whenever you are instructed to do so by airport or airline staff. If your device offers a ‘flight mode’ or similar feature consult airline staff as to its use in flight. DRIVING Full attention should always be given to driving and local laws and regulations restricting the use of wireless devices while driving must be observed. - Page 6 Be careful when handling the battery. The lithium-ion battery can be put into use immediately after being unpacked. Use only the Opel Mobile battery that came with the device. We recommend charging the battery as soon as possible once the phone has been switched on.
-
Page 7: Appearance And Key Functions
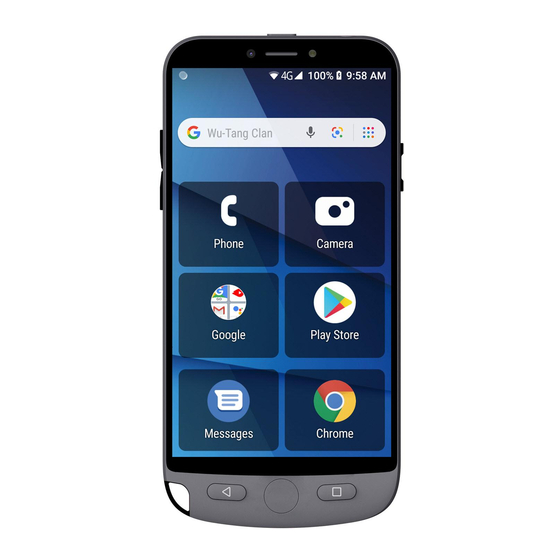
Appearance and Key Functions... -
Page 8: Quick Setup Guid
Quick Setup Guide Installing the SIM Card This phone requires a Micro size SIM card. If you don’t have a Micro size SIM card contact your SIM card provider, they will be able to supply one for you. 1. Make sure the device is turned off. 2. - Page 9 Charging the Phone 1. Connect the charger to the phone by inserting the Micro USB cable into the USB port in the phone and connecting the power adaptor to a wall socket and turn on. 2. You can also charge the device from the charging cradle. Connect the Micro USB to the USB port in the charging cradle.
-
Page 10: Notifications Bar
Notifications Bar The Notification bar is located on the top of the screen which contains useful and important information regarding your phone and the applications that are installed. To access the notification bar, simply swipe down from the top of the screen to access it. On the notification bar, several setting icons will appear such as Wi-Fi, Bluetooth®, Do not disturb, Torch, Portrait, Battery saver, Mobile Data, Aeroplane mode, Location, Hotspot and data saver. -
Page 11: Phonebook/Calls
Phonebook/Calls Adding new contacts 1. Tap on the Phone icon Tap on the Phone icon 2. Tap on the contacts icon, then tap on “Create new contact” “Create contact”... - Page 12 3. Choose where you would like to save this contact (Phone, SIM card or email account) Choose where you would like to save your contact 4. Then fill in all the contacts details such as name, phone number, email, address and any other information you would like to save.
- Page 13 6. Click the save button when done. Follow the same process to add all your other contacts Phone Favourites/Recent call list 1. Click the Phone icon...
- Page 14 2. There are 3 tabs in the Phone application; Favourites, Recent call list and Contacts 3. To add a favourite contact simply click add a favourite and select which contact you wish to add as a favourite. Once you have setup favourites you can call and message these contacts directly from this menu by clicking on the contact and selecting the call button or message button Tap here to add favourites...
- Page 15 4. Recent Call List will show all your recent calls you have made and received. You can click on any recent call to call this person again Tap here to see your recent call list Search contacts 1. To search contacts tap on the Search contacts panel in the phonebook app. 2.
- Page 16 Delete Contacts 1. Click on the Phone icon 2. Click on the contact you wish to delete 3. Then click on the settings icon and choose delete.
- Page 17 Settings Icon Import / Export Contacts The phone allows you to import and export contacts to synchronize information between different storage types that include the SIM card, Google account and your phone. To import or export contacts 1. Press the Contacts icon to enter the phonebook. 2.
- Page 18 3. Select the source you want to copy the contacts from. Once selected click next and select the destination where you want the contact to be copied to then select the desired contacts to be copied.
- Page 19 Quick dial shortcuts You can create quick dial shortcuts for any contact that is saved to your phone’s storage. 1. Make sure the contact you wish to create as a quick dial shortcut is saved on the phone’s storage not the SIM card. Select that contact as a favourite by following the steps above. If you want a picture of the contact to appear in the quick dial shortcut, ensure you add a picture to that contact prior to creating the quick dial shortcut.
- Page 20 4. You can hold down on apps and quick dial shortcuts and move them around on your home screen interface into the positions you prefer. 5. To then dial that contact via quick dial, simply tap on the contact and it will then begin to call that contact.
- Page 21 How to answer or reject a call 1. To answer an incoming call swipe up to answer the call or swipe down to reject the call 2. Once you have answered a call you have options to mute the call, put it on loudspeaker, add another caller or put the caller on hold.
-
Page 22: Phone Settings
Phone Settings 1. To access Phone settings, tap on the settings icon while in the Phone app, then tap settings. 2. Within settings you can adjust your Phone settings: Display Options – You can sort by first name or last name and also change Name Format, First name first or surname first Sounds and vibrations –... -
Page 23: Messages
Messages Write text messages 1. Click on the Messages icon 2. Click on start chat to begin a message... - Page 24 3. Click on the contact or type in the phone number you wish to send a text message to Tap on the contact you wish to send a message 4. Once you have selected the contact. Write the message you wish to send using the screens keypad, you can also send images and attachments using the plus icon, then click the SMS button to send the message Tap SMS...
- Page 25 View messages 1. To view a message, you have received click on the Message icon. Any message that is bold is an unread message you have received. Click on that message to view. You are also able to reply to that message from the view screen Tap on the message you wish to view...
- Page 26 Message Settings To access your message settings, click on the settings icon, then tap on settings within the message app. Within message settings you can adjust the following: Default SMS app – you can change which app to use as default for messages, you may have a preferred app you wish to use.
-
Page 27: Camera
Camera Prior to use: You have the option of inserting an SD/TF card (up to a maximum of 32GB) before using the camera or video camera. All photos or videos taken by the phone are typically stored in the memory card for large storage capacity of images and videos. 1. - Page 28 Taking Videos 1. Aim the camera to the object/s that you want to take a video of. 2. Press the video record button on the screen to begin taking the video. 3. To end the video, press the video record button. 4.
-
Page 29: Photos
Camera Settings You may adjust various settings for the camera by pressing settings while in the camera interface. When in the standard camera mode, you can switch to video to record or click the gallery preview box. Photos Photos from your phone's storage or SD card can be displayed in the Photos app. 1. - Page 31 Share Pictures You may share pictures by sending them through different types of installed applications. You may also send pictures through the MMS message function by attaching a picture and also via Bluetooth. 1. Tap on the photo you wish to share. 2.
-
Page 32: Music
Music If you have saved or stored your own music via the phone’s memory or via a TF/SD card you will be able to access from this app. You can choose to search music by artists, albums, songs or create playlists. Playlist Shuffle Playback... -
Page 33: Sound Recorder
Sound Recorder Record 1. Keep the phone’s microphone near the sound source. 2. Click the record button to record the audio. 3. Click the stop button to stop recording the audio. - Page 34 Record Recorded files Recording Time Recording Controls Pause, Stop...
-
Page 35: Files
Files The file manager allows you to search and organise your stored phone files conveniently and efficiently through one program. Scroll and search through the File Manager for stored phone files Send and receive files Calendar The calendar helps keep track of your life’s most important moments in one application. 1. -
Page 36: Clock/Alarm
Click to add a new event Clock/Alarm Click on the Clock icon then click the alarm tab to enter the alarm clock interface. This option allows you to add and edit alarms. 1. Click on the plus icon to add a new alarm. 2. -
Page 37: Sos
Turn an alarm on or off Tap to edit an alarm Tap to add an alarm The SOS function is designed to help you while in an emergency. If you’re in need of help it is a great function to allow you to connect with your emergency contacts quickly. The phone also comes equipped with a Fall Detector Alarm, if enabled and you fall it will automatically activate the SOS alarm feature and attempt to contact your emergency contacts advising you may have fallen, and you need help. - Page 38 How to setup the SOS feature 1. Tap on the SOS app to open this app 2. Open the fall detection feature by tapping on the round icon. 3. To add your emergency contacts click on the edit button. 4. Tap on the plus symbol to add your contact on each available space. You are able to add up to 5 emergency contacts.
- Page 39 Fall Detection on/off Add up to 5 emergency contacts Edit emergency message Start or stop the SOS alarm Fall Detection alarm message. Click cancel to stop the feature activating and messaging/calling your emergency contacts.
-
Page 40: Chrome Web Browser
Chrome Web Browser To access the Chrome web browser, tap on the Chrome web browser Icon... -
Page 41: Google Apps
1. You can search webpages using the Google search engine, or if you know the webpage address, type it directly into the search panel bar. 2. Using the touch screen, you can scroll through webpages, click on links and more Google Apps To access the Google apps folder, tap on the Google folder. -
Page 42: Applications - Downloading / Deleting / Moving
This is where you can access your email account/s. To setup an email account: Simply press add an email address Choose which type of email account you have Then follow the steps on that type of account to add the email to this application Once setup you can access all your emails via this application. - Page 43 2. Search and download the app you wish to download and click install. Once installed the app will show on your home screen, by tapping on that app it will open for you to use. Tap on the install button to install that app on your phone Search and select between different Play Store categories...
-
Page 44: Bluetooth & Wi-Fi
3. To remove or move an app simply hold your finger on the app for 3 seconds, continue holding your finger on that app, you can then move it around to a new location or move it to the top of the phone to delete the app. Tap and hold on the app you wish to move or delete. - Page 45 List of available Bluetooth devices Power on Wi-Fi 1. Go to Settings » Wi-Fi and select ON to power on Wi-Fi 2. Click on the desired Wi-Fi network to be connected. 3. Most secured Wi-Fi connection require passcodes. Please follow the instructions on the Wi-Fi device to connect.
-
Page 46: Settings
Network connection screen Settings Settings shortcut... -
Page 47: Additional Settings
The shortcut settings have the most common settings used for quick and easy access. Wi-Fi, Bluetooth, Location, time and date, airplane mode, mobile data, sounds and volume, display settings, battery settings, storage, accessibility settings, screen lock, users and accounts. Simply click on one of these functions to access it quickly. Additional settings Network &... -
Page 48: Connected Devices
1. Turn airplane mode on or off. Connected devices Bluetooth 1. Power on Bluetooth. Once on, Bluetooth will automatically scan for any nearby open devices. 2. Click to connect a device Printing 1. You may print files via Cloud Ready printers. (Please check Google Cloud Print website for printer compatibility information) 1. -
Page 49: Security & Location
Security & location Security Screen lock Set up basic screen locks: Use swipe, pattern, PIN or password to lock the screen. The phone will ask for this lock pattern, pin or password when your screen has timeout or has been locked. 1. -
Page 50: Users & Accounts
Users & accounts Lets you add, remove and manage your Google and other supported accounts. Emergency Information Under emergency information you are able to add emergency information details. This is very helpful if you are non-responsive, emergency services or other people are able to access this information without your phone being unlocked. -
Page 51: Backup
10. Experimental settings – here you can adjust the contrast of text, colour correction and colour inversion settings. Google Here you can adjust the Google settings, like ads, app preview messages, backup, cast media controls, device phone number, devices, location, nearby, parental controls, restore contacts, security, set up nearby devices and set up work profile. -
Page 52: Troubleshooting And Support
About phone Phone information status and build version Troubleshooting and support If you are experiencing difficulties with your mobile phone, please go through the following troubleshoots The Mobile Phone will not power on: 1. Ensure you are pressing and holding the power button for 5 seconds. 2. - Page 53 3. Your signal strength may be weak. Check your signal strength and contact your provider Cannot hear anyone on the call: 1. Ensure your call volume is adjusted to your requirements. Using the volume keys on the right side of the phone 2.
- Page 54 1. Ensure you have turned on and activated Wi-Fi on your phone. See Wi-Fi guide in the manual. 2. Ensure the Wi-Fi you are connecting to is working. 3. Your device may be too far away from the Wi-Fi Router. Ensure you are within range of this device to connect...
Need help?
Do you have a question about the EasySmart 2 and is the answer not in the manual?
Questions and answers