Table of Contents
Advertisement
Quick Links
owner's manual
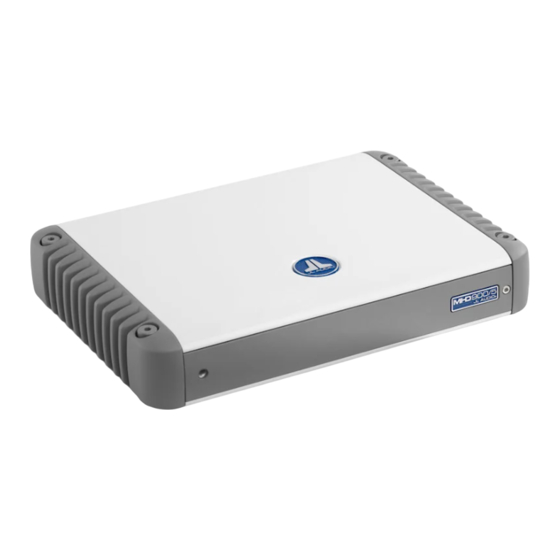
5-Channel Class-D Marine System Amplifier
Thank you for purchasing a JL Audio amplifier for
your marine sound system.
Your amplifier has been designed and manufactured to exacting
standards in order to ensure years of musical enjoyment in your vessel.
For maximum performance, we highly recommend that you have
your new amplifier installed by an authorized JL Audio dealer. Your
authorized dealer has the training, expertise and installation equipment
to ensure optimum performance from this product. Should you
decide to install the amplifier yourself, please take the time
to read this manual thoroughly so as to familiarize yourself
with its installation requirements and setup procedures.
If you have any questions regarding the instructions in this
manual or any aspect of your amplifier's operation, please contact your
authorized JL Audio dealer for assistance. If you need further assistance,
please call the JL Audio Technical Support Department
at (954) 443-1100 during business hours.
Advertisement
Table of Contents

Summary of Contents for JL Audio MHD900/5
- Page 1 For maximum performance, we highly recommend that you have your new amplifier installed by an authorized JL Audio dealer. Your authorized dealer has the training, expertise and installation equipment to ensure optimum performance from this product.
-
Page 2: Protect Your Hearing
+12 V Power Remote Turn-On Connector (pgs. 6-7) 2 | JL Audio - MHD900/5 Owner’s Manual Cooling efficiency Considerations: The outer shell of your JL Audio amplifier is designed to remove heat from the amplifier circuitry. For optimum cooling performance, this outer shell should be exposed to as large a volume of air as possible. -
Page 3: Product Description
ProduCt desCriPtion The JL Audio MHD900/5 is a very powerful The MHD900/5’s flexible input and and compact five-channel amplifier utilizing crossover sections permit operation with patented Single Cycle Control™ Class D a wide variety of source units and system technology for all channels. This groundbreaking configurations. - Page 4 JL Audio the wire. XB-BTU. This connection must be tight and If only the MHD900/5 is being run from corrosion-free to ensure proper connectivity. This a single power wire, install a 60A fuse to wire MUST be fused appropriately for safety. Any protect the wire: AGU (big glass fuse).
- Page 5 8 | JL Audio - MHD900/5 Owner’s Manual amPliFier inPuts “4 Ch.” input mode The MHD900/5 has three separate input In this mode, you will connect separate pairs of input cables to the “Front”...
-
Page 6: Crossover Controls
Be aware that all three “Input Sens.” the MHD900/5 to the specific signal source that is feeding the amplifier. These controls must be adjustments will need to be made, regardless... - Page 7 In this configuration, the “Front” channels and are separately filtered to send appropriate frequency ranges to each speaker system. of the MHD900/5 will be bridged to drive the The most common application of left front component speaker system (150W x bi-amplification in mobile audio is to drive a 1 @ 4Ω) with high-pass filtering.
-
Page 8: Bridging Considerations
3-8Ω load. Operating bridged channel pairs into a load lower than 3Ω is not recommended. 14 | JL Audio - MHD900/5 Owner’s Manual “status” led / ProteCtion CirCuitrY There is a single multi-color LED on the... - Page 9 If your amplifier fails or malfunctions, please return it to your authorized JL Audio dealer so that it may be sent in to JL Audio for service. There are no user serviceable parts or fuses inside the amplifier. The unique nature of the circuitry in the JL Audio amplifiers requires specifically trained service personnel.
- Page 10 Sens.” with this procedure. This applies to any EQ boost circuit, source unit tone controls or EQ circuits. EQ cuts will not require re-adjustment. 18 | JL Audio - MHD900/5 Owner’s Manual the nine-step Procedure 7) Connect the AC voltmeter to the “Front (follow this procedure for each pair of channels) 1) Disconnect the Speaker Connector Plugs.
- Page 11 “my amplifier shuts off once in a while, usually at higher volumes” Check your voltage source and grounding point. The power supply of the MHD900/5 will operate with charging system voltages down to 9V. Shutdown problems at higher volume levels can occur when the charging system voltage drops below 9V.
- Page 12 22 | JL Audio - MHD900/5 Owner’s Manual...
- Page 13 - marine ProduCts (usa) JL AUDIO warrants this product to be free of defects in materials and workmanship for a period of two (2) years from the original date of purchase. This warranty is not transferable and applies only to the original purchaser from an authorized JL AUDIO dealer.


Need help?
Do you have a question about the MHD900/5 and is the answer not in the manual?
Questions and answers