Table of Contents
Advertisement
Quick Links
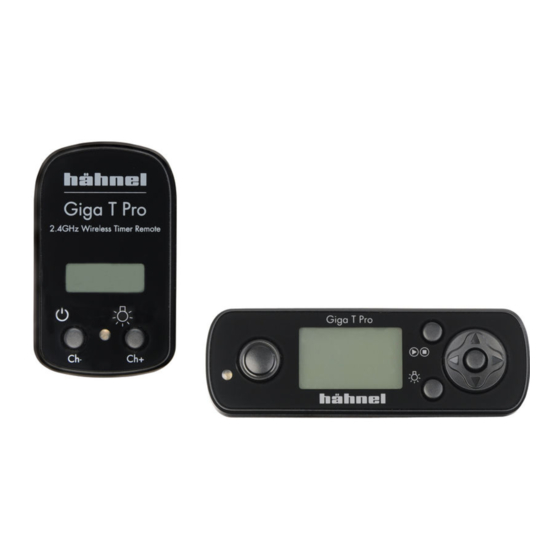
Switching on your Giga T Pro
Insert CR2 battery into the receiver. Then press and "hold" button (3) for 3
seconds. The receiver is now ON.
Inbetriebnahme Ihres Giga T Pro
Legen Sie die CR2-Batterie in den Empfänger ein. Dann drücken und halten Sie
Taste 3 für 3 Sekunden. Der ist jetzt "ON" (eingeschaltet).
To Set Channel
Both transmitter and receiver must be set to the same channel (example "CH02")
You may adjust the channel to avoid interference with another Giga T Pro or
similar wireless device
Einstellen des Kanals
Sender und Empfänger müssen beide auf den gleichen Kanal eingestellt werden
(z.B. "CH02"). Um eine ... mit einem anderen Giga T Pro oder einem ähnlichen
drahtlosen Geräte zu vermeiden
To set channel on the receiver
Press (2) and (4) simultaneously.
Press (4) to set the receiver to Channel 02.
Press (2) and (4) simultaneously again to save setting.
Einstellen des Empfängerkanals
Dürcken Sie 2 und 4 gleichzeitig.
Drücken Sie 4 um den Empfänger auf Kanal 02 einzustellen.
Drücken Sie wieder 2 und 4 um die Einstellung zu speichern.
To set channel on the transmitter
The transmitter is already set to Channel "CH02"
If you want to change the channel
Press Joypad (12a) to set the transmitter to display CH mode (J)
Press centre button (11) to adjust channel. Use (12c) or (12d) to change channel
Press centre button (11) to save setting.
Einstellen des Senderkanals
Der Sender ist bereits auf Kanal "CH02" eingestellt.
Um den Kanal zu verstellen:
Drücken Sie 12a auf dem Joypad um auf dem Display CH mode J anzuzeigen
The Giga T Pro is now ready to use and can be connected to your camera
To turn off the receiver press and hold button (2) for 3 seconds
To save power, turn off when not in use
Der GigaT Pro ist jetzt einsatzbereit und kann mit Ihrer Kamera verbunden
werden.
Um den Empfänger auszuschalten halten Sie Taste 2 für 3 Sekunden gedrückt.
Advertisement
Table of Contents

Related Manuals for Hahnel Giga T Pro


Summary of Contents for Hahnel Giga T Pro
- Page 1 Drücken Sie 12a auf dem Joypad um auf dem Display CH mode J anzuzeigen The Giga T Pro is now ready to use and can be connected to your camera To turn off the receiver press and hold button (2) for 3 seconds...
- Page 2 Schalten Sie das Gerät aus, wenn Sie es nciht verwenden um Energie zu sparen. Standard Wireless Remote Control Functions Standard Funkfernbedienungs-Funktionen A: Single Shot Mode Press Joypad (12b) to ensure the transmitter is in single shot mode (A) To Autofocus, ensure camera has autofocus enabled, “half press” transmitter button (7).
- Page 3 C: Continuous Shooting - using Bulb Mode Ensure camera is in continuous shot mode Press Joypad (12b) to set the tramsmitter in Bulb mode (C) “half press” for autofocus, “full press” botton (7). The camera will start continous shooting and display (8) will count the time the camera is shooting. “Press button (7)”...
- Page 4 H- N: • “Single shot mode” = Number of shots • “Continuous shot mode” = Number of burst of continuous shooting • “Bulb mode” – Number of shots/exposures Programmierbare Timer-Intervallfunktionen E – Verzögerung Verzögerung in Stunden, Minuten und Sekunden bevor die Intervallaufnahme startet F –...
- Page 5 Drücken Sie den Center-Knopf um die Einstellung zu speichern. • Drücken Sie 11b auf dem Joypad um den Transmitter auf INTVL G einzustellen. Stellen Sie die gewünschte Zeit ein. Drücken Sie 10 um die Einstellung zu speichern • Drücken Sie 11b um den Transmitter auf N (H) einzustellen. Drücken Sie den Center-Knopf.
- Page 6 Ensure that camera is in Bulb Mode • Press Joypad (11b) to set transmitter to DELAY (E) Press centre button (10). Use joypad (11c) or (11d) to adjust time and (11a) or (11b) to choose hours, min, sec. Press centre button (10) to save setting •...
Need help?
Do you have a question about the Giga T Pro and is the answer not in the manual?
Questions and answers