
Related Manuals for Sellenis S-Jet 700 Series


Summary of Contents for Sellenis S-Jet 700 Series
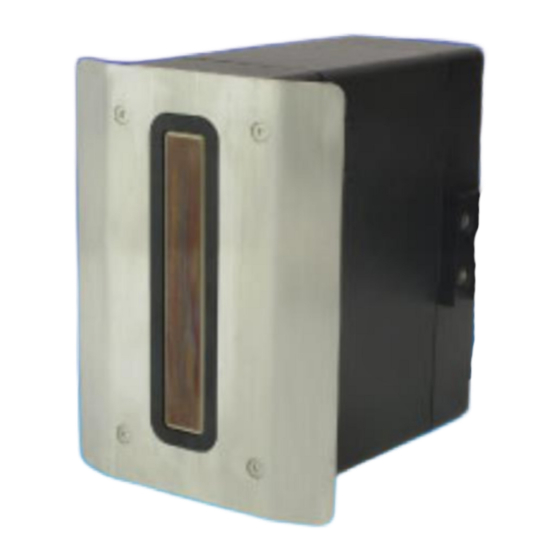
- Page 1 S-Jet 700 SERIES PIEZO dOD PrinterS USER MANUAL V2 Registered Office: 29 High Street, Harston, Cambridge, England, CB22 7PX, Page 1 Copyright © Sellenis Ltd 2020...
-
Page 2: Table Of Contents
Key Features ........................6 Installation........................... 6 Operating the Printer Hardware ..................10 Additional Information ....................... 11 List of Parts ........................11 Sellenis Printer Control Software ..................11 Overview ........................... 11 Key Features ........................11 Installation......................... 11 Accessing the Application ....................14 Account Manager ...................... - Page 3 Rotating a Selected Element ..................63 Runtime Data Configuration ..................63 Setting Template Length ....................63 Printing Process ......................64 Loading Template ......................64 Print Controls ........................ 65 Registered Office: 29 High Street, Harston, Cambridge, England, CB22 7PX, Page 3 Copyright © Sellenis Ltd 2020...
- Page 4 Onscreen Keypads ......................73 User Privileges ........................75 Adding Variable Data ......................76 Variable Wizard ........................ 77 GS1 Wizard ........................78 Support Information ......................79 Registered Office: 29 High Street, Harston, Cambridge, England, CB22 7PX, Page 4 Copyright © Sellenis Ltd 2020...
-
Page 5: Preface
This User Manual is intended for the users of the S-Jet 700 Printer. This Manual guides you through the process for installing the print head (s), configuring the S-Jet 700 Printer, and also the usage of the Sellenis Printer Control Software. Registered Office: 29 High Street, Harston, Cambridge, England, CB22 7PX, Page 5 Copyright ©... -
Page 6: S-Jet 700 Printer Hardware
S-JET 700 PRINTER HARDWARE Overview The S-Jet 700 Printer Printers are high-speed range industrial digital printers from Sellenis Limited. These printers use the so called Piezo High Resolution Drop On Demand (DOD) ink jet technology. The S-Jet 700 Printers are designed to meet your Online, Live, Hands-Free Coding, and Marking applications. - Page 7 The connectors for the various inputs and outputs of the S-Jet 700 are located on the back panel of the printer controller as shown below: Figure 2-1, Rear of the controller Registered Office: 29 High Street, Harston, Cambridge, England, CB22 7PX, Page 7 Copyright © Sellenis Ltd 2020...
- Page 8 The connectors’ panel at the back of the printer controller can provide up to 10 connectors. The number of connectors provided depends on the printer model ordered. Up to four printheads can be connected to the controller. Registered Office: 29 High Street, Harston, Cambridge, England, CB22 7PX, Page 8 Copyright © Sellenis Ltd 2020...
- Page 9 Table 2-1, Controller connections Location Icon Description Shaft Encoder Photocell Lamp RS232 Camera trigger Alarm 510 prinnthead 510 printhead 128 printhead 128 printhead Registered Office: 29 High Street, Harston, Cambridge, England, CB22 7PX, Page 9 Copyright © Sellenis Ltd 2020...
-
Page 10: Operating The Printer Hardware
ON. Once the power is on, the computer battery starts to recharge. Press and hold the button on the top left of the unit for approximately 10 seconds to turn on the printer. Registered Office: 29 High Street, Harston, Cambridge, England, CB22 7PX, Page 10 Copyright © Sellenis Ltd 2020... -
Page 11: Additional Information
XP, Vista, 7, 8, or 10. The recommended Operating System is Windows 8. The software comes with a one click installer (executable exe file) along with the printer hardware. To install the Sellenis Registered Office: 29 High Street, Harston, Cambridge, England, CB22 7PX, Page 11 Copyright ©... - Page 12 Printer Control software from a location, where the executable (exe) is placed, perform the following procedure: Navigate to the location/folder, where the Sellenis Printer Control software executable file is placed. Double click the Hires DOD file. The installation is invoked and the following screen is displayed.
- Page 13 Once the installation is completed, the application Welcome screen with Login icon is displayed. Registered Office: 29 High Street, Harston, Cambridge, England, CB22 7PX, Page 13 Copyright © Sellenis Ltd 2020...
-
Page 14: Accessing The Application
Accessing the Application Once installed, the Sellenis Printer Control software can be accessed by double clicking the application icon, on your computer. The application opens the Welcome screen with Login icon, Power off icon, and the option to select your preferred language from a drop down menu as depicted in the following figure: Figure 3-1, Langauge options You can click on any flag to choose the corresponding language. - Page 15 Important: The default login key of the Administrator account is “1234”. It is recommended that you change this after your initial login. You are logged in to the Sellenis Printer Control software. Once logged in, the following screen is displayed.
- Page 16 Import Files and Folders • Event Log • Labels, Layout, and Templates • Ink Configuration • Logout and Power Off Track & Trace • Registered Office: 29 High Street, Harston, Cambridge, England, CB22 7PX, Page 16 Copyright © Sellenis Ltd 2020...
-
Page 17: Account Manager
From the Home screen of the Sellenis Printer Control software, you can click icon to access the Account Manager section. The Account Manager section is displayed as follows:... - Page 18 While at the Account Manager section, at any point of time, click Cancel button to go back to previous account manager screen then press exit button to go back to the application Home screen. Figure 3-3, Account manager Registered Office: 29 High Street, Harston, Cambridge, England, CB22 7PX, Page 18 Copyright © Sellenis Ltd 2020...
-
Page 19: Changing Users
Click the name of the User, which you want to remove, from the Users list. Note: You cannot remove the Administrator user account. Click Delete button. A confirmation message is displayed. Registered Office: 29 High Street, Harston, Cambridge, England, CB22 7PX, Page 19 Copyright © Sellenis Ltd 2020... - Page 20 While at the Account Manager section, at any point of time, click Cancel button to go back to previous account manager screen then press exit button to go back to the application Home screen. Registered Office: 29 High Street, Harston, Cambridge, England, CB22 7PX, Page 20 Copyright © Sellenis Ltd 2020...
-
Page 21: Printer Configuration
Therefore, this section completely handles the hardware operation. From the Home screen of the Sellenis Printer Control software, you can click icon to access the Printer Configuration section. The Printer Configuration section is displayed as follows:... -
Page 22: Printhead Configurations
The Xaar 128 piezo DOD prints images up to 17.5 mm high The Sellenis S-Jet 700 series is able to run 1 or 2 off 510 or 1 or 2 off 128 printheads as the same time. When running 2 printheads, these have to be on the same production line running off the same shaft encoder and the same photocell. -
Page 23: Print Orientation
Configuration section. You can access the Firing Voltage section by clicking the icon from the Print Configuration header bar. Upon clicking this icon, the Firing Voltage section is displayed: Figure 4-1 Registered Office: 29 High Street, Harston, Cambridge, England, CB22 7PX, Page 23 Copyright © Sellenis Ltd 2020... -
Page 24: Print, Read, Match & Verify
Appendix A Print, Read, Match & Verify The S-Jet 700 series printers come with the necessary software and hardware to integrate with Camera Vision Systems, external Serial devices such as Barcode Scanners, Weigh scales, magnetic strip readers, or other Serial devices. Camera Vision system enables you to perform Read-Match-Print-Verify functions of OCR, OCV, 1D, and 2D barcodes. -
Page 25: Printhead Offsets- Print Delays
It also enables the user to align the print from two printheads when the printer is configured with two printheads. The S-Jet 700 series printers support horizontal and vertical alignment. -
Page 26: Setup The Print Position
To set up the print position, simply enter the distance from the photocell to the desired printhead position (to the printhead) by clicking on the space adjacent to the Group1 field Registered Office: 29 High Street, Harston, Cambridge, England, CB22 7PX, Page 26 Copyright © Sellenis Ltd 2020... - Page 27 Note: The default spacing is set to 75 mm. Figure 4-5 To know more about the alphanumeric keypad and the numeric keypad, refer to Onscreen Keypads section in Registered Office: 29 High Street, Harston, Cambridge, England, CB22 7PX, Page 27 Copyright © Sellenis Ltd 2020...
-
Page 28: Setup Printhead Stroke Delay (Horizontal Print Stitching/Alignment)
Note: The vertical alignment is applicable, only if you have two printheads present. To know more about the alphanumeric keypad and the numeric keypad, refer to Onscreen Keypads section in Appendix A Registered Office: 29 High Street, Harston, Cambridge, England, CB22 7PX, Page 28 Copyright © Sellenis Ltd 2020... -
Page 29: Printer Resolution Settings
Photocell field to toggle the photocell as Normal or Inverted. Click text field adjacent to the Photocell Mask field. The Numeric keypad is enabled. Registered Office: 29 High Street, Harston, Cambridge, England, CB22 7PX, Page 29 Copyright © Sellenis Ltd 2020... -
Page 30: Printing Mode Settings
Note: This option is enabled, only if you have selected Simulated Printing as the printing mode. Registered Office: 29 High Street, Harston, Cambridge, England, CB22 7PX, Page 30 Copyright © Sellenis Ltd 2020... -
Page 31: Simulated Printing
Appendix A Simulated Printing Simulated Printing setting in the Sellenis Printer Control software enables you to set the print without the aid of a physical shaft encoder or photocell. By selecting Simulated Printing mode, the printer uses its own electronically generated inputs to provide continuous and constant speed printing. -
Page 32: Standard Printing Settings
The Photocell mask must also be set and it is recommended that if not set to a value that is less than the average product spacing on the conveyor Figure 4-9 Registered Office: 29 High Street, Harston, Cambridge, England, CB22 7PX, Page 32 Copyright © Sellenis Ltd 2020... -
Page 33: Standard Printing Mode (With Internal Shaft Encoder)
Figure 4-10, Printing mode setting Repeat Printing Settings Figure 4-11, Repeat printing Registered Office: 29 High Street, Harston, Cambridge, England, CB22 7PX, Page 33 Copyright © Sellenis Ltd 2020... -
Page 34: Track & Trace Printing Mode (Refer To Separate Instruction Manual)
Track & trace printing mode (refer to separate instruction manual) Figure 4-12, Camera input External Serial Devices Printing Mode (see separate instruction manual) Figure 4-13, External device settings Registered Office: 29 High Street, Harston, Cambridge, England, CB22 7PX, Page 34 Copyright © Sellenis Ltd 2020... -
Page 35: Barcode Reader Error Free Data Entry (See Separate Instruction Manual)
Barcode reader error free data entry (see separate instruction manual) Figure 4-14 Protocol Mode (see separate instruction manual) Figure 4-15 Registered Office: 29 High Street, Harston, Cambridge, England, CB22 7PX, Page 35 Copyright © Sellenis Ltd 2020... -
Page 36: Printhead Purge Settings
You can enter the purge offset differently for the printheads. To know more about the alphanumeric keypad and the numeric keypad, refer to Onscreen Keypads section in Appendix A Registered Office: 29 High Street, Harston, Cambridge, England, CB22 7PX, Page 36 Copyright © Sellenis Ltd 2020... -
Page 37: Labels, Layouts And Templates
You can also select the layout, include text, barcodes, QR codes, and so on, from this section. From the Home screen of the Sellenis Printer Control software, you can click icon to access the Labels, Layout, and Templates section. - Page 38 • Uploading an Existing template • Editing an Existing Template • Setting Template Properties • Deleting Elements in a Template • Additional Options Registered Office: 29 High Street, Harston, Cambridge, England, CB22 7PX, Page 38 Copyright © Sellenis Ltd 2020...
- Page 39 Edit selected element or field of a template Template field justification Select font properties Zoom to 100% Plus zoom Minus zoom Clockwise rotation Anti-clockwise rotation Load database Registered Office: 29 High Street, Harston, Cambridge, England, CB22 7PX, Page 39 Copyright © Sellenis Ltd 2020...
-
Page 40: Creating A New Template
If one 510 printhead is selected , the template will be as follows: Figure 4-18 If two off Seiko 510 printheads are selected the template will be as follows: Figure 4-19 Registered Office: 29 High Street, Harston, Cambridge, England, CB22 7PX, Page 40 Copyright © Sellenis Ltd 2020... -
Page 41: Adding Text Data
For more information, refer to Updating Font Information section in Appendix A Registered Office: 29 High Street, Harston, Cambridge, England, CB22 7PX, Page 41 Copyright © Sellenis Ltd 2020... -
Page 42: Adding Date & Time Stamps
“Mfg” or “Exp” or you can create a new prefix or create timestamps without prefix. Registered Office: 29 High Street, Harston, Cambridge, England, CB22 7PX, Page 42 Copyright © Sellenis Ltd 2020... - Page 43 Edit the values and click Change button to update the prefix information. Click Delete button to remove the prefix. Note: You cannot change or remove the default prefixes. Click OK button. Figure 4-22 Registered Office: 29 High Street, Harston, Cambridge, England, CB22 7PX, Page 43 Copyright © Sellenis Ltd 2020...
- Page 44 Now press Date & Time format. The default date and time format are displayed. Select the desired date and time format from the list then press OK. Figure 4-24 Registered Office: 29 High Street, Harston, Cambridge, England, CB22 7PX, Page 44 Copyright © Sellenis Ltd 2020...
-
Page 45: Date And Time Stamp Edit Section
Click and select the required time format from the list of available values. You can review the output from the Example field. Click New button. The alphanumeric keypad is displayed. Registered Office: 29 High Street, Harston, Cambridge, England, CB22 7PX, Page 45 Copyright © Sellenis Ltd 2020... - Page 46 You can also select an existing clock and click Delete button to remove the same form the list. You cannot remove the Default Clock. Registered Office: 29 High Street, Harston, Cambridge, England, CB22 7PX, Page 46 Copyright © Sellenis Ltd 2020...
-
Page 47: Adding Numeric Serializer
Click the text box adjacent to the Ending Value field to enter the ending value of the counter, using a numeric keypad. Registered Office: 29 High Street, Harston, Cambridge, England, CB22 7PX, Page 47 Copyright © Sellenis Ltd 2020... - Page 48 Click Delete button to remove the Counter. To know more about the alphanumeric keypad and the numeric keypad, refer to Onscreen Keypads section in Appendix A Registered Office: 29 High Street, Harston, Cambridge, England, CB22 7PX, Page 48 Copyright © Sellenis Ltd 2020...
-
Page 49: Adding Shift Codes
Click New button. The alphanumeric keypad is displayed. Enter the new Shift Group Name. Click OK button to save the details and exit from Creating Shift Code section. Registered Office: 29 High Street, Harston, Cambridge, England, CB22 7PX, Page 49 Copyright © Sellenis Ltd 2020... -
Page 50: Adding User Codes
You can enter multiple user codes. You can also delete an existing user code by selecting the user code and clicking Delete button. Registered Office: 29 High Street, Harston, Cambridge, England, CB22 7PX, Page 50 Copyright © Sellenis Ltd 2020... -
Page 51: Adding Vision Camera
Labels, Layout, and Templates section and click Add Database menu item. The Database section is displayed. Figure 4-29 Registered Office: 29 High Street, Harston, Cambridge, England, CB22 7PX, Page 51 Copyright © Sellenis Ltd 2020... - Page 52 Click the drop down list adjacent to the Field Separator field and select the required value. The available options are, Comma, Semi Colon, and Tab. Figure 4-31 Registered Office: 29 High Street, Harston, Cambridge, England, CB22 7PX, Page 52 Copyright © Sellenis Ltd 2020...
- Page 53 Select the required field type and press ok to include and display it on the template. Figure 4-33 Registered Office: 29 High Street, Harston, Cambridge, England, CB22 7PX, Page 53 Copyright © Sellenis Ltd 2020...
- Page 54 View Database button to view the database details. The View Database section is displayed as depicted in the following sample image: Figure 4-35 Registered Office: 29 High Street, Harston, Cambridge, England, CB22 7PX, Page 54 Copyright © Sellenis Ltd 2020...
-
Page 55: Adding Single Dimensional (1D) Barcode
Print from selected row button to print the values starting from the selected row. Adding Single Dimensional (1D) Barcode You can develop barcode information and add it to the template with the aid of Sellenis Printer Control software. To create barcodes by providing detailed information, perform the following procedure: Click the icon on the right margin of the Labels, Layout, and Templates section. - Page 56 Click OK button to save the details and exit the Creating Barcode section. The barcode with selected details is displayed in the template. Registered Office: 29 High Street, Harston, Cambridge, England, CB22 7PX, Page 56 Copyright © Sellenis Ltd 2020...
-
Page 57: Adding Two Dimensional (2D) Barcode
Adding Two Dimensional (2D) Barcode You can develop 2D barcode information and add it to the template with the aid of Sellenis Printer Control software. To create 2D barcodes by providing detailed information, perform the following procedure: Click the icon on the right margin of the Labels, Layout, and Templates section. -
Page 58: Adding Images
Once all the required elements are entered in the template, you can click the icon to save the template after selecting the required location. Registered Office: 29 High Street, Harston, Cambridge, England, CB22 7PX, Page 58 Copyright © Sellenis Ltd 2020... -
Page 59: Editing An Existing Template
To set these properties, perform the following procedure: Click icon from the left margin of the Labels, Layout, and Templates section. The Template Properties section is displayed. Figure 4-38 Registered Office: 29 High Street, Harston, Cambridge, England, CB22 7PX, Page 59 Copyright © Sellenis Ltd 2020... -
Page 60: Deleting Elements In A Template
: Align top left of the template. : Align top centered of the template. : Align top right of the template. : Align centered left of the template. Registered Office: 29 High Street, Harston, Cambridge, England, CB22 7PX, Page 60 Copyright © Sellenis Ltd 2020... -
Page 61: Updating Font Information
You can access the Font Information section by clicking icon from the header bar of the Labels, Layout, and Templates section. The Font Information section is displayed as follows: Figure 4-39 Registered Office: 29 High Street, Harston, Cambridge, England, CB22 7PX, Page 61 Copyright © Sellenis Ltd 2020... - Page 62 Click the text area adjacent to the Border field of the Right grid to enter the required size of the right border using a Numeric Keypad. Registered Office: 29 High Street, Harston, Cambridge, England, CB22 7PX, Page 62 Copyright © Sellenis Ltd 2020...
-
Page 63: Zoom In, Zoom Out, And Default View
Labels, Layout, and Templates section to move across the template and paste labels in the template. Registered Office: 29 High Street, Harston, Cambridge, England, CB22 7PX, Page 63 Copyright © Sellenis Ltd 2020... -
Page 64: Printing Process
Through the Printing Process section, you can load a template, initiate print process, and view the print process related information. From the Home screen of the Sellenis Printer Control software, you can click icon to access the Printing Process section. The Printing Process section is displayed as follows:... -
Page 65: Print Controls
You can access the Print Status section by clicking the icon from the header bar of the Printing Process section. The Print Status section is displayed as follows: Figure 4-41 Registered Office: 29 High Street, Harston, Cambridge, England, CB22 7PX, Page 65 Copyright © Sellenis Ltd 2020... -
Page 66: Print Statistics
Hardware version, Job name, Print start name, Run time, Product count, Product speed, Line Speed. Click icon to close the Print Statistics section. Registered Office: 29 High Street, Harston, Cambridge, England, CB22 7PX, Page 66 Copyright © Sellenis Ltd 2020... -
Page 67: Print Event
Additionally, from the Printing Process section, you can perform the following functions: • Click icon to minimize the Sellenis Printer Control software to the task bar. • Click icon to navigate back to the Sellenis Printer Control software Home screen. -
Page 68: Import Files And Folders
Import Files and Folders The Import Files and Folders section enables you to import files or folders from hard disk, USB storage devices, network, or CD ROM though an interface to the Sellenis Printer Control software directory. From the Home screen of the Sellenis Printer Control software, you can click icon to access the Import Files and Folders section. - Page 69 Sellenis Printer Control software directory. Additionally, from the Import Files and Folders section, you can perform the following functions: You can also select the folders/files from the Sellenis Printer Control software directory and export the files/folders by clicking the icon or icon.
-
Page 70: Event Log
The Event Log section enables you to view the event log in a daily basis. This section also enables you to save the daily event log and filter the event log display. From the Home screen of the Sellenis Printer Control software, you can click icon to access the Event Log section. -
Page 71: Selecting Event Log Filters
The Event Log section is displayed, according to the filters selected. Additionally, from the Printing Process section, you can perform the following functions: Click icon to minimize the Sellenis Printer Control software to the task bar. Click icon to navigate back to the Sellenis Printer Control software Home screen. -
Page 72: Logout And Power Off
Logout and Power Off This section details you on how to logout from the Sellenis Printer Control software Home screen and how to close the Sellenis Printer Control software. • From the Home screen of the Sellenis Printer Control software, you can click icon to logout from your account and navigate back to the Welcome screen. -
Page 73: Onscreen Keypads
APPENDIX A Onscreen Keypads This section details about the keypads available in the Sellenis Printer Control software. The following are the two types of keypads present in the Sellenis Printer Control software: • Onscreen Alphanumeric Keypad • Onscreen Numeric Keypad... - Page 74 Use the button to finish typing and to enter the number to the text area. Use the button to close the Onscreen Numeric Keypad. Registered Office: 29 High Street, Harston, Cambridge, England, CB22 7PX, Page 74 Copyright © Sellenis Ltd 2020...
-
Page 75: User Privileges
Table 5-1 User Privilege Description ADMIN User Account Create and manage User accounts. File Manager Manage the files in the Sellenis Printer Control software. Operating Setting Manage the operating settings. PRINT USB Import Import files from USB drive. Load/Print Load templates and initiate printing. -
Page 76: Adding Variable Data
(variable wizard; GS1 wizard or database) you would like to add (as displayed in the following screen). Figure 5-4 Registered Office: 29 High Street, Harston, Cambridge, England, CB22 7PX, Page 76 Copyright © Sellenis Ltd 2020... -
Page 77: Variable Wizard
Enter the value from the Creating Shift Code section, if you have selected Shift Code in the Data Source field. For more information, refer to Adding Shift Codes section. Registered Office: 29 High Street, Harston, Cambridge, England, CB22 7PX, Page 77 Copyright © Sellenis Ltd 2020... -
Page 78: Gs1 Wizard
Click Add button. The type is listed and the Preview is displayed. Click OK button to save the changes and exit from the GS1 Barcode Wizard section. Registered Office: 29 High Street, Harston, Cambridge, England, CB22 7PX, Page 78 Copyright © Sellenis Ltd 2020... -
Page 79: Support Information
Unit 1, Saxon Way Melbourn, South Cambridge SG8 6DN, England, UK Email: mailto:info@sellenis.com Tel: +44 (0) 1763 269554 Website: http://www.sellenis.com/ Copyright © 2017. Sellenis Limited Registered Office: 29 High Street, Harston, Cambridge, England, CB22 7PX, Page 79 Copyright © Sellenis Ltd 2020...
Need help?
Do you have a question about the S-Jet 700 Series and is the answer not in the manual?
Questions and answers