Advertisement
Quick Links
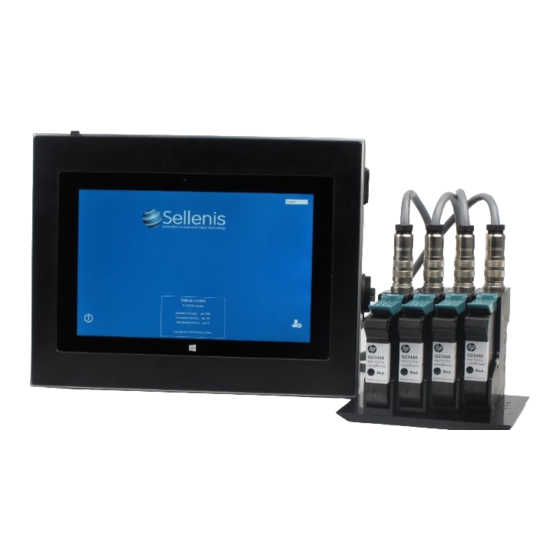
Advertisement

Related Manuals for Sellenis S-Jet 600 Series


Summary of Contents for Sellenis S-Jet 600 Series
- Page 1 Sellenis S-Jet 600 series Troubleshooting Ver 4 Page 1 of 24...
- Page 2 WARNING : The Sellenis S-Jet 600 printers are built, assembled and tested to Sellenis’ standard of quality and specification to ensure reliable, trouble free operation of the printers. The Printer controller and associated printhead must not be dissembled, opened, altered or tempered with to ensure guaranteed functionality and performance as specified.
-
Page 3: Software Display
“connecting to printer & firmware version display after starting Ver 4” – see appendix 1 Software needs /running printer Exit Sellenis software wait 30 secs to 1 minute then restarting software re-launch the software again Least likely cause is ... -
Page 4: Printing Process
Printing Process Condition Probable cause Correction “ SENC direction “ Ensure standard mode printing is checked Not printing on products in setting is incorrect Ensure photocell is connected to controller standard printing “group 1” distance Ensure photocell sensititivity is adjusted correctly mode setting incorrect ... - Page 5 ASIC of controller is unable to then it is likely the a printhead channel in the main that pen displays communicate with board has failed. Return board to sellenis 255 number printhead Faulty main board Printhead failure...
-
Page 6: Print Quality
Clean nozzle face using lint free wipe and cleaning Missing dots/lines (in a print from a dirty fluid (which you can order from Sellenis) Dried ink on cartridge one pen) Check product is running flat under the printhead nozzle face ... -
Page 7: Printer Software
WARNING: The Sellenis S-Jet 600 series are Windows touch screen based printer systems. The S- Jet 600 priner controller MUST be used as a printer controller and no more. It must not be used as a personnel PC for surfing the internet and/or downloading other software applications. It is recommended that the printer controller not be connected to the internet if not necessary for its functionality unless it is using nicelabel or external protocol. - Page 8 APPENDIX 1 Connection to Printer & Display of Firmware version Page 8 of 24...
- Page 9 Connection to Printer & Display of Firmware version Connection to the printer and display of Firmware version in pre-programmed boards (Software version V4xxx) can take up to 15 seconds. The following are description of steps to take to diagnose and try to resolve possible issues that might prevent the software from connecting to the printer and therefore not displaying the firmware version on the start up screen.
- Page 10 If the log contains errors, these will be shown in red text and can explain why the printer was not connecting. Below are explanations of all possible error lines associated with the software not being able to connect to the printer: "Failed to open port, code: XXX”- FTDI chip issue.
- Page 11 It means that another Ethernet adapter has already been allocated this IP address. This is correct because the previous main hub (the one you just replaced) was connected to the controller. Therefore, Windows still “thinks” the printer IP address was already set which is true but set to another main USB hub.
- Page 12 Now you can see all devices. We need to delete all Ethernet Adapter devices in “Network Adapters” branch which appear to be not active (not full colour pc icon in this case). For example the one named as “ASIX AX88179 USB 3.0 to Gigabit Ethernet Adapter”. On picture 4 this inactive adapter is circled red (note it is light blue instead or bright blue) After deleting this inactive adapter and other inactive (hidden adapters) (light coloured) adapters, please return back to step 6 above and set the 192.168.100.200 IP address.
- Page 13 APPENDIX 2 Printing messages having heights more than 12.7 mm Page 13 of 24...
- Page 14 Alignment of prints on the Sellenis S-jet 600 series between 2 or more cartridges is accomplished with the head mount fixture MC300143...
- Page 15 2. Observe the print samples then loosen screw#1 as shown in the drawing below (picture 2) Picture 2 3. If there appear print overlap (dark lines between prints from the different heads) as shown in the example of picture 3 below, then Turn slowly crew 2 (see picture 2 above) anti-clockwise and carry out printing again until you see no underlap (no dark lines between prints).
- Page 16 5. Once the prints from the printheads do not show either black line or white lines and the print appears as if it is being printed from 1 head then lock screw 1 as show in figure 5 below. Picture 5 6.
- Page 17 APPENDIX 3 Pens Configuration and Offset Settings Page 17 of 24...
- Page 18 Page 18 of 24...
- Page 19 Overview: Please ensure that the printhead cables are connected to the correct ports at the back of the controller (see picture and diagram below. For example, the cable for pen#1 must be connected to port And pen#2 to port etc..Pen#3 Pen#2 Pen#4...
- Page 20 Pen Numbering Convention Page 20 of 24...
- Page 21 Setting distance from photocell to one pen or one group of pens. If the printer system is for example a group of 3 pen system (i.e S-Jet 603), then the printer configuration could be as below (although it can configured to use only pen#1 or pen#1 and pen#2 or all 3 pens as below).
- Page 22 Page 22 of 24...
- Page 23 Setting Distance from Photocell to Multiple Groups Setting the distance from photocell to Group 1, 2, 3 or 4 (i.e setting delay or offset from photocell to a given group) is as described below and in drawing of page 6 too. In summary, independent of SENC direction: ...
- Page 24 Page 24 of 24...
Need help?
Do you have a question about the S-Jet 600 Series and is the answer not in the manual?
Questions and answers