Husqvarna R112C5 Operator's Manual
Hide thumbs
Also See for R112C5:
- Workshop manual (56 pages) ,
- Operator's manual (132 pages) ,
- Operator's manual (140 pages)

Subscribe to Our Youtube Channel
Related Manuals for Husqvarna R112C5


Summary of Contents for Husqvarna R112C5
- Page 1 R112C, R112C5, R115C Operator's manual 2-31 Manual de usuario 32-63 Manuale dell'operatore 64-95 Manual do utilizador 96-127...
-
Page 2: Table Of Contents
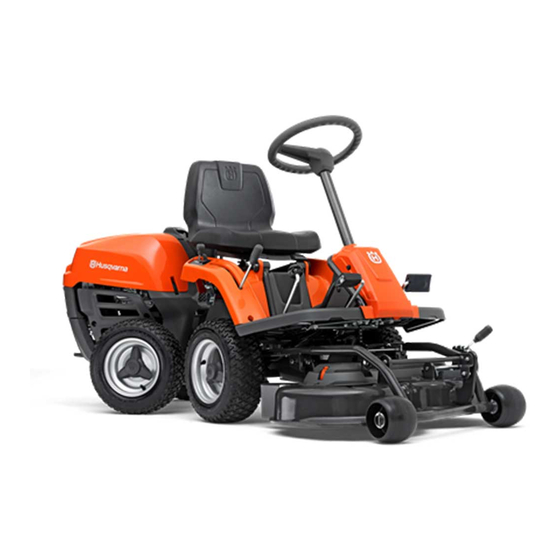
Transmission: Product description optional accessory to use the product for other tasks. Speak to your Husqvarna dealer for more information The product is a ride-on lawn mower. Forward and about which accessories that are available. reverse pedals let the operator adjust the speed Insure your product steplessly. - Page 3 Product overview R112C, R115C 1. Type plate 2. Lever to engage or disengage the drive 3. Battery 4. Throttle control/choke control 5. Ignition lock 6. Lift lever for the cutting deck 7. Rearward pedal 8. Forward pedal 9. Cutting height lever 10.
- Page 4 Product overview R112C5 1. Type plate fertilizer. The 2-in-1 cutting deck can also be used without the mulch function, for rear discharge of the 2. Battery grass. 3. Throttle control/choke control 4. Lever to shift gear Cutting height lever 5. Ignition lock The cutting height is adjusted in 5 (1–5) different...
- Page 5 Neutral gear. The blades are disengaged. Move rearward. Servicing position for the cutting deck. Operation position for the cutting deck. Clutch (R112C5). Oil level. Note: Other symbols/decals on the product refer to Choke. certification requirements for some commercial areas. Parking brake.
-
Page 6: Safety
Product liability • the product has an accessory that is not from the manufacturer or not approved by the manufacturer. As referred to in the product liability laws, we are not • the product is not repaired at an approved service liable for damages that our product causes if: center or by an approved authority. - Page 7 • Do not let children or other persons not approved for operation of the product to use or do servicing on it. Local laws may regulate the age of the user. Safety instructions for operation • Make sure that nobody else is in the vicinity of the product when you start the engine, engage the drive WARNING: Do not touch the engine or or start to move the product.
- Page 8 Safety devices on the product To do a check of the brake pedal, R112C5 WARNING: Read the warning instructions For R112C5 the parking brake pedal is also the service that follow before you use the product. brake. •...
- Page 9 flammable materials and/or fumes to prevent overturns on ground that is not flat. Long grass can fire. hide obstacles. • Do not cut grass near edges, ditches or banks. The product can suddenly overturn if a wheel moves Parking brake across the edge of a steep slope or a ditch, or if an edge gives way.
-
Page 10: Assembly
Do not run the product indoors or in has a deformation or is damaged, speak to closed spaces. an approved Husqvarna service agent. WARNING: Read the warning instructions WARNING: Read the warning instructions that follow before you use the product. - Page 11 3. Push the cutting deck in and make sure that the 7. Attach the drive belt as given in the illustration. guide bolts are put into the grooves on the equipment frame. 4. Align the pipes on the cutting deck with the pipes on the equipment frame.
- Page 12 13. Lift the cutting deck and put it against the product or a wall. 7. Remove the drive belt. 8. For R112C, R112C5: Hold the cutting deck with 2 hands and pull it out. Lift the cutting deck and put it against the product or a wall.
-
Page 13: Operation
Operation Introduction • Pull out the drive system lever fully to disengage the drive on the axle. WARNING: Before you operate the product, you must read and understand the safety chapter. To fill fuel WARNING: Gasoline is very flammable. Be Fuel safety careful and refuel outdoors (see on page 9 ). - Page 14 6. Turn the ignition key to the start position. 3. Apply the parking brake. Note: For R112C, R115C, the parking brake is on the left side. For R112C5, the parking brake is on the right side. 516 - 001 - 26.01.2018...
- Page 15 Do not apply full throttle until the cutting deck has been lowered to the mow position. To operate the product, R112C, R115C To operate the product, R112C5 1. Select cutting height (1–5) with the cutting height lever. CAUTION: To prevent damage to the...
- Page 16 6. Lower the cutting deck. a) For R112C, R115C, let the engine idle for a minimum of 30 seconds. b) For R112C5, put the gearshift lever in the neutral position (N). 7. To brake, press the parking brake/speed brake pedal.
-
Page 17: Maintenance
To get a good result 2. Press and hold the lock button (B). • Do not cut a wet lawn. Wet grass can give a bad result. • Start with a high cutting height and decrease it gradually. • Cut with blades that rotate at high speed (highest Technical data on page permitted engine speed, see 28 ). - Page 18 Do a check of the fuel hose. Replace it if necessary To clean the product To clean the cold air intake of the engine, R112C, R112C5 CAUTION: Do not use a high pressure washer or a steam cleaner. Water can go WARNING: Stop the engine.
-
Page 19: Service
1. Release the clips on the engine cover. Note: For R112C, R115C, the parking brake is on the left side. For R112C5, the parking brake is on the right side. 4. For R112C5, put the gearshift lever in the neutral position (N). - Page 20 7. Attach the protective cover with the 4 screws. To replace the air filter, R115C To replace the air filter, R112C, 1. Open the engine cover. R112C5 2. Loosen the knobs that hold the air filter cover and remove the cover. 1. Open the engine cover.
Need help?
Do you have a question about the R112C5 and is the answer not in the manual?
Questions and answers