Table of Contents
Advertisement
Available languages
Available languages
Quick Links
INSTRUCTIONS D'INSTALLATION ET GUIDE DE L'USAGER
INSTALLATION GUIDE / USE AND CARE MANUAL
IMPORTANT
instructions.
Installateur: Laissez ce guide au propriétaire. Propriétaire: Conservez ce guide pour référence ultérieure
Installer: Leave this guide with the homeowner. Homeowner: keep this guide for future reference.
26012021MCT
09062022MC
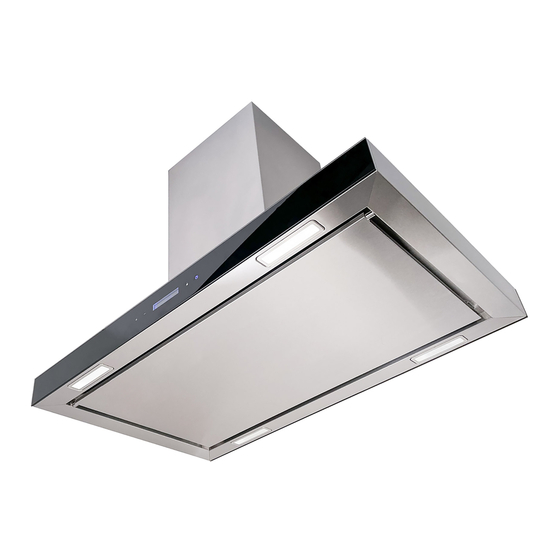
Hotte Îlot / Island range hood
MODÈLE / MODEL
:
Lire et conserver ces instructions
AVI-366IS3 – IOWA
:
AVC-306CS – CALIFORNIA
. Read and save these
.
Advertisement
Chapters
Table of Contents

Subscribe to Our Youtube Channel
Related Manuals for AVG AVI-366IS3


Summary of Contents for AVG AVI-366IS3
- Page 1 Hotte Îlot / Island range hood AVI-366IS3 – IOWA MODÈLE / MODEL AVC-306CS – CALIFORNIA INSTRUCTIONS D’INSTALLATION ET GUIDE DE L’USAGER INSTALLATION GUIDE / USE AND CARE MANUAL IMPORTANT Lire et conserver ces instructions . Read and save these instructions.
-
Page 2: Table Of Contents
Table des matières MESURES DE SÉCURITÉ IMPORTANTES ........... 3-4 INSTRUCTIONS D’INSTALLATION ............5-11 MODE D’EMPLOI ..................12 ENTRETIEN ................... 13 SERVICE ET GARANTIE ................14 APPROUVÉ POUR LES APPAREILS DE TYPE RÉSIDENTIEL ET POUR UNE UTILISATION RÉSIDENTIELLE SEULEMENT. LISEZ CES INSTRUCTIONS ET CONSERVEZ-LES VEUILLEZ LIRE CES INSTRUCTIONS AU COMPLET AVANT DE COMMENCER. -
Page 3: Mesures De Sécurité Importantes
MESURES DE SÉCURITÉ IMPORTANTES AVERTISSEMENT Pour usage domestique seulement. Ne pas utiliser pour évacuer des vapeurs ou des matières dangereuses ou explosives. ATTENTION Cette hotte peut avoir des bords très tranchants; veuillez porter des gants de protection lors de l'installation, du nettoyage ou de l'entretien de l'appareil. Cet appareil doit être installé... - Page 4 AVERTISSEMENT Afin de réduire les risques d’incendie, assurez-vous d’évacuer l’air vers l’extérieur. Ne pas évacuer l’air dans des espaces restreints comme l’intérieur des murs, du plafond, le grenier, faux plafond ou garage. Dispositif automatique - pour réduire les risques de blessures, débranchez l’appareil avant d’effectuer l'entretien.
- Page 5 Dimensions Sortie Installation 6’’ rond haut Hauteur du plancher au plafond variable Hauteur du plancher au comptoir 36’’ (standard) Hauteur recommandée entre la surface 28’’ à 30’’ de cuisson et le dessous de la hotte Hauteur de la hotte 2.8’’ Hauteur de la cheminée 24.45’’...
-
Page 6: Instructions D'installation
INSTRUCTIONS D’INSTALLATION OUTILS NÉCESSAIRES POUR INSTALLER LA HOTTE ▪ ▪ Pinces à bec Gants et lunettes de protection ▪ ▪ Ciseaux (pour couper du ruban pour conduit) Perceuse électrique ▪ ▪ Ruban pour conduit Tournevis Phillips (tête étoilée) ▪ ▪ Marqueur ou crayon Tournevis à... - Page 7 DIMENSIONS AVANT D'INSTALLER LA HOTTE ▪ Pour un échappement d'air plus efficace, nous recommandons une installation le plus rectiligne possible et d'utiliser aussi peu de coudes que possible. ▪ Évacuez l'air vers l'extérieur seulement. Ne pas évacuer l’air dans des espaces restreints comme l’intérieur des murs, plafond, grenier, faux plafond ou garage.
- Page 8 ▪ Pour usage domestique seulement. Ne pas utiliser pour évacuer des vapeurs ou des matières dangereuses ou explosives. ▪ Pour une meilleure évacuation des odeurs de cuisson, la distance minimale recommandée est de minimum 30" au-dessus d’une surface de cuisson au gaz et de 28" pour une surface de cuisson électrique.
- Page 9 SCHÉMA D'INSTALLATION ▪ La distance minimale de la hotte au-dessus de la table de cuisson ne doit pas être inférieure à 30" pour une surface au gaz et de 28" pour une surface électrique. ▪ Une distance de plus de 30" est à la discrétion de l'installateur * et de l’utilisateur, à...
- Page 10 ATTENTION À CE STADE-CI, NE PAS RETIRER LE FILM PROTECTEUR DE PLASTIQUE RECOUVRANT LA CHEMINÉE DÉCORATIVE (SUPÉRIEUR ET INFÉRIEUR) ET LA HOTTE. INSTALLATION DU SUPPORT DE MONTAGE Fixez la position de la hotte selon la hauteur recommandée de 28'' au-dessus de la surface de cuisson électrique et 30'' au-dessus de la surface de cuisson au gaz.
- Page 11 Faites glisser le conduit intérieur vers le haut lentement et doucement pour éviter les rayures. Fixez le tout à l'aide de deux vis sur le cadre du plafond...
-
Page 12: Mode D'emploi
MODE D’EMPLOI TOUCHE MINUTEUR/MISE EN MARCHE (K1) • Appuyez une fois sur la touche de minuterie / mise en marche (K1) pour démarrer le système. • Appuyez sur la touche «+» (K4) pour activer la hotte, appuyez de nouveau sur la minuterie (K1) et démarrez le minuteur à... -
Page 13: Entretien
ENTRETIEN AVERTISSEMENT NE JAMAIS METTRE VOTRE MAIN DANS L'AIRE ABRITANT LE VENTILATEUR. POUR UN FONCTIONNEMENT OPTIMAL, NETTOYEZ LA HOTTE DE CUISINIÈRE, SURFACES ET FILTRES RÉGULIÈREMENT. Un entretien régulier aidera à préserver l'apparence de la hotte. Nettoyez les surfaces extérieures périodiquement avec de l'eau tiède savonneuse et un chiffon de coton. N'utilisez pas de détergents corrosifs ni abrasifs car ceux-ci pourraient endommager la surface en acier inoxydable. -
Page 14: Service Et Garantie
SERVICE ET GARANTIE Nous garantissons notre hotte contre tout défaut de fabrication, tant au niveau des matières premières que de la main-d’œuvre, pour une période de un (1) an à partir de la date d’achat originale. Cette garantie limitée ne s’applique pas en cas d’une mauvaise installation, d’une mauvaise utilisation, de négligence, d’incendie ou autres causes extérieures, d’altérations, réparation non conforme ou encore d’un usage commercial. - Page 15 Table of Contents ............16-17 IMPORTANT SAFETY PRECAUTIONS ............18-24 INSTALLATION INSTRUCTIONS ................25 OPERATING THE HOOD ..................26 MAINTENANCE ..................27 WARRANTY APPROVED FOR RESIDENTIAL TYPE DEVICES FOR RESIDENTIAL USE ONLY. READ AND SAVE THESE INSTRUCTIONS. PLEASE READ THE ENTIRE INSTRUCTIONS BEFORE YOU BEGIN. INSTALLATION OF THE UNIT MUST RESPECT ALL CODES.
-
Page 16: Important Safety Precautions
IMPORTANT SAFETY PRECAUTIONS READ AND SAVE THESE INSTRUCTIONS CAUTION: For residential use only. Do not use to exhaust hazardous or explosive materials and/or vapors. CAUTION: The range hood may have very sharp edges; please wear protective gloves when installing, cleaning or servicing the unit. - Page 17 CAUTION: To reduce risk of fire and to properly exhaust air, be sure to duct air outside – DO NOT vent exhaust air into spaces within walls, ceilings, attics, crawl spaces or garages. Automatically operated device - to reduce risk of injury disconnect from power supply before servicing. WARNING TO REDUCE THE RISK OF FIRE, USE ONLY METAL DUCTWORK.
- Page 18 Dimensions ’’ Duct transition Installation 6’’ Round top Floor to ceiling height variable Floor to counter top height 36’’ (standard) Recommended height between cooking surface and bottom of the 28’’ to 30’’ hood Hood height 2.75’’ Cabinet height 24.8’’ to 44.49’’ The information contained herein is based on sources that we believe to be reliable, but is not guaranteed by us, may be incomplete and/or may change without notice...
-
Page 19: Installation Instructions
INSTALLATION INSTRUCTIONS TOOLS NEEDED TO INSTALL THE RANGE HOOD ▪ Safety gloves and goggles ▪ Needle nose pliers ▪ Electrical drill ▪ Scissors (to cut duct tape) ▪ Phillips screwdriver ▪ Duct tape ▪ Flathead screwdriver ▪ Marker or pencil ▪... - Page 20 BEFORE INSTALLING THE HOOD ▪ For the most efficient airflow exhaust use a straight run or as few elbows as possible. ▪ Vent unit to the outside only. ▪ At least two people are required for installation ▪ Remove the range hood from the carton packaging and place on a flat surface for assembly. ELECTRIC REQUIREMENTS CAUTION: THIS APPLIANCE SHOULD BE PROPERLY GROUNDED.
- Page 21 ▪ Determine the exact location of the vent hood. Mark the location. Find the centerline of the cooktop. Use a level to draw a vertical straight pencil line on the wall. ▪ Plan the route for venting exhaust to the outdoors. Use the shortest and straightest duct route possible. Long duct runs, elbows and transitions will reduce the performance of the hood.
- Page 22 INSTALLING THE MOUNTING BRACKET WARNING WHEN CUTTING OR DRILLING INTO CEILING, DO NOT DAMAGE ELECTRICAL WIRING AND OTHER HIDDEN UTILITIES. WHEN BUILDING FRAMEWORK, ALWAYS FOLLOW ALL APPLICABLE CONSTRUCTION CODES AND STANDARDS. ▪ To construct wood wall framing that is flush with surface of ceiling studs, ensure that: a) The framing is centered over installation location and is sturdy enough to support the weight of the hood.
- Page 23 Lift up the hood and mount the ceiling frame to the ceiling ensuring that it is enough to handle the weight of the hood. Connect the power supply and ducting system. Slide the inner flue upwards slowly & carefully to avoid scratch.
-
Page 24: Operating The Hood
OPERATING THE HOOD TIMER/POWER BUTTON (K1) • Press timer/Power button (K1) once to turn on the system. • Press the plus sign “+” to activate the hood, press timer (K1) again and start power-off delay timer. Use the plus “+” (K4) and minus “-“ (K3) to set delay timer period (1 to 10 minutes). Once the set time is terminated, the hood will shut itself off. -
Page 25: Maintenance
MAINTENANCE SAFETY WARNING: NEVER PUT YOUR HAND INTO AREA HOUSING THE FAN For optimal operation, clean range hood, surfaces and filters regularly. Regular care will help preserve the appearance of the range hood. CLEANING THE EXTERIOR SURFACES Clean periodically with hot soapy water and clean cotton cloth. Do not use corrosive or abrasive detergent or steel wool pads, which will scratch and damage the stainless steel surface. -
Page 26: Warranty
SERVICE AND WARRANTY We warrant our hood against defects in materials and workmanship under ordinary residential use for one year from the date of original retail purchase. This limited warranty applies to any repair and /or replacement parts. This limited warranty is not subject to improper installation, accident, misuse, neglect, fire or other external causes, alterations, repair or commercial use.
Need help?
Do you have a question about the AVI-366IS3 and is the answer not in the manual?
Questions and answers