
Subscribe to Our Youtube Channel
Related Manuals for Hitachi LP-WU6600


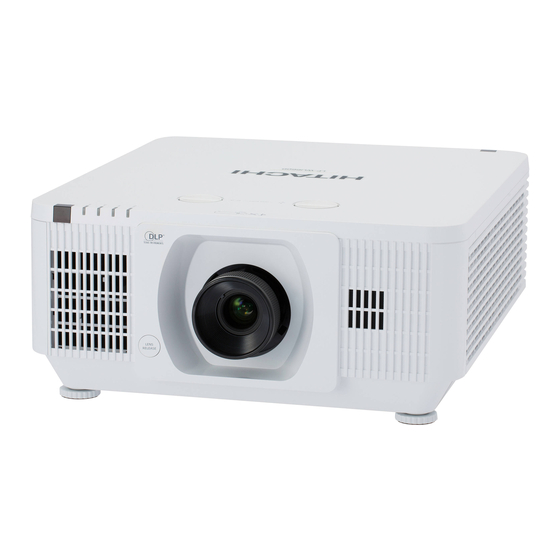
Summary of Contents for Hitachi LP-WU6600
- Page 1 User's Manual English Projector Français LP-WU6600 Deutsch Español Português 簡体中文 繁體中文 한국어 Русский Thank you for purchasing this product. Please read this manual before using the product. Store it for future reference.
- Page 2 INDEX Warning, Notices and Safety Instructions Adjusting the projector's angle Adjusting the projector’s zoom and focus Zoom Projector parts and functions Focus Front view Correcting keystone LED Indicator OSD menu tree Rear view Projector keypad I/O Port (Input / Output) OSD description Bottom view Image...
- Page 3 Specifications Specifications Lens Series Supported signal input modes MHL timing format 3D timing format Dimensions Communication settings RS-232 communication Connection Command control via the network Connection Communication port Command control settings Communication command table PJLink command Projection distance vs projection size table Copyright information Copyright Trademark...
-
Page 4: Warning, Notices And Safety Instructions
Warning, Notices and Safety Instructions Warning, Notices and Safety Instructions Notice This product is intended for the adults who have the ability to operate this machine. Please write down your projector model number and serial number and keep the information for maintenance purposes in the future. -
Page 5: Information For Users Applicable In European Union Countries
Warning, Notices and Safety Instructions Operation of this equipment in a residential area is likely to cause harmful interference in which case. The user will be required to correct the interference at his own expense. Caution: Changes or modifications not expressly approved by the manufacturer void the user’s authority to operate the equipment. -
Page 6: Carrying The Projector
Warning, Notices and Safety Instructions Electric shock To protect your projector, avoid turning on the projector during lightning storms and unplug it from the wall outlet. This will prevent sudden electrical surges caused by the lightning from damaging the projector. Do not overload wall outlets/extension cords Pay attention to the current load of the outlet and cord you are using to prevent fire or electrical shock. -
Page 7: Please Install The Projector On An Even And Stable Surface
Warning, Notices and Safety Instructions Please install the projector on an even and stable surface Avoid placing the projector on unstable cart, tripod, table and so forth to prevent the projector from falling, becoming damaged or causing injuries. Servicing Should you encounter problem with the projector, please seek assistance from your local dealer or qualified service personnel. -
Page 8: Power Cord
Warning, Notices and Safety Instructions Power cord Don't place the projector where the cord can be walked on. This may result in fraying or damage to the power cord, especially at the plug and the point of connection between the power cord and the projector. - Page 9 Warning, Notices and Safety Instructions ENGLISH FRANÇAIS DEUTSCH ESPAÑOL PORTUGUÊS Descriptions of the Les descriptions de ces Beschreibungen der am Descripciones de los Descrições dos símbolos symbols displayed on the symboles sont affichées Projektor angezeigten símbolos mostrados en el apresentados no projector projector sur le projecteur Symbole...
-
Page 10: Notices You Should Read Prior To The Installation Of The Projector
Warning, Notices and Safety Instructions Notices you should read prior to the installation of the projector Take frequent breaks to let your eyes rest Prolonged viewing of the projector screen could strain your eyes. Please be sure to rest your eyes adequately. -
Page 11: Positioning Precautions
Warning, Notices and Safety Instructions Description: The regulation of temperature inside the projector by the cooling fan is automatic. And as such, the sound of cooling fan changing its operating speed does not imply that a problem has occurred with the projector. Positioning precautions This projector can be installed 360°... -
Page 12: Caution For 3D
Warning, Notices and Safety Instructions Caution for 3D • Don't let children view the 3D by themselves , please always be accompanied by an adult. • Although more than six years old can view the 3D. But children may not tell you if they are feeling unwell when viewing 3D content, so always be sure to check with the child. -
Page 13: Laser Warning
Warning, Notices and Safety Instructions LASER WARNING This symbol indicates that there is a potential hazard of eye exposure to laser radiation unless the instructions are closely followed. CLASS 3R LASER PRODUCT This Laser Product is designated as Class 3R during all procedures of operation. LASER LIGHT - AVOID DIRECT EYE EXPOSURE. - Page 14 Warning, Notices and Safety Instructions Product labels Below drawing show the label's location. Serial No. & Mac Label English-14...
- Page 15 Warning, Notices and Safety Instructions Warning, Notices and Safety Instructions a. Hazard Warning Symbol b. Aperture Label c. Certification Statement Label d. Explanatory Label English-15...
-
Page 16: Location Of Laser Aperture
Warning, Notices and Safety Instructions Location of laser aperture Following drawing shows the laser aperture location. Be careful not to see the light directly. Interlock switches This machine has interlock switches to protect the laser light leakage. 1. Switch will power-off the system when the Top cover is opened. 2. -
Page 17: Projector Parts And Functions
Projector parts and functions Projector parts and functions Front view 1. LENS SHIFT 9. Ventilation inlet Adjust the projected image position. The internal cooling fan draws cool air from the ventilation inlet into the 2. LED Indicator projector. 3. Infrared receiver 10. -
Page 18: Rear View
Projector parts and functions Rear view 1. Infrared sensor 5. Projector keypad 2. Kensington lock 6. Speaker ® 3. Security bar 7. I/O port 4. Ventilation outlet 8. Power inlet Projector keypad 1. ▲ / 5. ▼ / Use this button to make your selection Use this button to make your selection or configure, adjust configuration on the or configure, adjust configuration on the... - Page 19 Projector parts and functions I/O Port (Input / Output) 1. RJ45 12. RS-232C (9-pin D-sub socket) (Cross cable) Connect a LAN cable from Ethernet. IN: Connect your PC or system control 2. MONITOR OUT (D-sub 15-pin mini equipment. shrink jack) OUT: Connects to another projector (same Connect to a monitor.
-
Page 20: Bottom View
Projector parts and functions Bottom view English-20... -
Page 21: Remote Control
Remote control Remote control 1. IR transmitter 2. ON This button is used to turn on the projector. 3. PC Displays the VGA (COMPTER IN) / BNC (R/B/G/H/V) source selection (toggle). 4. HDMI Displays the HDMI 1/HDMI 2/DVI source selection (toggle). 5. - Page 22 Remote control 17. Source Select input source. Forward in set increments for MHL. Combo key function for Remote Control ID 33. Volume / 1 settings (Press ID button + Number for 3 Displays the Volume setting bar. seconds). Number for Remote ID setting used. 18.
-
Page 23: Range Of Effective Remote Control Signal Reception
Remote control Range of effective remote control signal reception The diagram below illustrates the range of effective remote control signal reception (Unused new battery). Note: Avoid placing the remote control at places of high temperature or humidity as it could cause the remote control to malfunction. - Page 24 Remote control Note: If you will not use the remote control for long period, remove the batteries from the remote control and store them in a safe place. Note: The liquid contents in the batteries is harmful to the skin; do not touch the leakage with your bare hands directly.
-
Page 25: Projector Installation
Projector installation Projector installation Installing or removing the optional lens Caution: Do not shake or place excessive pressure on the projector or the lens to prevent damage of the precision parts. Caution: Before removing or installing the lens, be sure to turn off the projector, wait until the cooling fans stop, and turn off the main power switch. -
Page 26: Removing The Existing Lens From The Projector
Projector installation Removing the existing lens from the projector 1. Press the LENSE RELEASE button to the unlock position. 2. Rotate the lens counterclockwise. The existing lens will be disengaged. 3. Pull out the existing lens slowly. 4. Put on the mount cap. English-26... -
Page 27: Throw Distance
Projector installation Throw distance Throw Distance (TD) = Screen Width (W) x Throw Ratio (TR) Coupled with the available projection lenses, the projector offers the following throw ratios: • SD-63 (Standard (STD) Lens) (1.54~1.93 : 1 36.1~211inch) • SL-62 (Semi Short Throw Lens) (1.1~1.3 : 1 35.8~379.8inch) •... - Page 28 Projector installation Ceiling Rear + Ceiling Refer to Page 46 : “Ceiling” Refer to Page 47 : “Rear + Ceiling” Advantage: does not occupy floor space does not Advantage: the projector is completely hidden draw attention to it. from plain view this setup usually Eliminates the possibility that offers better reduction of ambient someone would accidentally move...
-
Page 29: Horizontal And Vertical Lens Shift
Projector installation Horizontal and vertical lens shift In addition to using the adjustable feet to adjust projection angle, you can also use the Lens Shift function to adjust the projected picture. Lens shift 1. Turn the VERTICAL adjuster fully counter clockwise. Then turn it clockwise and adjust the vertical lens position upward. - Page 30 Projector installation Note for adjusting the lens shift 1. You can feel the rotational resistance of the lens adjuster increasing if the lens shift exceed its range. Do not turn the lens adjuster further. If the lens adjuster is turned excessively, it runs idle by a clutch mechanism inside the adjuster.
-
Page 31: Moving The Lens Vertically
Projector installation Moving the lens vertically The distance of vertical lens movement is +55% , -15% of the screen height in both directions. For instance, if you are using a 2.15m × 1.35m (100”) screen, you will be able to move the picture upwards no more than 74.3cm or downwards no more than 20.3cm. -
Page 32: Connecting The Projector
Projector installation Connecting the projector HDMI / MHL / DVI connection Signals from picture source offer the best projection picture quality when sent through HDMI/DVI. Therefore, try to use input devices with HDMI/DVI output as the source of picture. English-32... -
Page 33: Rgb Connection
Projector installation RGB connection Connect your PC or other devices with RGB output to the RGB input connectors (COMPUTER IN (in OSD we say VGA)) on the projector to be used as the source of picture input. English-33... - Page 34 Projector installation Connector a monitor to MONITOR OUT for COMPUTER IN signal. Connect RGB (R/B/G/H/V) or component (YPbPr) source to BNC inputs. English-34...
-
Page 35: Hdbaset Connection
Projector installation HDBaseT connection HDBaseT is a technology to transmit image signal use LAN function, RS-232 function and IR function through a LAN cable. Connect Cat5e/Cat6 cable from HDBaseT TX Box for HDBaseT signal received. Video Signal - Connect it to HDBaseT output equipment (Such as high-definition TV source, Blu-ray Player..etc). -
Page 36: Trigger Connection
Projector installation 12V Trigger connection If your home theater system includes a projector screen, screen cover, or other 12V Trigger equipment, please connect such device/equipment to the projector’s 12V Trigger output as illustrated. After you have done so, your screen will lower automatically whenever you turn on your projector for your convenience. -
Page 37: Usb Power (5V/1.5A) Connection
Projector installation USB POWER (5V/1.5A) connection Connect a USB cable for USB device. Support 5V/1.5A output as long as the projector is powered on. 3D SYNC (5V) connection • IN: Connect 3D-sync in cable from a computer or an enabled device. •... -
Page 38: Video Connection
Projector installation VIDEO connection Connect the composite cable from a video device. SERVICE connection For service personnel only. English-38... -
Page 39: Rs232C Connection
Projector installation RS232C connection • IN: Connects to the computer by RS-232 communication, the projector can be controlled with RS-232 commands from the computer. • OUT: Connects to another projector RS-232 IN (same model) for RS-232 serial control. Audio IN (L/R) connection Connect an audio source input (Available for video source). -
Page 40: Audio Out (L/R) Connection
Projector installation Audio OUT (L/R) connection Connect to an audio amplifier device. Audio IN (Mini jack) connection Connect an audio source input (Available for computer, BNC, DVI source). English-40... -
Page 41: Wired Remote Connection
Projector installation WIRED REMOTE connection • IN: Connect the wired remote from remote control to the projector for wired remote control. • OUT: Connect “WIRED REMOTE OUT” to another projector WIRED REMOTE IN (same model) for serial control. English-41... -
Page 42: Powering The Projector On Or Off
Projector installation Powering the projector on or off Powering on the projector Press on the projector or on the remote control to start up the projector. The POWER LED will now flash green. The startup screen will display in approximately 10 seconds. The first time you use the projector, you can select your preferred language from the quick menu after the startup screen display. -
Page 43: Selecting An Input Source
Projector installation Selecting an input source If more than one input device is connected, press SOURCE and press ▲ ▼ to scroll among devices. (Component is supported through the RGB to Component adapter.) • HDMI 1: High-Definition Multimedia Interface compatible •... -
Page 44: Setting An Access Password (Security Lock )
Projector installation Setting an access password (security lock) You can use the four (arrow) buttons to set a password and prevent unauthorized use of the projector. When enabled, the password must be entered after you power on the projector. Note: Keep the password in a safe place. Without the password, you will not be able to use the projector. - Page 45 Projector installation 3. Press ENTER / ► to enter the Advanced 1 sub menu. Press ▲ ▼ to select Security Lock. 4. Press ◄► to enter and enable or disable security lock function. A password dialog box automatically appears. 5. Press ▲ ▼◄► either on keypad or IR remote control for password entry. You can use any combination including the same arrow five times, but not less than five.
-
Page 46: Choosing A Location
Projector installation Choosing a location By default, the projector is configured for “Normal”. If you choose to install your projector in other setups, be sure to adjust the screen orientation to achieve the correct projection mode. Ceiling Press MENU Settings 1 Projection, select Ceiling, the projector is now configured for “Ceiling”. -
Page 47: Adjusting The Projector's Angle
Projector installation Rear + Ceiling Press MENU Settings 1 Projection, select Rear + Ceiling, the projector is now configured for “Rear + Ceiling”. Adjusting the projector's angle Use the adjustable feet to change the angle of the projector in order to achieve the most suitable angle for projection on the screen. - Page 48 Projector installation Focus Semi short throw lens focus Note for adjusting the zoom/focus 1. Adjust the lens shift/zoom/focus after 30 minutes have passed since the projector turned on. 2. Slight changes of the image position and/or focus may occur within 30 minutes after the projector was turned on.
-
Page 49: Correcting Keystone
Projector installation Correcting keystone 1. To adjust keystoning, press ▼ ▲◄► on the keypad or remote control and press ▼ ▲◄► to adjust Vertical or Horizontal Keystone. Refer to Fig 2 and 3. 2. To adjust keystoning, press the MENU button on the keypad or remote control and choose Settings 1 ... -
Page 50: Osd Menu Tree
OSD menu tree OSD menu tree 1st layer 2nd layer 3rd layer 4th layer Selections Presentation, Bright, Game, Movie, Display Mode Vivid, TV, sRGB, DICOM SIM., User1¸ User2 Brightness 0 ~ 100 Contrast 0 ~ 100 Horizontal -5 ~ 5 (depend on Auto Sync) Position Vertical -5 ~ 0 (depend on Auto Sync) - Page 51 OSD menu tree 1st layer 2nd layer 3rd layer 4th layer Selections 0 ~ 100 Saturation 0 ~ 100 Gain 0 ~ 100 0 ~ 100 Green Saturation 0 ~ 100 Gain 0 ~ 100 0 ~ 100 Blue Saturation 0 ~ 100 Gain 0 ~ 100...
- Page 52 OSD menu tree 1st layer 2nd layer 3rd layer 4th layer Selections English, Français, Deutsch, Español, Português, 簡体中文, 繁體中文, Italiano, Norsk, Svenska, Nederlands, Language Русский, Polski, Suomi, Ελληνικά, العربية 한국어, Magyar, Čeština, فارسی Türkçe, Việt, 日本語, ไทย, , תירבעDansk, Fran. can. Security Lock Off, On Splash Logo...
- Page 53 OSD menu tree 1st layer 2nd layer 3rd layer 4th layer Selections Menu Position Translucent 0%, 25%, 50%, 75%, 100% Menu Low Power On, On by LAN Mode Fan Speed Normal, High Normal, Eco Plus, Dimming, Extreme Laser Info Dimming, Custom Light Remote ID Default, 1, 2, 3, 4, 5, 6, 7 Network State...
-
Page 54: Osd Description
OSD description OSD description 1. Press MENU on the remote control or on the side of the projector to bring up the OSD menu. 2. You will see three main menus (Image, Settings 1 and Settings 2). 3. Press ◄► to move to the main menu. Press ▲ ▼ to select the desired sub menu. Press ◄► to enter and change values for settings. - Page 55 OSD description • DICOM SIM This display mode simulates the grayscale/gamma performance of equipment used for “Digital Imaging and Communications in Medicine” (DICOM). Important: This mode should NEVER be used for medical diagnosis, it is for education/training purposes only. • User1, User2 Recalls the settings customized based on the current available picture modes.
- Page 56 OSD description Computer Press ENTER / ► to enter the Computer menu. • Horizontal Position Press ◄► to adjust the projected picture’s horizontal position. If the projected picture is not at the center of the screen (i.e. shifted to right or left) and ends up being cropped, use this function to adjust the picture’s horizontal position.
-
Page 57: Auto Image
OSD description Auto Image When Auto image was selected in the OSD menu, press ENTER to execute the automatic picture adjustment function. By executing this function, the projector will resync the picture. Use this function when the picture source is unstable or when you notice deterioration in picture quality and the projector will automatically adjust the picture size, phase and timing. - Page 58 OSD description • Video Saturation Press ◄► to adjust the color saturation of the projected image. Fig 6 illustrates the results of direct brightness adjustment using a random picture: • Video Tint Press ◄► to adjust the ratio of red to green in the color portion of the image. Fig 7 illustrates the results of direct brightness adjustment using a random picture: Fig 4 Fig 5...
-
Page 59: Color Manager
OSD description • White Balance Regardless of the change in ambient light, the human eye is equipped with an automatic adjustment mechanism that makes a white object appear white and black object black. However, since no machine has such an incredible innate feature, you may need to make certain adjustments to the projector’s settings when the ambient light changes so that the picture will appear closer to the actual colors. - Page 60 OSD description Settings 1 Source This function is same as the hotkey which on Remote controller. You can use remote controller or this function to select the correct input source. • HDMI1 HDMI input from PC or media device. • HDMI2 / MHL Connect to a MHL-compatible device by using an HDMI/MHL cable.
-
Page 61: Aspect Ratio
OSD description Aspect Ratio Use this function to adjust the aspect ratio of the projected picture. Press ◄► to adjust the ratio of picture length and width. The projector’s full picture size is 16:10 (1920×1200 dots). The following diagram illustrates the difference in various aspect ratio settings: Note: When used for commercial purposes, including: projection of picture in movie theaters, hotels, cafeteria and other public venues, compression or extension of picture achieved... - Page 62 OSD description Advanced 1 Press ENTER / ► to enter the Advanced 1 menu. • Language You can use this function to select the language you wish for the OSD menu to be displayed in. The options are English, French, German, Spanish, Portuguese, Simplified_Chinese, Traditional_ Chinese, Italian, Norwegian, Swedish, Dutch, Russian, Polish, Finnish, Greek, Korean, Hungarian, Czech, Arabic, Turkish, Vietnamese, Japanese, Thai, Farsi, Hebrew, Danish, French Canadian.
- Page 63 OSD description Note: Power on the glasses. Glasses normally have a power on -off switch. Each type of glasses has their own configuration instructions. Please follow the configuration instructions that come with your glasses to finish the setup process. Note: Passive 3D is not going to support thru 3D Sync In/Out. Note: Since different types of glass (DLP link or IR shutter glass) have their own setting instructions, please follow the guide to finish the setup process.
-
Page 64: Auto Source
OSD description Settings 2 Auto Source • ON By enabling this function, the projector will automatically determine the source of input every time it is turned on so that the user will not have to make the selection on the OSD menu. •... -
Page 65: Reset All
OSD description • Extreme Dimming When set to Extreme Dimming mode, the brightness will be 25% of the normal brightness. The cooling fan will slow down the speed. If the surrounding environment is sufficiently dark or if you do not require intense brightness, you can set the power mode to Extreme Dimming to save the power. - Page 66 OSD description Under normal circumstances, the projector will operate normally with this function set to Normal. By default, the projector will detect the temperature of the surrounding environment to regulate the speed of the cooling fan. When the ambient temperature rises, fan speed will increase (generates louder noise) to make sure the heat inside the projector gets discharged and keep the projector working normally.
- Page 67 OSD description • DNS If has DHCP server and the function is on. The DNS address will auto display here , or you need to enter it value by yourself. • Apply Press ENTER / ► to confirm settings. LAN_RJ45 Wired LAN terminal functionalites Remote control and monitoring of a projector from a PC (or laptop) via wired LAN is also possible.
- Page 68 OSD description LAN_RJ45 1. Connect an RJ45 cable to RJ45 ports on the projector and the PC (Laptop). 2. On the PC (Laptop), select Start Control Panel Network and Internet. 3. Right-click on Local Area Connection, and select Properties. English-68...
- Page 69 OSD description 4. In the Properties window, select the Networking tab, and select Internet Protocol (TCP/IP). 5. Click Properties. 6. Click Use the following IP address and fill in the IP address and Subnet mask, then click OK. 7. Press MENU on the projector. 8.
- Page 70 OSD description 10. Press ENTER / ► to confirm settings. Open a web browser. (for example, Microsoft Internet Explorer with Adobe Flash Player 9.0 or higher). 11. In the Address bar, input the IP address: 10.10.10.10. 12. Press ENTER / ►. The projector is setup for remote management.
- Page 71 OSD description Category Item Input-length Crestron Control IP Address IP ID Port Projector Projector Name Location Assigned To Network Configuration DHCP (Enabled) (N/A) IP Address Subnet Mask Default Gateway DNS Server User Password Enabled (N/A) New Password Confirm Admin Password Enabled (N/A) New Password...
- Page 72 OSD description Preparing email alerts 1. Make sure that user can access the homepage of LAN RJ45 function by web browser (for ex- ample, Microsoft Internet Explorer 11). 2. From the homepage of LAN/RJ45, click Alert Settings. 3. By default, these input boxes in Alert Settings are blank. English-72...
- Page 73 OSD description 4. For Sending alert mail, input the following: The SMTP field is the mail server for sending out email (SMTP protocol). This is a required field. The To field is the recipient’s email address (for example, the projector administrator). This is a required field.
-
Page 74: Custom Light
OSD description • HDBaseT/IR Press ENTER / ► to enter the HDBaseT/IR menu. • HDBaseT– IR/RS232/RJ45 Press ◄► to enter and enable or disable HDBaseT–IR/RS232/RJ45 Control. • Front IR Press ◄► to enter and enable or disable Front IR. • Rear IR Press ◄►... -
Page 75: Cleaning The Cabinet
Cleaning Cleaning Turn off the projector and unplug the power before cleaning. Suggest to wait at least 45 minute to let the projector cool down. Cleaning the cabinet • Use a dry soft cloth to wipe off the cabinet dust. Note: Not suggest to use cleanser. -
Page 76: Using The Kensington Lock
Using the Kensington® lock Using the Kensington lock ® Worry about the security of the projector. You can use Kensington lock the projector to avoid it be stolen. Note: For Kensington lock detail installation inormation. Please contact to the dealer. English-76... -
Page 77: Simple Troubleshooting
Simple troubleshooting Simple troubleshooting The following table offers a list of common problems with projectors and how to troubleshoot. If the recommended solutions fail to resolve your problem, contact your local dealer to arrange for servicing; do not attempt to service the projector by yourself. Problem Possible cause Solution... -
Page 78: Led Status
Simple troubleshooting Problem Possible cause Solution 1. The input signal type might not have been 1. Check to make sure that the connections connected properly. between the projector and the input The color of the picture device are correct. 2. The Color is not correct setting. looks pale. - Page 79 Simple troubleshooting Error Detail Power Light Temp SYS_ERR_G781_2 Thermal sensor IC initial failed (PW T3) SYS_ERR_ADS1015 Thermal sensor IC initial failed (T1/T4/T5) SYS_ERR_DRIVERBOARD_ Laser driver failed on communication Comm_Fail SYS_ERR_DRIVERBOARD_ Laser driver failed on CW-1 Speed_CW SYS_ERR_DRIVERBOARD_ Laser driver failed on CW-2 Speed_PW SYS_ERR_DRIVERBOARD_54V Laser driver failed on power input SYS_ERR_DRIVERBOARD_...
-
Page 80: Specifications
Specifications Specifications Specifications Description Specifications Model Name LP-WU6600 Resolution 1920 × 1200 (Native) Micro display 1 x 0.67" WUXGA DMD Laser Diode: 6 Banks Light Green and Red by laser phosphor Blue by diffuse laser 1 x 3.5mm Mini Jack for 12V Trigger... -
Page 81: Lens Series
Specifications Lens Series Throw Zoom Image Size Projection Vertical Horizontal Lens Ratio Ratio (Diagonal) Distance Lens Shift Lens Shift Semi Short Throw Lens 0.67” WUXGA 1.1-1.3 1.18 16.64 ~ 19.54 2.05~2.27 35.8"~379.8" 1~9m -15%~55% -5%~5% SL-62 Standard (STD) Lens 0.67” WUXGA 1.54~1.93 1.25 22.84 ~ 28.61 2.0~2.09... - Page 82 Specifications HDMI / HDBaseT Signal H Freq. Frame PCLK Component VGA - 5 BNC - Resolution DVI-D Remark Format Rate Hz 5 BNC RGBHV RGBHV 8bit 10bit 12bit 65.290 60.00 146.250 VESA DMT 1680 x 1050 65.290 59.95 146.250 VESA CVT 65.220 60.00 147.136...
-
Page 83: Mhl Timing Format
Specifications MHL timing format Mode V-Freq (KHz) Frame Rate (Hz) Pixel Clock (MHz) 720x480P 60 31.469 59.94 27.000 720x576P 50 31.250 27.000 720(1440)x480i 60 15.734 59.94 27.000 720(1440)x576i 50 15.625 27.000 1280x720P 60 44.955 59.94 74.175 1920x1080i 60 33.716 59.94 74.175 1920x1080i 50 28.125... - Page 84 Specifications Dimensions English-84...
-
Page 85: Communication Settings
Communication settings Communication settings RS-232 communication When the projector connects to the computer by RS-232 communication, the projector can be controlled with RS-232 commands from the computer. For details of RS-232 commands, refer to RS- 232 Communication command table. Connection 1. - Page 86 Communication settings 1. Protocol 19200bps,8N1 2. Command format ("h" shows hexadecimal) [Header code] [Packet] [Data size] Set [BEh, EFh, 03h, 06h, 00h] to byte number 0~4. [CRC flag] For byte number 5, 6, refer to RS-232 Communication command table. [Action] Set functional code to byte number 7, 8. <SET>...
-
Page 87: Command Control Via The Network
Communication settings 4. Data reply: 1Dh + xxxxh When the projector receives the GET command correctly, the projector returns the response code and 2 bytes of data. Note: For connecting the projector to your devices, please read the manual for each devices, and connect them correctly with suitable cables. -
Page 88: Communication Port
Communication settings Communication port The following two ports are assigned for the command control. TCP #23 Command control settings [TCP #23] 1. Command format Same as RS-232C communication, refer to RS-232C Communication command format. 2. Response code / Error code (“h” shows hexadecimal) Four of the response / error code used for TCP#23 are the same as RS-232C Communication (1)~(4). - Page 89 Communication settings Function Operation Header Data (7 bytes) Command Data (6 bytes) Description Header Packet Data Action Type Setting Code Size Code Display Mode Set Presentation BE EF 06 00 B3 CB 01 00 BA 30 51 00 Bright BE EF 06 00 23 CA 01 00...
- Page 90 Communication settings Function Operation Header Data (7 bytes) Command Data (6 bytes) Description Header Packet Data Action Type Setting Code Size Code Color Warm BE EF 06 00 6B F4 01 00 B0 30 01 00 Temperature Normal BE EF 06 00 9B F4 01 00...
- Page 91 Communication settings Function Operation Header Data (7 bytes) Command Data (6 bytes) Description Header Packet Data Action Type Setting Code Size Code Color Increment BE EF 06 00 12 66 04 00 12 27 00 00 Manager Decrement BE EF 06 00 C3 67 05 00...
- Page 92 Communication settings Function Operation Header Data (7 bytes) Command Data (6 bytes) Description Header Packet Data Action Type Setting Code Size Code Color Increment BE EF 06 00 CA 6A 04 00 28 27 00 00 Manager - Decrement BE EF 06 00 1B 6B 05 00...
- Page 93 Communication settings Function Operation Header Data (7 bytes) Command Data (6 bytes) Description Header Packet Data Action Type Setting Code Size Code Internal BE EF 06 00 6E D5 01 00 1C 20 00 00 Speaker BE EF 06 00 FE D4 01 00 1C 20...
- Page 94 Communication settings Function Operation Header Data (7 bytes) Command Data (6 bytes) Description Header Packet Data Action Type Setting Code Size Code BE EF 06 00 52 58 01 00 8D 22 00 00 DLP-Link BE EF 06 00 C2 59 01 00 8D 22 01 00...
- Page 95 Communication settings Function Operation Header Data (7 bytes) Command Data (6 bytes) Description Header Packet Data Action Type Setting Code Size Code 4 Corner - Top Increment BE EF 06 00 13 89 04 00 22 21 00 00 Left Corner Decrement BE EF 06 00...
- Page 96 Communication settings Function Operation Header Data (7 bytes) Command Data (6 bytes) Description Header Packet Data Action Type Setting Code Size Code Video BE EF 06 00 8A 83 02 00 06 11 00 00 fV[Hz] x 100 Information - Vert. Frequency Laser Hours - BE EF...
- Page 97 Communication settings Function Operation Header Data (7 bytes) Command Data (6 bytes) Description Header Packet Data Action Type Setting Code Size Code Laser Hours BE EF 06 00 51 56 02 00 B9 22 00 00 - Extream Dimming - High Laser Hours BE EF...
- Page 98 Communication settings Function Operation Header Data (7 bytes) Command Data (6 bytes) Description Header Packet Data Action Type Setting Code Size Code HDBaseT - BE EF 06 00 2A 5D 01 00 9F 22 00 00 IR/RS232/ BE EF 06 00 BA 5C 01 00 9F 22...
-
Page 99: Pjlink Command
Crestron INF1 ? Brand Name inquiry HITACHI INF2 ? Model Name inquiry LP-WU6600 CLSS ? Class Information inquiry Note: For specifications of PJLinkTM, see the web site of the Japan Business Machine and Information System Industries Association. URL: http://pjlink.jbmia.or.jp/ English-99... -
Page 100: Projection Distance Vs Projection Size Table
Communication settings Projection distance vs projection size table Semi Short throw pjecction lens: TR: 1.1 ~ 1.3; offset=55% Tele Wide Distance (m) 1.12 5.60 8.96 1.18 3.55 7.11 9.00 Diagonal (“) Image Width (mm) 2154 4308 6893 1077 3231 6462 8185 Image Height (mm) 1346... -
Page 101: Copyright Information
Copyright information Copyright information Copyright Copyright 2017. All rights reserved. No part of this publication may be reproduced, transmitted, transcribed, stored in a retrieva l system or translated into any language or computer language, in any form or by any means, electronic, mechanical, magnetic, optical, chemical, manual or otherwise, without the prior written permission of this company.
Need help?
Do you have a question about the LP-WU6600 and is the answer not in the manual?
Questions and answers