
Related Manuals for Hitachi LP-WU6500


Summary of Contents for Hitachi LP-WU6500
- Page 1 User's Manual English Projector Français LP-WU6500 Deutsch Español Português 簡体中文 繁體中文 한국어 Русский Thank you for purchasing this product. Please read this manual before using the product. Store it for future reference.
-
Page 2: Specifications
INDEX Warning, Notices and Safety Instructions OSD menu tree Projector parts and functions OSD description Front view Image LED Indicator Display Mode Brightness Rear view Projector keypad Contrast I/O Port (Input / Output) Computer Auto Image Bottom view Advanced Remote control Color Manager Settings 1 Range of effective remote control signal reception... -
Page 3: Communication Settings
Communication settings RS-232 communication Connection Command control via the network Connection Communication port Command control settings Communication command table PJLink command Projection distance vs projection size table Copyright information Copyright Trademark Warranty and after-service English-3... -
Page 4: Warning, Notices And Safety Instructions
Warning, Notices and Safety Instructions Warning, Notices and Safety Instructions Notice This product is intended for the adults who have the ability to operate this machine. Please write down your projector model number and serial number and keep the information for maintenance purposes in the future. -
Page 5: Information For Users Applicable In European Union Countries
Warning, Notices and Safety Instructions The user will be required to correct the interference at his own expense. Caution: Changes or modifications not expressly approved by the manufacturer void the user’s authority to operate the equipment. CAN ICES-3(A) / NMB-3(A) Information for users applicable in European Union countries Disposal of Old Equipment and Batteries Only for European Union and countries with recycling systems The above mark is in compliance with the Waste Electrical and Electronic Equipment Directive... - Page 6 Warning, Notices and Safety Instructions Electric shock To protect your projector, avoid turning on the projector during lightning storms and unplug it from the wall outlet. This will prevent sudden electrical surges caused by the lightning from damaging the projector. Do not overload wall outlets/extension cords Pay attention to the current load of the outlet and cord you are using to prevent fire or electrical shock.
-
Page 7: Please Install The Projector On An Even And Stable Surface
Warning, Notices and Safety Instructions Please install the projector on an even and stable surface Avoid placing the projector on unstable cart, tripod, table and so forth to prevent the projector from falling, becoming damaged or causing injuries. Servicing Should you encounter problem with the projector, please seek assistance from your local dealer or qualified service personnel. -
Page 8: Power Cord
Warning, Notices and Safety Instructions Power cord Don't place the projector where the cord can be walked on. This may result in fraying or damage to the power cord, especially at the plug and the point of connection between the power cord and the projector. - Page 9 Warning, Notices and Safety Instructions ENGLISH FRANÇAIS DEUTSCH ESPAÑOL PORTUGUÊS Descriptions of the Les descriptions de ces Beschreibungen der am Descripciones de los Descrições dos símbolos symboles sont affichées symbols displayed on the Projektor angezeigten símbolos mostrados en el apresentados no projector projector sur le projecteur Symbole...
-
Page 10: Notices You Should Read Prior To The Installation Of The Projector
Warning, Notices and Safety Instructions Notices you should read prior to the installation of the projector Take frequent breaks to let your eyes rest Prolonged viewing of the projector screen could strain your eyes. Please be sure to rest your eyes adequately. -
Page 11: Positioning Precautions
Warning, Notices and Safety Instructions Description: The regulation of temperature inside the projector by the cooling fan is automatic. And as such, the sound of cooling fan changing its operating speed does not imply that a problem has occurred with the projector. Positioning precautions This projector can be installed 360°... -
Page 12: Caution For 3D
Warning, Notices and Safety Instructions Caution for 3D • Don't let children view the 3D by themselves , please always be accompanied by an adult. • Although more than six years old can view the 3D. But children may not tell you if they are feeling unwell when viewing 3D content, so always be sure to check with the child. -
Page 13: Laser Warning
Warning, Notices and Safety Instructions LASER WARNING This symbol indicates that there is a potential hazard of eye exposure to laser radiation unless the instructions are closely followed. CLASS 3R LASER PRODUCT This Laser Product is designated as Class 3R during all procedures of operation. LASER LIGHT - AVOID DIRECT EYE EXPOSURE. -
Page 14: Product Labels
Warning, Notices and Safety Instructions Product labels Below drawing show the label's location. a. Serial No. b. MAC Label English-14... - Page 15 Warning, Notices and Safety Instructions Warning, Notices and Safety Instructions a. Hazard Warning Symbol b. Aperture Label c. Certification Statement Label d. Explanatory Label English-15...
-
Page 16: Location Of Laser Aperture
Warning, Notices and Safety Instructions Location of laser aperture Following drawing shows the laser aperture location. Be careful not to see the light directly. Interlock switches This machine has interlock switches to protect the laser light leakage. Switch will power-off the system when the Top cover is opened. English-16... -
Page 17: Projector Parts And Functions
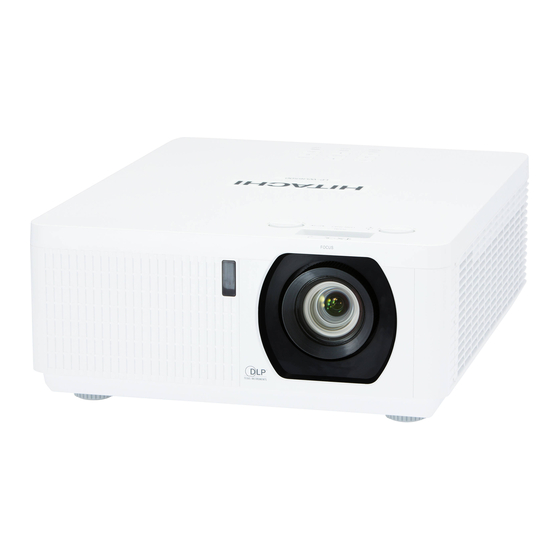
Projector parts and functions Projector parts and functions Front view 1. LENS SHIFT 6. LED Indicator Adjust the projected image position. 7. Projector keypad 2. Ventilation outlet 8. Ventilation inlet The hot air generated inside the projector The internal cooling fan draws cool is dispersed through the ventilation slot. -
Page 18: Rear View
Projector parts and functions Rear view 1. I/O port 5. Speaker 2. Power inlet 6. Ventilation outlet ® 3. Infrared sensor 7. Kensington lock 4. Security bar Projector keypad 1. ▲ / 6. ENTER Press to select items in the menu or Use this button to make your selection confirm the settings you have changed. - Page 19 Projector parts and functions I/O Port (Input / Output) 1. HDMI 1 (Digital audio/video connector) 12. AC Connect a POWER cable. Connect to HDMI or DVI source. 2. RJ45 13. RS-232C (9-pin D-sub socket) (Cross cable) Connect a LAN cable from Ethernet. Connect your PC or system control 3.
-
Page 20: Bottom View
Projector parts and functions Bottom view 135.0 135.0 English-20... -
Page 21: Remote Control
Remote control Remote control 1. IR transmitter 2. ON This button is used to turn on the projector. 3. PC Displays the VGA (COMPTER IN) / BNC (R/B/G/H/V) source selection (toggle). 4. HDMI Displays the HDMI 1/HDMI 2/DVI source selection (toggle). 5. - Page 22 Remote control 17. Source Select input source. Forward in set increments for MHL. Combo key function for Remote Control ID 33. Volume / 1 settings (Press ID button + Number for 3 Displays the Volume setting bar. seconds). Number for Remote ID setting used. 18.
-
Page 23: Range Of Effective Remote Control Signal Reception
Remote control Range of effective remote control signal reception The diagram below illustrates the range of effective remote control signal reception (Unused new battery). Note: Avoid placing the remote control at places of high temperature or humidity as it could cause the remote control to malfunction. - Page 24 Remote control Note: Do not recharge, short circuit, solder or disassemble a battery. Note: Be sure to insert the batteries in the corresponding orientations to match the polarities. Note: Do not mix new battery with used one as it would shorten the life of new one or cause leakage.
-
Page 25: Projector Installation
Projector installation Projector installation Throw distance Throw Distance (TD) = Screen Width (W) x Throw Ratio (TR) Projector offers the following throw ratios: • 1.15~1.9 : 1, 36.7~201.9inch Modes of installation • Install the projector in an environment from 0°C (32°F) to 40°C (104°F). The projector should be kept away from sources of heat and / or ventilation openings of air conditioner. - Page 26 Projector installation Ceiling Rear + Ceiling Refer to Page 42 : “Ceiling” Refer to Page 43 : “Rear + Ceiling” Advantage: does not occupy floor space does not Advantage: the projector is completely hidden draw attention to it. from plain view this setup usually Eliminates the possibility that offers better reduction of ambient someone would accidentally move...
-
Page 27: Horizontal And Vertical Lens Shift
Projector installation Horizontal and vertical lens shift In addition to using the adjustable feet to adjust projection angle, you can also use the Lens Shift function to adjust the projected picture. Lens shift 1. Turn the VERTICAL adjuster fully counter clockwise. Then turn it clockwise and adjust the vertical lens position upward. - Page 28 Projector installation Note for adjusting the lens shift 1. You can feel the rotational resistance of the lens adjuster increasing if the lens shift exceed its range. Do not turn the lens adjuster further. If the lens adjuster is turned excessively, it runs idle by a clutch mechanism inside the adjuster.
-
Page 29: Moving The Lens Vertically
Projector installation Moving the lens vertically The distance of vertical lens movement is 12% of the screen height directions (The offset range is about 63% to 75%). For instance, if you are using a 2.15m × 1.35m (100”) screen, you will be able to move the picture upwards no more than 13.5cm(10%) and downwards no more than 2.7cm(2%) from default position. -
Page 30: Connecting The Projector
Projector installation Connecting the projector HDMI / MHL / DVI connection Signals from picture source offer the best projection picture quality when sent through HDMI/DVI. Therefore, try to use input devices with HDMI/DVI output as the source of picture. English-30... -
Page 31: Rgb Connection
Projector installation RGB connection Connect your PC or other devices with RGB output to the RGB input connectors (COMPUTER (in OSD we say VGA)) on the projector to be used as the source of picture input. Connect a monitor to MONITOR OUT for through COMPUTER signal. English-31... -
Page 32: Hdbaset Connection
Projector installation HDBaseT connection HDBaseT is a technology to transmit image signal use LAN function, RS-232 function and IR function through a LAN cable. Connect Cat5e/Cat6 cable from HDBaseT TX Box for HDBaseT signal received. Video Signal - Connect it to HDBaseT output equipment (Such as high-definition TV source, Blu-ray Player..etc). -
Page 33: Usb Power (5V/1.5A) Connection
Projector installation RJ45 connection Connect it to your computer or Hub. Key in the correct IP Address or the computer host name which is the same as the projector’s host name then you can remote control the projector by internet. USB POWER (5V/1.5A) connection Connect a USB cable for USB device. -
Page 34: Sync Connection
Projector installation 3D SYNC connection Connect 3D IR glasses receiver unit. Connect 3D IR glasses receiver unit. VIDEO connection Connect the composite cable from a video device. English-34... -
Page 35: Service Connection
Projector installation SERVICE connection For service personnel only. RS232C connection Connects to the computer by RS-232 communication, the projector can be controlled with RS-232 commands from the computer. English-35... -
Page 36: Audio In (L/R) Connection
Projector installation Audio IN (L/R) connection Connect an audio source input (Available for video source). Audio OUT (Mini jack) connection Connect to an audio amplifier device. English-36... -
Page 37: Audio In (Mini Jack) Connection
Projector installation Audio IN (Mini jack) connection Connect an audio source input (Available for computer, BNC, DVI source). English-37... -
Page 38: Powering The Projector On Or Off
Projector installation Powering the projector on or off Powering on the projector Press on the projector or on the remote control to start up the projector. The POWER LED will now flash green. The startup screen will display in approximately 10 seconds. The first time you use the projector, you can select your preferred language from the quick menu after the startup screen display. -
Page 39: Selecting An Input Source
Projector installation Selecting an input source If more than one input device is connected, press SOURCE and press ▲ ▼ to scroll among devices. (Component is supported through the RGB to Component adapter.) • HDMI 1: High-Definition Multimedia Interface compatible •... -
Page 40: Setting An Access Password (Security Lock )
Projector installation Setting an access password (security lock) You can use the four (arrow) buttons to set a password and prevent unauthorized use of the projector. When enabled, the password must be entered after you power on the projector. Note: Keep the password in a safe place. Without the password, you will not be able to use the projector. - Page 41 Projector installation 3. Press ENTER / ► to enter the Advanced 1 sub menu. Press ▲ ▼ to select Security Lock. 4. Press ◄► to enter and enable or disable security lock function. A password dialog box automatically appears. 5. Press ▲ ▼◄► either on keypad or IR remote control for password entry. You can use any combination including the same arrow five times, but not less than five.
-
Page 42: Choosing A Location
Projector installation Choosing a location By default, the projector is configured for “Normal”. If you choose to install your projector in other setups, be sure to adjust the screen orientation to achieve the correct projection mode. Ceiling Press MENU Settings 1 Projection, select Ceiling, the projector is now configured for “Ceiling”. -
Page 43: Adjusting The Projector's Angle
Projector installation Rear + Ceiling Press MENU Settings 1 Projection, select Rear + Ceiling, the projector is now configured for “Rear + Ceiling”. Adjusting the projector's angle Use the adjustable feet to change the angle of the projector in order to achieve the most suitable angle for projection on the screen. - Page 44 Projector installation Focus Note for adjusting the zoom/focus 1. Adjust the lens shift/zoom/focus after 30 minutes have passed since the projector turned on. 2. Slight changes of the image position and/or focus may occur within 30 minutes after the projector was turned on. If the room temperature and humidity have changed after adjusting the lens shift/zoom/focus, readjust them as necessary.
-
Page 45: Correcting Keystone
Projector installation Correcting keystone 1. To adjust keystoning, press ▼ ▲◄► on the keypad or remote control and press ▼ ▲◄► to adjust Vertical or Horizontal Keystone. Refer to Fig 2 and 3. 2. To adjust keystoning, press the MENU button on the keypad or remote control and choose Settings 1 ... - Page 46 Tel: 0 40 73353 468 +49 (0) 40 73353 468 Tel: +60 -3-8911-2670 Email: tech.assist@hitachi-eu.com ► http://www.hitachiconsumer.com.my Hitachi Europe S.A. Hitachi Home Electronics Asia (S) Pte. Ltd. 364, Kifissias Ave. & 1, Delfon Str. 438A Alexandra Road #01-01/02/03 152 33 Chalandri Alexandra Technopark, 119967 SINGAPORE...
Need help?
Do you have a question about the LP-WU6500 and is the answer not in the manual?
Questions and answers