Advertisement
Advertisement

Related Manuals for FoxAlien Reizer


Summary of Contents for FoxAlien Reizer
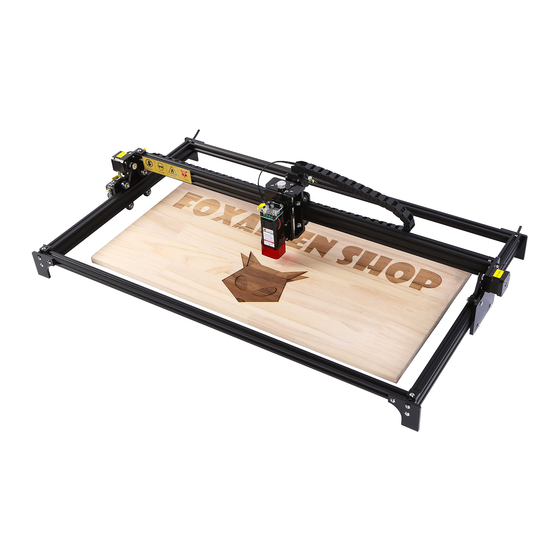
- Page 1 USER MANUAL Please read this manual carefully before using.
-
Page 2: Table Of Contents
Catalog Warranty & Disclaimer Product Specifications How to Assemble the Machine Wiring Diagrams How to Use LaserGRBL Make Your First Engraving Others... -
Page 3: Warranty & Disclaimer
Warranty & Disclaimer Please be careful when using your CNC machine. This machine is an electrical device with moving parts and dangerous areas. • This CNC Machine is for Indoor Use Only. • Wear the proper protection equipment while operating. •... -
Page 4: Product Specifications
Product Specifications Model Reizer 400 x 400 x 45mm (15.75” x 15.75” x 1.77”) Working Area Input Voltage Input Current 5A (Max) Laser Power S0-S1000 Motor NEMA17 Firmware Version 1.1f Limit Switch X, Y Support OS Windows XP, Windows 7, Windows 8, Windows 10, Linux, Mac OS... -
Page 5: How To Assemble The Machine
How to Assemble the Machine Y-axis Aluminum Profile (Left) Button Head Socket Bolt M5*10 T-nut M5 Y-L AXIS No need to completely No need to completely tighten the screw. We’ll tighten the screw. We’ll need it to install the other need it to install the other profiles later. - Page 6 Y-axis Aluminum Profile (Left) Button Head Socket Bolt M5*10 T-nut M5 Y-R AXIS...
- Page 7 Hex Socket Head Bolt M5*25 X-axis Aluminum Profile Insert the nut into the profile, tighten the screws Y-R AXIS Insert the nut into the profile, tighten the screws Insert the nut into the profile, tighten the screws Y-L AXIS Insert the nut into the profile, tighten the screws...
- Page 8 X-axis Gantry Button Head Socket Bolt M5*20 Y-R AXIS Y-L AXIS...
- Page 9 Button Head Socket Bolt M3*8 Acrylic Sheet Laser Module...
- Page 10 Hex Socket Head Bolt M3*8...
-
Page 11: Wiring Diagrams
Wiring Diagrams Laser Power 12V Output USB Port Module AXIS AXIS AXIS Supply Power on/off X Limit Switch Y Limit Switch Short Press: Weak Light Long Press: Home Offline Controller Port... - Page 12 Wiring Diagrams Y-L Axis Stepper (Left)&Control Board X Axis Stepper Y-R Axis Stepper (Right) Laser Module -10-...
-
Page 13: How To Use Lasergrbl
How to Use LaserGRBL - Driver Installation 1. Download from U disk. 2. Click “INSTALL” 3. Wait until it shows “Driver install success” Double-click to start installation. 5. To Determine your Machine's COM port • For Windows XP: Right click "My Computer"→ Select "Manage"→... - Page 14 - Download and install software- LaserGRBL 1. Download the free control software at this link: http://lasergrbl.com/ 2. Double click to install -12-...
- Page 15 - User Interface Introduction ① Connection control: here you can select serial port ① and proper baud rate for connection, according to grbl ② ③ firmware configuration. ② File control: this show loaded filename and engraving process progress. The green “Play” button will start program execution.
-
Page 16: Make Your First Engraving
Make Your First Engraving 1. LaserGRBL support custom buttons. Usually custom buttons are pre-added by default, if not, you can add them manually. A nice set of pre-defined custom buttons can be downloaded here: http://lasergrbl.com/usage/custom-buttons/ - Right-click in button area to import custom buttons. - After importing, you can see the following icons: 2. - Page 17 Make Your First Engraving 3. If the connection is successful, console window prints “Grbl 1.1h ['$' for help]”. 4. File → Open File: Open GCODE file or image format file. -15-...
- Page 18 Make Your First Engraving 5. Setting parameters, click Next. For more information, please click on the official link: https://lasergrbl.com/usage/raster-image-import/ 6. Set the Speed, S values and Size. !! Note: Different materials require different engraving speed and S value. You may need to try several times to find appropriate value. -16-...
- Page 19 Make Your First Engraving 7. You can preview the engraving in the right window. 8. Place the material under the laser head. As shown below, put the locator block on the surface of the material, rotate the knob to adjust the distance between the laser and the material. When the laser module sits on the block, you get the best focal length (30mm).
- Page 20 Make Your First Engraving 9. Click the laser focus icon. The laser can be turned on in low power. (See picture-1) You can turn on/off the laser in low power on the control board. (See picture-2) Picture-2 Picture-1 10. Jog the laser head to the zero point, then turn off the laser. 11.
- Page 21 Make Your First Engraving 12. Set passes of engraving, click the button “Run Program” to start engraving. Finished 13. File->Quick Save: Click to save GCODE file. -19-...
-
Page 22: Others
The machine is also compatible with the software-Lightburn with complete video tutorials and documentation, click the following link to learn more: https://lightburnsoftware.com/ Please visit www.foxalien.com for more CNC machine accessory products. Feel free to contact us for technical support if you come across any difficulty during assembly and using. E-mail: support@foxalien.com...
Need help?
Do you have a question about the Reizer and is the answer not in the manual?
Questions and answers