Advertisement
Table of Contents
Advertisement
Table of Contents

Subscribe to Our Youtube Channel
Related Manuals for Broyhill NERO 5680-13T


Summary of Contents for Broyhill NERO 5680-13T
-
Page 2: Maintenance
GENERAL BEST PRACTICES FOR ASSEMBLY: *Please read the assembly instructions prior to assembling this product. *Determine you have adequate space for assembly. *Assembly by two adults is recommended. *Assemble on soft surfaces to prevent damage to product finish. *Keep children away during assembly. This item contains small parts which can be swallowed by children. -
Page 3: Part List
PART LIST TABLE LEAF TABLE TOP LEAF SHELF x 1 PC x 1 PC x 2 PCS MOUNTING PLATE LEG FRAME 1 LEG FRAME 2 x 1 PC x 1 PC x 1 PC TABLE LEG TABLE PILLAR x 4 PCS x 1 PC Page 2 of 11... -
Page 4: Hardware List
HARDWARE LIST ALLEN BOLT ALLEN BOLT SPRING WASHER x 11 PCS x 27 PCS x 16 PCS ALLEN KEY FLAT WASHER x 27 PCS x 1 PC Page 3 of 11... -
Page 5: Hardware Needed
STEP 1 HARDWARE NEEDED Carefully place Leg Frame 1 (E) and Leg Frame 2 (F) bottom side up. Secure Leg Frame (E and F) with Bolt (1), Spring Washer (3) and Flat Washer (4) using Allen Key (5). Fully tighten Bolt. ASSEMBLED VIEW STEP 2 HARDWARE NEEDED... - Page 6 Supplementary instructions for the STEP 2 STEP 2-1 With assistance from another adult, place the Mounting Plate (D) bottom side up, align the dowels in the end of Table Leg (G) with the holes in the Mounting Plate and slide into place. Align the dowels in Table Pillar (H) with the holes on the inside of the assembled Table Legs (G).
- Page 7 STEP 3 HARDWARE NEEDED With assistance , turn the assembled Table Base upright. Place Mounting Plate (D) on the Table Base, align the wood dowels of Table Leg (G) with the holes in Mounting Plate (D) and slide into place. Secure the Mounting Plate (D) to the Table Leg (G) with Bolts (2), Spring Washers (3) and Flat Washers (4) using Key (5).
- Page 8 STEP 5 HARDWARE NEEDED Secure Leaf Shelf (C) to Wooden Slide Bottom of the Table Top (A) with Bolts (2), Spring Washers (3) and Flat Washers (4) using Allen Key (5). Fully tighten all Bolts. ASSEMBLED VIEW Page 6 of 11...
- Page 9 STEP 6 HARDWARE NEEDED With assistance, turn the assembled base upside down and place it on the Leaf Shelf (C). Align the holes in the assembled base with the holes in Leaf Shelf (C). Secure the assembled base to the Leaf Shelf (C) with Bolts (1) Spring Washers (3) and Flat Washers (4) using Allen Key (5).
- Page 10 STEP 7 With assistance from another adult, place the assembled table in the upright position. Open apron of Table Leaf (B) as shown in the diagram , open the locks located under the Table Top (A). With assistance, pull the two half tops from both ends, insert the Table Leaf (B). Ensure that the pins in the Table Leaf align with the holes in the table top half.
- Page 11 STEP 8 With assistance, carefully push the two half tops toward the center. Make sure tops are well aligned before the hardware underneath is locked. ASSEMBLED VIEW Page 9 of 11...
- Page 12 STEP 9 When not in use, Table Leaf (B) can be stored inside the table. Open the locks under Table Top (A). With assistance, fully extend the two table top halves. Carefully remove the leaf and place it topside down. Fold the apron of Table Leaf (B) to the flat position. Carefully place the leaf on the Leaf shelves (C) inside the table.
- Page 13 STEP 10 With assistance, place the Table in the desired location. If the Table is not level, the levelers in each foot can be adjusted until the table is level. Ensure all four levelers are in contact with the floor. STEP 11 ASSEMBLY IS COMPLETED.
Need help?
Do you have a question about the NERO 5680-13T and is the answer not in the manual?
Questions and answers
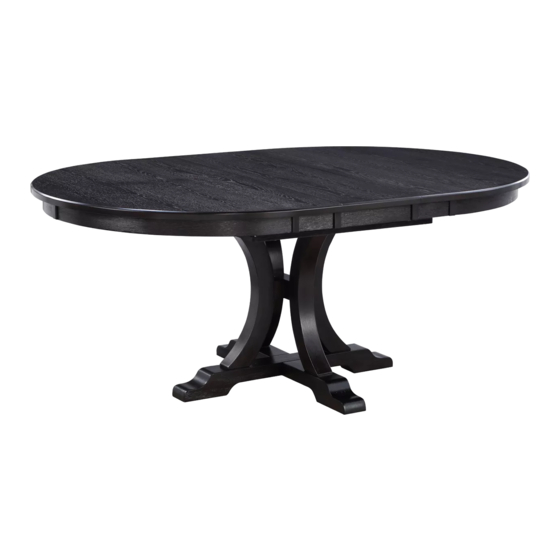
I find the tabletop for this one