Table of Contents
Advertisement
Quick Links
INSTRUCTION MANUAL
Models: 20 E and EL
For domestic household use only.
These products fully comply with all current European Safety Standard requirements
for Dehumidifiers and are fully compliant with the Low Voltage Directive 2014/35/EU,
the EMC Directive 2014/30/EU and the RoHS Directive 2015/863/EU.
08/80070/01
ISSUE: 5
Series: A
Advertisement
Table of Contents

Subscribe to Our Youtube Channel
Related Manuals for Dimplex everdri 20 E


Summary of Contents for Dimplex everdri 20 E
- Page 1 INSTRUCTION MANUAL Models: 20 E and EL For domestic household use only. These products fully comply with all current European Safety Standard requirements for Dehumidifiers and are fully compliant with the Low Voltage Directive 2014/35/EU, 08/80070/01 ISSUE: 5 Series: A the EMC Directive 2014/30/EU and the RoHS Directive 2015/863/EU.
- Page 2 NB These symbols on your device mean: • This appliance is filled with Propane gas R290. Follow strictly the manufacturer’s instruction concerning use and repairs! • Before using this appliance, you must carefully read the entire instruction manual. • Do not install, operate or store the device in a room with a floor area smaller than •...
- Page 3 IMPORTANT THESE INSTRUCTIONS SHOULD BE READ CAREFULLY AND RETAINED FOR FUTURE REFERENCE. Note also the information presented on the appliance CAUTION: FAILURE TO FOLLOW THESE INSTRUCTIONS MAY CAUSE INJURY AND/OR DAMAGE AND MAY INVALIDATE YOUR GUARANTEE Please read the operating instructions carefully before using your dehumidifier for the first time and keep them in a safe place.
- Page 4 DO NOT cover cord with carpeting, throw rugs, runners, or similar coverings. • DO NOT route cord under furniture or appliances. Take care to position the cord away • from traffic areas and where it will not be a tripping hazard. DO NOT COVER.
- Page 5 Exposed to the Near water If the power cable weather outdoors wires are frayed or cut Where small children If an extension Where the power may be left unattended lead may become cable may be overload damaged On a slope or Where there is risk Where it may be uneven surface...
-
Page 6: Specification
Equivalent (tonnes) 0.00021 tonnes Contains fluorinated greenhouse gases. Hermetically sealed system. Contact details: UK: Glen Dimplex Heating & Ventilation, Grange Drive, Hedge End, Southampton SO30 2DF ROI: Glen Dimplex Europe Limited, Airport Road, Cloghran, County Dublin, K67 VE08 • The data marked with * may vary for technical reasons. For greater precision, please refer to the rating label placed on the product. -
Page 7: How It Works
Quick start/ First time operation 1. Before switching on for first time please ensure unit has settled for 12 hours. 2. Please remove ‘carbon filter’ from its bag and locate between the anti- dust filter and air inlet on the body of the product (make sure carbon filter is lined up properly with guide locators on the air inlet). -
Page 8: Where To Position
Where To Position Excess moisture will travel throughout your home, in the same way that cooking smells waft to every room in the house. For this reason, the dehumidifier should be positioned, so that it can draw this moist air towards it from all over the home. Alternatively, if you have a serious problem in one area you can begin by positioning the dehumidifier close to this area and later moving it to a more central point. -
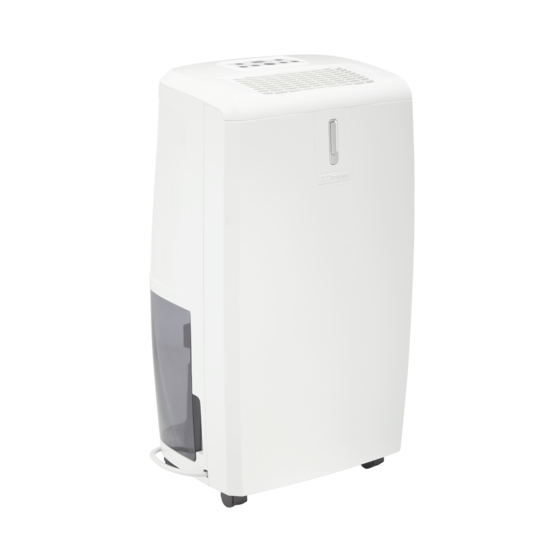
Page 9: Control Panel
Control Panel TEMP TIMER AIR CLEAN 8. DRYER High fan speed setting 1. Humidity setting button 2. Working mode indicator 9. High ventilation indicator (continuous working, humidity 10. Speed/Ventilation selection button 40%, 50%, 60%, 70%) 11. Low fan speed setting 3. -
Page 10: Operation
Operation 1. Plug the unit into a correct mains socket. (Please refer to the rating label at the rear of the unit for correct voltage/frequency.) 2. Press ON/OFF button to turn on the unit. The compressor will start to work. 3. - Page 11 Drainage While the water tank is full, the compressor will stop for self-protection and the water tank full indicator light will turn red. To move the water tank, pull it out squarely from the unit. After empting the water tank, place the water tank carefully back into its location into space.
-
Page 12: Maintenance
Maintenance Always unplug the unit from the mains before carrying out any maintenance or cleaning of the unit. CLEANING THE BODY Use a soft damp cloth to wipe the unit clean. Don’t ever use volatile chemicals, gasoline, detergents, chemically treated clothes, or other cleansing solutions. -
Page 13: Troubleshooting
Troubleshooting THE UNIT DOES NOT OPERATE: • Is the unit plugged in? • Is the house electricity on? • Is the room temperature below 5°C or above 32°C? If so, then it is out of the working range of the unit. •... -
Page 14: Spare Parts
If you don't intend to keep the packaging of this product for later use or storage, please dispose of it in an eco-friendly way, please dispose of it in your recycling bin or nearest recycling facility, thank you. Spare parts Selected replacement parts are available on www.dimplex.co.uk... - Page 15 All Dimplex products are individually tested before leaving the factory. If you are a consumer and you experience a problem with your Dimplex product, which is found to be defective due to faulty materials or workmanship within the guarantee period, this Dimplex guarantee will cover repair or - at the discretion of Dimplex –...
-
Page 16: Terms And Conditions
ROI: Glen Dimplex Europe Limited, Airport Road, Cloghran, County Dublin, K67 VE08 © Glen Dimplex. All rights reserved. Material contained in this publication may not be reproduced in whole or in part, without prior permission in writing of Glen Dimplex...
Need help?
Do you have a question about the everdri 20 E and is the answer not in the manual?
Questions and answers