
Related Manuals for Dimplex GDDEKD9


Summary of Contents for Dimplex GDDEKD9
- Page 1 9 LITRE DESICCANT DEHUMIDIFIER INSTRUCTION MANUAL GDDEKD9 Read and retain these instructions for future reference – 1 –...
-
Page 2: Table Of Contents
Before use Parts Programming Feature Operation Drainage Maintenance Trouble shooting SPECIFICATIONS Model no. GDDEKD9 Power supply 220~240V, 50Hz Humidity Removal capacity 9 L/day TURBO (high) – 730W Power consumption SLEEP (low) – 385W Electric heating element (max) – 650W Air volume (max.) -
Page 3: Where To Position
WHERE TO POSITION The dehumidifier should be positioned so that it can draw moisture from all areas of your home. When positioning the dehumidifier, ensure that it is placed on a level surface and that there is a minimum of 20 cm (8”) of space on either side of the unit to allow for efficient airflow. - Page 4 • Avoid getting the unit wet. Do not let any liquid enter the unit. • Do not place a container with liquid on top of the unit. • The condensed water is not for drinking; either for humans or animals. •...
- Page 5 • We suggest sending the unit for professional maintenance periodically. • Only a licensed professional is allowed to dismantle or modify the appliance. ANY DAMAGE OR INJURIES OF ANY KIND CAUSED AS A RESULT OF • The machine is to be used only for its prescribed purpose. Any other use is deemed to be a case of misuse.
-
Page 6: Parts
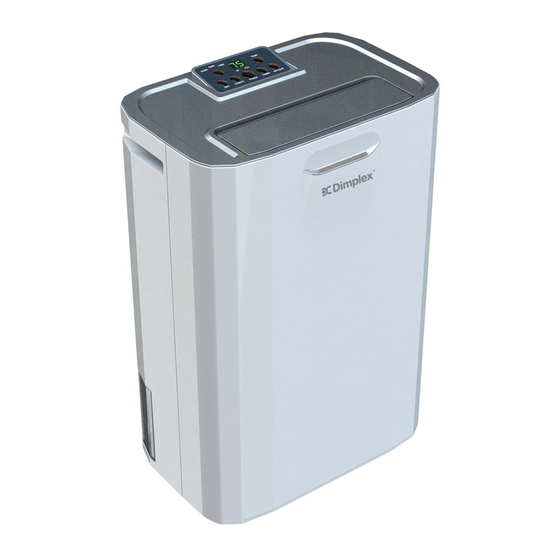
PARTS Parts Control Panel Air Deflector Humidity Indicator Rear Plate Air Inlet/ Air Filter Power Cord Water Tank Front Plate Active Carbon Filter Frame Filter – 6 –... -
Page 7: Programming Feature
Programming Feature PROGRAMMING FEATURE FAN SPEED Indicator (Sleep, DRY(TURBO) Button NORM, TURBO) Humidity Button 1. FAN SPEED Indicator 8. DRY CLOTHES (TURBO) Button (Sleep, NORM, TURBO) Humidity/Timer Display Window 10. ON indicator (heat element 9. Humidity Button 2. Humidity/Timer Display Window TIMER Indicator operation indicator) 10. ON indicator (heat element 3. TIMER Indicator operation indicator) AUTO button 11. - Page 8 • NORMAL: the unit will run in Medium ventilation/HIGH Heat. And, if the ambient humidity is less than the set humidity, the unit will run in Medium fan speed only, no Heat. • TURBO: the unit will run in HIGH ventilation/HIGH Heat. And, when the ambient humidity is less than the set humidity, the unit will run in HIGH fan speed only, no Heat.
- Page 9 TIMER BUTTON 1. IN OPERATION TIMER: while the dehumidifier is operating, press TIMER button to set the number of hours you want the dehumidifier to continue operation. While pressing the button, the LED display will show the number of hours you set (between 0 and 24 in a cycle).
-
Page 10: Operation
OPERATION 1. Plug the unit into the correct mains socket. 2. OPEN THE AIR DEFLECTOR at the top. 3. Press the POWER button to turn on the unit. The unit will start to work in LOW FAN/ LOW HEAT/LOW DEHUMIDIFY (humidity setting: 50%) 4. -
Page 11: Drainage
E5 means the unit is tipped over. Please reposition the unit upright, press POWER Drainage button to re-start. For other errors, please call Glen Dimplex or your service centre. DO NOT dismantle the machine by yourselves in any case. While the water tank is full, the unit will stop working for self-protection. The water full indicator will blink in red and the unit will buzz a warning. -
Page 12: Maintenance
CONTINUOUS DRAINAGE CONTINUOUS DRAINAGE When the dehumidifier is operated in very high humidity, the water tank will require more frequent drainage. In this situation, it may be more convenient to set the unit up for When the dehumidifier is operated in very high humidity, the water tank will require more frequent drainage. In this situation, it may be more convenient to set the unit up for continuous drainage with the following procedures: continuous drainage with the following procedures: 1. - Page 13 CLEANING THE FILTER CLEANING THE FILTER Draw out the air filter from the rear of the unit. Draw out the air filter from the rear of the unit. Filter Frame HEPA Filter For dust filter (washable filter) – For dust filter and filter frame: 1. Use a vacuum cleaner or tap the filter lightly 1. Use a vacuum cleaner or tap the filter lightly for easy cleaning. If the filter is particularly dirty, use warm water.
-
Page 14: Trouble Shooting
TROUBLE SHOOTING PROBLEM POSSIBLE REASON The unit doesn’t work at all. 1. Bad connection of the power cord 2. Water tank not positioned correctly or has a full tank. 3. The unit is not standing upright or is not level. The unit is not dehumidifying 1. - Page 15 Glen Dimplex New Zealand Ltd 38 Harris Road, East Tamaki Auckland, New Zealand P.O. Box 58473, Botany Manukau 2163, New Zealand Phone: 09 274 8265 Fax: 09 274 8472 Email: sales@glendimplex.co.nz Web: www.dimplex.co.nz...
Need help?
Do you have a question about the GDDEKD9 and is the answer not in the manual?
Questions and answers