
Subscribe to Our Youtube Channel
Related Manuals for Definitive Technology Studio 3D Mini


Summary of Contents for Definitive Technology Studio 3D Mini
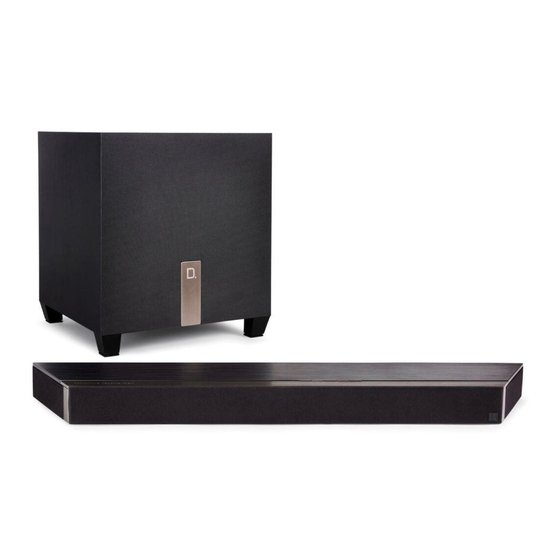
- Page 1 Studio 3D Mini 4.1 Home Theater Sound Bar and Wireless Subwoofer System Owner’s Manual...
- Page 2 Contents Connections Playback Settings Tips Appendix What you can do with this unit ........5 Connections .............. 22 Accessories ................. 9 Connecting a TV ............... 22 Inserting the battery ............10 Connection 1: TV equipped with an HDMI connector and compatible with the eARC (Enhanced Audio Operating range of the remote control unit ....
- Page 3 Contents Connections Playback Settings Tips Appendix Playback ..............28 Playing back files stored on a PC or NAS ....45 Enjoying TV, movies and music ........28 Playing music from a USB flash drive ......46 Turning on the power of the subwoofer ...... 29 AirPlay function ..............
- Page 4 Contents Connections Playback Settings Tips Appendix Tips ................58 Appendix ..............67 Troubleshooting ............... 58 About HDMI ................ 67 Power does not turn on / Power is turned off .... 59 Power management ............68 Operations cannot be performed through the remote Power modes ..............
-
Page 5: What You Can Do With This Unit
Settings Tips Appendix Thank you for purchasing this Definitive Technology product. To ensure proper operation, please read this owner’s manual carefully before using the product. After reading this manual, be sure to keep it for future reference. What you can do with this unit This sound bar and wireless subwoofer speaker system supports immersive surround sound and enables you to connect this unit to your TV to enjoy high-quality sound. - Page 6 Contents Connections Playback Settings Tips Appendix o Playing TV audio o Connecting to a playback device such as a Blu-ray disc player to perform playback [Related information] “Enjoying TV, movies and music” (v p. 28) [Related information] “Connecting a TV” (v p. 22) “Connecting an HDMI device”...
- Page 7 Contents Connections Playback Settings Tips Appendix o Using the app for smartphones/tablets o Playing streaming audio with Wi-Fi (HEOS App) for easy operation Streaming music service / Internet radio Internet HEOS [Related information] “Getting the HEOS App” (v p. 32) [Related information] “Playing from streaming music services”...
-
Page 8: Playing A Usb Flash Drive
Contents Connections Playback Settings Tips Appendix o Playing a USB flash drive o Playing a Bluetooth device HEOS [Related information] [Related information] “Playing music from a USB flash drive” (v p. 46) “Listening to music on a Bluetooth device” (v p. 30) - Page 9 Contents Connections Playback Settings Tips Appendix Accessories Check that the following parts are supplied with the product. Setup Guide Safety Instructions Wall mount template Power cords HDMI cable (4K) Optical cable Wall mount spacers Remote control unit R03/AAA batteries...
-
Page 10: Inserting The Battery
Contents Connections Playback Settings Tips Appendix Inserting the battery NOTE 0 Remove the battery from the remote control unit if it will not be in use for long periods. Slide the rear lid off the remote control unit in the 0 If the battery fluid should leak, carefully wipe the fluid off the inside of arrow direction. -
Page 11: Part Names And Functions
Contents Connections Playback Settings Tips Appendix Part names and functions Sound bar o Top panel A Power operation button (c) C Bluetooth button (g) Turns the sound bar power on/off (standby). (v p. 28) Switches the input source to “Bluetooth”. (v p. 30) Used to pair with Bluetooth devices. -
Page 12: Front Panel
Contents Connections Playback Settings Tips Appendix o Front panel A Visual Indicator LEDs Please refer to the “Visual indicator LEDs” (v p. 13) for LED color and state meaning. B Status LED Please refer to the “Status LED table” (v p. 70) for LED color and state meaning. - Page 13 Contents Connections Playback Settings Tips Appendix o Visual indicator LEDs Indicates input source, sound bar volume, night mode, dialogue, subwoofer volume and sound modes. n Input source indication n Volume level indication Input sources are indicated as follows. When the input source Volume level will be indicated with 5 LEDs.
- Page 14 Contents Connections Playback Settings Tips Appendix n Dialogue indication n Subwoofer volume indication Depending on the settings of the dialogue function for The volume of the subwoofer is indicated by 5 LEDs. The adjustment of the volume of dialogue in movies and vocals in default settings are ±0 and the center LED lights up.
-
Page 15: Rear Panel
Contents Connections Playback Settings Tips Appendix o Rear panel r t y io Q0 Q1 1 A Wall hook hole G CONNECT / SYNC LED Used to mount the sound bar on a wall. (v p. 20) Indicates the status of this unit. (v p. 70) B CONNECT button H AUX audio input connector Used for Wi-Fi setup. - Page 16 Contents Connections Playback Settings Tips Appendix Subwoofer o Rear panel A Power inlet Used to connect the power cord. (v p. 27) B SYNC LED Displays subwoofer status. (v p. 76) 0 The sound bar and subwoofer are wirelessly connected as the factory default. If no audio is output from the subwoofer, wirelessly connect the sound bar and subwoofer again.
-
Page 17: Remote Control Unit
Contents Connections Playback Settings Tips Appendix Remote control unit A Power operation button (c) Turns the sound bar power on/off (standby). (v p. 28) B Input source buttons (TV, OPT, AUX, HDMI, g) This selects the input source. (v p. 28) C Volume buttons (VOL +, –) These adjusts the volume level. - Page 18 Contents Connections Playback Settings Tips Appendix G Remote control signal transmitter This transmits signals from the remote control unit. (v p. 10) H Mute button ( This mutes the output audio. Press again to unmute. (v p. 29) I Movie mode button (MOVIE) Switches to the sound mode suitable for enjoying movies and TV programs.
-
Page 19: Positioning The Sound Bar
Contents Connections Playback Settings Tips Appendix Positioning Positioning the sound bar Position the sound bar in front of your TV, etc., on a flat surface. 0 When positioning the sound bar in front of your TV, make sure the sound bar does not obstruct the TV’s remote control light sensor, etc. - Page 20 0 Also, periodically check the safety of this unit and whether there is a possibility that the unit may fall. 0 Definitive Technology cannot accept any responsibility for damage, injury or accidents caused by problems with the mounting location or mounting method.
-
Page 21: Positioning The Subwoofer
Contents Connections Playback Settings Tips Appendix Positioning the subwoofer Position the subwoofer in a flat location near the sound bar. For the best performance, place on the same wall as the TV, no more than 30 ft (10 m) from the sound bar. 0 Placing the subwoofer in a corner can make the bass seem even more pronounced. - Page 22 Contents Connections Playback Settings Tips Appendix Connecting a TV How to connect a TV depends on the connectors and functions equipped on the TV. 0 Enable the TV’s HDMI control function when using an HDMI cable to connect this unit to your TV. (See the TV owner’s manual for details.) 0 Turn off the TV’s speaker or minimize the volume when using this unit.
- Page 23 Contents Connections Playback Settings Tips Appendix Connection 1: TV equipped with an HDMI connector and compatible with the eARC (Enhanced Audio Return Channel) or ARC (Audio Return Channel) Use the included HDMI cable to connect this unit to an eARC or ARC function-compatible TV. HDMI INPUT Sound bar eARC/ARC...
- Page 24 Contents Connections Playback Settings Tips Appendix Connection 2: TV equipped with an HDMI connector and incompatible with the eARC or ARC / TV equipped with an optical digital connector Use the included HDMI and optical cables to connect this unit to your TV. DIGITAL AUDIO Sound bar OPTICAL OUTPUT...
- Page 25 Contents Connections Playback Settings Tips Appendix Connection 3: TV equipped with an HDMI connector and incompatible with the eARC or ARC / TV equipped with an analog connector Use the included HDMI cable and a commercially available 3.5 mm stereo audio cable to connect this unit to your TV. AUX AUDIO Sound bar HDMI INPUT...
-
Page 26: Connecting A Playback Device
Contents Connections Playback Settings Tips Appendix Connecting a playback device Connecting an HDMI device Use a commercially available HDMI cable to connect a Blu-ray disc player, game device or similar device to this unit. HDMI device HDMI Sound bar OUTPUT HDMI cable (sold separately) 0 When connecting this unit to a device that is compatible with the 4K functions, use a “High Speed HDMI cable with Ethernet”... -
Page 27: Connecting The Power Cords
Contents Connections Playback Settings Tips Appendix Connecting the power cords Subwoofer Sound bar Power cord (included) Power cord (included) To household power outlet (AC 120 V, 60 Hz) -
Page 28: Input Source Buttons
Contents Connections Playback Settings Tips Appendix Enjoying TV, movies and music Turn on the power of the TV and connected devices. Press c to turn on power to the sound bar. Input source buttons Press the input source button. The Visual Indicator LEDs light up according to the selected input source. -
Page 29: Adjusting The Subwoofer Volume
Contents Connections Playback Settings Tips Appendix Turning on the power of the Adjusting the subwoofer volume subwoofer Use SUBWOOFER + or SUBWOOFER – to adjust the subwoofer volume. Press POWER ON/OFF switch on the rear panel of The Visual Indicator LEDs indicate the volume of the subwoofer to turn on power to the subwoofer. -
Page 30: Listening To Music On A Bluetooth Device
In pairing mode, the status LED repeatedly blinks 2 times in green. Activate the Bluetooth settings on your Bluetooth device. Select “Studio 3D Mini” (Default) from the list of devices displayed on the screen of the Bluetooth device. The status LED blinks in blue and this unit and the Bluetooth... -
Page 31: Pairing With Other Bluetooth Devices
Bluetooth device connected. If the connection is cut, repeatedly blinks 2 times in green. perform connection again. Select “Studio 3D Mini” (Default) from the list of Play music using any app on your Bluetooth device. devices displayed on the screen of the Bluetooth device. -
Page 32: Getting The Heos App
Contents Connections Playback Settings Tips Appendix Getting the HEOS App You can use many online music streaming services from the HEOS App. Depending upon your geographical location, there are several options to choose from. Download the HEOS App for iOS or Android by searching App Store, Google Play store or Amazon Appstore for “HEOS”. - Page 33 Contents Connections Playback Settings Tips Appendix Setting up first HEOS built-in device Make sure your mobile device is connected to your wireless network (the same network this unit Once you have placed this unit in your listening room and have connected to).
- Page 34 Contents Connections Playback Settings Tips Appendix o Adding wireless HEOS built-in devices Adding more HEOS built-in devices You can add additional wireless HEOS built-in devices to your The HEOS system is a true multiroom audio system that HEOS system by selecting “Add Device” from the HEOS App’s automatically synchronizes audio playback between multiple settings menu and follow the instructions: HEOS built-in devices so that the audio coming from different...
-
Page 35: What Is A Heos Account
Contents Connections Playback Settings Tips Appendix o Changing your HEOS Account HEOS Account HEOS Accounts can be registered by tapping “Music” tab - Tap the “Music” tab. “Settings” icon a in the HEOS App. Select the Settings icon a in the upper left corner of o What is a HEOS Account? the screen. -
Page 36: Playing From Streaming Music Services
Rooms Music Now Playing Tap the “Rooms” tab, and select “Studio 3D Mini” if there are multiple products with HEOS built-in. 0 Tap the Pencil icon e at the top right to switch edit mode. You can change the displayed name. - Page 37 Contents Connections Playback Settings Tips Appendix o Selecting the music track or station from music sources Music Tap the “Music” tab and select a music source. 0 All music services displayed may not be available in your location. This Phone Music Servers USB Music Playlists...
- Page 38 Contents Connections Playback Settings Tips Appendix Album Now Playing Browse the music to play. Artist After selecting a music track or radio station the app will Album automatically change to the “Now Playing” screen. 10 Tracks,60 Mins.,2014 Track 01 0 When you select a music track to play you will be asked how you Rooms want to queue up your music.
-
Page 39: Listening To The Same Music In Multiple Rooms
Contents Connections Playback Settings Tips Appendix Listening to the same music in Rooms Rooms Drag one room into another to group them Drag one room into another to group them multiple rooms Dining Dining Song Name 1 Song Name 1 This system is a true multi-room audio system. -
Page 40: Ungrouping Rooms
Contents Connections Playback Settings Tips Appendix o Ungrouping rooms Rooms Rooms Drag one room into another to group them Drag one room into another to group them Press and hold your finger on room that you want to Dining Dining remove from the group. -
Page 41: Grouping All Rooms (Party Mode)
Contents Connections Playback Settings Tips Appendix o Grouping all rooms (party mode) Rooms Rooms You can easily group 16 rooms together into Party Mode by Drag one room into another to group them Drag one room into another to group them using a "pinch"... -
Page 42: Ungrouping All Rooms
Contents Connections Playback Settings Tips Appendix o Ungrouping all rooms Rooms Rooms Drag one room into another to group them Drag one room into another to group them You can easily ungroup all of your rooms and exit Party Mode by using a "spread"... -
Page 43: Listening To Internet Radio
Contents Connections Playback Settings Tips Appendix Listening to Internet Radio The HEOS system includes access to more than 100,000 free internet radio streams from all corners of the globe via the TuneIn radio service. Just select the TuneIn logo from the main Audio signal “Music”... - Page 44 Contents Connections Playback Settings Tips Appendix Playing music stored on your mobile Perform this operation on the HEOS App. Download the HEOS Audio signal App in advance to your iOS or Android device. (v p. 32) Tap the “Music” tab. Select “This iPhone/iPod/iPad/Phone”.
-
Page 45: Playing Back Files Stored On A Pc Or Nas
Contents Connections Playback Settings Tips Appendix Playing back files stored on a PC or NAS Perform this operation on the HEOS App. Download the HEOS App in advance to your iOS or Android device. (v p. 32) (Network Attached PC Storage) Select “Music Servers”... - Page 46 Contents Connections Playback Settings Tips Appendix Playing music from a USB flash drive Perform this operation on the HEOS App. Download the HEOS App in advance to your iOS or Android device. (v p. 32) Insert a FAT32 or NTFS formatted USB flash drive into the USB port on the rear panel of the sound bar.
-
Page 47: Airplay Function
Contents Connections Playback Settings Tips Appendix AirPlay function Music files stored on your iPhone, iPod touch, iPad or iTunes can Audio signal be played on this unit via the network. 0 The screen may differ depending on the OS and software versions. This unit supports AirPlay 2 ®... -
Page 48: Playing Songs From Your Iphone, Ipod Touch Or Ipad
Contents Connections Playback Settings Tips Appendix Playing songs from your iPhone, iPod Playing iTunes music with this unit touch or iPad Install iTunes 10, or later, on a Mac or Windows PC If you update your “iPhone/iPod touch/iPad” to iOS 10.0.2 or that is connected to the same network as this unit. - Page 49 Contents Connections Playback Settings Tips Appendix Play a song from your iPhone, iPod Tap the AirPlay icon. touch or iPad on multiple synced Displays a list of devices/speakers that can be played back on the same network. devices (AirPlay 2) A circle is displayed to the right of AirPlay 2 compatible devices.
-
Page 50: Spotify Connect Function
Contents Connections Playback Settings Tips Appendix Spotify Connect function Spotify is all the music you’ll ever need. Millions of songs available instantly. Just search for the music you love, or let Spotify play you something great. Spotify works on your phone, tablet, computer and home speakers. So you’ll always have the perfect soundtrack for whatever you’re doing. -
Page 51: Setting The Night Mode
Contents Connections Playback Settings Tips Appendix Settings Perform the below operations and settings as needed. Adjusting the dialogue sound Adjust the volume of dialogue in movies, vocals in music, etc. so these can be heard more easily. Press DIALOGUE. Pressing the button switches between the following settings, and the Visual Indicator LEDs light up. -
Page 52: Setting The Sound Mode
Contents Connections Playback Settings Tips Appendix o Selecting a sound mode Setting the sound mode This unit allows you to enjoy various kinds of surround and stereo Press MOVIE or MUSIC to select a sound mode. playback modes. Disc formats such as Blu-ray Disc and DVD, as well as being Switches to the sound mode supported by digital broadcasting, and even by streaming MOVIE:... -
Page 53: Description Of Sound Mode Types
Contents Connections Playback Settings Tips Appendix o Description of sound mode types Dolby sound mode Sound mode type Description Indication Dolby Atmos Please select this mode to play content encoded with Dolby Atmos. In Dolby Atmos playback, the Dolby Speaker Virtualizer function operates automatically, and 3D playback is performed. - Page 54 Contents Connections Playback Settings Tips Appendix PCM multi-channel sound mode Sound mode type Description Indication Multi PCM This mode can be selected for playback of PCM signals that are input in certain transmission formats. The blue LED light moves 2 times from the center, to both the left and right.
-
Page 55: Sound Mode That Can Be Selected For Each Input Signal
Contents Connections Playback Settings Tips Appendix o Sound mode that can be selected for each input signal The following sound modes can be selected with the MOVIE button or MUSIC button. S:Sound mode that can be selected when MOVIE button or MUSIC button is pressed (F:Default sound mode) Input signal Sound mode MOVIE button... - Page 56 Contents Connections Playback Settings Tips Appendix o Using the remote control learning function Operating this unit using the remote Perform this operation on the HEOS App. Download the HEOS control of a TV App in advance to your iOS or Android device. (v p. 32) There are three ways to operate this unit using the remote Tap the Settings icon a located in the upper left control of a TV.
-
Page 57: Connecting The Sound Bar And Subwoofer Manually
Contents Connections Playback Settings Tips Appendix Connecting the sound bar and Setting the input source to switch subwoofer manually with the TV button on the remote control unit In the default settings, the subwoofer and sound bar are automatically paired, and wireless connection starts In the default settings, pressing the TV button switches to the automatically when the power turns on. -
Page 58: Troubleshooting
Contents Connections Playback Settings Tips Appendix Troubleshooting If a problem should arise, first check the following: 1. Are the connections correct? 2. Is the set being operated as described in the owner’s manual? 3. Are the other devices operating properly? If this unit does not operate properly, check the corresponding symptoms in this section. -
Page 59: Power Does Not Turn On / Power Is Turned Off
Contents Connections Playback Settings Tips Appendix Power does not turn on / Power is turned off Power does not turn on. Check whether the power plug is correctly inserted into the power outlet. (v p. 27) If the power of this unit cannot be turned on with the remote control for the TV, press the c button to turn on the power of this unit. (v p. -
Page 60: No Sound Comes Out
Connect the sound bar and subwoofer manually. (v p. 57) When you are using more than one Studio 3D Mini, this unit may automatically connect to a different subwoofer than the one supplied with it. To connect this unit to the subwoofer supplied with it, connect the unit manually. (v p. 57) -
Page 61: Music Cuts Out Or Delays Sometimes
Contents Connections Playback Settings Tips Appendix Music cuts out or delays sometimes Music cuts out or delays sometimes. Make sure your Internet connection is operating correctly. If you are sharing your network with other users or devices, they may be using most of your bandwidth (especially if they are streaming video). - Page 62 Contents Connections Playback Settings Tips Appendix I hear a delay when using the external input with my TV I hear a delay when using the external input with my TV. If you are connecting the external input with your cable or satellite box for enjoying TV audio through multiple HEOS built-in devices, you may hear a delay between when you see someone speak and when you hear the audio.
- Page 63 2. Go to the Wi-Fi menu under Settings on your iOS device. 3. Select “Studio 3D Mini” under “SET UP NEW AIRPLAY SPEAKER...” at the bottom of the list. 4. Select the network you want this unit to connect to and select “Next”.
-
Page 64: Connecting To A Wps Network
Contents Connections Playback Settings Tips Appendix Connecting to a WPS network Connecting to a WPS network. If your wireless router support WPS (Wi-Fi Protected Setup™) this unit can optionally connect to your network using the push button method by following these steps: (Wi-Fi Protected Setup™... -
Page 65: Resetting Factory Settings
Contents Connections Playback Settings Tips Appendix Resetting factory settings When the network function or this unit do not operate correctly, the problem may be solved by resetting factory settings. Resetting this unit will clear out the wireless network info, EQ, and name but retain it’s current software. You will have to use “Settings” - “Add Device”... - Page 66 Contents Connections Playback Settings Tips Appendix Resetting the firmware to the default state When the network function or this unit do not operate correctly, the problem may be solved by resetting the firmware to the default state. It is confirmed that the network connection has no problem, but the unit cannot connect to the Internet. The solution described in “Resetting factory settings”...
-
Page 67: About Hdmi
Contents Connections Playback Settings Tips Appendix About HDMI This unit supports the following HDMI functions. ARC (Audio Return Channel) function Enjoy movies, music, etc., on your TV simply by connecting an ARC function-compatible TV to this unit via HDMI. eARC (Enhanced Audio Return Channel) function The eARC function is compatible with conventional ARC function compatible audio formats in addition to multichannel linear PCM, Dolby TrueHD, Dolby Atmos, DTS-HD Master Audio, DTS:X and other audio formats a conventional ARC function cannot transmit. -
Page 68: Power Management
Contents Connections Playback Settings Tips Appendix Power management Power modes o Quick start mode AUX IN After around 20 minutes of no audio. This unit automatically enters quick start mode to save power in the following cases. During quick start mode, this unit OPT IN operations cause the power to turn on. -
Page 69: Deep Standby
Contents Connections Playback Settings Tips Appendix o Deep Standby The device also has the ability to automatically enter “Deep Standby” whenever the wired or wireless network connection is removed for more than 60 minutes in quick start mode. The front panel LED will turn off during Deep Standby. To wake this unit from Deep Standby, Press any button on the sound bar or the included remote control unit. -
Page 70: Status Led Table
Contents Connections Playback Settings Tips Appendix Status LED table The LEDs on the front panel and rear panel change to indicate the current sound bar status. o Sound bar Status Front LED action Rear LED action Description Power is off, or the sound bar is in deep standby mode. Deep standby (v p. - Page 71 Contents Connections Playback Settings Tips Appendix Status Front LED action Rear LED action Description Sound bar is starting up or connecting to the network. (blink) (off) Power on Sound bar is connected to the network. (solid) (off) Sound bar is unable to connect to the network. Try to connect the sound bar again.
- Page 72 Contents Connections Playback Settings Tips Appendix Status Front LED action Rear LED action Description Sound bar is connecting to the network via WPS. (fast blink) (fast blink) Sound bar is connected to the network via WPS. (for 3 sec. solid) (solid) WPS has timed out.
- Page 73 Contents Connections Playback Settings Tips Appendix Status Front LED action Rear LED action Description Sound bar is pairing via Bluetooth. (two blinks) (two blinks) Bluetooth Sound bar is paired via Bluetooth. (one blink) (off) Sound bar failed to pair to the Bluetooth device. Try to pair again.
- Page 74 Contents Connections Playback Settings Tips Appendix Status Front LED action Rear LED action Description Volume is being adjusted. (quick blink) (off) Volume setting Sound bar is muted. (slow blink) (off) Firmware is being updated. (blink) (blink) Firmware update There is a firmware error. Check your usage environment, relaunch the app, then try to update the firmware again.
- Page 75 Contents Connections Playback Settings Tips Appendix Status Front LED action Rear LED action Description There was a setup error. Check your usage environment, then follow the correct procedure to try setup again. If the error occurs again, restore factory settings and try setup again.
- Page 76 Contents Connections Playback Settings Tips Appendix o Subwoofer Status Rear LED Action Description Paired (solid) Subwoofer pairing Pairing (two blinks (repeatedly)) Not paired (slow blink)
-
Page 77: Supported File Types And Codecs
Contents Connections Playback Settings Tips Appendix Supported file types and codecs Frequency Sample rate File extension Codec Bit rates 32/44.1/48/88.2/96/176.4/192 kHz 16/24 bit .wav – MPEG-1 Audio Layer 3 32/44.1/48 kHz 16 bit .mp3 32 - 320 kbps CBR/VBR 32/44.1/48 kHz 16 bit .aac/.m4a AAC-LC... -
Page 78: Trademark Information
Contents Connections Playback Settings Tips Appendix Trademark information The terms HDMI, HDMI High-Definition Multimedia Interface, and Dolby, Dolby Vision, Dolby Atmos, and the double-D symbol are the HDMI Logo are trademarks or registered trademarks of registered trademarks of Dolby Laboratories Licensing HDMI Licensing Administrator, Inc. - Page 79 Contents Connections Playback Settings Tips Appendix The Wi-Fi CERTIFIED logo is a registered trademark of the Wi-Fi Alliance. Wi-Fi Certification provides assurance that the device has passed the interoperability test conducted by the Wi-Fi Alliance, a group that certifies interoperability among wireless LAN devices.
-
Page 80: Specifications
Contents Connections Playback Settings Tips Appendix Specifications Sound bar o General Wireless technology: 5.2 GHz/5.8 GHz frequency hopping Operating temperature: 41 °F - 95 °F (5 °C - 35 °C) Power supply: AC 120 V, 60 Hz Power consumption: 50 W 15 W (USB/1 A) Power consumption in quick start mode: 2.5 W (HDMI IN) -
Page 81: Bluetooth Section
Contents Connections Playback Settings Tips Appendix o Wireless LAN section Network type (wireless LAN standard): Conforming to IEEE 802.11a/b/g/n/ac (Wi-Fi ® compliant) Used frequency range: 2.4 GHz, 5 GHz z1 The Wi-Fi ® CERTIFIED Logo and the Wi-Fi CERTIFIED On-Product Logo are registered trademarks of the Wi-Fi Alliance. o Bluetooth section Communications system: Bluetooth Version 4.2... - Page 82 Contents Connections Playback Settings Tips Appendix o Dimensions (Unit : in. (mm)) 20 1/8 (510) 26 1/2 (670) 4 5/8 (115) o Weight : 4 lbs 10 oz (2.1 kg)
- Page 83 Contents Connections Playback Settings Tips Appendix Subwoofer o General Wireless Technology: 5.2 GHz/5.8 GHz frequency hopping Operating temperature: 41 °F - 95 °F (5 °C - 35 °C) Power supply: AC 120 V, 60 Hz Power consumption: 40 W Power consumption in Quick Start Mode: 0.5 W o Dimensions (Unit : in.
- Page 84 Contents Connections Playback Settings Tips Appendix Licence This unit uses source code programmed under GPL or LGPL. The licenses used are listed in the WEB manual. http://manuals.definitivetechnology.com/Studio3Dmini/NA/EN/...
- Page 85 3520 10800 00AT ©2020 Sound United. All Rights Reserved.
- Page 86 Studio 3D Mini 4.1 Home Theater Sound Bar and Wireless Subwoofer System Setup Guide...
-
Page 87: What's In The Box
What’s in the Box Sound bar HDMI cable Subwoofer Power cords Optical cable Wall mount spacers Wall mount template Literature Remote control Two AAA batteries... - Page 88 TV. You may choose to place it either on your furniture, or wall-mount the sound bar below the TV. OPTIONAL: The Studio 3D Mini can be wall mounted. Please refer to the wall mount template in the product carton.
- Page 89 Connect the subwoofer to an AC outlet and switch power to ON Subwoofer SYNC LED On the back of the subwoofer, the SYNC LED will be solid green to indicate that it is paired to the sound bar. Download the HEOS App Download the HEOS App on your iOS or Android Device.
- Page 90 Tap “Add Device” in the Settings Screen Settings Add Device Follow instructions in App to complete the setup and configuration of Studio 3D Mini. Owner’s Manual For more information, visit https://www.definitivetechnology.com/. Refer to the Online Manual for other functions information and operation procedure details.
-
Page 91: Remote Control
Remote Control Bluetooth Power On/Off Mute TV Input Auxilary Input HDMI Input Optical Input Master Volume Up Dialogue Enhancer - Adjust the volume of dialog in movies, vocals in music, etc. Master Volume Down so these can be heard more easily. Subwoofer Down Subwoofer Up Music Mode... -
Page 92: Sound Bar Controls
(See on page 8.) Status LED - Shows current sound bar status. (See pages 9 and 13.) • Power - Turns the Studio 3D Mini on/off • Source - Switches sound bar inputs • Bluetooth - Initiates Bluetooth pairing •... - Page 93 Back of Studio 3D Mini Power Optical HDMI IN Ethernet Sync Button HDMI OUT Connect Button (eARC/ARC) - Used to wirelessly - Used for Wi-Fi setup. connect the sound bar and subwoofer. Connect/Sync...
- Page 94 Sound Bar Indicators and Status Lights Visual Indicator LEDs Status LED Source Indication Below is a table showing the source indicators. HDMI OPTICAL BLUETOOTH HEOS Several source colors indicate the audio bitstream for non-streaming inputs. PCM CONTENT DOLBY SIGNAL DTS SIGNAL NOTE: “TV”...
- Page 95 Volume Indication Master Volume will be communicated with the five LEDs in the row of Visual Indicators LEDs. Volume of 1% will be indicated by the leftmost LED as dimly lit, and 100% will be indicated with all 5 Visual Indicator LEDs fully illuminated. Visual Indicator LEDs Visual indicator LEDs will illuminate purple NIGHT MODE - enabled...
- Page 96 Subwoofer Back Panel & Visual LED Indicators Back Panel of Subwoofer SYNC LED - Indicates connection status between sound bar and subwoofer. SYNC Button - Used for troubleshooting or resetting the connection between the sound bar and subwoofer. Power Switch Power...
- Page 97 3. Select “Studio 3D Mini” from the list of available Bluetooth speakers from your mobile device. 4. Play music using any app on your device and the sound will now play from the speaker.
-
Page 98: Basic Troubleshooting
Basic Troubleshooting MY SOUND BAR WON’T CONNECT TO MY NETWORK - Make sure your mobile device is connected to your wireless network before setting up your sound bar. - Alternatively, you can connect your sound bar to your network router using an Ethernet cable sold seperately. - Page 99 NO SOUND COMING OUT FROM THE SUBWOOFER - Ensure that your subwoofer is connected to power and switched ON. - Check the SYNC LED at the back of the subwoofer. Make sure that it is solid green. If it is not green, refer to the online manual for detailed instructions on how to manually reset the connection between the sound bar and subwoofer.
-
Page 100: For Further Assistance
+1 (410) 363-7148 Email definitive@custhelp.com Mail Definitive Technology 15541 Fermi Court Carlsbad, CA 92008 U.S.A Warranty This sound bar is covered by a limited warranty. Details can be found on the Definitive Technology website: https://www.definitivetechnology.com/warranty-information Follow us on Twitter Instagram Facebook... - Page 101 www.definitivetechnology.com Printed in Vietnam 5411 11892 00AT © 2020 Sound United. All Rights Reserved.
Need help?
Do you have a question about the Studio 3D Mini and is the answer not in the manual?
Questions and answers