Phason PEC Plus Quick Start Manual
Hide thumbs
Also See for PEC Plus:
- User manual and installation manual (112 pages) ,
- Manual (2 pages) ,
- User manual (40 pages)
Advertisement
Phason
PEC Plus socketed relay kit installation guide
The PEC Plus control board kit with socketed relays (K170048-RS) is a replacement circuit board
for your PEC Plus control.
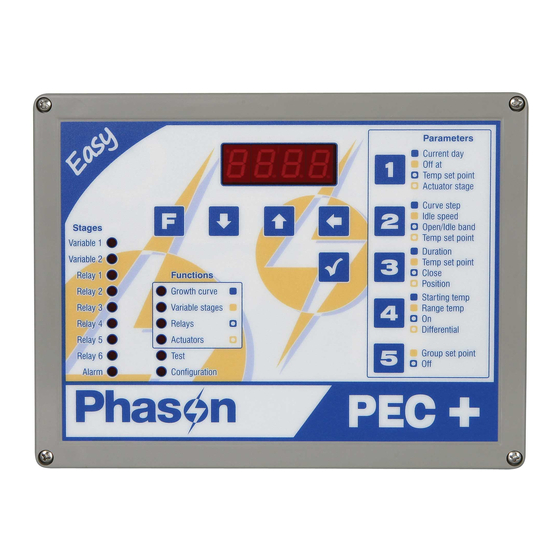
The PEC Plus socketed relay kit works only with controls having the display type
shown below on the left. The kit
on the right.
Removing the old circuit board
Before installing the kit or servicing the control, switch OFF the power at the
source.
Refer to the diagram on the next page.
1. Switch off the power to the PEC Plus.
2. Remove the cover from the unit.
3. Disconnect the ribbon cable from the socket.
4. Label and remove the wires from the terminal blocks on the circuit board.
5. Note the position of the jumpers.
6. Remove the screws fastening the triacs to the heatsink.
7. Remove the five screws fastening the circuit board to the enclosure.
8. Remove the circuit board from the enclosure.
17044800
PEC Plus socketed relay kit installation guide
with the display type shown below
does not work
2010-10-26
Advertisement
Table of Contents

Related Manuals for Phason PEC Plus


Summary of Contents for Phason PEC Plus
- Page 1 PEC Plus socketed relay kit installation guide PEC Plus socketed relay kit installation guide The PEC Plus control board kit with socketed relays (K170048-RS) is a replacement circuit board for your PEC Plus control. The PEC Plus socketed relay kit works only with controls having the display type shown below on the left.
- Page 2 Phason PEC Plus socketed relay kit installation guide Display cable Terminal blocks Actuator present pins Triacs Installing the new circuit board 1. Wipe the white grease and dust from the inside of the heatsink using a clean cloth. 2. Remove the new circuit board from the bag.
Need help?
Do you have a question about the PEC Plus and is the answer not in the manual?
Questions and answers