Advertisement
Available languages
Available languages
Quick Links
ASSEMBLY INSTRUCTIONS
INSTRUCCIONES DE ENSAMBLAJE
INSTRUCTIONS D'ASSEMBLAGE
RiverRidge
®
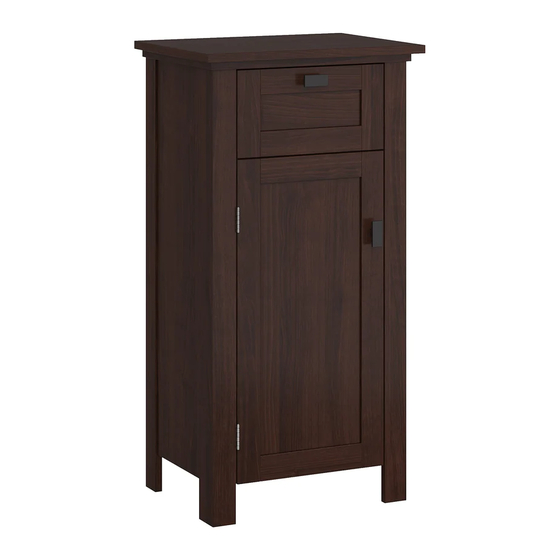
Hayward Single Door Floor Cabinet
®
Gabinete de piso de una puerta RiverRidge
Armoire à une porte RiverRidge® Hayward
06-174 – Dark Woodgrain, Madera oscura, madera oscura, Grain de bois foncé
06-178 – Light Woodgrain, Madera clara, Grain de bois pâle
®
RiverRidge
is a registered trademark of Sourcing Solutions, Inc., Hudson, WI 54016, USA
®
RiverRidge
es una marca comercial registrada de Sourcing Solutions, Inc., Hudson, WI 54016, USA
®
RiverRidge
est une marque déposée de Sourcing Solutions, Inc., Hudson, WI 54016, USA
Advertisement

Related Manuals for RiverRidge Hayward 06-174


Summary of Contents for RiverRidge Hayward 06-174
- Page 1 ® Hayward Single Door Floor Cabinet ® Gabinete de piso de una puerta RiverRidge Armoire à une porte RiverRidge® Hayward 06-174 – Dark Woodgrain, Madera oscura, madera oscura, Grain de bois foncé 06-178 – Light Woodgrain, Madera clara, Grain de bois pâle ®...
- Page 2 WARNING ADULT ASSEMBLY REQUIRED: This product requires assembly by an adult because of small parts. Care should be taken in unpacking and assembling this item to keep small parts away from children. During assembly children should be kept away from the product due to possible risk of injury. SERIOUS OR FATAL INJURIES CAN OCCUR FROM FURNITURE TIP-OVER.
- Page 3 ADVERTENCIA REQUIERE QUE UN ADULTO REALICE EL ENSAMBLAJE: Este producto requiere que un adulto lleve a cabo el ensamblaje debido a las piezas pequeñas. Debe tener cuidado al desempacar y ensamblar este artículo para mantener las piezas pequeñas alejadas de los niños. Los niños deben mantenerse alejados del producto durante el ensamblaje debido al posible riesgo de lesiones.
- Page 4 AVERTISSEMENT L’ASSEMBLAGE DOIT ÊTRE EFFECTUÉ PAR UN ADULTE : Ce produit doit être assemblé par un adulte à cause de la présence de petites pièces. Lorsque vous déballez et assemblez cet article, veillez à tenir les petites pièces hors de portée des enfants.
-
Page 5: Parts List
PARTS LIST DESCRIPTION Top Board Left Side Panel Right Side Panel Left Support Board Right Support Board Cross Bar 2PCS Front Cross Bar Shelf Back Board Bottom Board Door Drawer Front Board Drawer Left Side Panel Drawer Right Side Panel Drawer Back Board Drawer Bottom Board... - Page 6 PARTS LIST PARTS DESCRIPTION Cam Bolt 20PCS 20PCS Cam Lock 14PCS Wood Dowel 1 SET Magnet with 2 Screws Magnet Plate 2PCS Hinge 16PCS Screw (3x10mm) 4PCS Shelf Holder Handle 2PCS 2PCS Machine Screw (4x18mm) 8PCS Screw (4x30mm) 12PCS Screw (2.5x10mm) Plastic Anchor Screw (4x30mm) Adjustable Anchor Bracket...
- Page 7 STEP 1 1. Attach drawer left side panel (13) to drawer back board (15) by inserting 2 screws (K) through screw holes on drawer left side panel (13), then tighten into drawer back board (15). 2. Attach drawer right side panel (14) to drawer back board (15) by inserting 2 screws (K) through screw holes on drawer right side panel (14), then tighten into drawer back board (15).
- Page 8 STEP 3 Screw 6 cam bolts (A) into cam bolt holes on left support board (4) and right support board (5). Attach 2 hinges (F) to left support board (4) by inserting 4 screws (G) through holes on hinges (F), then tighten to left support board (4). STEP 4 Insert 2 wood dowels (C) into wood dowel holes on left support board (4).
- Page 9 STEP 5 Insert 4 wood dowels (C) into wood dowel holes on side panels (2, 3). Attach both cross bars (6) to side panels (2,3) by inserting wood dowels through wood dowel holes and 4 screws (K) through screw holes on both cross bars (6), then tighten to side panels (2,3). Attach 2 drawer slides (Q) to cross bars (6) by inserting 6 screws (G) through screw holes, then tighten to cross bars (6).
- Page 10 STEP 6 Attach magnet (D) to front cross bar (7) by inserting 2 magnet screws through holes on magnet (D), then tighten to front cross bar (7). Screw 6 cam bolts (A) into cam bolt holes on left side panel (2) and right side panel (3). Insert 6 wood dowels (C) into wood dowel holes on left side panel (2) and right side panel (3).
- Page 11 STEP 7 Attach front cross bar (7) to left side panel (2) by inserting wood dowel (C) and cam bolt (A) into holes on front cross bar (7), then insert 1 cam lock (B) into cam lock hole on front cross bar (7) and rotate clockwise to secure cam bolt (A) in place.
- Page 12 STEP 8 Insert 1 screw (P) through adjustable anchor bracket (O) into screw hole on top board (1). Screw 4 cam bolts (A) into cam bolt holes on top board (1). Attach top board (1) to left side panel (2) and right side panel (3) by inserting 4 cam bolts (A) into cam bolt holes on left side panel (2) and right side panel (3).
- Page 13 STEP 10 OPTION #1 OPTION #2 DRYWALL DRYWALL WOOD STUD SCREW WALL ANCHOR ONLY WITH SCREW Option #1: Securing to Drywall Position cabinet against wall in desired location. Using a pencil, make small mark on wall through hole on adjustable anchor bracket (O). Move cabinet away from wall and screw 1 plastic anchor (M) into wall on pencil mark.
- Page 14 STEP 12 Insert 4 shelf holders (H) into holes on left side panel (2) and right side panel (3). Make sure 4 shelf holders (H) are at same height. Place shelf (8) onto 4 shelf holders (H). ATTENTION ADULTS: Cabinet should be checked periodically for damage or loose screws/parts.
-
Page 15: Lista De Piezas
LISTA DE PIEZAS N.° DESCRIPCIÓN CANT. Tablero superior Panel izquierdo Panel derecho Tablero de soporte izquierdo Tablero de soporte derecho Barra transversal Barra transversal delantera Repisa Tablero trasero Tablero inferior Puerta Tablero delantero del cajón Panel izquierdo del cajón Panel derecho del cajón Tablero trasero del cajón Tablero inferior del cajón Perno de anclaje... - Page 16 HERRAMIENTAS NECESARIAS PARA EL ENSAMBLAJE: DESTORNILLADOR PLANO Y PHILLIPS (NO INCLUYEN). NO SE RECOMIENDA EL USO DE UN DESTORNILLADOR ELÉCTRICO PARA EL ENSAMBLAJE. NO UTILICE EL ARTÍCULO SI TIENE PIEZAS DAÑADAS O PIEZAS QUE FALTAN. Envíe pedidos de piezas dañadas o que faltan por correo electrónico a: customer.service@ssi-rr.com o llame gratis al 1-(844)-223-5201 o pida piezas en línea en www.riverridgehome.com.
- Page 17 los agujeros de ambas barras transversales (6). A continuación, apriételos en los tableros laterales (2, 3). 2. Fije las 2 guías para el cajón (Q) a las barras transversales (6) insertando los 6 tornillos (G) a través de los agujeros correspondientes. Luego apriételos a las barras transversales (6). 3.
- Page 18 2. Ubique el gabinete contra la pared, inserte 1 tornillo (N) a través del agujero del soporte de anclaje ajustable (O) y, luego, apriételo en el anclaje plástico (M). Opción n.º 2: Fijar a una pared de yeso y a un montante de madera 1.
-
Page 19: Liste Des Pièces
LISTE DES PIÈCES Nº DESCRIPTION QTÉ Plaque supérieure Panneau latéral gauche Panneau latéral droit Plaque de support gauche Plaque de support droite Barre transversale Barre transversale avant Étagère Plaque arrière Plaque inférieure Porte Plaque avant du tiroir Panneau latéral gauche de tiroir Panneau latéral droit de tiroir Plaque arrière du tiroir Plaque inférieure du tiroir... - Page 20 OUTILS NÉCESSAIRES POUR L’ASSEMBLAGE : TOURNEVIS À TÊTE PLATE ET À POINTE CRUCIFORME (NON FOURNIS). NOUS DÉCONSEILLONS D’UTILISER UN TOURNEVIS ÉLECTRIQUE POUR L’ASSEMBLAGE. N’UTILISEZ PAS CET ARTICLE SI UNE PIÈCE EST MANQUANTE OU ENDOMMAGÉE. Pour commander sans frais des pièces de rechange, envoyez un courriel à l’adresse customer.service@ssi-rr.com, appelez le 1-(844)-223-5201 ou commandez les pièces en ligne sur www.riverridgehome.com.
- Page 21 2. Fixez 2 glissières de tiroir (Q) à la barre transversale (6) en insérant 6 vis (G) dans les trous de vis, puis en les serrant dans la barre transversale (6). 3. Fixez la plaque magnétique (E) sur la porte (11) en insérant 2 vis (G) dans les trous de la plaque magnétique (E), puis en la serrant dans la porte gauche (11).
-
Page 22: Instructions D'entretien
Option 2 : Fixation sur des cloisons sèches et des montants en bois 1. Placez l’armoire contre le mur à l’endroit désiré. Insérez 1 vis (N) dans le trou du support d’ancrage réglable (O), puis vissez-la à travers la cloison sèche et dans le montant en bois. *Conseil : Le support d’ancrage réglable (O) peut être ajusté...
Need help?
Do you have a question about the Hayward 06-174 and is the answer not in the manual?
Questions and answers