Advertisement
Available languages
Available languages
Quick Links
Advertisement

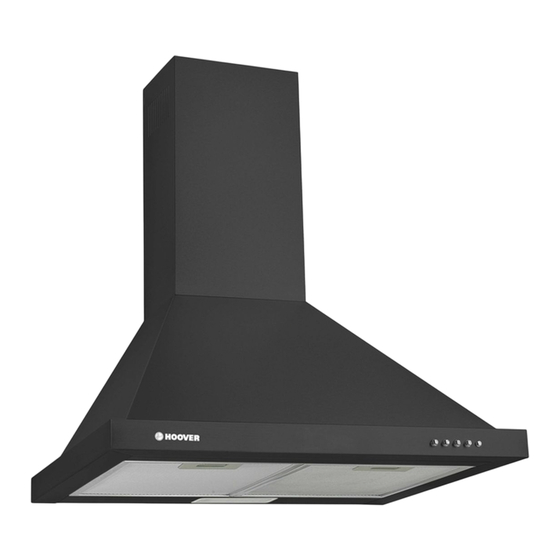
Related Manuals for Hoover HCE160N/1


Summary of Contents for Hoover HCE160N/1
- Page 1 HCE160N/1,HCE160X/1 Cooker Hood Instruction Manual ENGLISH(EN)--------------------------------------------------------------------------------page 001 PORTUGUESE (PT)------------------------------------------------------------------------page 012...
- Page 2 Cooker Hood Instruction Manual...
-
Page 3: Table Of Contents
Content 1…………………………………..………………………………Safety instructions 2…………………………………..………………………………Installation 3…………………………………..………………………………Start using your cooker hood 4…………………………………..………………………………Troubleshooting 5…………………………………..………………………………Maintenance and cleaning 6…………………………………..………………………………Environment protection... -
Page 4: Safety Instructions
SAFETY INSTRUCTIONS his manual explains the proper installation and use of your cooker hood, please read it carefully before using even if you are familiar with the product. The manual should be kept in a safe place for future reference. monoxide poisoning. - Page 5 arning: Before obtaining access to ● Always to do: terminals, all supply circuits must be disconnected. aution: The appliance and its ● accessible parts can become hot Always to do: during operation. Be careful to avoid touching the heating elements. lways put lids on pots and pans ●...
-
Page 6: Installation
INSTALLATION (VENT OUTSIDE) MOUNTING OF THE V-FLAP If the cooker hood does not have an assembled V-flap 1, you should mount the half- parts to its body.The images only show an example of how to mount the V- flap,because the outlet may vary according to different models and configurations. To mount the V-flap 1 you should: •... - Page 7 3. Install the hook on a suitable place once the installation height is fixed, and keep it in line. The fixed position of the inside chimney bracket is the place of chimney. See pic 2. 4. Install the outlet on the cooker hood with 4pcs screws.Fix the outside chimney bracket on the outside chimney, and be sure that the inside chimney can be adjusted the height in it freely as well as fixing the expansion pipe.
- Page 8 Electrical Installation All installation must be carried out by a competent person or qualified electrician. Before connecting the mains supply ensure that the mains voltage corresponds to the voltage on the rating plate. Direct Connection The appliance must be connected directly to the mains using an omnipolar circuit breaker with a minimum opening of 3mm between the contacts.
-
Page 9: Start Using Your Cooker Hood
• Failure to observe these basic instructions will reduce the performance and increase noise levels of the cooker hood. • Any installation work must be carried out by a qualified electrician or competent person. •Do not connect the ducting system of the hood to any existing ventilation system which is being used for any other appliance ,such as warmer tube, gas tube , hot wind tube. -
Page 10: Troubleshooting
TROUBLESHOOTING Fault Possible Cause Solution Fan switch turned off Select a fan switch position. Light on, but motor Fan switch failed Contact service center. does not work Motor failed Contact service center. House fuses blown Reset/Replace fuses. Light does not work, motor does Power cord loose or Refit cord to power outlet. - Page 11 STAINLESS STEEL The stainless steel must be cleaned regularly (e.g.weekly) to ensure a long life expectancy.Dry with a clean soft cloth. A specialized stainless steel cleaning fluid may be used. NOTE: Ensure that wiping is done along with the grain of the stainless steel to prevent any unsightly crisscross scratching patterns from appearing.
- Page 12 1. Before installing or replacing the carbon filters, disconnect the mains power to the unit. 2. Press the filter lock and remove the mesh filter. 3. Turn the carbon filter on both sides of the motor anti-clockwise. Replace the carbon filters with the new carbon filters. 4.
-
Page 13: Environment Protection
– Max wattage: 1×2 W – Voltage range: AC110-240V – Dimensions: ENVIRONMENTAL PROTECTION: This appliance is labelled in accordance with European Directive 2012/19/EU on Waste Electrical and Electronic Equipment Regulations 2013 regarding electric and electronic appliances (WEEE). The WEEE contain both polluting substances (that can have a negative effect on the environment) and base elements (that can be reused). - Page 14 Exaustor Manual de Instruções...
- Page 15 Índice 1…………………………………..………………………………Instruções de segurança 2…………………………………..………………………………Instalação 3…………………………………..………………………………Começar a usar o seu exaustor 4…………………………………..………………………………Resolução de problemas 5…………………………………..………………………………Manutenção e limpeza 6…………………………………..………………………………Proteção ambiente...
- Page 16 INSTRUÇÕES DE SEGURANÇA Este manual explica a instalação e a utilização correta do seu exaustor, leia-o atentamente antes de usar o produto, mesmo que já esteja familiarizado com o mesmo. O manual deve ser mantido num local seguro para referência futura. Estas instruções deverão estar sempre disponíveis num formato alternativo, por exemplo, num website ou a pedido, por parte do utilizador num formato como DVD.
- Page 17 O que deve fazer sempre: O que deve fazer sempre: ●Coloque sempre tampas nos tachos e ●CUIDADO: O aparelho e as suas peças panelas quando estiver a cozinhar num acessíveis podem ficar quentes durante o fogão a gás. funcionamento. Tenha o cuidado de evitar ●Quando no modo de extração, o ar na tocar nos elementos de aquecimento.
- Page 18 INSTALAÇÃO (VENTILAÇÃO EXTERIOR) MONTAGEM DA UNIDADE DE ALETAS Se o exaustor não tiver uma unidade de aletas 1 montada, deve montar as metades na sua estrutura. As imagens apenas mostram um exemplo de como montar a unidade de aletas, a saída pode ser diferente de acordo com os diferentes modelos e configuração.
- Page 19 3. Instale o fogão num local adequando logo que esteja determinada a altura de instalação e mantenha-o alinhado. A posição fixa no suporte da chaminé do lado de dentro é o local da chaminé. Ver Fig. 2 4. Prenda o suporte do exterior da chaminé no lado de fora da chaminé e certifique-se de que o interior da chaminé...
- Page 20 Instalação elétrica Toda a instalação deve ser realizada por uma pessoa competente ou por um eletricista qualificado Antes de conectar a rede, certifique-se de que a tensão da rede corresponda à indicada na placa de identificação. Conexão direta O aparelho deve ser conectado diretamente à rede elétrica usando um disjuntor omnipolar com um abertura mínima de 3mm entre os contatos.
- Page 21 •O ângulo de curvatura do tubo de expansão não pode ser inferior a 120º; deve orientar o tubo horizontalmente ou, em alternativa, o tubo deve ir desde o ponto inicial e deve estar dirigido para uma parede externa. •Depois da instalação, certifique-se de que o exaustor está nivelado para evitar a recolha de gordura no final.
- Page 22 RESOLUÇÃO DE PROBLEMAS RESOLUÇÃO DE PROBLEMAS Problema Causa possível Solução Selecione uma posição do Interruptor de ventoinha desligado interruptor da ventoinha Luz acesa, mas o Falha do interruptor da ventoinha Contacte o centro de serviço. motor não funciona Falha do motor Contacte o centro de serviço.
- Page 23 ASPETOS GERAIS A limpeza e manutenção deverão ser efetuadas com o aparelho frio especialmente quando se limpa. Evite deixar substâncias alcalinas ou ácidas (sumo de limão, vinagre, etc.) nas superfícies. AÇO INOXIDÁVEL O aço inoxidável deve ser limpo regularmente (ou seja, semanalmente) para garantir uma longa esperança de vida.
- Page 24 3. Rode o f iltro de ca rvão em ambos os lados do motor no se ntido dos ponteiros do relógio. Substitua os filtros de carvão pelos novos filtros de carvão. 4. Ponha o filtro de rede. 5. Ligue a alimentação à tomada. NOTA: •...
- Page 25 • O código ILCOS D para esta lâmpada é: DBS-2,5/65-H-120/33 – Módulos LED –lâmpada retangular – Tensão máx.: 1×2 W – Gama de tensão: CA 110-240 V – Dimensões: PROTEÇÃO DO AMBIENTE: Este aparelho está rotulado em conformidade com a Diretiva Europeia 2012/19/UE relativa aos resíduos de equipamentos elétricos e eletrónicos (REEE) 2013 em relação aos aparelhos elétricos e eletrónicos.
Need help?
Do you have a question about the HCE160N/1 and is the answer not in the manual?
Questions and answers