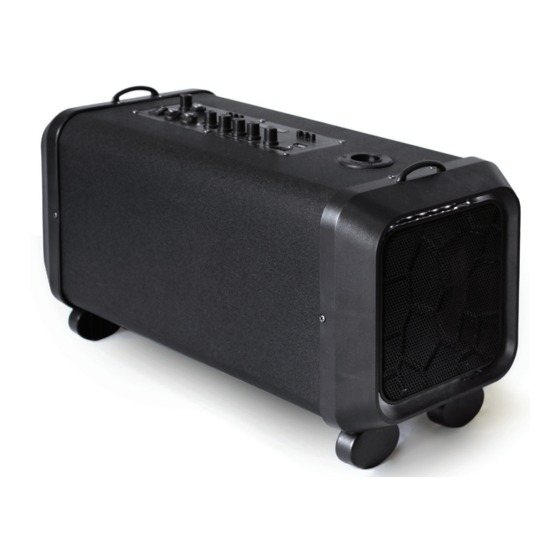
Summary of Contents for MASINGO Lento X5
- Page 8 The entire karaoke machine can easily be assembled and disassembled so that you can pack it up and take it on the go in just a few minutes! Microphone Stand Microphone Stand Parts: Microphone Pole Triangular Bracket Two Bendable Arms Two Microphone Clips...
- Page 9 How to Assemble the Microphone Stand: Begin with inserting the microphone pole into the large hole on the top right of the karaoke machine. Next, connect the triangular bracket to the top end of the microphone pole Connect both bendable arms to the triangular bracket the microphone pole.
- Page 10 Attach both microphone clips to each of the bendable arms by twisting them tightly into place. Place the microphones into the microphone clips Adjust the height of the microphone pole desired by twisting the two knobs on the pole.
-
Page 11: Device Holder
Device Holder Device Holder Parts: How to Assemble the Device Holder: Begin with inserting the ball at the end of part into the protruding piece on the back side of part and twist to tighten it in place. Attach the now-constructed device holder by holding it in place at the position and height you desire on... - Page 12 Disco Ball Disco Ball Parts: Disco Ball Disco Ball Clasp 2X Side Screws Pole Clip Screw Stand Clip Power Plug Wire Clips...
- Page 13 How to Assemble the Disco Ball: To attach the disco ball, screw the pole clip screw through the disco ball clasp and the hole on the stand clip Screw on both sides of the disco ball to the disco ball clasp with a side screw on each side and tighten...
- Page 14 Plug in the DC5V/2A cable (power plug) to its port on the machine and feed the wire through the large and small wire clips that can be attached to the microphone pole. The larger clip should be attached to the wider pole and the smaller clip should be attached to the narrower pole of the microphone...
- Page 16 Charge the machine and microphones before each use. Turn the machine and microphones on. Choose your preferred playback setting and begin blasting your favorite tunes. Connect your device to display song lyrics. Rock on! Do not turn on the Use caution when charging microphones while they are microphones in docks while charging.
- Page 17 How to use TWS (True Wireless Stereo Mode) to connect another machine TWS mode allows for more than one Masingo Lento X5 Karaoke Machine to be connected simultaneously. Once you have two of the same models in close proximity to each other, select the Bluetooth mode using the Mode button.
- Page 18 How to connect to an external battery source To connect the machine to an external charging source such as your car battery, plug in a compatible cable to your car and into the DC12V Input on the machine. How to record audio To record, first insert a USB or MicroSD card into the machine’s USB or MicroSD slots respectively.
- Page 19 How to set up the microphone The A-B button controls both the microphone’s channel and the microphone’s frequency band. IMPORTANT: When using both microphones simultaneously, each microphone must be set to a different frequency band (that is, one must be set to CHA while the other one is set to CHB). If both microphones are set to the same frequency band, the microphone audio may cut in and out.
- Page 20 Remote Control How to use the power button on the machine’s remote control Press the power button to activate standby or “sleep” mode. Press it again to exit standby mode. Please note that the remote’s front and rear panels have sensors with a range of up to 13 feet and an angle of up to 60 degrees.
- Page 21 Bluetooth mode. In order to connect to a device via Bluetooth, simply search for the machine name (“Masingo”) under your playback device’s Bluetooth connection settings and click to connect. Note that the machine will automatically connect to the audio source it successfully connected to initially if both are in the same vicinity with Bluetooth turned on.
- Page 22 How to use SD mode Playing music from an SD card Plug your MicroSD card into the TF slot on the machine. Playback will begin immediately. Use operation instructions in the “Music” subsection below to adjust settings. How to use AUX Mode To use AUX mode, plug the AUX or AUX-RCA cable into the AUX input on the machine and plug the other end into the AUX input on your device.
-
Page 23: Maintenance
How to customize your music To adjust the machine’s music volume, rotate the main Volume knob. To adjust the bass and treble levels of the music, rotate the knobs that say Bass and Treble accordingly. To adjust the microphone volume, rotate the MIC.VOL knob. To adjust the microphone’s echo level, rotate the Echo knob. - Page 24 Problem Solution Battery icon on the microphone The microphone battery is low screen is blinking or depleted. Charge before use. Microphone will not turn on The battery is depleted. Be sure Machine will not turn on to charge the machine after each use.
- Page 25 Check that the volume on both the machine and audio source is raised. Bluetooth is connected but If the issue persists, turn off no sound is coming from the the karaoke machine, restart machine it, and re-pair the machine to the audio source following the instructions on how to use Bluetooth mode.
- Page 26 We’re here for you. If you encounter any issues with your machine or have any questions or comments, please feel free to contact us. Have your warranty information on hand for faster service.


Need help?
Do you have a question about the Lento X5 and is the answer not in the manual?
Questions and answers