Table of Contents
Advertisement
Available languages
Available languages
Quick Links
GUIDE D'INSTALLATION / INSTALLATION GUIDE
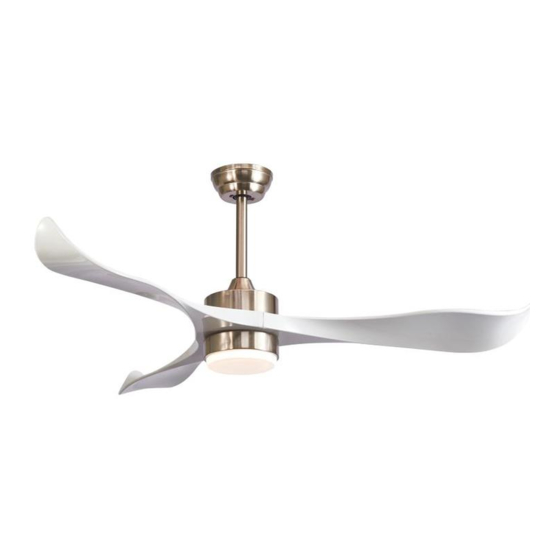
NORMÄ (9173-015-SN)
Ventilateur d'intérieur avec lumière DEL intégrée
Indoor fan with integrated LED light
ATTENTION / CAUTION
VEUILLEZ LIRE ATTENTIVEMENT LES INSTRUCTIONS POUR UNE INSTALLATION SÉCURITAIRE ET LE BON
FONCTIONNEMENT DU VENTILATEUR. EN CAS DE DOUTE, VEUILLEZ CONSULTER UN ÉLECTRICIEN QUALIFIÉ.
READ INSTRUCTIONS CAREFULLY FOR SAFE INSTALLATION AND FAN OPERATION. IF UNSURE CONSULT A
QUALIFIED ELECTRICIAN
Produit créé et distribué par Lumirama
Advertisement
Table of Contents

Subscribe to Our Youtube Channel
Related Manuals for Lumirama NORMA 9173-015-SN


Summary of Contents for Lumirama NORMA 9173-015-SN
- Page 1 VEUILLEZ LIRE ATTENTIVEMENT LES INSTRUCTIONS POUR UNE INSTALLATION SÉCURITAIRE ET LE BON FONCTIONNEMENT DU VENTILATEUR. EN CAS DE DOUTE, VEUILLEZ CONSULTER UN ÉLECTRICIEN QUALIFIÉ. READ INSTRUCTIONS CAREFULLY FOR SAFE INSTALLATION AND FAN OPERATION. IF UNSURE CONSULT A QUALIFIED ELECTRICIAN Produit créé et distribué par Lumirama...
-
Page 2: Règles De Sécurité
MERCI POUR VOTRE ACHAT Merci d’avoir acheté ce produit de qualité. À des fins de sécurité et de bon fonctionnement de l’appareil, veuillez lire attentivement les instructions avant d’utiliser le produit. 1. RÈGLES DE SÉCURITÉ 9. Pour éviter de vous blesser ou d’endommager 1. -
Page 3: Outils Et Matériel Nécessaires
2. OUTILS ET MATÉRIEL NÉCESSAIRES • Tournevis Philips (étoile) • Tournevis a tête plate • Clé de 11mm • Escabeau • Coupe fil LIRGT ON/OFF 3. CONTENU DE L’EMBALLAGE Vous devriez avoir les éléments suivants:: a. Pales de ventilateur (3) b. -
Page 4: Options De Montage
5. SUSPENDRE LE VENTILATEUR 4. OPTIONS DE MONTAGE N’OUBLIEZ PAS de couper l’alimentation. Suivez les S’il n’y a pas de boîtier de montage homologué étapes pour installer correctement votre ventilateur. UL (CUL pour installation canadienne), lisez les instructions suivantes. Débranchez l’alimentation en retirant les fusibles ou en désactivant les disjoncteurs. - Page 5 INSTALLATION POUR UN PLAFOND STANDARD Étape 1. Faites passer les fils d’alimentation de 120 Tige volts dans le trou central du support de montage au plafond, comme illustré à la Fig. 5. Canopé Étape 2. Fixez le support de montage à la boîte de jonction du plafond avec les vis et les rondelles fournies avec votre boîte de jonction.
-
Page 6: Connexions Electriques
6. CONNEXIONS ELECTRIQUES AVERTISSEMENT: POUR ÉVITER TOUT CHOC ÉLECTRIQUE POSSIBLE, ASSUREZ-VOUS D’AVOIR COUPÉ Récepteur Support de L’ALIMENTATION AU PANNEAU DE CIRCUIT montage PRINCIPAL. SUIVEZ LES ÉTAPES CI-DESSOUS POUR BRANCHER VENTILATEUR CÂBLAGE DE VOTRE DOMICILE. UTILISEZ LES ÉCROUS FOURNIS AVEC VOTRE VENTILATEUR. FIXER LES CONNECTEURS AVEC DU RUBAN ÉLECTRIQUE. -
Page 7: Terminer L'installation
boîte de jonction 7. TERMINER L’INSTALLATION Étape 1. support de Rentrez soigneusement toutes les montage connexions dans la boîte de jonction du plafond. Étape 2. Faites glisser la canopée jusqu’au support de montage et placez l’une des fentes de trou de clé canopé... -
Page 8: Fonctionnement De La Télécommande
10. FONCTIONNEMENT DE LA TÉLÉCOMMANDE LIRGT ON/OFF FONCTION DES TOUCHES 1. Arrêt du ventilateur 2. Lumière ALLUMÉ / ÉTEINTE 3. Vitesse du ventilateur (1 vitesse ---- 5 vitesses) 4. Minuterie du ventilateur (1 heure) 5. Minuterie du ventilateur (2 heures) 6. -
Page 9: Dépannage
11. DÉPANNAGE Le ventilateur ne démarre Vérifiez les fusibles ou les disjoncteurs du circuit Vérifiez toutes les connexions électriques pour assurer un bon contact ATTENTION: assurez-vous que l’alimentation principale est coupée lors de la vérification de toute connexion électrique. Bruit du ventilateur . -
Page 10: Safety Rules
THANK YOU FOR YOUR PURCHASE Thank you for purchasing this quality product. To ensure correct function and safety, please read and save all instructions before using the product. 1. SAFETY RULES 10. Do not use water or detergents when cleaning 1. -
Page 11: Tools And Materials Required
2. TOOLS AND MATERIALS REQUIRED • Philips screwdriver • Blade screwdriver • 11mm wrench • Step ladder • Wire cutters LIRGT ON/OFF 3. PACKAGE CONTENTS You should have the following items: a. Fan blades (3) b. Ceiling mount bracket c. Canopy d. -
Page 12: Mounting Options
4. MOUNTING OPTIONS 5. HANGING THE FAN REMEMBER to turn off the power. Follow the steps If there isn’t an existing UL (CUL for Canadian correctly install your fan. Installation) listed mounting box, then read the following instructions. Disconnect the power by removing fuses or turning off the circuit breakers. -
Page 13: Standard Ceiling Installation
STANDARD CEILING INSTALLATION Step 1. Pass the 120-volt supply wires through the center hole in the ceiling hanger bracket as shown in Fig. 5. Step 2. Secure the hanger bracket to the ceiling outlet box with the screws and washers provided with your outlet box. -
Page 14: Electric Connections
6.ELECTRIC CONNECTIONS WARNING: TO AVOID ANY POSSIBLE ELECTRICAL SHOCK, BE SURE YOU HAVE TURNED OFF THE POWER AT THE MAIN CIRCUIT PANEL. FOLLOW THE STEPS BELOW TO CONNECT THE FAN TO YOUR HOUSEHOLD WIRING. USE THE WIRE NUTS PROVIDED WITH YOUR FAN. SECURE THE CONNECTORS WITH ELECTRICAL TAPE. -
Page 15: Finishing The Installation
7. FINISHING THE INSTALLATION Step 1. Tuck all the connections neatly into the ceiling outlet box. Step 2. Slide the canopy up to the mounting bracket and place one of the key hole slots over the mounting screw on the mounting bracket. -
Page 16: Button Function Instruction
10. REMOTE LIRGT ON/OFF Button function instruction 1. Fan Off 2. Light ON/OFF 3. Speed of the fan (1speed----5speed) 4. Fan Timer (1 hour) 5. Fan Timer (2 hours) 6. Direction of the fan ( reverse switch) 7. Fan Timer (4hour) 8. -
Page 17: Troubleshooting
11. TROUBLESHOOTING Fan will not start 1. Check circuit fuses or breakers 2. Check all electrical connections to insure proper contact. CAUTION: Make sure the main power is OFF when checking any electrical connection Fan Sound noises 1. Make sure all motor housing screws are snug. 2.
Need help?
Do you have a question about the NORMA 9173-015-SN and is the answer not in the manual?
Questions and answers
I have had this fan for to long to return but when I opened it to finally install it there was no remote control for it. My question is if there is any way for me to order a new remote? I have tried a few universal remotes with no success. My fan is model number 9173-015-SN.