Table of Contents
Advertisement
Advertisement
Table of Contents

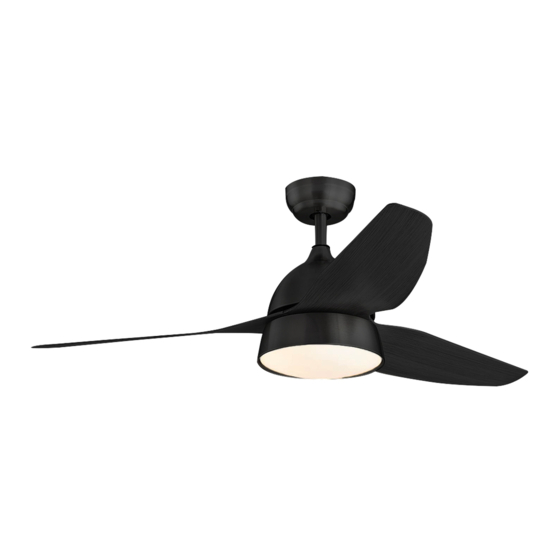
Summary of Contents for Lumirama 9633-01-BLK
- Page 1 9633-01-BLK/9703-01-SNWH...
-
Page 2: Safety Information
Safety Information To reduce the risk of electrical shcok, make sure the electricity WARNING:TO reduce the risk of persona! injury, has been turned off at the circuit breaker or fuse box before do not bend the blade brackets (also referred to as beginning. -
Page 3: Tools Required
The supplier warrants the fan motor to be free from defects in workmanship and mate rial present at time of shipment from the factory for a limited time after the date of purchase by the original purchaser.The supplier also warrants that ail other fan parts,excluding any glass or acrylic blades,to be free from defects in workmanship and material at the time of shipment from the factory for a period of one year after the date of purchase by the original purchaser.We agree to correct such defects without charge or , at our option, replace with a comparable or superior model if the... -
Page 4: Package Contents
Pre-lnstallation(continued) PACKAGE CONTENTS � �- Description Quantity Description Quantity Part Part Slide-on mounting bracket Blade (inside canopy) Light kit fitter assembly Canopy Lamp Cover Ball/downrod assembly Acrylic tablet Decorative cover Fan-motor assembly Remote Control Remote Control Receiver... -
Page 5: Bracket Installation
BRACKET INSTALLATION *SWITCH OFF THE ELECTRICAL MAIN AT THE CIRCUIT BREAKER FUSE BOX. 1. With the screws provided with your junction box, screw the bracket into place. IMPORTANT: SCREWS MUST BE TIGHTENED TILL SNUG DOWN ROD ASSEMBLY Remove the Iock pin and the Unscrew the screws of the SI ide the ball boit of the base of the downrod. - Page 6 lnsert on the downrod the Re-insert the boit of canopy(B)and decorative the hangar ball. cover(D) Carefully feed motor Rem ove the boit of the downrod. wires throught the downrod assembly. Change downrod (Optional) 1. Loosen the hangar ball from downrod by removing set screws.
- Page 7 Forward/Reverse & Color Temperature Yellow...
- Page 8 Use of Bluetooth Turn on the bluetooth of your phone and select the device named “MX-Light”. Once the bluetooth is connected successfully you can play the music. Use of APP 1.Scan the attached QR code to download the APP named “Smart life” 2.
-
Page 9: Control Receiver
Assembly - Hanging the Fan(continued) Install ball end of downrod into mounting bracket opening. Align (engage) slot(1)on ball hanger with the tab on the mounting bracket.(2) Warning: Failure to align slot on ball with tab may result in serious injury. INSTALL REMOTE CONTROL 1.Connect the quick connect wires together with regards to the color... - Page 10 Installation-Blade and Light Parts 1.lnstallation of the blades Total 3 blades,6 screws 2.lnstallation the light kit. Total 3 screws. 3.Connect the wires of the fan and light kit. 4.lnstallation the lamp cover on the light kit.. EB Phillips screwdriver...
- Page 11 Fans Balance If there is wobbling follow these steps: Put the clip in the center of a blade. Turn on the fan and, if the rolling persists, put the clip on another blade until the roll is reduced. It will be the blade that will need the counterweight.
- Page 12 The fan will not start The fan makes noise rvice and a balancing kit will be sent to you.


Need help?
Do you have a question about the 9633-01-BLK and is the answer not in the manual?
Questions and answers
How do I install the ceiling fan? Is there a video you can send to my email please. I tried looking online and can't find one, I only found videos on other ceiling models. Please send as soon as possible. Thanks
To install the Lumirama ceiling fan model 9633-01-BLK, follow these steps:
1. Bracket Installation:
- Switch off the power at the circuit breaker or fuse box.
- Use the screws provided to secure the mounting bracket to the ceiling junction box. Tighten screws securely.
2. Downrod Assembly:
- Remove the pin and screws from the base of the downrod.
- Insert the downrod into the fan motor assembly.
- Reinsert and tighten the pin and screws to secure the downrod.
- Feed the wires through the downrod.
3. Canopy and Decorative Cover:
- Slide the canopy and decorative cover onto the downrod.
- Secure the downrod and hang the fan on the mounting bracket.
4. Remote Control Receiver:
- Install the remote control receiver as instructed in the manual (exact wiring steps not provided in the context).
5. Final Assembly:
- Attach the blades, light kit, and lamp cover as needed.
- Ensure all parts are securely fastened.
6. Smart App Setup:
- Download the “Smart Life” app by scanning the QR code.
- Sign in, go to Home, press “+” and select “Auto Scan.”
- Enable phone location, Wi-Fi, and Bluetooth.
- Power on the fan and press the remote button for 5 seconds until you hear three beeps.
- Follow the app instructions to connect the fan to Wi-Fi.
- Control the fan and light through the app or connect to smart voice services.
Make sure all parts are installed correctly to avoid injury.
This answer is automatically generated
Bonjour, ou peut-ton trouver un vidéo pour installation