
Related Manuals for Insignia I-LC23Q1


Summary of Contents for Insignia I-LC23Q1
- Page 1 I-LC23Q1 23” LCD TV Display I-LC26Q1 26” LCD TV Display IMPORTANT: Read this guide thoroughly before using the unit. USER’S GUIDE April 2004...
- Page 2 This page is intentionally left blank.
-
Page 3: Table Of Contents
1-2 Optional Accessories ... 7 1-3 Inserting Batteries into the Remote Control ... 8 1-4 Turning ON the Power ... 8 2 YOUR LCD TV AT A GLANCE ... 9 2-1 Front Panel Controls ... 9 2-2 Right-side Connectors ... 10 2-3 Back Connectors...11... - Page 4 7 Setting the Channel ... 31 7-1 Setting Channels Automatically (AUTO SEARCH) ... 31 7-2 Setting Channels Manually (MANUAL SEARCH) ... 31 7-3 Removing Unwanted Channels (MANUAL SEARCH) ... 32 8 ADVANCED SETTINGS ... 33 8-1 Setting the Sleep Timer... 33 8-2 Blocking Channels ...
-
Page 5: Safety Precautions
Do not place your hands, face, or objects close to the ventilation openings of your LCD TV. The top of your LCD TV gets very hot from exhaust air that is released through the ventilation openings. Burns or personal injuries may occur if you are too close to the LCD TV. - Page 6 This page is intentionally left blank.
-
Page 7: Before You Start
BEFORE YOU START What’s in the Box When you receive your LCD TV, unpack it carefully, and check to make sure you have all the items below. 1 REMOTE CONTROL AND two AAA BATTERIES Optional Accessories The following are optional accessories you may purchase for your LCD TV:... -
Page 8: Inserting Batteries Into The Remote Control
Chapter 1 Before You Start Inserting Batteries into the Remote Control Before using the LCD TV set for the first time, insert two AAA batteries (supplied). When the batteries become depleted and the remote control fails to operate, replace the batteries with new batteries. -
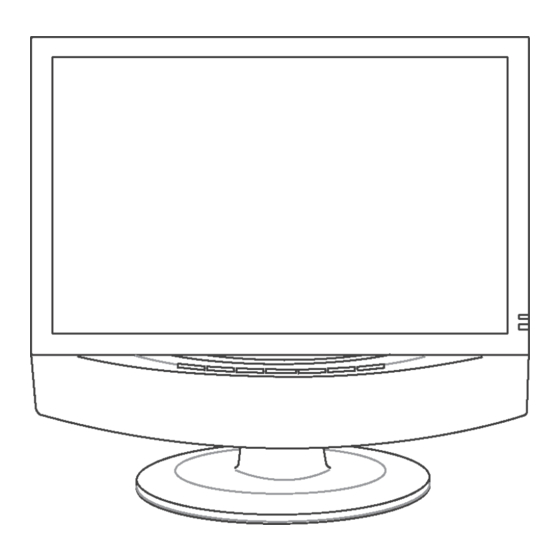
Page 9: Your Lcd Tv At A Glance
Turns the LCD TV ON/OFF. Activates the OSD main menu. Displays the previous stored channel. Displays the next stored channel. Chapter 2 Your LCD TV At A Glance MENU FUNCTION (OSD ON) Reduces a menu option value. Displays a submenu with selections for the current menu option. -
Page 10: Right-Side Connectors
Chapter 2 Your LCD TV At A Glance Right-side Connectors CONNECTOR DESCRIPTION Headphone Jack - Connect amplified speakers or headphones to this stereo headphone jack. Using this jack automatically disables the built-in speakers. Video/Audio-in - Connect composite audio/video devices, such as camcorders or... -
Page 11: Back Connectors
Chapter 2 Your LCD TV At A Glance Back Connectors To access the connectors on the back of your LCD TV, you will need to lift up and remove the protective cover. - Page 12 Chapter 2 Your LCD TV At A Glance CONNECTOR DESCRIPTION Main power switch - Turns the main power ON and OFF. Power cord connector - Connect the power cable to this. DVI in - Connects to a DVI video device, such as a computer or cable/Satellite box.
- Page 13 UHF/VHF (CATV) S-Video (S1/S2) Composite Video/Audio in (AV1/AV2) Component HDTV Video/Audio in (YPBPR) Subwoofer Chapter 2 Your LCD TV At A Glance...
- Page 14 Chapter 2 Your LCD TV At A Glance This page is intentionally left blank.
-
Page 15: Your Remote Control At A Glance
Selects a programmed amplifier. Selects a programmed component. INFO Shows the current status of your LCD TV, such as the video input source, audio status, and channel number Flashes when the remote is being programmed or is sending a signal to your LCD... -
Page 16: Using The Remote Control (Basic Operation)
Using the Remote Control (Basic Operation) Point the remote control towards the remote control sensor window located on the front of your LCD TV. Make sure no objects are in the line of aim, otherwise the remote control may not operate properly. -
Page 17: Connecting Devices
4. Connect the red (R) and white (L) audio jacks on the back of your DVD player to the R and L audio-in jacks on the back of your LCD TV. 5. Turn on your LCD TV, then press the INPUT button repeatedly to select YPBPR. UHF/VHF... -
Page 18: Connecting Your Hdtv Set-Top Box
1. Connect the S-Video jack on the back of your DVD player to one of the S-VIDEO (S1 or S2 jacks on the back of your LCD TV with the correct optional cable 2. Connect the red (R) and white (L) audio jacks on the back of your DVD player to the appropriately numbered AV1 or AV2 R and L audio-in jacks on the back of your LCD TV. -
Page 19: Connecting Your Vcr Or Video Camera
1. Connect the S-Video jack on the back of your DVD player to one of the S-VIDEO (S1 or S2 jacks on the back of your LCD TV with the correct optional cable. 2. Connect the red (R) and white (L) audio jacks on the back of your DVD player to the appropriately numbered AV1 or AV2 R and L audio-in jacks on the back of your LCD TV. - Page 20 4-3-3 TO CONNECT USING COAXIAL (RF) 1. Connect the “output to TV” (RF out or Antenna out) jack on the back of your VCR to the UHF/VHF jack on the back of your LCD TV with the correct optional cable.
-
Page 21: Connecting Broadcast Tv Or Cable Tv
1. Connect the coaxial (RF) connector from your antenna or cable box to the HF/VHF connector on the back of your LCD TV with the correct optional cable. 2. Turn on your LCD TV (see 1-4 Turning ON the Power), then press the INPUT button repeatedly to select CATV. - Page 22 2. Connect the Audio Out jack on your computer to the Line in jack on the back of your LCD TV. See 2-2 Right-side Connectors for the location of the Line in jack. 3. Turn on your LCD TV (see 1-4 Turning ON the Power), then press the INPUT button repeatedly to select VGA.
-
Page 23: Getting Started
Status LED on the front turns orange and your LCD TV is ready to turn on. 2. Press the POWER button on the front of your LCD TV or on your remote control. The Status LED on the front turns green. Chapter 5 Getting Started... - Page 24 WARNING! If you will be away for an extended period of time, turn off your LCD TV with the Main Power switch instead of using the remote control or front POWER button. For added protection during a lightning storm or when it is left unattended or unused for long periods of time, unplug your LCD TV from the wall outlet and disconnect the antenna or cable system.
-
Page 25: Adjusting Settings
ADJUSTING SETTINGS Basic Operations 6-1-1 ADJUSTING THE VOLUME You can adjust the volume in two ways - from your LCD TV’s front panel or by using the remote control. To adjust volume from the front panel: Press TO ADJUST VOLUME FROM THE REMOTE Press the VOL buttons (see illustration for location) to turn up or turn down the volume. -
Page 26: Using The On-Screen Display (Osd)
6-2-1 MAKING ADJUSTMENTS You can access the OSD from either the front of your LCD TV display or from your remote control. 1. With the power ON, press the TV button. -
Page 27: Picture Menu
Parental Controls - Activates parental controls. This option is accessible only from the remote control. NOTE: PIP is disabled when this option is turned ON. TV System - Sets the source for the tuner. If you are using cable or a satellite dish, select Cable,... -
Page 28: Options Menu
Manual Search - Select this option to add only certain channels to the channel list. Options Menu AV3 in-out - Sets AV3 connectors on the bottom front of your LCD TV as an AV in or AV out connection. Language - Changes the language of the OSD menu. Select between English, French, or Spanish. - Page 29 V-Position - Adjusts the vertical position of the image. Clock - Adjusts your LCD TV to match the video input source. Used when patterns appear. Phase - Adjusts the picture to remove any noise such as, horizontal distortion, and clears or sharpens the displayed characters.
-
Page 30: Choosing Your Language (Language)
6. When you are satisfied with your choice, press EXIT to return to normal viewing. Adjusting Picture Settings Follow these steps to adjust your LCD TV image. Press MENU to call up the on-screen display (OSD) main menu. 2. Press the Navigation (UP/DOWN) buttons to highlight Picture Menu. -
Page 31: Setting The Channel
Setting the Channel Setting Channels Automatically (AUTO SEARCH) Use this option to quickly add all channels that have a signal to the channel list. TO ADD CHANNELS AUTOMATICALLY 1. Press the MENU button on the remote control to open the OSD. 2. -
Page 32: Removing Unwanted Channels (Manual Search)
Chapter 7 Setting the Channels Removing Unwanted Channels (MANUAL SEARCH) TO REMOVE CHANNELS 1. Press the MENU button on the remote control to open the OSD. 2. Press the Navigation (UP/DOWN) buttons to select the Setup menu. 3. Press OK to open the menu. 4. -
Page 33: Advanced Settings
ADVANCED SETTINGS Setting the Sleep Timer The sleep timer allows your LCD TV to automatically turn OFF after a given amount of time. You can set the sleep timer using your remote control or through the onscreen display (OSD). TO SET THE SLEEP TIMER USING THE REMOTE CONTROL 1. -
Page 34: Setting A Password
Chapter8 Advanced Settings TO SET THE PARENTAL CONTROLS FOR MOVIES 1. Press the MENU button on the remote control to open the OSD. 2. Press the Navigation (UP/DOWN) buttons to select the Setup menu. 3. Press OK to open the menu. 4. -
Page 35: Displaying Closed Caption Subtitles
11. Press EXIT to close the OSD. Displaying Closed Caption Subtitles Designed to help the hearing-impaired, Closed Captioning (C.C.) displays on screen the voice content of TV programs. TO TURN ON CLOSED CAPTIONING 1. Press the MENU button on the remote control to open the OSD. -
Page 36: Displaying The Serial Number
Chapter8 Advanced Settings Displaying the Serial Number 1. Press the MENU button on the remote control to open the OSD. 2. Press the Navigation (UP/DOWN) buttons to select the Options menu. 3. Press OK to open the menu. The serial number is displayed on screen. 5. -
Page 37: Programming The Remote Control
PROGRAMMING THE REMOTE CONTROL The TV device button has been preset to work with your LCD TV. You can program the remote control to work with as may as seven other devices (VCR, DVD player, satellite, etc). Programming to Control Other Devices TO PROGRAM TO CONTROL OTHER DEVICES 1. - Page 38 Chapter 9 Programming the Remote Control American high Admiral Adventura Aiko Aiwa 009,046,059,067,068 Akai 013,021,022,030,069 Amstrad Asha Audiovox Beaumark Bell & Howell Broksonic 001,033,035,038,045,049,071 Calix Canon Capehart Carver 027,044 Cineral Citizen 009,044 Colt Craig 009,018,027,042,043 Curtis Mathes 007,013,034 Daewoo 003,016,044,051 Daytron Denon Dynatech...
- Page 39 Some models 060,061,062,063,064,065,066 Chapter8 Advanced Settings SAT. Aifa Aiko Alfa gold Alphastar 078,124 Best Channel Master 046,062 Chaparral 049,060,062,063,098,114 Citoh Digital satellite TV 179,180,181,182 Drake 046,050,102,065,106, 108,115,118,121 169,170 Drake satellite 139,140,141 Dx Antenn DX Communications Echostar 055,057,066,099,079, 111,149,153,156 157,158,159,160,163,164,165 Equus...
- Page 40 Rural cable Samsung 124,155 Scientific Atlanta 146,183 Signal super LT 930 154 Skardin 191,192,193 Sony Star Trak 058,094,122,123,128 047,061 STS satellite Space TV Sun Moon Star Superguige 097,105 Tadiran Technosat Tedelex Toshiba 053,138 Tosonic Uniden 048,051,052,064,069, 075,076,090,097 099,107,109 United satellite...
- Page 41 Jasco 010,026,034 JEBSEE Jerrold 003,006,007,009,010,032,037,129 130,131,196,237,238,245,262 KOKA 202,205 LEON 198,219 Magnasonic Magnavox 009,018 Mechanics Memorex Movie Time Novaplex 004,012 OAK Sigma 500 Optimus Panasonic 014,024,085 Panther 043,244 Paragon 085,243,249 Philips 017,018,019,026 Pioneer 016,025,041 Popular Proscan Pulsar Radio Shack 010,034,044,045 Realistic Recoton Regal 013,031...
- Page 42 Chapter 9 Programming the Remote Control Magnavox 017,021 Marantz 014,017 Mitsubishi Panasonic Philips 014,017 Pioneer Quasar Realistic Samsung Sega Sony 016,018 Technics Theta digital Yamaha Zenith Adcom 044,061 Aiwa 026,041,046 Akai Audio Alchemy Audio-Techica 057,063 Burmester California Audio Labs 029 Carrera Carver 046,052,076...
- Page 43 Kenwood 107,108 Linn Luxman Magnavox Marantz 102,105 Nakamichi Optimus Panasonic Parasound Philips Pioneer 092,103 Realistic Sansui 091,105 Shure Sony Soundesign 093,098 Technics 104,112 Victor Wards 092,093,098 Yamaha 094,095,107,111 TUNER Adcom Aiwa 128,132,139,156 Akai 123,143 Archer Capetronic Carver 115,119,139,153 Curtis Mathes 118,124 Denon 114,145,168...
- Page 44 Harman/Kardon Magnavox Marantz Philips Sony TURNTABLE Aiwa Carver Magnavox Marantz Philips Sony VIDEO Archer GC Electronics Jebsee Radio Shack Sony Web-TV TeleCaption AUDIO Aiwa 206,210,213 Fisher Harman/Kardon Nikko Panasonic Paramount Pict Philips 215,217 Polytek Schneider Scientific Atlanta Sony 206,210 Soundesign...
-
Page 45: Troubleshooting And Support
Make sure that the selected video input source is connected to a working compo- nent. If your LCD TV is connected to your computer in VGA mode, press any key on your keyboard to wake up your computer. No Sound Try pressing the MUTE button. - Page 46 Pixel Problems Your LCD TV is manufactured using an extremely high level of precision technology. However, sometimes some pixels of your LCD TV may not display correctly. Pixel defects within industry specifications are inherent to this type of product and do not constitute a defective product.
Need help?
Do you have a question about the I-LC23Q1 and is the answer not in the manual?
Questions and answers