
Subscribe to Our Youtube Channel
Related Manuals for ALDI FERREX F-TS 2000-1


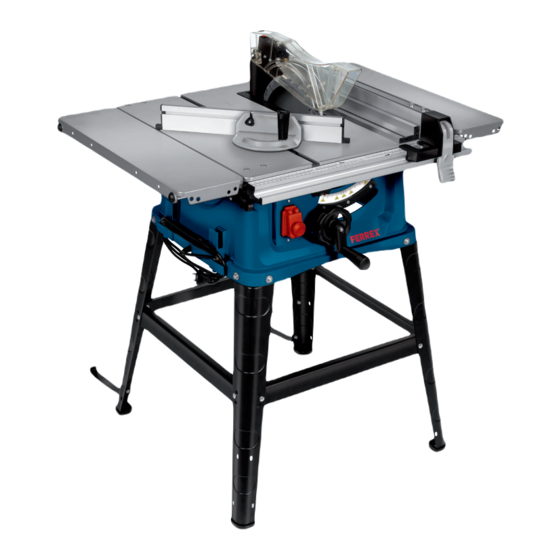
Summary of Contents for ALDI FERREX F-TS 2000-1
- Page 1 User Manual TABLE SAW F-TS 2000-1 Original instructions Layout_F_TS_2000_1_UK_SPK7.indd 1 Layout_F_TS_2000_1_UK_SPK7.indd 1 23.06.2020 14:29:10 23.06.2020 14:29:10...
-
Page 2: Table Of Contents
Contents Package contents ................ 3 General information ..............11 Reading and storing the user manual .......... 11 Explanation of symbols ..............11 Safety ..................13 Intended use ..................13 Residual hazards ................13 Important information about the power connection ....14 General safety information .............14 Warranty .....................14 Safety information ................15 Safety information on the batteries ..........16... -
Page 3: Package Contents
Package contents Package contents Package contents Layout_F_TS_2000_1_UK_SPK7.indd 3 Layout_F_TS_2000_1_UK_SPK7.indd 3 23.06.2020 14:29:21 23.06.2020 14:29:21... - Page 4 Package contents Layout_F_TS_2000_1_UK_SPK7.indd 4 Layout_F_TS_2000_1_UK_SPK7.indd 4 23.06.2020 14:29:22 23.06.2020 14:29:22...
- Page 5 Package contents Layout_F_TS_2000_1_UK_SPK7.indd 5 Layout_F_TS_2000_1_UK_SPK7.indd 5 23.06.2020 14:29:24 23.06.2020 14:29:24...
- Page 6 Package contents Layout_F_TS_2000_1_UK_SPK7.indd 6 Layout_F_TS_2000_1_UK_SPK7.indd 6 23.06.2020 14:29:27 23.06.2020 14:29:27...
- Page 7 Package contents 42 41 Laser Layout_F_TS_2000_1_UK_SPK7.indd 7 Layout_F_TS_2000_1_UK_SPK7.indd 7 23.06.2020 14:29:30 23.06.2020 14:29:30...
- Page 8 Package contents Layout_F_TS_2000_1_UK_SPK7.indd 8 Layout_F_TS_2000_1_UK_SPK7.indd 8 23.06.2020 14:29:33 23.06.2020 14:29:33...
- Page 9 Package contents Components Saw table Saw blade guard Laser Splitter Table insert Guide groove (saw table) Table width extension Leg, 4x Middle strut, 4x Tilt guard, 2x Rubber foot, 4x Size 10 wrench / saw blade Size 10 wrench / wrench Ring spanner Cross stop (with lock bolt and knurled nut, 2x) Knurled screw (cross stop)
- Page 10 Package contents Spring washer, 8x Washer (small), 12x Washer (large), 8x Hex nut, 12x Knurled screw (table width extension) Blade Crank arm Clamping screw Clamping plate Eccentric lever Bar with scale (saw table) Dust extraction connector Locking screw Crank wheel Angle scale Laser switch Battery compartment cover...
-
Page 11: General Information
General information General information Reading and storing the user manual These operating instructions are a part of this table saw. They contain information of importance for your safety, for the use of the product and for its care. Read the operating instructions carefully before you start using the table saw. - Page 12 General information This symbol draws attention to additional information about assembly or use. Declaration of conformity (see the section “Declaration of conformity”): Products bearing this symbol comply with all applicable Community legislation of the European Economic Area. Read the operating instructions. Wear ear protection.
-
Page 13: Safety
Safety Safety Intended use The table saw is designed for the slitting and cross-cutting (only with the cross stop) of all types of timber commensurate with the machine’s size. The equipment is not to be used for cutting any type of round wood. -
Page 14: Important Information About The Power Connection
Safety • Damage to hearing if essential ear-defenders are not used. • Risk of eye damage if essential safety goggles are not worn. • Risk of harm to health if the requisite breathing mask is not used. • Harmful emissions of wood dust when used in closed rooms. The equipment is allowed to be used only for its intended purpose. -
Page 15: Safety Information
Safety Safety information Read all the safety information and instructions. Failure to adhere to the safety information and instructions set out below may result in electric shock, fire and/or serious injury. Laser radiation Do not look into the beam Laser class 2 CAUTION ! –... -
Page 16: Safety Information On The Batteries
Safety Safety information on the batteries Use of the batteries • Inserting the batteries when the laser is switched on can cause accidents. • If the equipment is not used correctly, the batteries may leak. Avoid contact with the battery fluid. If you come into contact with battery fluid, clean the affected body part with running water. - Page 17 Safety The term “power tool” used in the safety information and instructions refers to power tools operated from the mains power supply (with a power cable) and to battery operated power tools (without a power cable). 1. Workplace safety a) Keep your work area clean and well lit. Untidy or unlit work areas can result in accidents.
- Page 18 Safety e) If you use an electric power tool outdoors, use only extension cables that are suitable for outdoor use. The use of an extension cable which is suitable for outdoor use reduces the risk of an electric shock. f) If you cannot avoid using the power tool in a damp location, use a residual current device (RCD) circuit breaker.
- Page 19 Safety clothing, jewellery or long hair can be caught by moving parts. g) If dust extraction devices and dust collection devices can be fitted, they must be connected and must be used correctly. The use of a dust extractor can reduce the dangers posed by dust.
-
Page 20: Special Safety Information For Table Saws
Safety f) Keep cutting tools sharp and clean. Carefully maintained cutting tools with sharp cutting edges will jam less and are easier to control. g) Use the power tool, plug-in tools, etc. as set out in these instructions. Take account of the conditions in your work area and the job in hand. -
Page 21: Safety Information For Sawing
Safety Accidental contact between these components and the saw blade could lead to dangerous situations. e) Adjust the splitter in accordance with the description in these operating instructions. Incorrect clearances, position or alignment may be the reason why the splitter fails to prevent a kickback effectively. - Page 22 Safety blade. Use a push stick if the gap between the stop rail and the saw blade is less than 150 mm, and a push block if the gap is less than 50 mm. Work aids of this kind help ensure that your hand is kept at a safe distance from the saw blade.
- Page 23 Safety the stop rail or in the saw blade and cause your fingers to be drawn into the saw blade if you attempt to remove it. Switch off the saw and wait until the saw blade has come to a standstill before removing the material.
- Page 24 Safety d) Align the stop rail parallel to the saw blade. If the stop rail is not properly aligned, the workpiece will press against the saw blade and cause kickback. e) Do not use this saw to cut rebates or grooves. For design reasons, the saw is not suitable for such work.
- Page 25 Safety power supply before you remove the table insert, change the saw blade, adjust the splitter or the saw blade safety guard and when the machine is left unattended. Precautions are intended to help prevent accidents. b) Never leave the table saw running unattended. Switch off the power tool and do not leave it before it has come to a complete standstill.
- Page 26 Safety j) Make sure that the saw blade is fitted in the correct direction of rotation. Do not grinding wheels or wire brushes with the table saw. If the saw blade is fitted incorrectly or accessories are used which are not recommended, this could lead to serious injuries.
- Page 27 Safety or the push block into its holder when not in use. 13. The sawing of angles/wedges is only permitted if an appropriate auxiliary stop (cross stop) is used. 14. Replace the table insert if it is worn – pull out the power plug – 15.
- Page 28 Safety 27. Be sure to observe the safety information and operating and maintenance instructions issued by the manufacturer, as well as the dimensions listed in the Technical Data. 28. It is imperative to observe the accident prevention regulations in force in your area as well as all other generally recognized rules of safety.
-
Page 29: Using For The First Time
Using for the first time 40. Have your tool repaired only by trained personnel using only genuine spare parts. This will ensure that your tool remains safe to use. 41. All covers and safety devices have to be properly fitted before the equipment is switched on. -
Page 30: Assembling The Table Saw
Using for the first time transit – to prevent hazards. If you have any doubts, do not use it but contact our customer service instead. You will find the service address in our warranty terms on the warranty card. Risk of injury! The equipment and packaging material are not toys. - Page 31 Using for the first time 5. Secure the middle struts to the legs using two lock bolts ( ), two small washers ( ), two spring washers ( ) and two hex nuts ( ) on each. 6. Now tighten all the screw connections. 7.
- Page 32 Using for the first time necessary. 1. Make sure that the saw blade ( ) is lowered to the maximum in the saw table ( ). To lower the saw blade if necessary, turn the crank ( ) counterclockwise as far as the stop. 2.
-
Page 33: Operation
Operation 13. Secure the table insert using the two fastening screws. Fitting the parallel stop (Fig. 21) 1. Slide the stop rail ( ) onto the parallel stop ( ) so that the square necks of the two lock bolts slide into the profile of the stop rail. - Page 34 Operation Setting the cutting depth Use the crank ( ) to turn the saw blade ( ) out of the saw table ( ) and lower it into the saw table. Adjust it to the depth you require as follows: •...
- Page 35 Operation 4. Slide the stop rail onto the parallel stop so that the square necks of the two lock bolts slide into the profile of the stop rail. 5. Turn the knurled nuts to tighten them again to secure the stop rail to the parallel stop.
- Page 36 Operation 2. Slacken the knurled nuts on the parallel stop ( ) by turning them several revolutions. 3. Move the stop rail until the rear end of the stop rail touches the imaginary 45° line. 4. Tighten the knurled nuts again. Cross stop Do not push the stop rail of the cross stop too far toward the saw blade.
- Page 37 Operation top. A red laser beam will now be projected from the laser emission aperture. If you guide the laser beam along the sawing line mark as you saw, you will produce clean, precise cuts. Switching off the laser: Set the laser switch ( ) to “OFF”.
- Page 38 Operation Switching the table saw on and off Risk of injury! If the table saw has been assembled incorrectly, this could lead to serious injuries. • Assemble the table saw correctly and completely before using for the first time. • Before you switch on the table saw, make sure that the saw blade is correctly fitted and that the equipment’s moving parts run smoothly.
- Page 39 Operation • Always use the parallel stop when making angular cuts. • Use a push stick or push block to feed the workpiece past the saw blade. If the push stick is damaged or worn, replace it immediately. • Secure long workpieces against falling off at the end of the cut. •...
- Page 40 Operation 6. Always push the workpiece through to the end of the splitter ( ). 7. Switch off the table saw and the vacuum extraction system. 8. Leave the off-cut piece on the saw table until the saw blade is back in its position of rest.
- Page 41 Operation part which is to be cut off. • Always push the cross stop forward until the workpiece is cut all the way through. 1. Adjust the cross stop ( ) to the desired position (see the section “Cross stop”). If you also want to tilt the saw blade ( ) slide the cross stop into the right guide groove ( ...
- Page 42 Operation Removing jammed material Risk of injury! There is a risk of serious injuries if the table saw is handled improperly. • Switch off the table saw immediately and pull the power plug out of the socket if the saw blade has got jammed in the workpiece or if any other blockages occur.
- Page 43 Operation 3. To turn the saw blade out of the saw table as far as the maximum, turn the crank clockwise as far as the stop. 4. Remove the splitter by turning the clamping screw ( ) several revolutions counterclockwise to slacken it and then pull the splitter up and out.
-
Page 44: Cleaning And Maintenance
Cleaning and maintenance 14. Hold the saw blade securely using the saw blade wrench and turn the hexagon screw until it is tight using the ring wrench. 15. Fit the splitter, table insert and saw blade guard as described in the section “Fitting/adjusting the splitter”. -
Page 45: Cleaning The Table Saw
Cleaning and maintenance − Do not use a high-pressure cleaner to clean the table saw. − Ensure that no water or other liquids get into the housing. Risk of damage! Improper cleaning or irregular maintenance could lead to damage to the table saw. -
Page 46: Carbon Brushes
Cleaning and maintenance 9. Wipe the table saw with a clean cloth or blow it down with compressed air at low pressure. Wear safety goggles when using compressed air. 10. In cases of stubborn dirt, use a damp cloth and a little soft soap. Carbon brushes In case of excessive sparking, have the carbon brushes checked by a qualified electrician. -
Page 47: Replacing The Power Cable
Cleaning and maintenance Risk of damage The ingress of water into the housing could cause a short-circuit. • Never immerse the table saw in water. • Ensure that no water gets into the housing. Correct and regular care is not only important for safe use, it will also contribute to a longer service life for your table saw. -
Page 48: Transport
Transport Transport Risk of injury There is a risk of serious injuries if the equipment is handled improperly. • The table saw is very heavy. Arrange another person to help you when you want to transport the table saw. • Completely dismantle the table saw before transporting it. •... -
Page 49: Spare Parts And Accessories
Spare parts and accessories Spare parts and accessories You can order suitable spare parts and accessories for your table saw on the internet at: www.isc-gmbh.info. You will find the latest prices and information there. Please provide the following information when ordering spare parts: •... -
Page 50: Noise/Vibration Information
Noise/vibration information Laser Laser class: ....................2 Battery: ..............2 x 1.5V AAA/LR03 Article number: ...................91328 A temporary voltage drop can occur when the equipment starts up, in particular if the power supply quality is poor. These voltage drops can influence other equipment (for example lamps may flicker). If the supply impedance Zmax is <... - Page 51 Noise/vibration information Information about sounds and vibrations The values stated above are noise emission values and are therefore not necessarily reliable workplace values. The interrelationship between emission and immission levels cannot be taken to reliably determine whether additional precautions are needed or not. Factors with a potential influence on the immission level at the specific workplace include the specifications of the work area and surrounding area, the duration of exposure, other sources of noise,...
-
Page 52: Disposal
Disposal Disposal Disposing of the packaging Separate the packaging materials by type before disposing of them. Dispose of cardboard in your waste paper container and take plastic film or sheets to your recycling center. Disposing of the table saw Waste equipment may not be disposed of with normal household refuse! This symbol draws attention to the fact that under the Directive on Waste Electrical and Electronic Equipment (2012/19/EU) and national... -
Page 53: Troubleshooting Guide
Troubleshooting guide *labelled with: Cd = cadmium, Hg = mercury, Pb = lead The reprinting or reproduction by any other means, in whole or in part, of documentation and papers accompanying the products is strictly subject to the express consent of iSC GmbH. Subject to technical changes Troubleshooting guide Problem... -
Page 54: Declaration Of Conformity
Declaration of conformity Declaration of conformity Einhell Germany AG · Wiesenweg 22 · D-94405 Landau/Isar erklärt folgende Konformität gemäß EU-Richtlinie und deklaruje zgodno wymienionego poni ej artyku u z Normen für Artikel nast puj cymi normami na podstawie dyrektywy WE. GB explains the following conformity according to EU directi- ves and norms for the following product déclare la conformité... - Page 55 Layout_F_TS_2000_1_UK_SPK7.indd 55 Layout_F_TS_2000_1_UK_SPK7.indd 55 23.06.2020 14:29:38 23.06.2020 14:29:38...
- Page 56 PRODUCED IN CHINA FOR: ALDI STORES LTD. PO BOX 26, ATHERSTONE WARWICKSHIRE, CV9 2SH. ALDI STORES (IRELAND) LTD.
Need help?
Do you have a question about the FERREX F-TS 2000-1 and is the answer not in the manual?
Questions and answers
How to change blades
To change the blade on the ALDI F-TS 2000-1 table saw:
1. Disconnect the power plug from the socket.
2. Wear protective gloves; do not touch the saw blade with bare hands.
3. Remove the two fastening screws and take out the table insert (5) from the saw table.
4. Check the table insert and replace it if damaged or not flush with the table.
5. Set the saw blade angle adjustment to 45°. Adjust if necessary based on the cutting angle setting instructions.
6. Proceed to turn the saw blade out of the saw table as described in the manual.
This answer is automatically generated