Advertisement
Quick Links
Quick Start Guide
(8200-1937-10_A0)
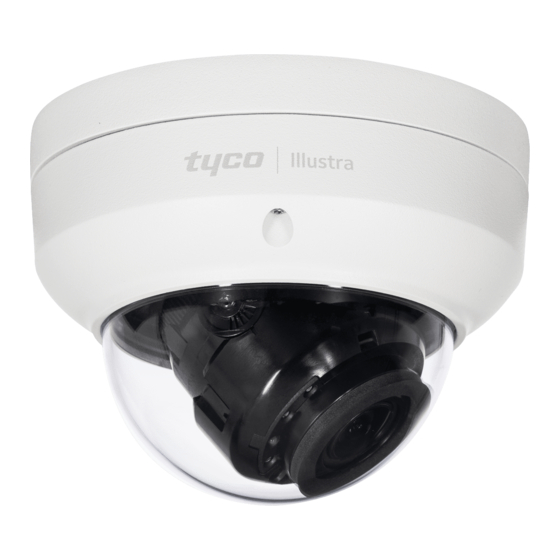
Flex Gen 3
Outdoor Dome camera
Mounting back box accessory
The IBJB-F-3OWB-0 mounting back box is used to install the FG3
Outdoor Dome camera to an electrical gang box or a wall
In the box
1 x Mounting back box
4 x '50x4mm' tapping screws
4 x '40x6mm' plastic screw anchors
3 x '8x4mm' screws
1 x Printed Quick Start Guide
Installation tools
1 x Screw driver
1 x drill
Figure 1: Outdoor Dome mounting back box
Figure 1
Table 1: Mounting Back box symbol description
Security
Symbol
Name
A
Double Gang Box
4" Octagon
B
C
Single Gang box
Installing the back box to an electrical gang box
When installing the mounting back box to an electrical gang box then
you must first remove the electrical gang box cover.
Note: All camera cables can be routed through the cable hole on the
mounting back box or the side entry hole on the back box.
1.
Safely remove the electrical gang box cover.
2.
Hold the mounting back box up to the electrical gang box and
align the holes on the mounting back box with the holes on the
electrical gang box.
3.
Insert the four screws into the four holes on the mounting back
box and securely attach it to the electrical gang box.
(See Figure 1 and Table 1 for help identifying the correct
connection holes for the different electrical gang boxes).
4.
Hold the Outdoor Dome camera up to the mounting back box
and route all camera cables through the cable hole on the back
box or the cable side entry hole (1) (Figure 2).
Note: You must first remove the cap-bolt (3) (Figure 2) and then
attach the cable pipe (2) (Figure 2) when using the cable side
entry hole.
Installing the back box to an electrical gang box (continued)
5.
Hold the Outdoor Dome camera base (1) (Figure 3) up to the
mounting back box and align the holes on the camera base with
the holes on the mounting back box.
6.
Securely attach the camera base to the mounting back box with
the two camera base screws.
Description
Attach the plate to a double gang box.
Attach the plate to a 4" Octagon box
Attach the plate to a single gang box.
Figure 2
Installing the back box to an electrical gang box (continued)
Figure 3
7.
See the Outdoor Dome camera Quick Start Guide for
assistance on how to install the Outdoor Dome camera.
Installing the back box to a wall
Note: All camera cables can be routed through the cable hole on the
mounting back box or the side entry hole on the back box.
1.
Hold the mounting back box up to the wall and mark-up on the
wall four holes for the screws.
2.
Drill a hole on each of the four mark-ups on the wall.
3.
Insert the four plastic screw anchors into the four holes.
4.
Hold the back box up to the wall and align the holes on the back
box with the holes on the wall.
5.
Insert the four screws into the four holes on the mounting back
box and securely attach it to the wall.
6.
Hold the Outdoor Dome camera up to the mounting back box
and route all camera cables through the cable hole on the back
box or the cable side entry hole (1) (Figure 2).
Note: You must first remove the cap-bolt (3) (Figure 2) and then
attach the cable pipe (2) (Figure 2) when using the cable side
entry hole.
7.
Hold the Outdoor Dome camera base (1) (Figure 3) up to the
mounting back box and align the holes on the camera base with
the holes on the mounting back box.
8.
Securely attach the camera base to the mounting back box with
the three camera base screws.
9.
See the Outdoor Dome camera Quick Start Guide for assistance
on how to install the Outdoor Dome camera.
Advertisement

Subscribe to Our Youtube Channel
Related Manuals for Tyco Illustra Flex Gen 3


Summary of Contents for Tyco Illustra Flex Gen 3
- Page 1 Table 1: Mounting Back box symbol description Installing the back box to an electrical gang box (continued) Security Symbol Name Description Double Gang Box Attach the plate to a double gang box. Quick Start Guide 4” Octagon Attach the plate to a 4” Octagon box (8200-1937-10_A0) Single Gang box Attach the plate to a single gang box.
- Page 2 Ensure to install the mounting back box and camera on an area strong enough to support more than four times the total weight of this product and the camera. © 2020 Johnson Controls. All rights reserved. JOHNSON CONTROLS, TYCO and ILLUSTRA are trademarks and/or registered trademarks. Unauthorized use is strictly prohibited.
Need help?
Do you have a question about the Illustra Flex Gen 3 and is the answer not in the manual?
Questions and answers