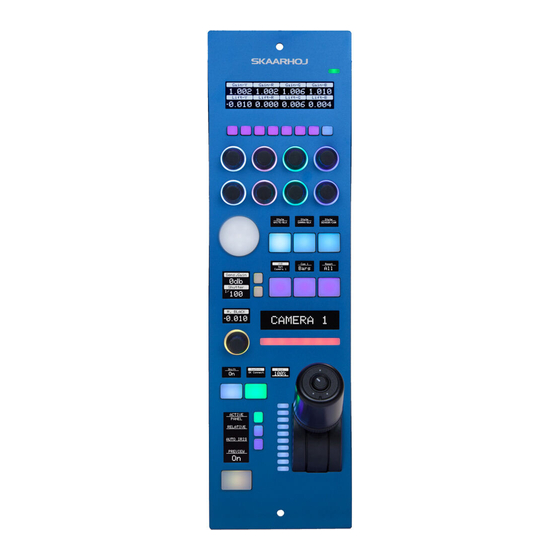
Summary of Contents for SKAARHOJ RCPv2
- Page 1 SKAARHOJ RCPv2 Sony BRC-X400 DRAFT USER GUIDE | April 2020 Get the latest version of this User Guide at: https://www.skaarhoj.com/support/manuals/...
-
Page 2: Table Of Contents
Contents Contents Important Information Legal Notice Warnings Maintenance Precautions Regulatory Compliance What’s In the Box Overview Features Controller Diagram Backside System Configuration Connection Power Camera Settings Network Interface Initial set up of the Sony BRC-X400 needs to be done through the camera’s network interface. IP settings Firmware Controller Settings... -
Page 3: Important Information
Important Information Legal Notice • Do not use organic solvents, such as benzene or ethanol when cleaning the surface of the Attention: controller The content and instructions of this document are subject to change without prior notice. Updates will be added to the manual. Regulatory Compliance Best effort have been conducted to verify the For private households: Information on... -
Page 4: What's In The Box
What’s In the Box • Power • Menu Display 1 x SKAARHOJ RCPv2 Controller • Super crisp window with large display tiles for 1 x Power Adaptor including power plug settings 1 x 2m CAT.5E Ethernet cable • High-quality encoders with RGB backlight for 1 x 1m USB 2.0 Type A/Type Micro B cable... -
Page 5: Controller Diagram
Controller Diagram CONNECTED CAM STUDIO 1. Large display with 8 tiles. Functions associated with encoders from group 3 2. 8 presets buttons 3. 8 rotary encoders with RGB backlight for function identification 4. Elastomer joypad 5. Group of 6 4-way buttons with associated displays 6. -
Page 6: Backside
Backside 1. DB9 (EXT I/O) For external routing/tally systems 2. Camera Selector 3. USB 2.0 Port Used for fi rmware upgrade and IP settings only 4. IP Network RJ45 Port For IP Control with PoE (48V IEEE 802.3af) 5. 12V DC Power Supply Connect the supplied DC Power adaptor 6. -
Page 7: System Configuration
System Configuration Connection The SKAARHOJ RCPv2 communicates to The layout of the configuration for the RCPv2 is camera(s) via wired ethernet communication. This done towards control of a single camera, but up is the supported case. to 7 cameras can be controlled from the same RCPv2 (or any other SKAARHOJ controller). -
Page 8: Camera Settings
Camera Settings Network Interface Initial set up of the Sony BRC-X400 needs to be done through the camera’s network interface. Please consult the camera manual for instructions. IP settings A static IP address must be set on the camera Please consult the camera manual for instructions. Firmware This integration was done using Sony BRC-X400 software version 1.00... -
Page 9: Controller Settings
In order to change IP or to update the Firmware Application on the controller the Firmware Updater 2. Connect the USB cable to the controller and to Application is used: https://www.skaarhoj.com/ the computer. Power the controller support/firmware-updater/ 3. Press “Update Firmware”... -
Page 10: Network Interface Details
Network Interface Details • The controller have a 100 mbps network interface • Network switch must have Auto-MDI/MDIX • Network switch must support 100 mbps • PoE: IEEE 802.3af Power over Ethernet (PoE) Specifications The PoE industry standard 48V IEEE 802.3af is used. -
Page 11: Controller Use
Controller Use Overall the controller have seven Menus. To change between the menus press M1, M2, M3, or M6 on either the top edge or bottom edge of the button. The controller have 1 shift level. To activate this press M7. CONNECTED CAM STUDIO CONNECTED CAM STUDIO C1-C8... - Page 12 Joystick Active Panel. If enabled no hardware interface will Controls iris value respond Ring Sets exposure mode to Auto Joystick Button Activates “Preview” relay on DB9 connector Setes exposure mode to Iris LED Bar Upper Press Lower Press Indicates Iris value Hold down: Hijacks main Hold down: Activates display to show actions...
-
Page 13: Dimensions
Dimensions Not to scale Not to scale CONNECTED CAM STUDIO 35.5 cm 10.2 cm Thickness: 0.3 cm 2.3 cm 7.2 cm 2.3 cm Not to scale 6.0 cm 24.6 cm... -
Page 14: Changing Default Configuration
Changing Default Configuration In some cases it can be desirable to change mapping of functionality on the different hardware components on the controller. This is presented in the following section. To access the internal configuration in the firmware updater click on Online Configuration. Please note, you need to be connected to the internet to access the online configuration. - Page 15 When you have finished setting reconfiguring your controller press the green Save Settings button in the bottom right corner. Once you have saved, go back to SKAARHOJ firmware updater and press Update Firmware. This load a new firmware file onto your controller with your new configuration.
-
Page 16: Serial Connection Option
Serial Connection Option Instead of connection via IP you are able to establish a serial connection by way of a Device Core Options: Setting VISCA over serial would be set by this configuration under “Manage Media” on the configuration page for your controller. Access this by pressing “Online Configuration” in the Firmware Application. Remember to save on the configuration page and press “Check for updates”... -
Page 17: Contact Support
Contact Support You are always welcome to contact us for support questions - write an email to support@skaarhoj.com and we will do our best to accommodate your request. In order for us to provide the best support please state: • Which SKAARHOJ unit it is about •...


Need help?
Do you have a question about the RCPv2 and is the answer not in the manual?
Questions and answers