Table of Contents

Subscribe to Our Youtube Channel
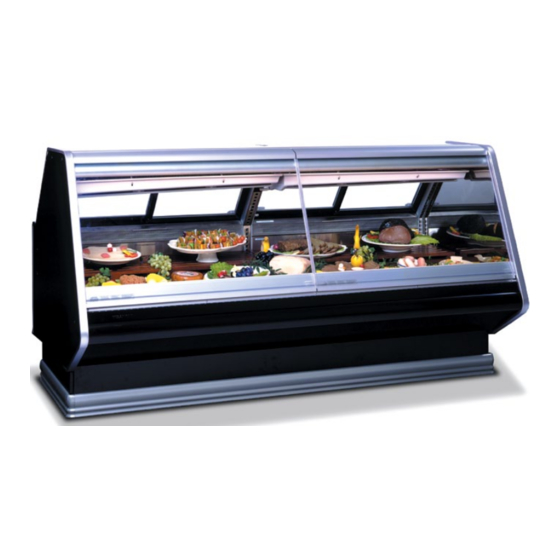
Related Manuals for Hussmann SMB


Summary of Contents for Hussmann SMB
- Page 1 ® Merchandisers Service Merchandisers Fresh Meat, Delicatessen, and Seafood Merchandisers (Includes Wedge Installation) ® Certified Installation & Operation Manual Shipped With Case Data Sheets P/N 0420057A. Impact Series July , 2001...
-
Page 2: Table Of Contents
P/N 0420057A INSTALLATION NSF Certification ....1-1 Location ......1-1 Front Glass Caution . -
Page 3: Installation
This means that from the time the product is received, through storage, preparation and display, the temperature of the product must be controlled to maximize the life of the product. HUSSMANN CORPORATION • BRIDGETON, MO 63044-2483 (Printed in U.S.A.) INSTALLATION CAUTION ®... -
Page 4: Shipping Damage
NSTALLATION WARNING Do NOT remove shipping braces until the merchandisers are positioned for installation. SHIPPING DAMAGE All equipment should be thoroughly examined for shipping damage before and during unloading. This equipment has been carefully inspected at our factory. Any claim for loss or damage must be made to the carrier. -
Page 5: Shipping Rider
Preparation 1. Using store blueprints, measure off and mark on floor the exact dimensions/locations of the case footprint. HUSSMANN CORPORATION • BRIDGETON, MO 63044-2483 (Printed in U.S.A.) Cross-Members Screws (two each end of each cross-member) 2. -
Page 6: Leveler Adjustment
NSTALLATION Leveler Adjustment Position the first case at the highest point. Set a long level (4 ft [1220 mm] or more) on the upper front panel of the case. Use an open-end wrench to turn leg levelers until the case is level from end to end and from front to back. -
Page 7: Glass Positioning
If the glass is not bottomed out in the clamp hard- ware it can be re-positioned as follows: HUSSMANN CORPORATION • BRIDGETON, MO 63044-2483 (Printed in U.S.A.) A. Remove the glass and clamp hardware from the case by opening the glass and loosening set screws in hinge, (Metric 3 millimeter set screws). -
Page 8: Adjustment Bolt
NSTALLATION 4. Is the glass hitting the end or adjacent glass? Slowly open and close the glass to inspect. If the glass is hitting the end or adjacent glass it may not be positioned correctly from left to right. This can be adjusted as follows: •... - Page 9 8. Remove stainless steel trim pieces and foam insulation on each side of the door frame. HUSSMANN CORPORATION • BRIDGETON, MO 63044-2483 (Printed in U.S.A.) 9. The set screw and adjusting bolt are now accessible. • The set screw must be backed out before turn- ing the adjusting bolt, ( inch set screw).
-
Page 10: Joining Instructions
NSTALLATION 11. Re-apply caulk or silicone as required. 12. Verify glass is positioned and operating cor- rectly. JOINING INSTRUCTIONS Sectional construction means that two or more merchandisers may be joined in line yielding one long continuous display requiring only one pair of ends. - Page 11 Connect installed copper drip tube to drip tray using flexible connector supplied. Ensure condensate flows freely from drip tray through drip tube. Check the drip tube connection for leaks before stocking. HUSSMANN CORPORATION • BRIDGETON, MO 63044-2483 (Printed in U.S.A.) Back Coil Coil Cover...
-
Page 12: Refrigeration / Electrical
The interconnecting piping may be run outside the case. HUSSMANN CORPORATION • BRIDGETON, MO 63044-2483 (Printed in U.S.A.) Piping Location Line Sizing Refrigerant lines should be sized as shown on the refrigeration legend that is furnished for the store or according to ASHRAE guidelines. -
Page 13: Insulation
EFRIGERATION INSULATION The suction and liquid lines should be clamped or taped together and insulated for a minimum of 30 ft (9144 mm) from the merchandiser. Additional insulation for the balance of the liquid and suction lines is recommended wherever condensation drippage is objectionable or lines are exposed to ambient conditions. -
Page 14: Control Settings
HUSSMANN CORPORATION • BRIDGETON, MO 63044-2483 (Printed in U.S.A.) REFRIGERATION THERMOSTAT The bulb for the optional refrigeration thermostat is located in the discharge air of the evaporator. -
Page 15: Merchandiser Electrical Data
EFRIGERATION MERCHANDISER ELECTRICAL DATA Merchandiser data sheets are shipped with this manual. The data sheets provide case electrical data, electrical schematics, parts lists and performance data. Refer to the merchandiser data sheets and case serial plate for electrical informa- tion. ELECTRICAL CONNECTIONS All wiring must be in compliance with NEC and local codes. -
Page 16: Drip Piping And Splashguards
3. Pitch the drip piping in the direction of flow. There should be a minimum pitch of foot (3 mm per 300 mm). HUSSMANN CORPORATION • BRIDGETON, MO 63044-2483 (Printed in U.S.A.) 4. Avoid long runs of drip piping. Long runs make it impossible to provide the pitch neces- sary for good drainage. -
Page 17: Installing Splashguards And Lower Front Panels
IPING AND INSTALLING SPLASHGUARD AND LOWER FRONT PANEL Make certain that the end assemblies, end splashguards and end panels have been installed according to the End Kit instruction. The splashguard and lower front panel are After shipped inside each case. have been leveled and joined, and all drip pip- ing, electrical and refrigeration work has been completed, install the splashguard and lower... - Page 18 LH-End Panel LH-End Splashguard Lower Front Panel Tab 3 for 8 ft 4 for 12 ft Front Splashguard Retainer / Bracket 3 for 8 ft — 4 for 12 ft Skid Leveler Assembly Lower Front Panel Front Splashguard Detail Base Screws Rail RH End...
-
Page 19: Installing Bottom Rear Panel
IPING AND INSTALLING BOTTOM REAR PANEL For fixed installation: 1. Align slots in bottom rear panel with center of legs. 2. Drive a hex head sheetmetal screw through each slot into each leg. P/N 0420057A PLASHGUARDS... -
Page 20: Start Up / Operation
The TEV has been factory set to provide the recommended performance settings as specified on the merchandiser data sheets. HUSSMANN CORPORATION • BRIDGETON, MO 63044-2483 (Printed in U.S.A.) START UP / OPERATION STOCKING Product should NOT be placed in merchandisers until case is at proper operating temperature. -
Page 21: Load Limit Profiles
TART UP PERATION LOAD LIMIT PROFILES Load Limit Load Limit Load Limit SMBT SMBV Load Limit Load Limit Load Limit SMGT SMGV Load Limit Load Limit Load Limit SSGT SSGV P/N 0420057A... -
Page 22: Maintenance
Allow glass fronts, ends, and service doors to warm before applying hot water. HUSSMANN CORPORATION • BRIDGETON, MO 63044-2483 (Printed in U.S.A.) MAINTENANCE • Remove the product and all loose debris to avoid clogging the waste outlet. -
Page 23: Interior Cleaning Steps
AINTENANCE INTERIOR CLEANING STEPS WARNING Do NOT allow product to sit in a non-refrigerated area. STEP 1 – Remove product to cooler. 41°F (5°C) STEP 2 – Turn off refrigeration. STEP 3 – Shut power off. Note that refrigeration controls and power controls are not in the merchandiser. - Page 24 STEP 6 – Lift out display pan support. STEP 7 – Lift out discharge air grille. HUSSMANN CORPORATION • BRIDGETON, MO 63044-2483 (Printed in U.S.A.) STEP 8 – Lift out interior back panel. STEP 9 – Lift out upper shelf supports.
-
Page 25: Fan Plenum
AINTENANCE STEP 11 – Lift out return air grille (from front). STEP 12 – Rotate fan plenum up and back; hook chain at rear of liner. P/N 0420057A Unplug fan harness. Lift fan plenum up and back to remove. (view is from the back) -
Page 26: Drip Tray
Hand wash drip trays. Sanitize drip trays and drip tubes. Use paper toweling to dry inside and out- side of trays before reinstalling. HUSSMANN CORPORATION • BRIDGETON, MO 63044-2483 (Printed in U.S.A.) STEP 14 – Clean inside the merchandiser. Once interior parts have been removed, collect loose debris for removal. -
Page 27: Removing Scratches From Bumper
AINTENANCE REMOVING SCRATCHES FROM BUMPER Most scratches and dings can be removed using the following procedure. 1. Use steel wool to smooth out the surface area of the bumper. 2. Clean area. 3. Apply vinyl or car wax and polish surface for a smooth glossy finish. -
Page 28: Service
9. Reconnect fan to wiring harness. Turn power 10. Verify that motor is working and blade is turning in the correct direction. Hussmann Corporation • Bridgeton, MO 63044-2483 (Printed in U.S.A.) SERVICE Always disconnect the electrical power at the main disconnect when servicing HE BLADES or replacing any electrical component. -
Page 29: Removing Polycarbonate Lamp Covers
ERVICE For access to ambient fans: 1. Turn off power. 2. Remove lower front panel. 3. Disconnect fan from wiring harness. 4. Remove screws holding motor and grille. 5. Replace fan motor and grille. 6. Reconnect fan to wiring harness. Turn power 7. -
Page 30: Replacing Fluorescent Lamps
Plastic Shield Fluorescent Lamp End Cap Hussmann Corporation • Bridgeton, MO 63044-2483 (Printed in U.S.A.) REPLACING LAMP HOLDERS AND END CAPS The Hussmann Impact lamp holder is designed to snap into the sheet metal of the case. The lamp holder has a locking ‘nub’... -
Page 31: Replacing Electronic Ballast
ERVICE REPLACING ELECTRONIC BALLAST Lamp Ballast The lamp ballast are located in the raceway, behind the back lower panel at the left-hand end of the merchandiser (facing rear of case). NOTE: The switch for the lamp is located in this panel. To gain access: 1. -
Page 32: Replacing Cylinders - Single Pane Glass
300N and 400N cylinders. 300N Cylinder – P/N 0412539 400N Cylinder – P/N 0406925 Hussmann Corporation • Bridgeton, MO 63044-2483 (Printed in U.S.A.) 1. Raise the front glass to open completely. 2. Use special hand tool, shown in photo, to compress and remove cylinder. -
Page 33: Replacing Single Pane Front Glass
ERVICE REPLACING SINGLE PANE FRONT GLASS (Requires more than one person.) WARNING Once set screws are loose, the glass and glass clamp have NO support or retain- ers. Support the front glass at all times until the top glass clamp and set screws are secured, or glass is removed. -
Page 34: Replacing Glass Hand Grip
P/N 0401884 Used on: 8 ft and 12 ft (2438 mm and 3658 mm) parent cases and as a joining bracket. Hussmann Corporation • Bridgeton, MO 63044-2483 (Printed in U.S.A.) Type: Two cylinders and three fastening points. P/N 0407352 Used on: 30° outside wedge. -
Page 35: Repairing Aluminum Coils
ERVICE REPAIRING ALUMINUM COIL The aluminum coils used in Hussmann merchan- disers may be easily repaired in the field. Materials are available from local refrigeration wholesalers. Hussmann recommends the following solders and technique: Solders Aladdin Welding Products Inc. P.O. Box 7188 1300 Burton St. - Page 36 The full product warranty is available from our website, www.hussmann.com To obtain additional information or other support, contact your Hussmann representative. Please include the model and serial number of the product. Hussmann Corporation, Corporate Headquarters: Bridgeton, Missouri, U.S.A. 63044-2483 01 July 2005...
Need help?
Do you have a question about the SMB and is the answer not in the manual?
Questions and answers