Table of Contents
Advertisement
Quick Links
Advertisement
Table of Contents

Related Manuals for FAVORIT 4-J


Summary of Contents for FAVORIT 4-J
- Page 5 PART 2 SAFETY WARNINGS READ THESE INSTRUCTIONS CAREFULLY AND COMPLETELY BEFORE USING YOUR APPLIANCE, AND KEEP IT IN A CONVENIENT PLACE FOR REFERENCE WHEN NECESSARY. THIS MANUAL IS PREPARED FOR MORE THAN ONE MODEL IN COMMON. YOUR APPLIANCE MAY NOT HAVE SOME OF THE FEATURES THAT ARE EXPLAINED IN THIS MANUAL. PAY ATTENTION TO THE EXPRESSIONS THAT HAVE FIGURES, WHILE YOU ARE READING THE OPERATING MANUAL.
- Page 6 - The appliance is not intended to be operated by means of an external timer or separate remote-control system. - During use, the appliance becomes hot. Care should be taken to avoid touching heating elements inside the oven. - During use, handles held for short periods in normal use can get hot.
- Page 7 - CAUTION: This appliance is designed only for cooking food and is intended for indoor domestic household use only and should not be used for any other purpose or in any other application, such as for non-domestic use or in a commercial environment or room heating. - Do not try to lift or move the appliance by pulling the door handle.
- Page 8 - Do not put heavy things or flammable or ignitable goods (nylon, plastic bag, paper, cloth...etc) into the drawer. This includes cookware with plastic accessories (e.g. handles). - Do not hang towels, dishcloths or clothes from the appliance or its handles. During cleaning and maintenance - Always turn the appliance off before operations such as cleaning or maintenance.
- Page 10 Figure 2...
- Page 11 Figure 3...
- Page 12 50° 100° 250° 150° 200° Figure 4 Figure 5 Figure 5 Figure 6 50° 100° 250° 150° 200° Figure 6...
- Page 14 Lower Heating and Fan Function The oven 's thermostat and warning lights will be turned on, the lower heating element and fan will start operating. The lower heating and fan function is ideal for heating foods equally in a short time. It is recommended to pre-heat the oven about 10 minutes.
- Page 31 Работна површина мин Плоча за мин 25 мм вградување 50 мм Рерна за вградување Вметнете ја рерната во шкафот туркајќи ја Ако рерната се поставува под плочата, напред. Отворете ја вратата на рерната и растојанието меѓу работната површина и ставете ги 2 шрафа во дупките што се наоѓаат горната...
- Page 33 50° 100° 250° 150° 200° 50° 100° 250° 150° 200°...
- Page 35 Ôóíêöè¼à íà äîëåí ãðå¼à÷ ñî âåíòèëàòîð Òåðìîñòàòîò íà ðåðíàòà è ñâåòèëêèòå çà ïðåäóïðåäóâàœå ñå âêëó÷óâààò, äîëíèòå ãðå¼à÷è è âåíòèëàòîðîò çàïî÷íóâààò äà ðàáîòàò. Ôóíêöè¼àòà çà äîëíî ãðååœå ñî âåíòèëàòîð å ñîâðøåíà çà ïîäåäíàêâî ãðååœå íà õðàíà âî êðàòîê âðåìåíñêè ïåðèîä. Ñå ïðåïîðà÷óâà ïðâî äà ¼à çàãðååòå ðåðíàòà 10 ìèíóòè.
- Page 41 Марка FAVORIT 4-J BLACK Модел Вид на рерна НА СТРУЈА Тежина кг 29(+/-2) Индекс за енергетска ефикасност - конвенционални 104,5 Индекс за енергетска ефикасност - со вентилатор 94,8 Енергетска класа Потрошувачка на енергија (струја) - конвенционални kWh/циклус 0,86 Потрошувачка на енергија (струја) - со вентилатор...
- Page 46 DEO 2 UPOZORENJA MOLIMO PAZLJIVO I U CELOSTI PROÈITATI OVA UPUTSTVA PRE KORIŠÆENJA URE? AJA, I ÈUVAJTE OVA UPUTSTVA NA UDOBNOME MESTU ZBOG KONSULTACIJE KADA BUDE POTREBNO. OVAJ PRIRUÈNIK JE PRIPREMLJEN ZA VIŠE OD JEDNOG MODELA. VAŠ UREÐAJ MOŽDA NEMA NEKE OD ODLIKA OBJAŠNJENIH U OVOM PRIRUÈNIKU. DOK ÈITATE PRIRUÈNIK OBRATITE PAŽNJU IZRAZIMA KOJI SADRŽE FIGURE Opšta bezbednosna upozorenja - Ovaj ureðaj se može koristiti sa strane dece veæa od 8...
- Page 47 - Ne koristiti silna abraziona sredstva ili oštre metalne strugaèe za èišæenje vrata peæi i ostale površine, jer mogu ogrebati površinu, šta kasnije može dovesti do pucanje stakla ili ošteæenje površine. - Ne koristiti paroèistaèe za èišæenje ureðaja. - UPOZORENJE: Osigurati se da je ureðaj iskljuèen pre zamjenu lampe kako bi izbegli elektrièni udarac.
- Page 48 Tokom korišcenja Kada pustite peæ po prvi put, osetiæe se miris iz materijale za izolaciju i grejne elemente. Zbog toga, pre postavljanja hrane, pustiti peæ da radi na najvišu temperaturu tokom 45 minuta. U isto vreme morate propisno provetriti okolinu gde se ureðaj nalazi. Tokom korišæenja, spoljašne i unutrašnje površine se ugrevaju.
- Page 50 Slika 2...
- Page 51 Slika 3...
- Page 52 50° 100° 250° 150° 200° Slika 4 (Slika 4) Slika 5 (Slika 5). 50° 100° 250° 150° 200° Slika 6...
- Page 53 4. KORIŠÆENJE PROIZVODA Funkcije rerne...
- Page 54 4. KORIŠÆENJE PROIZVODA Funkcija grejanje i ventilator Termostat i svetiljka za upozorenje na rerni æe se ukljuèiti, donji grejaè i ventilator æe poèeti da rade. Funkcija donji grejaè i ventilator je idealna za brzo i jednako grejanje hrane. Preporuèuje se da prethodno zagrejete rernu oko 10 minuta. Funkcija roštilja Termostat i svetiljka za upozorenje na rerni æe se ukljuèiti, grejaè...
- Page 55 STEDNJA ENERGIJE Koristite posude koje imaju ravno dno. Odaberite posudu odgovarajuce velicine. Koriscenje poklopaca smanjuje vreme pripreme hrane. Smanjenjenm kolicine tecnosti iii masti smanjuje se vreme pripreme hrane Kada tecnost pocne vreti, smanjite temperaturu. Za vreme pripreme hrane izbegavajte cesto otvaranje vrata rerne...
- Page 57 Slika 7...
- Page 58 Stavljanje resetke Postavite resetku u otvor vodilica i gurnite do kraja dok pravilno ne "sedne". Resetka mora da bude smestena unutar prostora za pecenje. UPOZORENJE: Postavite resetku uotvor vodilice i gurnite do kraja dok ► pravilno ne "sedne".
- Page 59 5. DEO: CISCENJE I ODRZAVANJE 5.1 CISCENJE Pre pocetka ciscenja, svi kontrolna dugmad mora da budu iskljucena, a proizvod ohladen. lskljucite sporet sa napajanja. Ne koristite sredstva za ciscenje koja sadrze zrnca koja bi mogla da ogrebu emajlirane i obojene delove aparata. Koristite kremasta iii tecna sredstva ciscenje koja ne sadrie takva zrnca.
- Page 60 6. DEO: SERVIS I PRIJEVOZ 6.1 ZAHTEVI PRE OBRACANJA SERVISU Ako proizvod ne radi; Mozda je aparat iskljucen sa napajanja iii je doslo je do nestanka napajanja. Na modelima s vremenskim programatorom, mozda je uzrok u nepodesenom vremenu. Ako proizvod ne greje; Mozda je uzrok u nepodesenoj temperaturi pomocu okretnog tastera za kontrolu toplote.
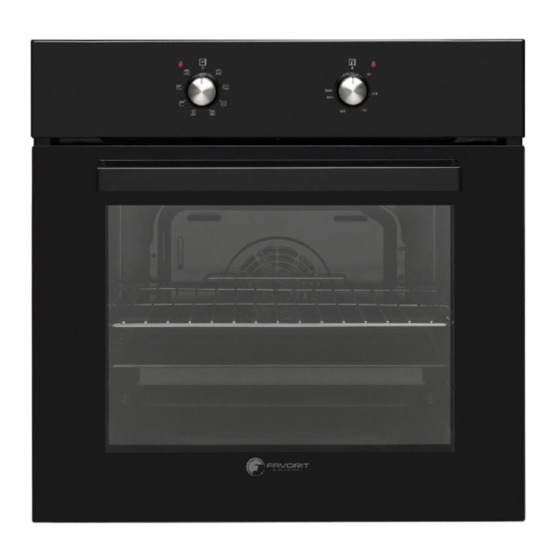
- Page 61 FAVORIT 4-J BLACK...
- Page 64 ÂÒÎÐ ÄÅË: ÁÅÇÁÅÄÍÎÑÍÈ ÏÐÅÄÓÏÐÅÄÓÂÀŒÀ ÂÍÈÌÀÒÅËÍÎ È ÖÅËÎÑÍÎ ÏÐÎ×ÈÒÀ£ÒÅ ÃÈ ÎÂÈÅ ÓÏÀÒÑÒÂÀ ÏÐÅÄ ÄÀ ÃÎ ÊÎÐÈÑÒÈÒÅ ÓÐÅÄÎÒ È ×ÓÂÀ£ÒÅ ÃÈ ÍÀ ÏÎÃÎÄÍÎ ÌÅÑÒÎ ÇÀ ÄÀ ÃÈ ÏÐÎ×ÈÒÀÒÅ ÊÎÃÀ Å ÈÌÀÒÅ ÏÎÒÐÅÁÀ. ÎÂÀ ÓÏÀÒÑÒÂÎ Å ÇÀÅÄÍÈ×ÊÎ ÇÀ ÏÎÂÅ Å ÌÎÄÅËÈ. ÂÀØÈÎÒ ÓÐÅÄ ÌÎÆÅ ÄÀ ÍÅÌÀ ÍÅÊÎÈ ÎÄ...
- Page 65 - ÏÐÅÄÓÏÐÅÄÓÂÀŒÅ: Àêî ïîâðøèíàòà å íàïóêíàòà, èñêëó÷åòå ãî óðåäîò çà äà èçáåãíåòå åëåêòðè÷åí óäàð. - Çà ïëî÷è êîè èìààò è êàïàê, àêî èìà íåøòî èñòóðåíî, òîà òðåáà äà ñå òðãíå îä êàïàêîò ïðåä äà ñå îòâîðè. Èñòî òàêà, ïëî÷àòà òðåáà äà ñå èçëàäè ïðåä äà...
- Page 66 Ïðåäóïðåäóâàœà çà èíñòàëàöè¼àòà Íåìî¼òå äà ãî êîðèñòèòå óðåäîò ïðåä öåëîñíî äà áèäå èíñòàëèðàí. Óðåäîò ìîðà äà ãî ïîñòàâè è ïóøòè âî ðàáîòà îâëàñòåí òåõíè÷àð. Ïðîèçâîäèòåëîò íå å îäãîâîðåí çà êàêâà áèëî øòåòà øòî ìîæå äà íàñòàíå ïîðàäè ëîøî ïîñòàâóâàœå è èíñòàëàöè¼à îä íåîâëàñòåíè...
- Page 69 Декларација за усогласеност Изјавуваме дека нашите производи ги исполнуваат применливите европски директиви, решенија и одредби, како и побарувањата наведени во посочените стандарди. 32A, 3x2,5 mm² 220V~ 5x1.5 mm² 380V 3N~ 3x2,5 mm² 220V~ 5x1.5 mm² 380V 3N~ 3x2,5 mm² 230V~ 5x1.5 mm²...
- Page 84 FAVORIT 4-J BLACK...
- Page 85 FAVORIT 4-J BLACK OPERATING AND INSTALLATION INSTRUCTIONS BUILT-IN VITROCERAMIC HOB...
-
Page 86: Table Of Contents
CONTENTS: DESCRIPTION OF THE HOB SAFETY INSTALLATON USAGE Turn On and Turn Off The Control Select Heater Turn on dual- and triple zones Turn Off Individual Heaters Timer Function Key Lock Child Lock TOUCH CONTROL SAFETY FUNCTIONS Sensor Safety Cut Off Over Temperature Switch Off Operating Time Limitations Residual Heat Functions... - Page 87 DESCRIPTION OF THE HOB It is important that you should read this manual for best performance and for future reference. Your new hob is guaranteed and will give lasting service. This guarantee is only applicable if the appliance has been installed and operated in accordance with the operating and installation instructions detailed in this manual.
- Page 88 YOUR APPLIANCE, AND KEEP IT IN A CONVENIENT PLACE FOR REFERENCE THIS MANUAL IS PREPARED FOR MORE THAN ONE MODEL IN COMMON. YOUR APPLIANCE MAY NOT HAVE SOME OF THE FEATURES THAT ARE EXPLAINED IN THIS MANUAL. PAY ATTENTION TO THE EXPRESSIONS THAT HAVE FIGURES, WHILE YOU ARE READING THE OPERATING MANUAL.
- Page 89 - WARNING: If the surface is cracked, switch off the appliance to avoid the possibility of electric shock. - For hobs incorporating a lid, any spillage should be removed from the lid before opening. And also the hob surface should be allowed to cool before closing the lid. - The appliance is not intended to be operated by means of an external timer or separate remote-control system.
- Page 90 - Your appliance is produced in accordance with all applicable local and international standards and regulations. - Maintenance and repair work must be made only by authorized service technicians. Installation and repair work that is carried out by unauthorized technicians may endanger you.
- Page 91 During usage - Do not put flammable or combustible materials, in or near the appliance when it is operating. - Do not leave the cooker while cooking with solid or liquid oils. They may catch fire on condition of extreme heating. Never pour water on to flames that are caused by oil. Cover the saucepan or frypan with its cover in order to choke the flame that has occured in this case and turn the cooker off.
- Page 92 INSTALLATION The electrical connection of this hob should be carried out by an authorised service personal or a qualified electrician, according to the instructions in this guide and in compliance with the current regulations. · Before connecting your appliance to the mains at home, make sure to check the conformity of voltage settings, which are specified on the information sticker attached to the appliance and/or packaking, with the usage conditions available.
- Page 93 Neighboorhood walls A [mm] B [mm] Combustible Non-combustible · Apply the one-sided self-adhesive sealing tape supplied all the way round the lower edge of the cooking surface along the outer edge of the glass ceramic panel. Do not stretch it. ·...
- Page 94 Electrical connection of your hob . Before proceeding with the electrical connection, verify that the current carrying capacity of the system and the socket is adequate for the maximum power rating of the hob. · Electrical installation of the residence and the electrical current plug in use must be earthed and conform with safety regulations.
- Page 95 3x2,5 mm² 220V~ 5x1.5 mm² 380V 3N~ 3x2,5 mm² 220V~ 5x1.5 mm² 380V 3N~ 3x2,5 mm² 230V~ 5x1.5 mm² 400V 3N~ 3x2,5 mm² 230V~ 5x1.5 mm² 400V 3N~ 3x2,5 mm² 240V~ 5x1.5 mm² 415V 3N~ 3x2,5 mm² 240V~ 5x1.5 mm² 415V 3N~ Supply cable connection can be differ according to terminal box type.
- Page 96 USAGE The appliance is operated by touching buttons and the functions are confirmed by displays and acoustic signals. The mains are applied to the hob control Stand-By-Mode S-Mode and all heater displays are off or a residual heat display is active. At least one heater display shows a heat Operating-Mode B-Mode...
-
Page 97: Select Heater
If the appliance is in Stand-By-Mode, it is put in Operating-Mode by pressing successful operation acoustically. On all heaters a ´0` appears and all Decimal Point of the heater flashes (1 sec on, 1 sec off). If there is no operation within 10 sec, the display of all heaters will turn off. If the displays are turned off, the heater will be set into Stand-By-Mode. -
Page 98: Turn On Dual- And Triple Zones
Turn on dual and triple zones (available only in some models) Turn on the dual zone The activation of the dual zone is done after selecting the desired heater corresponding Dual Zone Indicator goes on statically. Touching for a second time, the status of the dual zone toggles: it changes from dual zone on to dual zone off and back again. -
Page 99: Turn Off Individual Heaters
The heat boost can be turned off by pressing until heat setting ´0` appears. If the heat boost should be used, it can always be activated by actuating again if the heat setting is set to level 9. In the heat display ´A/9` flashes. Turn Off Individual Heaters . -
Page 100: Timer Function
Use of timer turn off function for corresponding heater (available only in some models) After reaching a remaining time of 0 minutes, the timer stops the linked Display. In the Timer Display is shown ´00`. The related timer Cooking Zone Indicator disappears. - Page 101 Minute Minder No matter whether a heater is activated or not, the minute minder can be operated by touching . The appearing ´00` shows that timer is active and the dot in the right Timer Display indicates that are now linked for setting the timer value.
-
Page 102: Key Lock
10 sec after the last operation, the timer display changes to the timer that will run out next. The assignment of that timer is displayed always by a flashing Cooking Zone Indicator. How many timer are running you can identify by the number of Cooking Zone Indicator that are statically on. -
Page 103: Child Lock
If the heater is locked, only can be operated, all other buttons are blocked. If there is any other button operated in the blocked mode, the buzzer signal sounds and the Key Lock Indicator flashes as indication for the activated key lock functionality. - Page 104 pressing until the beep, then the have to be pressed a confirmation for successful unlocking, ´L` symbol in the displays will be erased immediately.
-
Page 105: Touch Control Safety Functions
TOUCH CONTROL SAFETY FUNCTIONS The following safety functions are available to avoid unintended operations of the hob control. Sensor Safety Cut Off To prevent the appliance from unwanted, random sensor operation, a sensor monitoring is included. In case of one or more buttons are pressed longer than 12 sec, the sensor monitoring routine indicates acoustically that wrong operation (pot or other object placed on the button, sensor failure, etc.) and switches off the appliance. -
Page 106: Over Temperature Switch Off
Over Temperature Switch Off Due to the placement of the control is very close to the heater in the middle front of the hob, it can occur that a not correctly placed pot half on the control and not sensed by the sensor safety cut off (not covering a button) heats up the hob to a very high temperature, which makes the glass and the buttons untouchable without get burned the finger. -
Page 107: Residual Heat Functions
Residual Heat Functions After all cooking processes there is some heat stored in the vitroceramic glass called residual heat. The control can calculate roughly how hot the glass is in the worst case. If the calculated temperature is higher than + 60 °... - Page 108 Cookware with rough bottoms should not be used since these can scratch the glass ceramic surface. The bottom of the good cookwares should be as thick and flat as possible. Before use, make sure that cookware bottoms are clean and dry. Always place the cookware on the cooking zone before it is switched on.
- Page 110 FAVORIT 4-J BLACK...
- Page 114 -Temperatura donje površine ringle može da poraste u toku rada. Stoga, potrebno je postaviti ploèu ispod proizvoda.
- Page 117 Izjava o usklađenosti Izjavljujemo da naši proizvodi zadovoljavaju primenljive evropske direktive, odluke i propise, kao i zahteve navedene u naznačenim standardima.
- Page 119 Sa ekajte dok „F“ ne nestane u svim zonama, uklju ite plo u za kuvanje dodirivanjem i nastavite sa koriš enjem.
- Page 133 52208766...
Need help?
Do you have a question about the 4-J and is the answer not in the manual?
Questions and answers