Table of Contents
Advertisement
Quick Links
Junior Commercial Assembly Instructions
First construct the tubing as per the instructions included in the Tube box.
Insert the 4" Hub into one end of Tube.
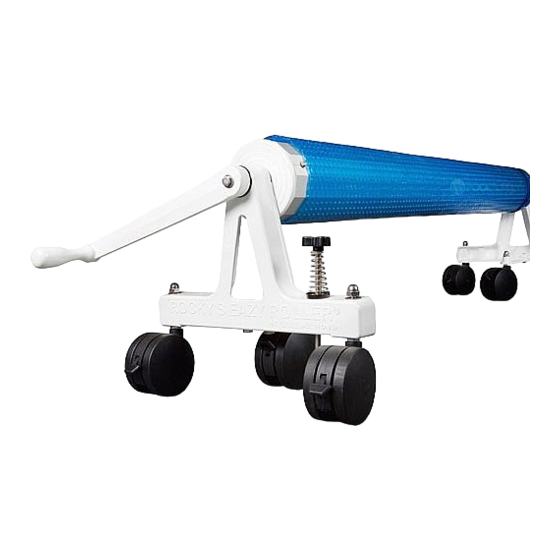
Assemble The End Units
1
029
021
211
029
021
Bolt the Wheels to the Frames and to the 3rd Leg
Frame, as shown in the diagram. Next, bolt the 3rd
Leg Frames to the Frames.
Assemble one end unit to the Tube, using the Large
Handle, as shown in the diagram.
Assemble the other end unit to the Tube, using the
Knob.
For smoother operation, apply waterproof grease
between the Hub and the Black Bushing.
This should be done once a year.
Position the assembled roller unit at the widest end
of the pool.
3
Positioning Your Reel System
Marking The Anchors
4
Using one of the two holes in the Frame as a
guide, make mark #1 on deck. With a 1/2" con-
crete drill bit, drill a 1 1/2" deep hole at mark #1.
Complete steps 5 and 6 before continuing with
step 4. On the other side of the roller unit, make
mark #2 by using one of the two holes in the
A-frame as a guide. With a 1/2" concrete drill bit,
drill a 1 1/2" deep hole at mark #2.
NOTE:
Set one Bolt at the front of the Frame at one end
and one at the rear of the Frame at the other end.
067
055
021
007
211
For regular shaped pools,
align the outside edge of
the Tube parallel with the
end of the pool.
MARK #2
With two 7/8" TEK screws attach the Hub to the
Tube using a drill. Apply pressure to ensure the
screw cuts into the aluminum Tube and then cuts
it's own thread.
(No pre-drilling required)
Repeat with other side.
2
Put the Black Bushing onto the end of the Hub
remembering to put some waterproof grease inside the
bushing. Grease once a year after that.
105
065
Push the Tube with the Hub into the
Black Bushing then into the Frame.
Put the Black Washer over the end of
the protruding end of the Hub and slide
the Handle onto the end of the Hub. Put
the Washer on the Bolt and secure the
Handle.
NOTE do not over tighten this Bolt as it will make it hard
to rotate the Handle.
Repeat these steps on the other end of the unit and use
the Knob in place of the Handle.
Your system is now complete.
5
Setting The Anchors
Drive the Concrete Anchor into
the hole with a hammer. Leave
the Anchor raised 1/16".
To set the Concrete Anchor, hit
the slug with a hammer and
center punch driving the slug
down into the Anchor forcing the
legs out into concrete.
Hit center slug
Slug
with hammer
& center punch.
1/16"
15
TEK Screws
Assembling The System
019
071
107
055
For irregular shaped pools,
the outside edge of the Tube
should be a minimum of 3'
inside from the end of the pool.
Place the reel at the widest
point if possible for a better
result.
Bolting The System
6
Insert the Anchor Bolt through
the Spring and then through the
Spring Guard. Next put them
through the hole in the Frame.
013
025
109
001
005
061
Advertisement
Table of Contents

Related Manuals for Rocky's Junior

Summary of Contents for Rocky's Junior
- Page 1 Junior Commercial Assembly Instructions First construct the tubing as per the instructions included in the Tube box. TEK Screws With two 7/8” TEK screws attach the Hub to the Tube using a drill. Apply pressure to ensure the screw cuts into the aluminum Tube and then cuts it’s own thread.
- Page 2 FOR REGULAR SHAPED INGROUND POOLS Roller Attach the cut Straps every 3’ Open the cover over the pool and cover to the roller with set it into position. Ensure that the blue straps (See the end of the cover (where it Grommet detail).
Need help?
Do you have a question about the Junior and is the answer not in the manual?
Questions and answers