Advertisement
Please note that the color of parts in your kit may vary from that shown in these instructions.
Preparation
1. You will need a clean flat work area 3 to 4 square feet in size.
2. Tools required are a small file, small angled needle nose pliers, and toothpicks.
3. Spray booth or well ventilated and clean area to paint.
4. Area where parts can be set aside without getting dirty or damaged.
5. Carefully remove the contents from the poly bag. Remove the
parts from the packing material. Please note there are many
small detail parts in a separate bag.
TRANSFORMER 3 ASSEMBLY INSTRUCTIONS
1
Advertisement
Table of Contents

Related Manuals for Railfan Models TRANSFORMER 3


Summary of Contents for Railfan Models TRANSFORMER 3
- Page 1 TRANSFORMER 3 ASSEMBLY INSTRUCTIONS Please note that the color of parts in your kit may vary from that shown in these instructions. Preparation 1. You will need a clean flat work area 3 to 4 square feet in size. 2. Tools required are a small file, small angled needle nose pliers, and toothpicks.
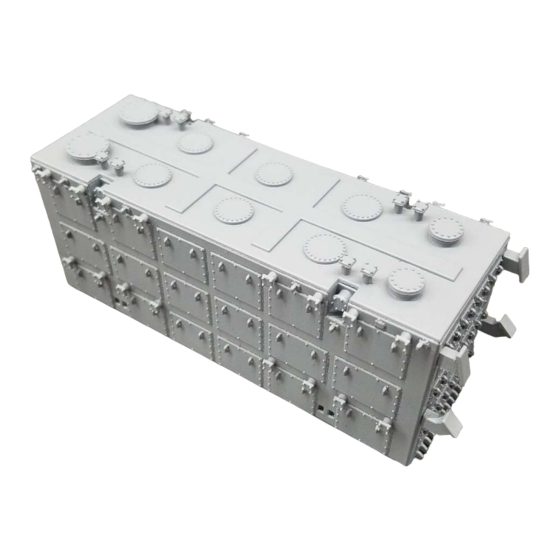
- Page 2 Assembly 1. Please note that the transformer design modeled in this kit has many small, fine features, which are delicate. Hold the panels by the edge to minimize the chance that any of those features get damaged. 2. Use medium viscosity CA glue only. No other glue will hold the parts together. Only a small amount of glue is necessary.
- Page 3 5. Test fit and glue the 16 small square caps to each side. 6. Glue the small round caps to the recessed pockets as shown here. 7. Glue the recessed pockets to the inside top positions of each side panel. Also glue the smaller enclosed boxes to the lower areas of each side.
- Page 4 8. Lay out the sides and ends around the bottom. The bottom should have the magnets facing up. The ends and sides are keyed to the bottom, so they will only fit one side correctly. 9. Dry fit the sides and ends with the bottom to ensure a tight a proper fit with each piece. The corners should not have any gaps.
- Page 5 13. Repeat for the opposite side then the opposite end. 14. Dry fit the roof and remove. Apply CA to the side of the lip of the roof and replace on the top of the transformer.
- Page 6 Start out with a light setting to get all of the hard to reach places. 17. Once the paint is dry, the transformer is ready to place on your Railfan Models KRL heavy duty flat car.
Need help?
Do you have a question about the TRANSFORMER 3 and is the answer not in the manual?
Questions and answers