Table of Contents
Advertisement
Quick Links
HESS & ASSOCIATES, INC.
BLAST-IT-ALL®
185 Piper Ln.
LEADING THE INDUSTRY IN
Salisbury, NC 28147
SURFACE PREPARATION
(800) 535-2612
EQUIPMENT
LIVE CHAT- www.blast-it-all.com
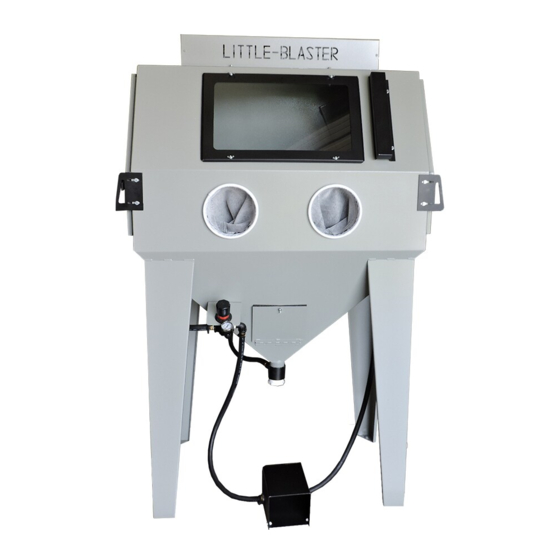
LITTLE BLASTER™
w/ DUST COLLECTOR
LB4024 / LB4824
MANUAL DOWNLOAD
www.blast-it-all.com
** WARNING **
DO NOT USE SAND. SAND WILL CAUSE SILICA DUST, WHICH IS
THE CAUSE OF SILICOSIS DISEASE, A CONDITION OF MASSIVE
FIBROSIS OF THE LUNGS. THIS STATEMENT INDICATES A
POTENTIAL PERSONNEL HAZARD. FAILURE TO COMPLY WITH
THESE INSTRUCTIONS MAY RESULT IN PERSONAL INJURY.
© 2020 Hess & Associates
Man. # 561 v02-02 8/2020
Advertisement
Table of Contents

Related Manuals for Blast-It-All LITTLE BLASTER

Summary of Contents for Blast-It-All LITTLE BLASTER
- Page 1 BLAST-IT-ALL® 185 Piper Ln. LEADING THE INDUSTRY IN Salisbury, NC 28147 SURFACE PREPARATION (800) 535-2612 EQUIPMENT LIVE CHAT- www.blast-it-all.com LITTLE BLASTER™ w/ DUST COLLECTOR LB4024 / LB4824 MANUAL DOWNLOAD www.blast-it-all.com ** WARNING ** DO NOT USE SAND. SAND WILL CAUSE SILICA DUST, WHICH IS THE CAUSE OF SILICOSIS DISEASE, A CONDITION OF MASSIVE FIBROSIS OF THE LUNGS.
-
Page 2: Table Of Contents
MAINTENANCE ............................15 VENTURI BLAST GUN TUNING : ....................... 16 PARTS : ................................ 17 Little Blaster™ BLAST GUN ASSEMBLY PARTS ..................17 Little Blaster™ STANDARD CABINET PARTS .................... 18 Little Blaster™ LIGHT BOX PARTS ......................19 Little Blaster™ MACHINE AIR CONTROL PARTS ..................20 Little Blaster™... -
Page 3: Safety
SAFETY *** READ ENTIRE MANUAL BEFORE INSTALATION/OPERATING EQUIPMENT *** DO NOT USE SAND SAND WILL CAUSE SILICA DUST, WHICH IS THE CAUSE OF SILICOSIS DISEASE, A CONDITION OF MASSIVE FIBROSIS OF THE LUNGS. THIS STATEMENT INDICATES A POTENTIAL PERSONNEL HAZARD. FAILURE TO COMPLY WITH THESE INSTRUCTIONS MAY RESULT IN PERSONAL INJURY. - Page 4 SAFETY (cont’d) 7. Use CAUTION when interacting with any Electrical Components. You MUST incorporate Lock Out / Tag Out Procedures Prior to Servicing Equipment. 8. Gun MUST ALWAYS be pointed away from the Operator and Towards the item being processed. 9.
-
Page 5: Osha Fact Sheet
FactSheet Protecting Workers from the Hazards of Abrasive Blasting Materials Abrasive blasting uses compressed air or water to direct a high velocity stream of an abrasive material to clean an object or surface, remove burrs, apply a texture, or prepare a surface for the application of paint or other type of coating. Employers must protect workers from hazardous dust levels and toxic metals that may be generated from both the blasting material and the underlying substrate and coatings being blasted. - Page 6 How to Protect Workers from Exposure Engineering Controls to Abrasive Blasting Materials 1. Substitution Each abrasive blasting operation is unique, • Use a less toxic abrasive blasting material. involving different surfaces, coatings, blast • Use abrasives that can be delivered with material, and working conditions.
- Page 7 • Provide accommodations for end-of-shift Personal Protective Equipment showers and change areas with separate • Hearing protection storage facilities for street clothes, protective • Eye and face protection clothing and equipment. • Helmet • Keep contaminated clothing and equipment • Leather gloves that protect to full forearm and out of the clean change area.
- Page 8 Applicable OSHA Standards and Safety and Health Topic Pages The following table provides links to several OSHA standards (not all-inclusive) that may contain requirements that apply to abrasive blasting operations. For example, the removal of lead paint by abrasive blasting will likely require employers to follow provisions of the OSHA Lead standard. Safety and health topic pages listed here provide employers and workers with information that may be useful for safely conducting abrasive blasting.
-
Page 9: Instalation
7. Plug electrical cord from side of dust collector into plug from light box. (READ OPERATION - “Little Blaster™ CARTRIDGE DUST COLLECTOR”) 8. Connect your air supply line to machine air inlet on left rear leg, we recommend using 1/2" I.D. Hose or Pipe minimum supply line. -
Page 10: Little Blaster™ Air Controls
INSTALATION : Little Blaster™ AIR CONTROLS *** READ BEFORE OPERATING EQUIPMENT *** 1. Remove Box from inside of the Machine. Box contains : Foot Petal, ½” Air Regulator w/Assembled Hoses Blast Gun w/Assembled Hose ½” Barbed Brass Fitting 2. - Page 11 INSTALATION : Little Blaster™ AIR CONTROLS (cont’d) 4. Insert Air Hose from the Foot Petal through the Rubber Grommet on the Right Side of the Sump. 5. Remove Work Grate from inside of the Machine. Insert the Media Hose (attached to Gun) from the Inside, through the Rubber Grommet on the Back Sump.
- Page 12 INSTALATION : Little Blaster™ AIR CONTROLS (cont’d) 7. Teflon Tape and Attach the Media Valve to the Bottom of the Sump and Attach/Secure the Media Hose from the Back of the Sump to the Media Valve’s Barbed Brass Fitting. Small Fitting Should Always be Facing Up an Remain Open.
-
Page 13: Operation
Media should be good quality and dry. Damp media will cause the media not to flow and will clog abrasive flow. Media Available @ Blast-It-All Online Store IF YOU ARE HAVING A PROBLEM SELECTING MEDIA FOR A SPECIFIED JOB, CONTACT YOUR DISTRIBUTOR FOR THEIR RECOMMENDATIONS ©... -
Page 14: Little Blaster™ Cartridge Dust Collector
OPERATION Little Blaster™ CARTRIDGE DUST COLLECTOR *** READ BEFORE OPERATING EQUIPMENT *** After installing the Dust Collector, it is very IMPORTANT to follow the next steps. This will ensure your machine will blast satisfactorily and have good visibility in blast chamber. - Page 15 OPERATION Little Blaster™ CARTRIDGE DUST COLLECTOR (cont’d) 3. To clean cartridge: Turn Dust Collector switch off. Grasp lift handle and raise up and down vigorously Body allowing the top housing to thump on the body lip. Do this repeatedly, until...
-
Page 16: Troublshooting
TROUBLSHOOTING 1. Caking of Media : A. Media caking is caused by moisture in compressed air supply or oily and greasy parts. If this is not corrected, media will not flow and will clog gun. Check air supply. If water or moisture is present, install a good moisture trap. -
Page 17: Maintenance
MAINTENANCE 1. Blasting Gun : After 10 - 12 hours of blasting time the air orifice and nozzle should be checked. If the nozzle shows wear, rotate 1/4 Turn to prevent uneven wear. If this is not checked, it could result in the destruction of nozzle and damage to the gun housing. -
Page 18: Venturi Blast Gun Tuning
VENTURI BLAST GUN TUNING : ® WATCH THE VIDEO FROM BLAST-IT-ALL https://www.youtube.com/watch?v=dKT9XeFhNNY Attach & Secure Vacuum Gage Hose to the Bottom of the gun. Vacuum Gauge Part # 011267 Vacuum Gauge Kit Part # ( TBD ) 2. Attach & Secure Compressed Air (80psi) Hose to the Orifice Inlet. -
Page 19: Parts
© 2020 Hess & Associates Man. # 561 v02-02 8/2020 Page 17... -
Page 20: Little Blaster™ Standard Cabinet Parts
Little Blaster™ STANDARD CABINET ASSEMBLY PARTS © 2020 Hess & Associates Man. # 561 v02-02 8/2020 Page 18... -
Page 21: Little Blaster™ Light Box Parts
Little Blaster™ LIGHT BOX ASSEMBLY PARTS © 2020 Hess & Associates Man. # 561 v02-02 8/2020 Page 19... -
Page 22: Little Blaster™ Machine Air Control Parts
Little Blaster™ MACHINE AIR CONTROLS PARTS © 2020 Hess & Associates Man. # 561 v02-02 8/2020 Page 20... -
Page 23: Little Blaster™ Cartridge Dust Collector Parts
Little Blaster™ CARTRIDGE DUST COLLECTOR PARTS © 2020 Hess & Associates Man. # 561 v02-02 8/2020 Page 21... -
Page 24: Little Blaster™ Recommended Consumable/Spare Parts
Little Blaster™ RECOMMENDED CONSUMABLE/SPARE PARTS PART NO. DESCRIPTION 23-050 WINDOW, VIEWING 22-111 GLOVE, SNAP-IN (LEFT ONLY) 22-112 GLOVE, SNAP-IN (RIGHT ONLY) 20-200 MEDIA VALVE 011191 MYLAR GLASS PROTECTOR 20-054 NOZZLE NUT HOLDING 20-074 NOZZLE CERAMIC, ¼” I.D. SIZE 4 20-075 NOZZLE CERAMIC, 5/16”... -
Page 25: Electrical
Little Blaster™ Electrical Diagram © 2020 Hess & Associates Man. # 561 v02-02 8/2020 Page 23... -
Page 26: Warranty
Blast-it-all® to include common wear items. For the entire period of the warranty. 3) Failures to provide proof of the purchase of Blast-it-all® OEM wear Items voids warranty. Manufacturer shall have the right to inspect prior replacing all merchandise in question. -
Page 27: Venturi Blast Data
VENTURI BLAST DATA VENTURI GUN AIR * MOTOR DATA: BLAST PRESSURE (PSI): NOZZLE: ORIFICE: INCHES: INCHES: REQUIREMENTS: AIR (CFM) 14.26 16.39 18.62 20.76 22.99 25.00 1/4" 4/32” MOTOR (HP) AIR (CFM) 22.28 25.61 29.09 32.43 35.92 40.00 5/16” 5/32” MOTOR (HP) AIR (CFM) 32.01 36.86... -
Page 28: Index
INDEX OPERATION · 2, 7, 12, 13, 14 ORIFICE · 16, 17, 18, 24, 27, 28 OSHA · 2, 1, 3, 4, 5, 6 ABRASIVE · 8, 12 GASKET · 7, 13 AIR · 7, 12, 15 GLOVE · 24 GRATE ·...
Need help?
Do you have a question about the LITTLE BLASTER and is the answer not in the manual?
Questions and answers