Table of Contents
Advertisement
Quick Links
RED-D-ARC
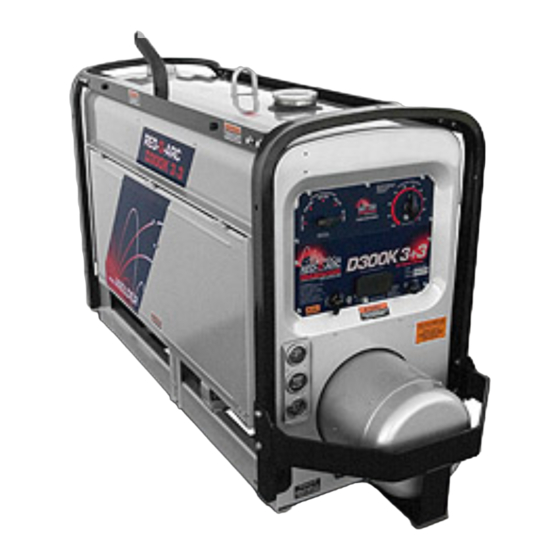
D300K 3+3 SE
For use with machines having Code Numbers:
OPERATOR'S MANUAL
Red-D-Arc Spec-Built Welding Equipment
This RED-D-ARC welder is built to RED-D-ARC Extreme Duty
design specifications by Lincoln Electric.
Safety Depends on You
This welder is designed and built with safety in mind.
However, your overall safety can be increased by proper installation
... and thoughtful operation on your part.
DO NOT INSTALL, OPERATE OR REPAIR THIS EQUIPMENT
WITHOUT READING THIS MANUAL AND THE SAFETY
PRECAUTIONS CONTAINED THROUGHOUT.
And, most importantly, think before you act and be careful.
1-800-245-3660
North America's Largest Fleet of Welding Equipment
The Global Leader in Welder Rentals
11948
IM10156
July 2016
(
Advertisement
Chapters
Table of Contents
Troubleshooting

Related Manuals for Red-D-Arc Welderentals D300K 3+3 SE


Summary of Contents for Red-D-Arc Welderentals D300K 3+3 SE
- Page 1 RED-D-ARC IM10156 July 2016 D300K 3+3 SE 11948 For use with machines having Code Numbers: OPERATOR’S MANUAL Red-D-Arc Spec-Built Welding Equipment This RED-D-ARC welder is built to RED-D-ARC Extreme Duty design specifications by Lincoln Electric. Safety Depends on You This welder is designed and built with safety in mind.
- Page 2 THANK YOU FOR SELECTING A QUALITY PRODUCT BY KEEP YOUR HEAD OUT OF THE FUMES. DON’T get too close to the arc. LINCOLN ELEC TRIC. Use corrective lenses if necessary to stay a reasonable distance away from the arc. READ and obey the Safety Data PLEASE EXAMINE CARTON AND EQUIPMENT FOR Sheet (SDS) and the warning label DAMAGE IMMEDIATELY...
- Page 3 SAFETY SECTION A: with hot engine parts and igniting. Do not spill fuel when filling tank. If fuel is spilled, wipe it up and do not start engine until WARNINGS fumes have been eliminated. 1.d. Keep all equipment safety guards, covers and devices in position and in good repair.
- Page 4 SAFETY ELECTRIC SHOCK ARC RAYS CAN BURN. CAN KILL. 3.a. The electrode and work (or ground) circuits are 4.a. Use a shield with the proper filter and cover plates to protect your electrically “hot” when the welder is on. Do eyes from sparks and the rays of the arc when welding or not touch these “hot”...
- Page 5 SAFETY WELDING AND CUTTING CYLINDER MAY EXPLODE IF SPARKS CAN CAUSE DAMAGED. FIRE OR EXPLOSION. 7.a. Use only compressed gas cylinders containing the correct shielding gas for the process used 6.a. Remove fire hazards from the welding area. If and properly operating regulators designed for this is not possible, cover them to prevent the welding sparks the gas and pressure used.
-
Page 6: Table Of Contents
TABLE OF CONTENTS Page Installation .......................Section A Technical Specifications ..................A-1 General Description ....................A-2 Design Features ....................A-2 Pre-Operation Installation ..................A-3 Safety Precautions ..................A-3 Exhaust Spark Arrester ...................A-3 Location/Ventilation..................A-3 Machine Grounding..................A-3 Lift Bail ......................A-3 Trailers ......................A-4 Polarity Control and Cable Sizes ..............A-4 Pre-Operation Service ...................A-5 Oil........................A-5 Fuel, Cooling System ..................A-5... -
Page 7: Installation
INSTALLATION TEChNICAL SPECIFICATIONS - Red-D-Arc D300K 3+3 SE INPuT - ENgINE Make/Model Description Speed (RPM) Displacement Starting Capacities System 3 Cylinder 91.47 cu. in. Fuel: 16gal. (1.56 ltrs) 24.8 HP @ (60.6L) High Idle 1800 (18.5KW) 12VDC Oil: 5.9qts. Full Load 1800... -
Page 8: General Description
Welder Enclosure - The complete welder is rubber mounted on a rugged steel “C” channel base. The D300K 3+3 SE is a heavy duty, engine driven, The output terminals are placed at the side of the DC arc welding power source, capable of providing machines so that they are protected by the door. -
Page 9: Pre-Operation Installation
Leaving the doors open changes the designed air flow and may cause overheating. The welder should be located to provide an unrestrict- ed flow of clean, cool air. Also, locate the welder so that engine exhaust fumes are properly vented to an outside area. D300K 3+3 SE... -
Page 10: Trailers
• Do not exceed maximum rated loads for compo- nents such as suspension, axles and tires. • Mount equipment base to metal bed or frame of vehicle. • Follow vehicle manufacturer’s instructions. ------------------------------------------------------------------------ D300K 3+3 SE... -
Page 11: Pre-Operation Service
Engine Operator’s manual. ------------------------------------------------------------------------ Cooling System The D300K 3+3 SE is equipped with a wet charged battery. The charging current is automatically regulat- ed when the battery is low (after starting the engine) The radiator has been filled at the factory with a 50-50 to a trickle current when the battery is fully charged. -
Page 12: Operation
Kubota Diesel Engine Refer to the Welder Nameplate for starting instruc- tions. The D300K 3+3 SE’s engine is equipped with gLOW PLugS. The gLOW PLugS should always be used to help start Kubota diesel engines. Follow the table below for approximate gLOW PLug on times to be... -
Page 13: Break In Period
1. Connect the welder output studs to a suitable resistive load bank. Note that any attempt to short The output rating of the D300K 3+3 SE is 300 the output studs by connecting the welding leads amperes at 32 arc volts on a 60% duty cycle. Duty together, direct shorting of the output studs, or con- cycle is based on a ten minute period;... -
Page 14: Auxiliary Power
The total combined load of the duplex receptacle or GFCI is not to exceed 2400W. If a GFCI is tripped, See the MAINTENANCE section for detailed information on testing and resetting the GFCI. D300K 3+3 SE... -
Page 15: Maintenance
Turn the engine off before working inside the machine. In some cases, it may be The D300K 3+3 SE is equipped with a pressure radia- necessary to remove safety guards to perform tor. Keep the radiator cap tight to prevent loss of required maintenance. -
Page 16: Slip Rings
• uSINg A BOOSTER - connect positive lead to battery first then connect negative lead to engine foot. BATTERY ACID CAN BuRN EYES AND SKIN. • Wear gloves and eye protection and be careful when working near battery. Follow instructions printed on battery. -------------------------------------------------------------------------------- D300K 3+3 SE... - Page 17 MAINTENANCE D300K 3+3 SE...
-
Page 18: Gfci Testing And Resetting Procedure
"Test" button is pushed, the GFCI is not working prop- erly or has been incorrectly installed (miswired). If your GFCI is not working properly, contact a qualified, certified electrician who can assess the situation, rewire the GFCI if necessary or replace the device. D300K 3+3 SE... -
Page 19: Troubleshooting
Local Authorized Field Service Shop. ------------------------------------------------------------ CAuTION If for any reason you do not understand the test procedures or are unable to perform the tests/repairs safely, contact your Local Authorized Field Service Facility for technical troubleshooting assistance before you proceed. D300K 3+3 SE... -
Page 20: Welder Troubleshooting
CAuTION If for any reason you do not understand the test procedures or are unable to perform the tests/repairs safely, contact your Local Authorized Field Service Facility for technical troubleshooting assistance before you proceed. D300K 3+3 SE... - Page 21 CAuTION If for any reason you do not understand the test procedures or are unable to perform the tests/repairs safely, contact your Local Authorized Field Service Facility for technical troubleshooting assistance before you proceed. D300K 3+3 SE...
-
Page 22: Engine Troubleshooting Guide
CAuTION If for any reason you do not understand the test procedures or are unable to perform the tests/repairs safely, contact your Local Authorized Field Service Facility for technical troubleshooting assistance before you proceed. D300K 3+3 SE... - Page 23 Repair in a field service shop. CAuTION If for any reason you do not understand the test procedures or are unable to perform the tests/repairs safely, contact your Local Authorized Field Service Facility for technical troubleshooting assistance before you proceed. D300K 3+3 SE...
-
Page 24: Diagrams
DIAgRAMS D300K 3+3 SE... - Page 25 Red-D-Arc D300K 3+3 SE - 11948...
- Page 27 Contents Engine Driven Welders Red-D-Arc Red-D-Arc D300K 3+3 SE - 11948 Parts Pages .........................2 Index of Sub Assemblies - 11948..................32 Miscellaneous Items ......................34 Upper Control Panel Assembly..................36 Lower Control Panel Assembly..................38 Engine Assembly .......................41 Radiator Assembly......................44 Fuel Tank Assembly ......................46 Base &...
-
Page 28: Index Of Sub Assemblies - 11948
P-737-J WELDING GENERATOR & COUPLING - 1 OF 2 P-737-K WELDING GENERATOR & COUPLING - 2 OF 2 P-737-L ROOF & DOORS P-737-M ALTERNATOR BRUSH HOLDER P-737-N GENERATOR BRUSH HOLDER P-737-P ROLL CAGE ASSEMBLY Red-D-Arc D300K 3+3 SE - 11948... - Page 29 Index of Sub Assemblies - 11948 P-737-A.jpg Red-D-Arc D300K 3+3 SE - 11948...
-
Page 30: Miscellaneous Items
DESCRIPTION 9SS14165-472 RECEPTACLE & LEAD ASBLY 9SS14165-473 PLUG & LEAD ASBLY 9SM8859-93 ENGINE MOUNTING 9SS30143 FUEL SHUT OFF ROD 9SS27402 SPRING 9SG7547 HARNESS ASBLY 9SS30169 EXHAUST OUTLET PIPE 9SS30170 EXHAUST CLAMP 9SS30174 CONNECTOR TERMINAL Red-D-Arc D300K 3+3 SE - 11948... - Page 31 Miscellaneous Items No Image Red-D-Arc D300K 3+3 SE - 11948...
-
Page 32: Upper Control Panel Assembly
#8-32X.50BR-RHS 9ST9695-3 LOCKWASHER 9SCF000103 #8-32BR-HN 9SM13335 SELECTOR SWITCH ASBLY 9SCF000127 #10-24X1.75RHS-FULL-GR2-1427 9SS10918-60 SPACER 9SS9262-27 PLAIN WASHER 9ST9695-1 LOCKWASHER 9SCF000010 #10-24HN 9SL16338 NAMEPLATE UPPER 9SS8025-92 SELF TAPPING SCREW 9SM13989-1 CONTROL HANDLE 9SS16664-13 CONTROL HANDLE ASBLY Red-D-Arc D300K 3+3 SE - 11948... - Page 33 Upper Control Panel Assembly P-737-C.jpg Red-D-Arc D300K 3+3 SE - 11948...
-
Page 34: Lower Control Panel Assembly
9ST4291-A LOCKWASHER 9SCF000001 #4-40X.375RHS 9SCF000002 #4-40HN 9SS9262-39 PLAIN WASHER 9ST10728-8 FUSE 9ST15011-1 FUSE BLOCK 9ST4291-B LOCKWASHER 9SCF000049 #10-24X2.75RHS 9SS10918-69 SPACER 9SS9262-27 PLAIN WASHER 9ST9695-1 LOCKWASHER 9SCF000010 #10-24HN 9SS9225-36 THREAD FORMING SCREW (CUTTING) 9ST9695-1 LOCKWASHER Red-D-Arc D300K 3+3 SE - 11948... - Page 35 Lower Control Panel Assembly PART NUMBER DESCRIPTION 9SCF000010 #10-24HN 9SS28445 MOV ASSEMBLY 9ST10889 KNOB 9ST12380-6 BUSHING 9SL16339 NAMEPLATE LOWER 9SS8025-92 SELF TAPPING SCREW 9SM24953 GUARD CASE FRONT LEFT 9SM24952 GUARD CASE FRONT RIGHT Red-D-Arc D300K 3+3 SE - 11948...
- Page 36 Lower Control Panel Assembly P-737-D.jpg Red-D-Arc D300K 3+3 SE - 11948...
-
Page 37: Engine Assembly
ENGINE MTG FOOT 9SS9262-80 PLAIN WASHER 9SM20367-2 ENGINE MTG FOOT 9SS9262-80 PLAIN WASHER 9SL13687 FAN GUARD (BOTTOM) 9ST14731-49 METRIC SOCKET HD SCREW-M10 X 1.25 9SS17400-1 LOCKWASHER-METRIC 9ST14731-3 METRIC HEX HD SCREW-M8 X1.25 9SE106A-3 LOCKWASHER Red-D-Arc D300K 3+3 SE - 11948... - Page 38 Engine Assembly PART NUMBER DESCRIPTION 9SL12244 UPPER RADIATOR HOSE 9SS10888-44 HOSE CLAMP 9SS10888-8 HOSE CLAMP 9SL12245 LOWER RADIATOR HOSE 9SS10888-44 HOSE CLAMP 9SS10888-8 HOSE CLAMP Red-D-Arc D300K 3+3 SE - 11948...
- Page 39 Engine Assembly P-737-E.jpg Red-D-Arc D300K 3+3 SE - 11948...
-
Page 40: Radiator Assembly
RADIATOR CAP 9ST9956 DRAIN COCK 9SL5163-4 RADIATOR SHELL 9SS9225-8 THREAD FORMING SCREW (ROLLING) 9SM8003 RADIATOR CAP COVER ASBLY 9SS8025-12 SELF TAPPING SCREW 9SM19051 FAN SHROUD ASBLY 9SL16395 FAN GUARD (RIGHT) 9SL16396 FAN GUARD (ALTERNATOR SIDE) Red-D-Arc D300K 3+3 SE - 11948... - Page 41 Radiator Assembly P-737-F.jpg Red-D-Arc D300K 3+3 SE - 11948...
-
Page 42: Fuel Tank Assembly
LOCKWASHER 9SCF000029 5/16-18HN 9SM16779-2 REMOTE/LOCAL RECEPTACLE ASBLE 9SM25075 REMOTE RECEPTACLE BRACKET 9SS9225-8 THREAD FORMING SCREW (ROLLING) 9ST14166-9 OUTPUT TERMINAL KIT 9SS24765 GUARD (CASE FRONT) 9ST10642-231 FLEX TUBE 9ST10642-86 FLEX TUBE 9SM24836 COIL ASSEMBLY CHOKE Red-D-Arc D300K 3+3 SE - 11948... - Page 43 Fuel Tank Assembly P-737-G.jpg Red-D-Arc D300K 3+3 SE - 11948...
-
Page 44: Base & Lift Bale Assembly
9SL9084 LIFT BALE & HOOK ASBLY 9ST8833-24 HEX HD CAP SCREW 9SE106A-5 LOCKWASHER 9SCF000027 1/2-13HN 9SM15045-37 ACOUSTICAL FOAM 9SM8237-15 REAR SUPPORT ASBLY 9SCF000019 3/8-16X1.00HHCS 10 9SS9262-120 PLAIN WASHER 9SE106A-16 LOCKWASHER 9SCF000067 3/8-16HN 9SCF000029 5/16-18HN Red-D-Arc D300K 3+3 SE - 11948... - Page 45 Base & Lift Bale Assembly P-737-H.jpg Red-D-Arc D300K 3+3 SE - 11948...
-
Page 46: Welding Generator & Coupling - 1 Of 2
9SS8025-91 SELF TAPPING SCREW 9SM16158 BRUSH & BRUSH HOLDER ASBLY 9SS13247-54 ROCKER & BRUSH HOLDER ASSEMBLY 9ST2687 BRUSH 9ST8833-2 HEX HD CAP SCREW 9SE106A-8 LOCKWASHER 9SCF000014 1/4-20X.75HHCS 9SS9262-23 PLAIN WASHER 9SE106A-2 LOCKWASHER 9SCF000017 1/4-20HN Red-D-Arc D300K 3+3 SE - 11948... - Page 47 Welding Generator & Coupling - 1 of 2 P-737-J.jpg Red-D-Arc D300K 3+3 SE - 11948...
-
Page 48: Welding Generator & Coupling - 2 Of 2
HEX HD CAP SCREW 9SE106A-8 LOCKWASHER 9SCF000019 3/8-16X1.00HHCS 10 9SE106A-16 LOCKWASHER 9SCF000123 1/2-13X2.75HHCS 9SS9262-1 PLAIN WASHER 9ST8823 RUBBER PAD 9SS10040-86 MTG BRKT 9ST8822 RUBBER PAD 9ST9187-4 LOCKNUT 9SS9262-5 PLAIN WASHER 9SCF000067 3/8-16HN 9ST13260-4 DECAL-EARTH GROUND CONN Red-D-Arc D300K 3+3 SE - 11948... - Page 49 Welding Generator & Coupling - 2 of 2 P-737-K.jpg Red-D-Arc D300K 3+3 SE - 11948...
-
Page 50: Roof & Doors
WASHER 9SS8025-92 SELF TAPPING SCREW 9SL5193-7 ROOF 9SS13593 ROOF MTG ANGLE 9SCF000258 5/16-18X1.50SQHS 9ST9187 LOCKNUT 9SS25896-1 WARNING DECAL 9SM21436 CARBON MONOXIDE WARNING DECAL 9ST13086-205 FUEL WARNING DECAL 9SS30157 DOOR SLIDER RDA 9SM24777 WIRING DIAGRAM Red-D-Arc D300K 3+3 SE - 11948... - Page 51 Roof & Doors P-737-L.jpg Red-D-Arc D300K 3+3 SE - 11948...
-
Page 52: Alternator Brush Holder
Alternator Brush Holder PART NUMBER DESCRIPTION 9SM16158 BRUSH & BRUSH HOLDER ASBLY 9SG2114 BRUSH HOLDER CARTRIDGE 9SM16157 BRUSH ASBLY RETAINER 9SS19480 BRUSH ASBLY 9SM19896 BRUSH HOLDER BRACKET (SS) Red-D-Arc D300K 3+3 SE - 11948... - Page 53 Alternator Brush Holder P-737-M.jpg Red-D-Arc D300K 3+3 SE - 11948...
-
Page 54: Generator Brush Holder
BRUSH HOLDER STUD 9ST9020 PLAIN WASHER 9ST4479 INSULATING WASHER 9SS13721-1 BRUSH HOLDER STUD INSULATION 9ST2414 CLAMPING WASHER 9SCF000019 3/8-16X1.00HHCS 10 9SE106A-16 LOCKWASHER 9ST2687 BRUSH 9SS16986-1 ROCKER ASBLY 9SM9857-1 ROCKER 9SE106A-2 LOCKWASHER 9ST8833-22 HEX HD CAP SCREW Red-D-Arc D300K 3+3 SE - 11948... - Page 55 Generator Brush Holder P-737-N.jpg Red-D-Arc D300K 3+3 SE - 11948...
-
Page 56: Roll Cage Assembly
PART NUMBER DESCRIPTION 9SL16582 ROLL CAGE ASSEMBLY 9SM25108 REAR SUPPORT ASSY 9SM25085 FRONT SUPPORT ASSY 9SM25109 SIDE RAIL 9SM25086 BULLNOSE ASSBLY 9SCF000019 3/8-16X1.00HHCS 10 9SCF000034 3/8-16X.75HHCS 9SCF000066 3/8-16X1.50HHCS 9SE106A-16 LOCKWASHER 9SS9262-120 PLAIN WASHER 9SCF000067 3/8-16HN Red-D-Arc D300K 3+3 SE - 11948... - Page 57 Roll Cage Assembly P-737-P.jpg Red-D-Arc D300K 3+3 SE - 11948...
- Page 58 WARNING Do not touch electrically live parts or Keep flammable materials away. Wear eye, ear and body protection. electrode with skin or wet clothing. Insulate yourself from work and AVISO DE ground. Spanish PRECAuCION No toque las partes o los electrodos Mantenga el material combustible Protéjase los ojos, los oídos y el bajo carga con la piel o ropa moja-...
- Page 59 WARNING Keep your head out of fumes. Turn power off before servicing. Do not operate with panel open or Use ventilation or exhaust to guards off. remove fumes from breathing zone. AVISO DE Spanish PRECAuCION Los humos fuera de la zona de res- Desconectar el cable de ali- No operar con panel abierto o piración.
- Page 60 Need help? Lincoln Electric “Rapid Response” Service! Call 1.888.935.3877 to talk to a Service Representative Hours of Operation: 8:00 AM to 6:00 PM (ET) Mon. thru Fri. After hours? Use “Ask the Experts” at lincolnelectric.com A Lincoln Service Representative will contact you no later than the following business day. •...
Need help?
Do you have a question about the D300K 3+3 SE and is the answer not in the manual?
Questions and answers